

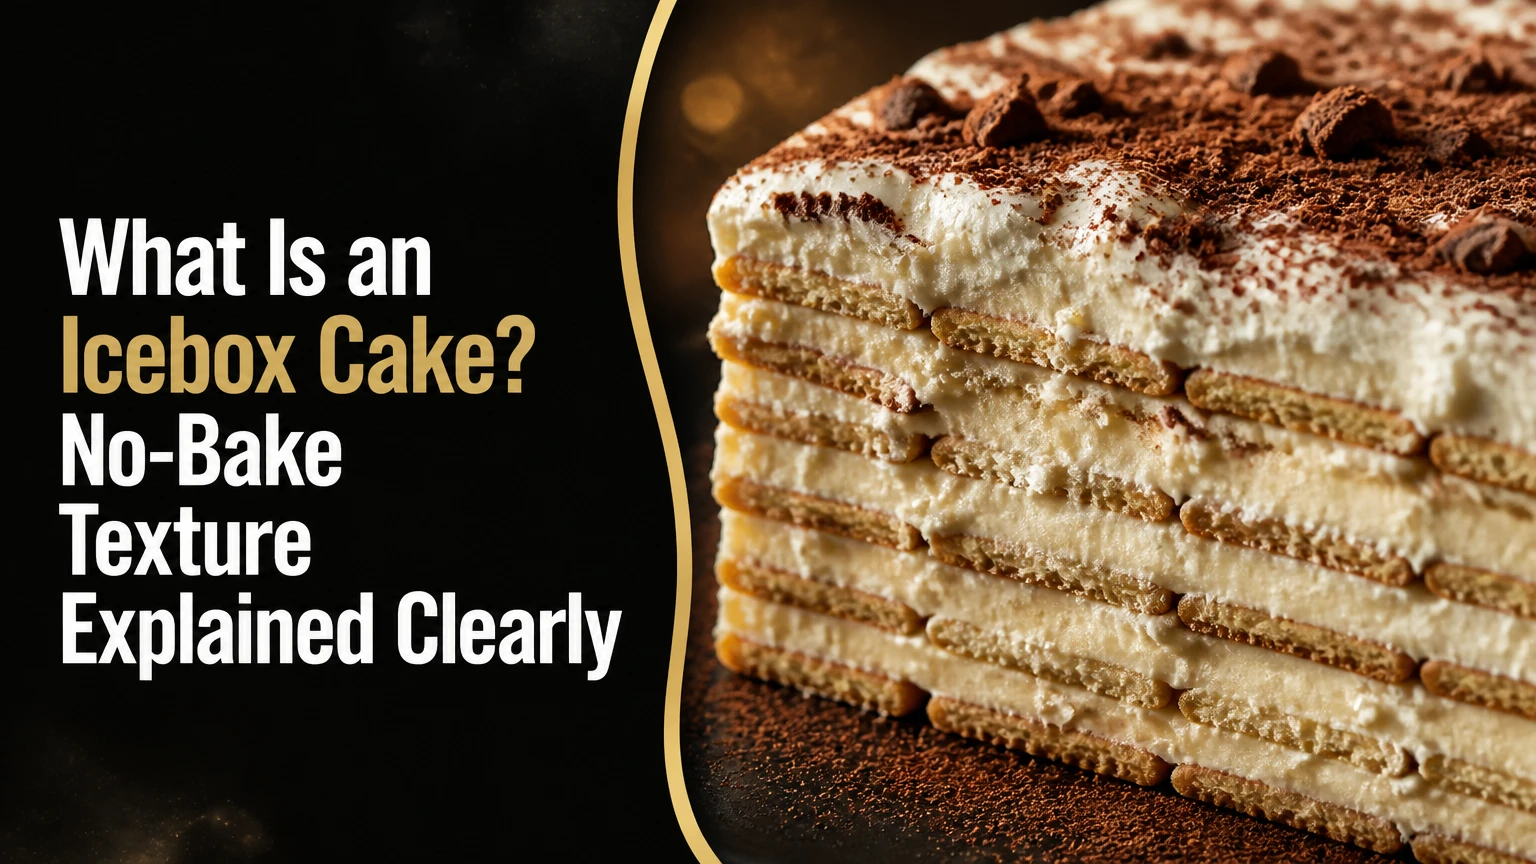
An icebox cake is a no-bake dessert made by layering dry cookies, wafers, or crackers with whipped cream, pudding, custard, or another moist filling. Refrigeration allows moisture to migrate into the crisp layers, softening them into a tender, sliceable texture that resembles cake without an oven.
Key Facts at a Glance
- An icebox cake contains alternating layers of dry biscuits and moist filling.
- Refrigeration, not baking, creates the cake-like texture through moisture absorption.
- Most icebox cakes need 4-6 hours to set, while 12-24 hours usually produces the most even texture.
- Chocolate wafer cookies with sweetened whipped cream form the classic American version.
- A typical homemade icebox cake costs about $8-$15 and serves 8-12 people.
- Icebox cake is best refrigerated for 1-3 days, because the layers become progressively softer and less distinct.
What Is an Icebox Cake?
An icebox cake is a layered refrigerator dessert in which cookies or thin biscuits soften inside a creamy filling until the assembled dessert can be cut like cake. The name comes from the “icebox,” an older term for a household refrigerator, because cold storage replaced the oven as the main tool.
The simplest formula uses chocolate wafer cookies and sweetened vanilla whipped cream. Modern versions use graham crackers, Maria biscuits, shortbread, ladyfingers, sandwich cookies, pudding, lemon curd, mascarpone, fruit, or cookie butter. The dessert can be built in a loaf pan, springform pan, baking dish, individual jars, or a free-form stack.
An icebox cake is not the same as an ice cream cake. Icebox cake becomes soft through hydration and remains creamy when refrigerated, whereas ice cream cake depends on frozen ice cream and must stay below freezing. It is also different from a trifle, which usually contains cake, fruit, cream, and sometimes custard in visibly separate layers rather than relying on biscuit softening.
Where Did the Name Come From?
The word “icebox” describes the refrigeration method rather than a special ingredient. Before modern refrigerators became common, iceboxes used delivered or harvested ice to keep perishable food cold. Recipes marketed as icebox desserts became especially useful because they avoided heating the kitchen and could be prepared ahead of service.
The familiar chocolate wafer and whipped-cream arrangement is often associated with Nabisco Famous Chocolate Wafers. Similar refrigerator desserts also developed around graham crackers, tea biscuits, and regional pudding mixtures, so no single cookie defines every icebox cake.
Why Do Cookies Become Cake-Like?
Cookies become cake-like because water from the filling hydrates baked starches in the biscuit. The cream also firms as it chills, so the softened layers and cold filling develop enough cohesion to slice.
A crisp cookie contains relatively little available water and a rigid network of baked starch, sugar, and sometimes fat. When that cookie touches whipped cream or pudding, water gradually moves toward the drier biscuit. The process is slower than soaking because the filling and cookie differ in moisture, sugar, fat, and surface area.
Starch hydration changes the bite. The cookie loses its snap, becomes pliable, and eventually resembles a thin sponge layer. Chilling does not bake the mixture or create a new crumb; it controls the rate of moisture movement and firms the fat in the cream.
The common claim that “fat stabilization” creates the cake structure needs precision. Cold butterfat in whipped cream helps the filling hold its shape, but the cake-like biscuit texture comes mainly from moisture transfer and starch softening. A cake may slice neatly when cold yet become loose after warming for 20-30 minutes.
What Controls the Softening Rate?
Cookie thickness, filling moisture, sugar concentration, and contact area determine how quickly an icebox cake softens. Thin wafers hydrate faster than dense shortbread, while pudding usually transfers moisture more readily than stiff whipped cream.
| Variable | Faster softening condition | Slower softening condition |
|---|---|---|
| Biscuit thickness | 2-3 mm chocolate wafer | 8-10 mm shortbread |
| Filling | Vanilla pudding, high moisture | Firm whipped cream, lower free water |
| Contact area | Flat, complete biscuit coverage | Large gaps and overlapping pieces |
| Chilling time | 18-24 hours | 2-3 hours |
| Fruit content | Drained berries or bananas | Watery melon or undrained citrus |
A practitioner rule of thumb is to use a filling that feels slightly softer than the final texture you want. Refrigeration firms the cream, while the biscuits absorb moisture and become less resistant to the knife.
Which Cookies and Fillings Work Best?
The best base depends on the desired texture, sweetness, and chilling time. Chocolate wafers create a balanced classic, graham crackers soften quickly, and dense cookies require more time or a wetter filling.
| Style | Biscuit base | Filling | Typical chill | Result |
|---|---|---|---|---|
| Classic American | Chocolate wafer cookies | Vanilla whipped cream | 12-24 hours | Tender chocolate layers |
| Beginner-friendly | Graham crackers | Vanilla pudding or whipped topping | 6-12 hours | Soft, mildly chewy layers |
| Citrus | Maria biscuits or petit beurre | Lemon curd folded into cream | 8-16 hours | Tangy, delicate texture |
| Coffee | Ladyfingers | Mascarpone cream and espresso | 6-12 hours | Tiramisu-like structure |
| Decadent | Oreo or Biscoff cookies | Cookie butter mousse | 12-24 hours | Dense, sweet, rich layers |
Chocolate wafer cookies are the most predictable choice when the goal is a clean slice with a soft but recognizable layer. Graham crackers work well for banana pudding variations, although their honeyed flavor can dominate delicate fillings. Maria biscuits and petit beurre provide a less sweet, more neutral base for citrus or coffee.
Dense shortbread and thick chocolate-chip cookies can work, but they need thinner layers of cookie, more filling contact, and a longer rest. Sandwich cookies are convenient, although their sugar and fat can make the finished dessert heavier and sweeter than a wafer-based version.
Which Filling Should You Use?
Whipped cream gives the lightest texture, pudding gives the fastest hydration, and pastry cream provides the richest result. Stabilized whipped cream is the safest choice when the dessert must hold for a party or travel a short distance.
| Filling | Main ingredients | Texture after chilling | Best pairing |
|---|---|---|---|
| Sweetened whipped cream | Heavy cream, sugar, vanilla | Light and airy | Chocolate wafers |
| Instant pudding | Milk, pudding mix | Soft and moist | Graham crackers |
| Pastry cream | Milk, egg yolks, sugar, starch | Dense and custardy | Petit beurre |
| Mascarpone cream | Mascarpone, cream, sugar | Rich and stable | Ladyfingers |
| Cookie butter mousse | Cookie butter, cream, cream cheese | Thick and sweet | Biscoff cookies |
Use approximately 4-5 cups of filling for a standard 8-inch round cake containing 30-40 thin cookies. A filling layer about 1/2 inch thick usually provides enough moisture without making the assembly unstable.
How Do You Build an Icebox Cake?
Build an icebox cake in six stages: prepare a stable filling, anchor the first layer, arrange cookies tightly, cover each layer completely, chill the covered cake, and garnish immediately before serving. Active preparation usually takes 15-30 minutes, while the refrigerator performs the remaining work.
Before You Start
| Requirement | Typical amount or range | Practical specification |
|---|---|---|
| Active time | 15-30 minutes | Includes filling and assembly |
| Chilling time | 6-24 hours | 12 hours minimum for dense cookies |
| Ingredients | 30-40 cookies, 4-5 cups filling | Serves 8-12 in an 8-inch pan |
| Equipment | 8-inch pan or 9-by-13-inch dish | Plastic wrap and sharp knife required |
| Typical cost | $8-$15 | Varies with cream, fruit, and branded cookies |
Step 1: Prepare the Filling
Whip 3 cups of cold heavy cream with 1/3 cup confectioners’ sugar and 1 teaspoon vanilla until firm peaks form, or prepare about 5 cups of pudding, custard, or stabilized cream. Stop whipping when the cream holds a peak without looking grainy.
You will know the filling is ready when a spatula can make a clean path through it and the mixture does not immediately flow back. Over-whipped cream becomes grainy and loses its ability to spread evenly.
Step 2: Anchor the First Layer
Spread 2-3 tablespoons of filling across the bottom of the pan. Place the first cookies over the cream, breaking pieces as needed to cover gaps smaller than 1 inch.
The thin base prevents the first biscuit layer from sliding while you assemble the cake. A bare pan encourages movement and creates dry edges that may remain crunchy.
Step 3: Add an Even Cookie Layer
Arrange one flat layer of cookies with their edges touching. Avoid stacking cookies or leaving large uncovered spaces, because uneven contact produces alternating crunchy and mushy areas.
You will know the layer is effective when no cookie has more than a small visible gap around it. The broken pieces used around the edge should remain in the same horizontal plane as the whole cookies.
Step 4: Cover the Cookies Completely
Spread approximately 1/2 inch of filling over the cookies, pressing gently so the cream reaches the edges. Repeat the cookie and filling layers until the pan is nearly full, ending with filling.
A standard 8-inch round cake usually needs 4-6 cookie layers. A 9-by-13-inch dish may need 5-7 layers, depending on biscuit thickness and the quantity of cream available.
Step 5: Cover and Chill
Press plastic wrap directly over the pan or cover the container tightly, then refrigerate for at least 6 hours. Choose 12-24 hours when using chocolate wafers, petit beurre, or dense cookies.
The cover prevents refrigerator odors from entering the cream and limits surface drying. The cake is ready when a knife passes through the center with light resistance rather than striking a crisp layer.
Step 6: Garnish and Slice
Add cocoa powder, cookie crumbs, berries, citrus zest, or chocolate curls immediately before serving. Warm a sharp knife under hot water, dry it, and cut the cake with a steady downward motion.
Wipe the blade between slices when clean layers matter. Leave the cake at room temperature for 10-15 minutes before serving if the chilled filling feels excessively firm.
How Long Does an Icebox Cake Need to Chill?
An icebox cake needs at least 4-6 hours to soften, but 12-24 hours generally produces the most uniform texture. Thin wafers may be ready after 6 hours, while thick biscuits and low-moisture fillings can require a full day.
| Biscuit and filling | Minimum chill | Preferred chill | Texture warning |
|---|---|---|---|
| Chocolate wafers and whipped cream | 6 hours | 12-24 hours | Crunchy center if served early |
| Graham crackers and pudding | 4 hours | 8-12 hours | Can become very soft after 48 hours |
| Ladyfingers and mascarpone | 6 hours | 8-12 hours | Espresso can create soggy edges |
| Petit beurre and pastry cream | 8 hours | 16-24 hours | Dense center needs extra time |
| Oreo and cream cheese mousse | 8 hours | 12-18 hours | High sugar can make layers heavy |
Twenty-four hours is a useful texture target, not an absolute requirement. The correct endpoint is a tender biscuit that still provides enough resistance to distinguish the layers.
What Do Ingredients and Bakery Slices Cost?
A typical homemade icebox cake costs $8-$15 for 8-12 servings, while a bakery slice commonly costs about $4-$7 and a specialty whole cake often costs $25-$40. Cream, mascarpone, fresh fruit, imported biscuits, and decorative chocolate create most of the price variation.
| Cost category | Typical price range | Main cost driver |
|---|---|---|
| Basic homemade cake | $8-$12 | Heavy cream and cookies |
| Fruit or citrus cake | $10-$18 | Berries, curd, and seasonal produce |
| Mascarpone version | $14-$24 | Mascarpone and espresso ingredients |
| Bakery slice | $4-$7 | Labor and portion size |
| Specialty whole cake | $25-$40 | Decoration, packaging, and premium ingredients |
These figures are typical retail ranges rather than fixed national prices. A homemade graham-cracker and pudding cake can cost less than a chocolate wafer cake, while fresh raspberries may add more than the entire biscuit package.
Which Style Fits Your Situation?
Choose a graham-cracker and pudding version for a first attempt, a lemon and berry cake for warm-weather hosting, and a mascarpone or chocolate wafer version for a more formal dessert. The best style depends on serving time, available equipment, sweetness preference, and tolerance for fragile layers.
| Situation | Recommended base | Recommended filling | Why it fits |
|---|---|---|---|
| First-time baker | Graham cracker | Vanilla pudding | Rapid, forgiving hydration |
| Summer gathering | Nilla wafer or graham cracker | Lemon cream and drained berries | Bright flavor and no oven |
| Chocolate dessert request | Chocolate wafer | Vanilla or mocha cream | Classic contrast |
| Coffee dessert preference | Ladyfinger | Mascarpone and espresso | Familiar tiramisu profile |
| Individual servings | Maria biscuit | Pudding or whipped cream | Easy jar assembly |
What Is the Classic Version?
The classic American icebox cake uses chocolate wafer cookies layered with sweetened vanilla whipped cream. The cookies soften into dark, tender layers, while the cream remains cool and lightly sweet.
The traditional formula is deliberately simple because the contrast between bitter cocoa and sweet dairy carries the dessert. Cocoa powder or chocolate shavings add flavor without introducing excess moisture at the surface.
Can You Use Fruit?
Fresh fruit works when it is sliced thinly and drained thoroughly. Bananas, strawberries, raspberries, mango, and citrus curd are practical choices, but watery fruit can thin the filling and cause collapse.
Pat berries dry after washing and drain canned fruit for at least 10 minutes. Keep fruit layers thin, because a thick layer interrupts contact between the biscuits and cream.
How Does It Compare With Other Desserts?
Icebox cake is the best option when you want a no-oven, make-ahead dessert with soft layered texture, while baked cake is better for structural decoration and ice cream cake is better for a frozen dessert. Trifle is more visibly layered but usually has less dependence on biscuit hydration.
| Dessert | Preparation | Serving temperature | Texture | Best use |
|---|---|---|---|---|
| Icebox cake | No-bake assembly | Refrigerated | Soft, creamy, sliceable | Summer hosting |
| Baked cake | Oven, usually 25-40 minutes | Cool or room temperature | Resilient crumb | Layered decoration |
| Ice cream cake | Frozen assembly | Frozen | Firm and icy-creamy | Birthday celebrations |
| Trifle | Layered assembly | Refrigerated | Custardy and spoonable | Large bowl service |
| Refrigerator cheesecake | Chilled set | Refrigerated | Dense and creamy | Clean slices without biscuits |
Icebox cake cannot reliably support fondant, heavy tiers, or tall sculptural decoration. Its structure depends on cold cream and hydrated biscuits, so it is designed for a low, horizontal presentation.
Baked cake offers stronger structural support but requires oven heat and usually more precise mixing. Icebox cake trades architectural strength for speed, forgiving assembly, and a softer eating texture.
How Should You Store an Icebox Cake?
Store an icebox cake covered in the refrigerator at 40°F or below, and aim to eat it within 1-3 days for the best texture. The dessert may remain acceptable for about 3-4 days when handled safely, but the biscuits will become increasingly soft and the filling may lose volume.
| Storage condition | Recommended limit | Expected result |
|---|---|---|
| Covered refrigerator, 40°F or below | 1-3 days | Best texture and flavor |
| Covered refrigerator, 40°F or below | 3-4 days | Softer, less defined layers |
| Room temperature | No more than 2 hours | Food-safety risk increases |
| Freezer, tightly wrapped | Up to 2 weeks typical | Firmer texture after thawing |
| Thawing after freezing | 4-8 hours refrigerated | Possible moisture release |
Freezing can rescue a loose cake and create a semifrozen dessert, but it changes the intended texture. Cream may weep after thawing, and fruit can become watery, so freezing is better for short-term storage than for preserving a fresh layered finish.
Keep strong-smelling foods away from uncovered cream. Whipped cream absorbs refrigerator aromas quickly, and plastic wrap should be sealed around the pan rather than loosely placed over the top.
Why Did the Cake Turn Crunchy or Soupy?
A crunchy icebox cake usually lacks chilling time or contains too little moist filling, while a soupy cake usually contains under-whipped cream, excess liquid, or overloaded fruit. Correcting the cause is more reliable than simply extending refrigeration.
| Problem | Likely cause | Immediate fix | Prevention |
|---|---|---|---|
| Crunchy center | Chill under 6 hours | Refrigerate 2-6 hours longer | Use 12-hour target |
| Soupy filling | Soft peaks or watery fruit | Chill, then freeze briefly if needed | Whip to firm peaks |
| Sliding layers | No anchor cream | Reassemble or chill in place | Start with thin cream layer |
| Dry edges | Poor coverage | Pipe cream into gaps | Cover cookies to the rim |
| Refrigerator smell | Loose covering | Seal in airtight container | Wrap tightly before chilling |
A cake that remains crunchy after 24 hours probably has a structural ingredient problem, such as very dense cookies or a filling with insufficient free moisture. Adding a thin layer of milk, coffee, or fruit syrup can help, but excess liquid quickly creates a soggy dessert.
A loose cake can be chilled for several more hours if the cream is only slightly soft. If the filling flows when cut, freeze the cake for 1-2 hours and serve it semifrozen, because refrigeration alone will not restore over-thinned whipped cream.
What Common Mistake Causes Soggy Layers?
Watery fruit and excessive soaking cause soggy layers faster than refrigeration itself. Icebox cake cookies should contact a moist filling, not sit in a pool of liquid.
Do not dunk every cookie unless the recipe specifically calls for it. Ladyfingers may tolerate a brief espresso dip, but chocolate wafers and graham crackers usually need only the moisture supplied by the surrounding cream.
Which Variations Are Practical?
Gluten-free, dairy-free, reduced-sugar, and single-serving icebox cakes are practical when the replacement ingredients preserve the same balance of dry biscuit, moist filling, and chilled structure. Substitution works best when the replacement cookie has similar thickness and absorbency.
| Variation | Biscuit replacement | Filling replacement | Main adjustment |
|---|---|---|---|
| Gluten-free | Certified gluten-free graham crackers | Standard dairy cream | Chill 1-2 hours longer |
| Dairy-free | Vegan chocolate cookies | Coconut or plant-based whipped topping | Stabilize and drain excess liquid |
| Lower sugar | Plain tea biscuits | Unsweetened whipped cream with fruit | Add citrus zest for intensity |
| Egg-free | Chocolate wafers | Egg-free pudding | Use a thicker pudding formula |
| Single serving | 8-12 small cookies | 3/4-1 cup cream | Assemble in a 10-12 ounce jar |
Coconut cream can produce a stable dairy-free filling, although its flavor is noticeable and its texture depends on thorough chilling before whipping. Plant-based whipped toppings often hold longer than homemade coconut cream but may contain more stabilizers and added sugar.
For gluten-free preparation, check every packaged ingredient, including pudding mix, cookie crumbs, and flavor extracts. Cross-contact matters when the dessert is served to someone with celiac disease.
What Are the Main Advantages and Limitations?
Icebox cake offers low equipment demands, forgiving assembly, and reliable make-ahead service, but it requires patience and has a short period of ideal texture. The dessert is an inefficient choice when you need a warm cake, a tall decorated centerpiece, or a crisp biscuit contrast.
Advantages include:
- No oven or stovetop baking is required for whipped-cream versions.
- Preparation can be completed in 15-30 minutes.
- Broken cookies disappear inside the assembled layers.
- The dessert can be portioned for 8-12 guests.
- Flavor combinations can shift from chocolate and vanilla to citrus, coffee, fruit, or cookie butter.
Limitations are equally practical. The cake needs several hours of refrigeration, becomes fragile when warm, and cannot carry the weight of fondant or multiple decorated tiers. Its quality also declines as the biscuit absorbs more moisture.
A useful practitioner rule is to plan service around the 12-24-hour window. Earlier service risks crunchy centers, while much later service produces softer layers and less visual definition.
Frequently Asked Questions
Is an icebox cake actually a cake?
An icebox cake is a cake-style dessert rather than a baked cake. Cookies or wafers replace baked sponge layers, and whipped cream, pudding, or custard binds the assembly. The finished dessert is sliced like cake, but its crumb develops through refrigeration and hydration instead of oven heat.
Can I make an icebox cake the same day?
You can make an icebox cake the same day if you allow at least 4-6 hours of chilling. Graham crackers with pudding may soften within that period, while chocolate wafers, petit beurre, and dense cookies usually improve after 12-24 hours. Assemble the dessert in the morning for evening service.
Why is my icebox cake still hard after overnight chilling?
An icebox cake can remain hard after overnight chilling when the cookies are thick, the filling is too firm, or the layers have poor surface contact. Spread the filling completely to the edges and use a wetter cream or pudding. Very dense biscuits may need more than 24 hours.
Can I use whipped topping instead of whipped cream?
Whipped topping can replace whipped cream in an icebox cake and often provides greater stability during storage. The finished dessert may taste sweeter and less dairy-rich, so reduce added sugar elsewhere. Choose a firm, fully thawed topping and avoid adding watery fruit without draining it.
Can an icebox cake sit out at a party?
An icebox cake should remain refrigerated until serving and should not sit at room temperature for more than about two hours. Keep slices on a chilled tray during longer events, because cream softens quickly and perishable dairy fillings become less safe as temperatures rise.
What is the difference between an icebox cake and tiramisu?
Tiramisu is a specific Italian dessert made with coffee-soaked ladyfingers and mascarpone cream, while icebox cake is a broad no-bake category based on chilled biscuit and filling layers. Tiramisu can be considered an icebox-style dessert, but many icebox cakes contain no coffee, mascarpone, or cocoa.
The Bottom Line
An icebox cake is a refrigerated, no-bake dessert that turns crisp cookies into tender cake-like layers through moisture migration and starch hydration. The most reliable method uses complete cookie coverage, firm filling, and 12-24 hours of chilling. For a first attempt, choose graham crackers with pudding; for the classic flavor, choose chocolate wafers with vanilla whipped cream._finish
