

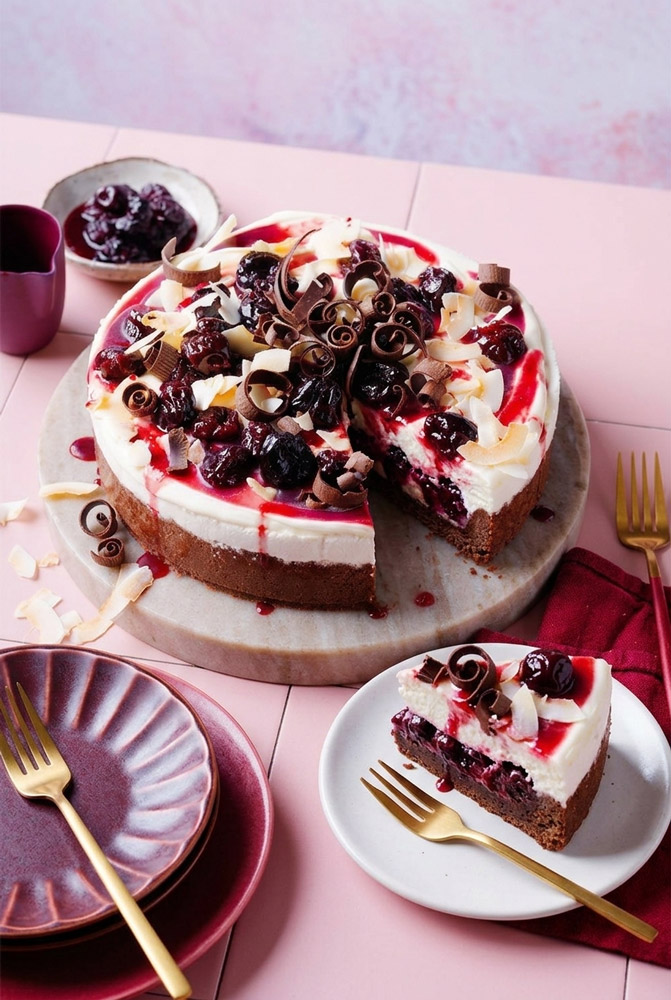
Few flavor pairings evoke nostalgic confectionery magic quite like the classic Australian Cherry Ripe bar. First introduced in 1924 by MacRobertson’s and later perfected as an iconic national staple, the marriage of dark chocolate, chewy coconut, and bold, ruby-red cherries is timeless. This no-bake Cherry Ripe cheesecake transforms that vintage candy-bar flavor profile into a sophisticated, multi-textured centerpiece dessert.
Growing up, Cherry Ripe bars were the treat saved for special road trips, tucked away in glove compartments and unwrapped with deliberate care. The goal here was to recreate those distinct elements—the bitter crack of dark chocolate, the tropical lushness of coconut, and the bright acidity of sour-sweet cherries—without the cloying artificial syrupiness often found in commercial candy.
What makes this specific version stand out is its balance of structure and silkiness. By incorporating a gently gelatine-stabilized coconut cream mousse alongside a tart, citrus-laced cherry compote, the finished dessert remains light, velvety, and deeply aromatic on the palate.
Recipe Overview & Planning
- Active Prep Time: 45 minutes
- Cook Time: 10 minutes (compote reduction)
- Chilling Duration: 4 hours minimum (overnight recommended)
- Yield: 12 generous portions
- Skill Level: Intermediate beginner (no water bath or oven monitoring required)
To execute this dessert seamlessly, set aside your prep window the day before serving. No-bake cheesecakes stabilized with gelatin require an undisturbed, cold setting environment to achieve that clean, knife-gliding slice.
Essential Equipment
- 22cm (9-inch) Springform Pan: Essential for releasing the biscuit sides without structural damage.
- Stand Mixer or Electric Hand Whisk: For incorporating air into both the pure cream and the cream cheese base.
- Small Heavy-Bottom Saucepan: Distributes heat evenly when dissolving gelatin into cream without scorching.
- Vegetable Peeler or Chef’s Knife: For shaving delicate, professional-grade chocolate curls.
- Clever Substitute: If you lack a 22cm springform tin, an 8-inch or 9-inch square loose-bottomed cake pan lined with parchment overhang (“handles”) works reliably.
Ingredient Selection & Preparation Notes
| Crust Base | |
|---|---|
| 266g | Dark Chocolate Digestive Biscuits (e.g., McVitie’s) |
| 70g | Unsalted Butter, melted and cooled to room temperature |
| 1 tbsp | Dutch-processed cocoa powder |
| Filling | |
| 300g | Full-fat block cream cheese, room temperature |
| 400ml | Canned coconut cream, room temperature & well shaken |
| 100g | Caster sugar (superfine) |
| 400ml | Pure cream (divided: 100ml + 300ml) |
| 5 sheets | Platinum-strength gelatine leaves |
| 50ml | Coconut rum (Malibu or dark coconut rum, optional) |
| Cherry Compote | |
| 300g | Cherries (pitted; fresh or whole frozen) |
| 1 medium | Orange (finely grated zest and strained juice) |
| 80g | Caster sugar |
| 2 1/2 tbsp | Kirsch or cherry liqueur (optional) |
| Topping & Garnish | |
| 300ml + 50g | Thickened heavy cream + caster sugar |
| 100g | High-quality dark chocolate bar (60–70% cocoa) |
| 50g | Fresh coconut flakes or toasted coconut chips |
- Dark Chocolate Digestives: Semi-sweet, malty biscuits provide a grounded structural foundation. If unavailable, use an equal weight of standard graham crackers or chocolate wafer cookies, boosting the cocoa powder to 2 tablespoons.
- Full-Fat Block Cream Cheese: Always use brick-style cream cheese rather than tub spreads. Tubs contain higher moisture and air content, which weakens the cheesecake’s set. Ensure it is fully softened at ambient room temperature to avoid graininess.
- Canned Coconut Cream: Opt for premium, unsweetened coconut cream where the only ingredients are coconut extract and water. Shake the can thoroughly to emulsify the thick cream top with the liquid bottom before measuring.
- Platinum-Strength Gelatine Leaves: Sheet gelatin yields a clearer, cleaner set without the savory aftertaste sometimes associated with powdered forms. If using powdered gelatin, substitute with 10g (approx. 1 tablespoon) bloomed in 3 tablespoons of cold water.
- Cherries (Fresh or Frozen): Dark, sweet cherries (such as Bing or Morello) provide rich color and acidity. Frozen pitted cherries work just as well as fresh, as their cell walls break down quickly during reduction, releasing juices rapidly.
- Kirsch & Coconut Rum: These liqueurs add complexity and amplify the fruit and nut profiles. For an alcohol-free profile, replace the coconut rum with 1 teaspoon of pure coconut extract, and swap the kirsch for an equal splash of fresh orange juice.
Step-by-Step Method
Step 1: Building the Chocolate Crust Foundation
Grease the interior rim of a 22cm springform pan lightly with butter or neutral oil, and line the bottom base with a cut round of parchment paper.
Snap the dark chocolate digestives into the bowl of a food processor. Pulse the biscuits until they reduce to a uniform, sand-like crumb with no stray chunks. Scatter the tablespoon of cocoa powder over the top, pour in the melted butter, and pulse for another 5 to 10 seconds until the mixture resembles wet beach sand and holds together firmly when pinched.
Tip the crumbs into your prepared pan. Using the flat base of a heavy drinking glass or measuring cup, press the crumbs firmly across the base and work the mixture halfway up the sides of the tin. Compacting the crust tightly prevents it from crumbling when sliced later. Slide the tin into the refrigerator for at least 30 minutes to firm up the butter matrix.
Step 2: Preparing the Coconut Cream Cheese Base
In the bowl of a stand mixer fitted with the whisk or paddle attachment, beat the softened cream cheese on medium speed for 2 minutes until completely smooth, glossy, and free of lumps. Stop the mixer to scrape down the sides and base of the bowl with a silicone spatula.
Pour in the room-temperature coconut cream and 100g of caster sugar. Whisk starting on low to incorporate the liquids, then increase to medium-high for 1 to 2 minutes until the sugar has dissolved and the mixture is silk-smooth and aromatic.
Pitfall to Avoid: If your cream cheese or coconut cream is cold, small stubborn lumps will form. If this occurs, set the mixer bowl over a warm water bath for 30 seconds to gently warm the fats, then re-whisk until emulsified.
Step 3: Blooming and Integrating the Gelatine
Submerge the 5 platinum gelatine leaves one by one into a shallow dish filled with cold water. Let them soak undisturbed for 5 minutes until soft, pliable, and jelly-like.
While the sheets bloom, measure 100ml of the pure cream into a small saucepan and bring it to a gentle simmer over medium-low heat—look for fine bubbles ringing the pan’s edge (do not boil). Lift the soaked gelatine leaves from the cold water and squeeze them firmly in your fist to remove excess moisture. Drop the wrung leaves directly into the hot cream and immediately whisk for 30 seconds until completely dissolved.
Remove the saucepan from the heat. In a steady, slow stream, pour the warm gelatine cream into your running stand mixer containing the coconut cream cheese mixture, whisking continuously on medium speed. Pour in the 50ml of coconut rum (if using) and blend for 15 seconds until homogenous.
-
1Soak Gelatine in Cold Water (5 min) Soft, translucent sheets
-
2Simmer 100ml Pure Cream Fine edge bubbles (~80°C)
-
3Squeeze & Whisk into Hot Cream Dissolved completely
-
4Stream into Cream Cheese Mixture Smooth, stable emulsion
Step 4: Folding the Chantilly & The Chill
In a separate, chilled mixing bowl, whip the remaining 300ml of pure cream using hand beaters or a clean whisk until soft, billowy peaks form. The cream should hold its shape gently while curling softly at the tip when the whisk is lifted.
Using a large flexible spatula, transfer one-third of the whipped cream into the coconut mixture and fold gently in broad figure-eight motions to lighten the base. Add the remaining whipped cream and fold until no white streaks remain, taking care not to knock out the incorporated air.
Retrieve your chilled crust from the fridge. Pour the filling over the base, using a mini offset spatula to level the top. Tap the pan once or twice gently on the counter to release trapped air bubbles. Transfer the pan to the refrigerator to chill for a minimum of 4 hours, or ideally overnight, until firm to the touch.
Step 5: Cooking the Glossy Cherry Compote
In a medium saucepan, combine the 300g of pitted cherries, the finely grated zest and strained juice of 1 orange, and 80g of caster sugar. Set the pan over low heat, stirring occasionally until the sugar melts into the citrus juice.
Allow the compote to simmer steadily for roughly 10 minutes. The cherries will soften, release their deep crimson juices, and burst slightly, while the liquid thickens into a glossy syrup that coats the back of a spoon. Pull the pan from the heat and stir in the 2½ tablespoons of kirsch or cherry liqueur. Allow the compote to cool to room temperature on the counter before moving it to the fridge to chill thoroughly.
Step 6: Creating Chocolate Curls & Final Assembly
To craft delicate chocolate curls without snapping, the block must be slightly tempered. Place the 100g dark chocolate block on a microwave-safe plate and heat in brief 10-second bursts. As soon as the edges show the faintest shine of melting, remove it. Draw a sharp vegetable peeler firmly down the long side edge of the chocolate block; ribbons and tight curls will peel off effortlessly. Collect the curls and keep them refrigerated until plating.
In a clean bowl, whip 300ml of thickened cream and 50g of caster sugar to medium-soft peaks. Release the springform latch and gently ease the collar away from the set cheesecake, using a warm palette knife if necessary. Transfer the cake to a serving platter.
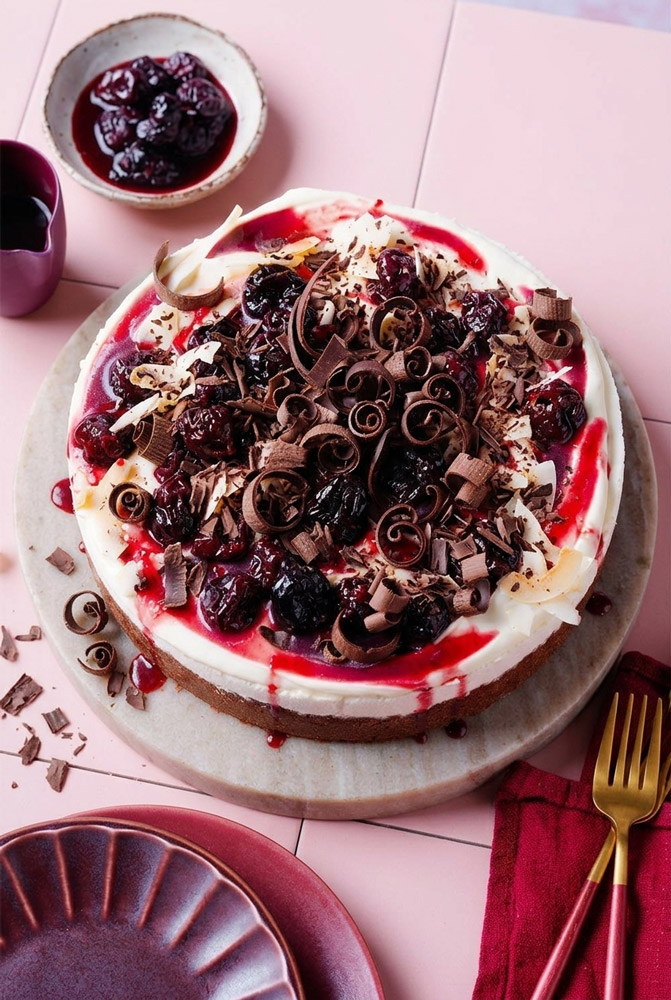
Top with the sweetened whipped cream, spoon the cold cherry compote generously across the center letting syrup pool organically, and finish with a cascade of chocolate curls and fresh coconut flakes.
Variations & Customizations
- Dairy-Free Adaptation: Substitute the butter in the crust with melted refined coconut oil. Swap the cream cheese for a block-style vegan alternative, and use whipped coconut cream in place of the dairy pure cream.
- White Chocolate & Raspberry Pivot: Replace the dark chocolate elements with a blondie crust base and shaved white chocolate curls, swapping the cherry-kirsch reduction for a tart raspberry-framboise compote.
- Non-Alcoholic Refreshment: Replace the kirsch with an equal measure of pomegranate juice concentrate for depth and tang, and incorporate a drop of pure almond or coconut extract into the filling.
- Mini Individual Pots: Layer the buttery biscuit crumb, coconut mousse, and compote into individual wide-mouthed mason jars or dessert glasses for an easy, no-cut dinner party dessert.
Plating, Storage & Make-Ahead Guide
| State | Max Duration | Best Practice |
|---|---|---|
| Fully Assembled | 24 to 48 Hours | Refrigerated, covered dome |
| Un-garnished Base | Up to 4 Days | Airtight in Springform tin |
| Cherry Compote | Up to 7 Days | Sealed glass jar in fridge |
| Frozen Base (Mousse) | Up to 1 Month | Double-wrapped, no garnish |
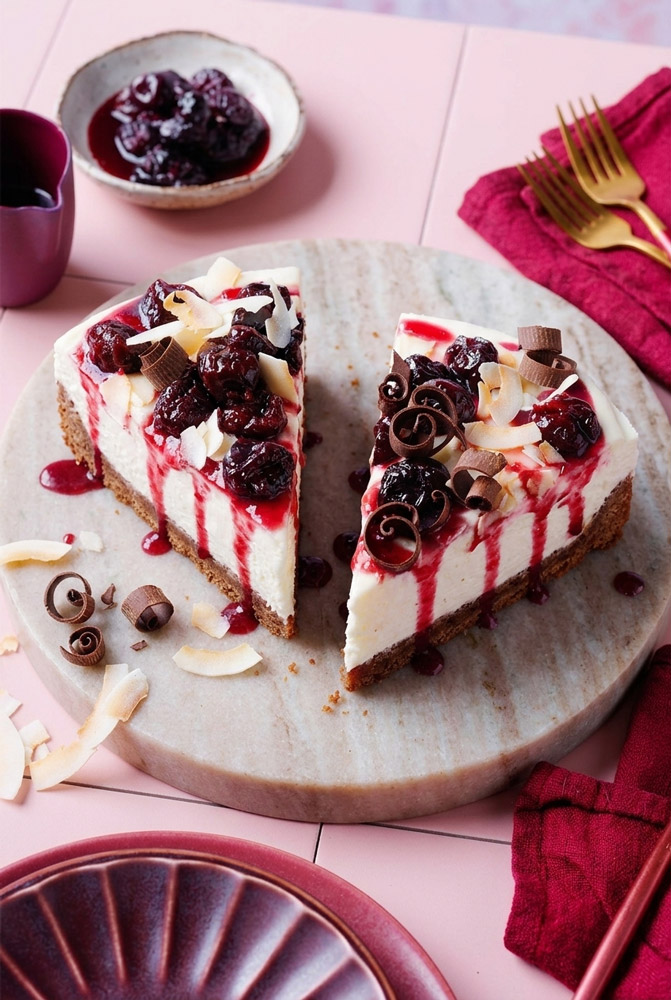
To achieve clean, restaurant-style slices, dip a long chef’s knife into a tall pitcher of hot water, wipe it clean with a kitchen towel, and make a single downward cut through the cheesecake. Wipe and reheat the blade between every single slice.
Pair this dessert with a glass of chilled Australian Tawny port, a late-harvest Pinot Noir, or a bold double espresso to offset the creamy sweetness.
PrintNo-Bake Cherry Ripe Cheesecake
A bakery-style dessert capturing the classic Australian confectionery trio: crisp chocolate crust, silky coconut filling, and sweet-tart cherry compote.
- Prep Time: 45 minutes
- Cook Time: 10 minutes
- Total Time: 4 hours 55 minutes (Chilling Time)
- Yield: 12 slices 1x
- Category: Dessert
- Cuisine: Australian / Fusion
Ingredients
Crust
- 266g dark chocolate digestive biscuits (crushed finely)
- 70g unsalted butter, melted and cooled
- 1 tbsp Dutch-process cocoa powder
Coconut Cheesecake Filling
- 300g full-fat cream cheese, room temperature
- 400ml canned coconut cream, room temperature
- 100g caster sugar
- 400ml pure cream, divided (100ml / 300ml)
- 5 platinum-grade gelatine leaves
- 50ml coconut rum (optional)
Tart Cherry Compote
- 300g sweet cherries, pitted (fresh or frozen)
- 1 orange, zested and juiced
- 80g caster sugar
- 2½ tbsp kirsch liqueur (optional)
Garnish & Whipped Top
- 300ml thickened cream + 50g caster sugar
- 100g dark chocolate block (for curls)
- 50g coconut chips or fresh coconut slices
Instructions
- Build Crust: Blend digestives, cocoa, and melted butter into fine crumbs. Press firmly across the base and halfway up the walls of a lined 22cm springform tin. Refrigerate 30 minutes.
- Beat Base: Whisk softened cream cheese until lump-free. Pour in coconut cream and 100g sugar; mix on medium until silky and combined.
- Dissolve Gelatine: Soften gelatine leaves in cold water for 5 minutes; squeeze dry. Bring 100ml pure cream to a light simmer, stir in the softened gelatine until fully dissolved, then blend into the cream cheese base along with coconut rum.
- Fold & Set: Whip remaining 300ml pure cream to soft peaks. Gently fold into the coconut base until uniform. Pour into the crust and chill for at least 4 hours.
- Simmer Compote: Cook cherries, orange zest, orange juice, and 80g sugar over low heat for 10 minutes until syrupy and soft. Stir in kirsch off the heat and cool completely.
- Shave Chocolate: Microwave chocolate block in 10-second bursts until slightly softened. Shave curls off the side using a vegetable peeler; keep chilled.
- Assemble: Whip 300ml thickened cream with 50g caster sugar to soft peaks. Unmold cheesecake, spread whipped cream over top, spoon over chilled cherry compote, and garnish with chocolate curls and coconut flakes.
Notes
- Temperature Check: Ensure cream cheese and coconut cream are at standard room temperature before beating to prevent the gelatin mixture from seizing into specks.
- Storage: Keep stored in the refrigerator under a cake dome for up to 4 days.
- Slicing Tip: Dip a sharp knife into boiling water and wipe dry between each cut for sharp, pristine slice edges.
