
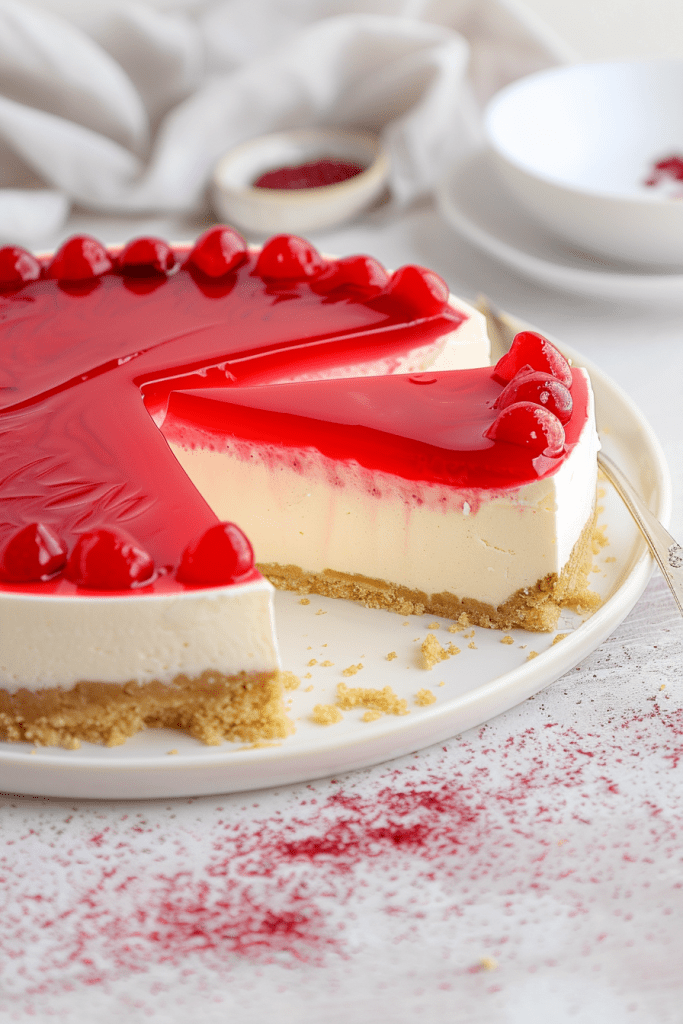
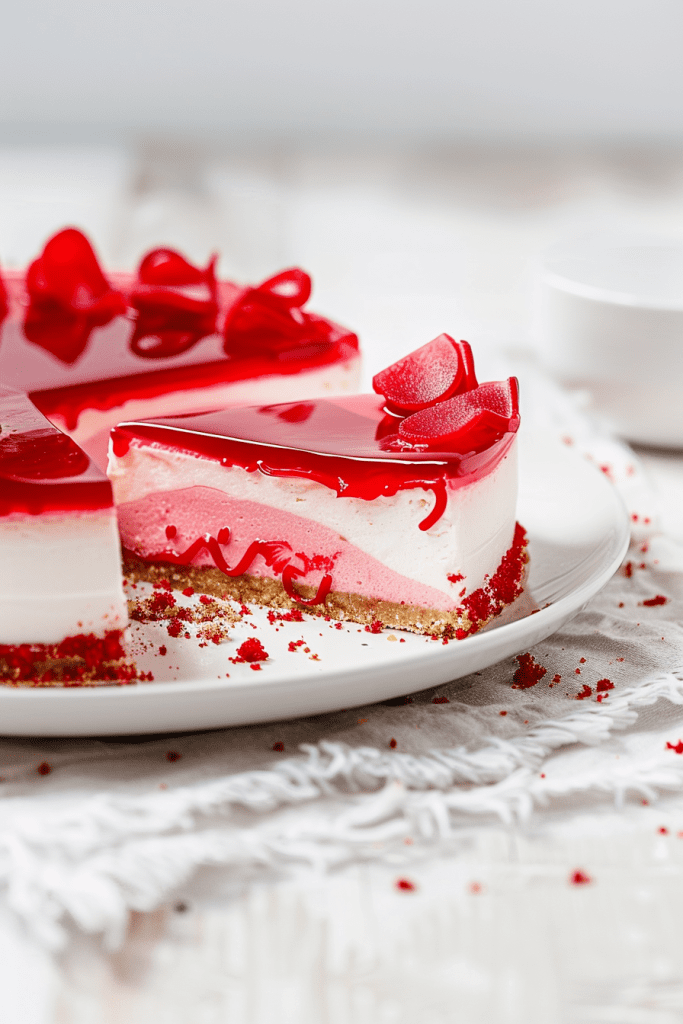
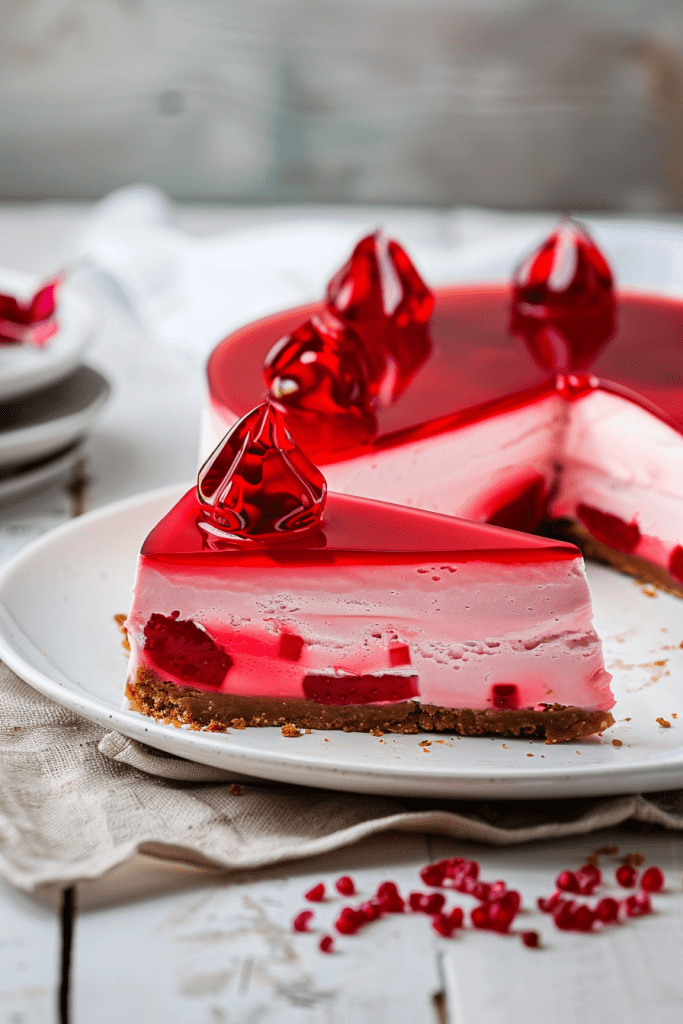
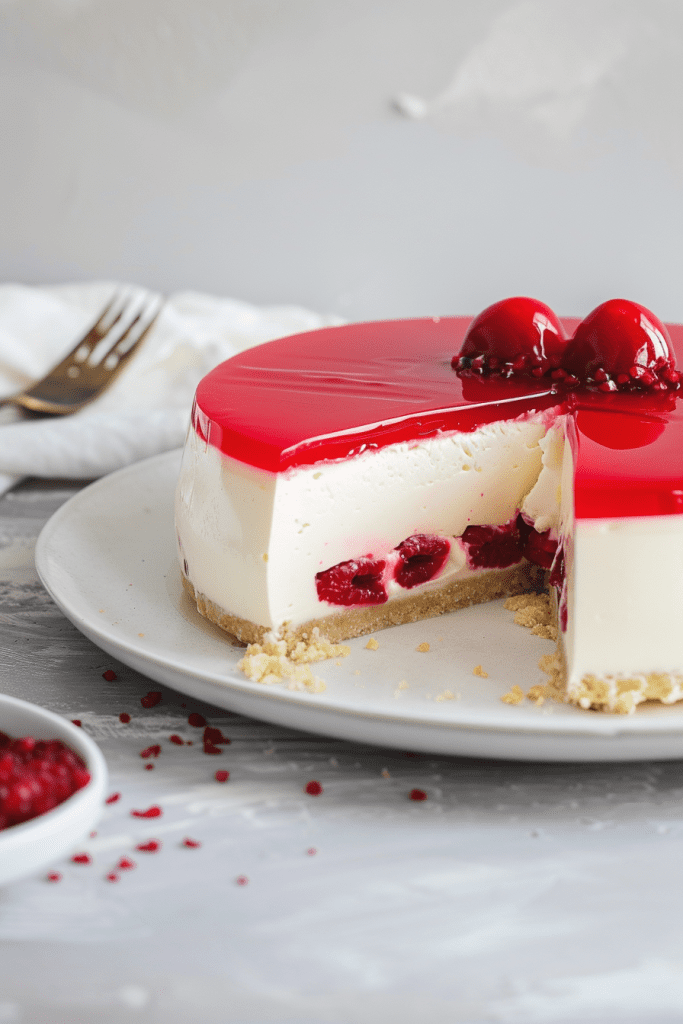
Craving a delightful dessert without the hassle of baking? Dive into the luscious world of no-bake red velvet cheesecake slice recipes! This indulgent treat combines the rich flavors of red velvet and creamy vanilla, nestled in a decadent Oreo crust. Perfect for any occasion, especially for those sweet tooth cravings or special celebrations.
With swirls of vibrant red velvet and a velvety smooth texture, this no-bake cheesecake slice is a showstopper that’s sure to impress your taste buds. Whether you’re a fan of red velvet or simply looking to try something new, this recipe offers a tantalizing blend of flavors and textures that will leave you craving for more.
Ingredients
Indulge in creating this delightful no-bake red rippers cheesecake slice with a perfect balance of red velvet sweetness and creamy vanilla goodness.
For the Base
- 28 Double Stuffed Oreos
- 1/4 cup salted butter, melted
For the Red Rippers Cheesecake Filling
- 24 ounces cream cheese, softened
- 1/4 cup sour cream
- 2 cups granulated sugar
- 1 tablespoon pure vanilla bean paste or pure vanilla extract
- 1 cup heavy cream
- 1/2 cup salted butter, softened
- 1 cup powdered sugar, sifted
Equipment Needed
To prepare this delectable no-bake red velvet cheesecake slice, you will need the following equipment:
- 6-inch cake ring (optional)
- Acetate sheet (for lining the cake ring; if not using, parchment paper can be used)
- Springform cake pan (6-inch)
- Mixer (hand or stand mixer)
- Spatula
- Bowls for mixing
- Measuring cups and spoons
- Whisk
- Saucepan
- Refrigerator
Make sure to have all these equipment ready before starting the preparation to ensure a smooth cooking experience.
Instructions
I am excited to guide you through preparing this delightful no-bake red velvet cheesecake slice. Follow these steps to create a decadent treat that will impress your guests or satisfy your sweet cravings.
Preparing the Base
- Line a 5cm-deep, 20cm square cake pan with baking paper, leaving a 5cm overhang to easily lift the cheesecake out later.
- Process Double Stuffed Oreos in a food processor until fine crumbs.
- Add ¼ cup melted salted butter and process to combine.
- Spoon the mixture into the prepared pan and press it firmly and evenly over the base using the back of a spoon.
- Place the pan in the refrigerator to chill while you prepare the filling.
Making the Cheesecake Filling
- In a large bowl, blend 24 ounces of softened cream cheese until smooth.
- Add ¼ cup sour cream, 2 cups granulated sugar, and 1 tablespoon pure vanilla extract. Mix well until fully combined.
- In a separate bowl, whip 1 cup of heavy cream to stiff peaks.
- Gently fold the whipped cream into the cream cheese mixture until incorporated.
- Divide the filling into two parts.
- To one part, add ¼ cup sifted unsweetened cocoa powder and a few drops of red food coloring. Adjust the coloring to achieve your desired shade of red.
- Retrieve the chilled crust from the refrigerator.
- Alternating spoonfuls of the two fillings, create a swirl effect in the crust using a spatula.
- Ensure the fillings are evenly distributed for a beautiful swirl pattern.
- Your red velvet cheesecake slice is now ready to be chilled and set.

Chill and Serve
After creating this delightful no-bake red velvet cheesecake slice, the next step is to chill it to perfection and serve it to impress your guests. Below are the key steps for chilling and serving this heavenly dessert:
Chilling Time
Once you’ve layered the red velvet cheesecake filling over the Oreo crust, it’s time to chill the dessert. Place the cheesecake slice in the refrigerator and let it chill for at least 4-6 hours, or preferably overnight. Chilling ensures that the cheesecake sets perfectly, allowing for clean slices and a beautiful swirl effect.
How to Serve
When you’re ready to serve the red velvet cheesecake slice, carefully remove it from the refrigerator. Using a sharp knife dipped in hot water, slice the cheesecake into neat portions to showcase the vibrant red velvet swirls. Serve the chilled slices on dessert plates, garnishing with extra cocoa powder or a dollop of whipped cream for an elegant touch. Enjoy this decadent dessert with friends and family, savoring each creamy bite of this showstopper treat.
Tips for Perfect No-Bake Cheesecake
As an experienced baker, I have learned a few tips and tricks that can help you achieve the perfect no-bake cheesecake every time. Follow these steps to ensure your red velvet cheesecake slice turns out divine:
Choose High-Quality Ingredients
Using high-quality ingredients is key to creating a delicious and visually appealing dessert. Opt for fresh cream cheese, top-notch cocoa powder, and pure vanilla extract for the best flavor profile.
Ensure Proper Temperature
Make sure all your dairy ingredients, especially the cream cheese and heavy cream, are at room temperature before you start. This will ensure a smooth and creamy texture when whipping them together.
Whip Cream to Stiff Peaks
When whipping the heavy cream, make sure to beat it until stiff peaks form. This will give your cheesecake filling the right texture and stability for a perfect slice.
Incorporate Colors Gradually
When adding red food coloring for the red velvet swirl, remember that a little goes a long way. Add the color gradually to achieve the desired deep red hue without overpowering the flavor.
Allow Enough Chilling Time
Patience is key when making no-bake cheesecake. Ensure you allow the cheesecake to chill for at least 4-6 hours, or preferably overnight, to set properly and develop the ideal consistency.
Use Acetate Sheets for Clean Slices
For clean and professional-looking slices, consider using acetate sheets around the cake ring before layering the fillings. This will help you achieve precise edges and neat layers.
Get Creative with Garnishes
Don’t shy away from experimenting with garnishes to elevate the presentation of your red velvet cheesecake slice. Dust some cocoa powder on top or add a dollop of freshly whipped cream for a finishing touch.
By following these tips, you’ll be on your way to mastering the art of creating the perfect no-bake red velvet cheesecake slice that will impress your taste buds and guests alike.
Conclusion
Creating a no-bake red velvet cheesecake slice is a delightful journey of flavors and textures. The fusion of red velvet and creamy vanilla, nestled in a crunchy Oreo crust, offers a tantalizing treat for any occasion. By following the detailed instructions and expert tips provided, you can craft a visually stunning and palate-pleasing dessert that will leave a lasting impression. Remember, quality ingredients, proper techniques, and a touch of creativity are key to mastering the art of making the perfect red velvet cheesecake slice. So, roll up your sleeves, gather your tools, and embark on your no-bake cheesecake adventure. Your taste buds and guests will thank you for the decadent experience!