

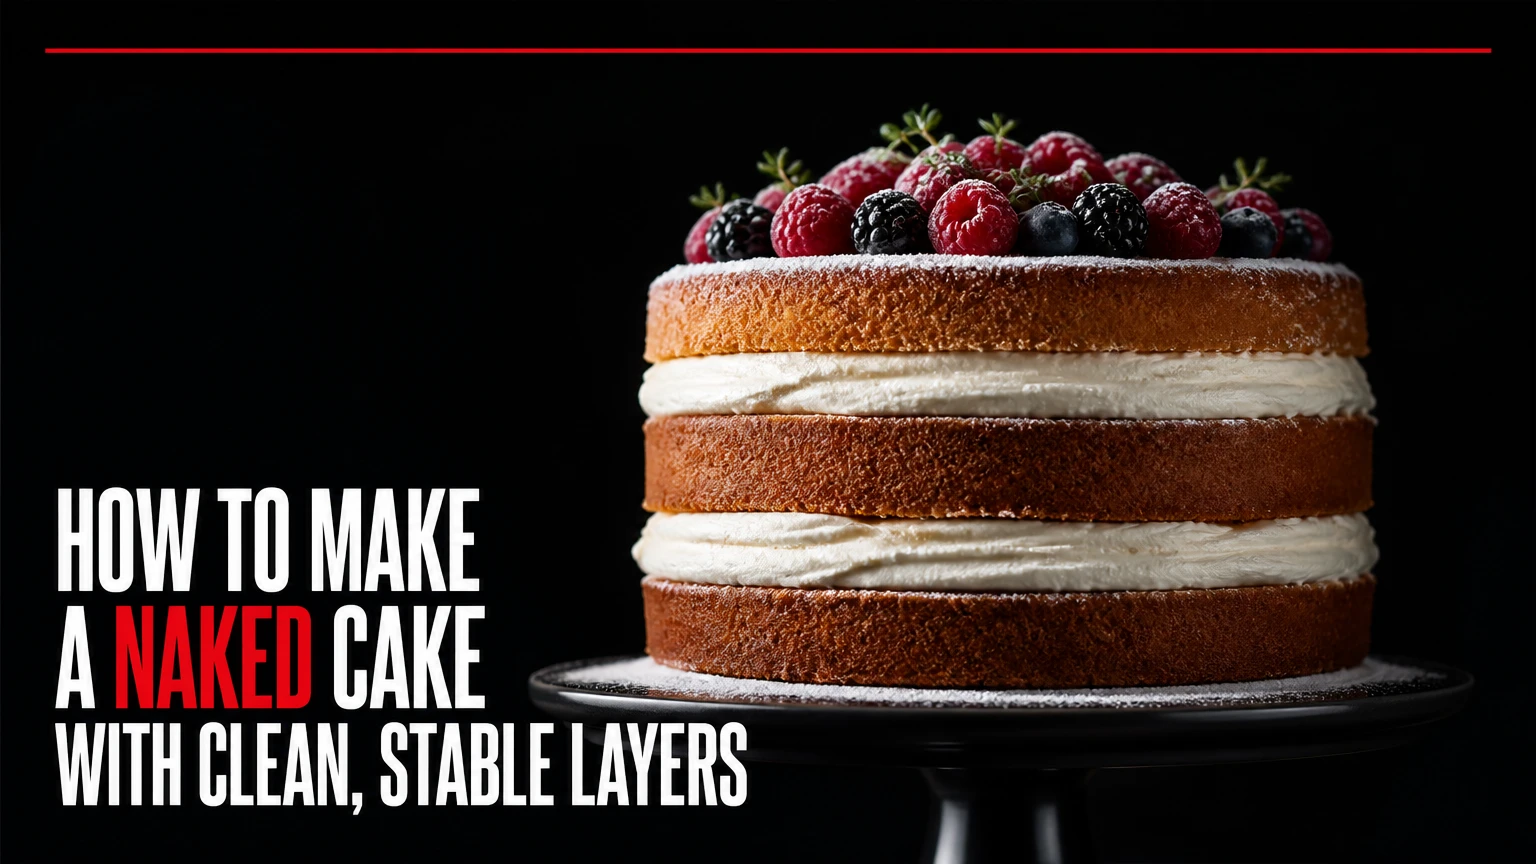
A naked cake is a layer cake with little or no frosting on its outside, leaving the sponge and filling visible. To make one, bake a firm cake, chill and level the layers, brush them lightly with syrup, add a stable filling inside a buttercream dam, stack accurately, and finish with either bare sides or a thin scraped coat.
Key facts at a glance
A semi-naked cake keeps a thin buttercream coat on the sides, while a fully naked cake leaves the sponge exterior exposed.
A firm butter cake, pound cake, or dense chocolate cake holds exposed layers better than a delicate chiffon.
Simple syrup uses equal weights or equal volumes of sugar and water, but a naked cake needs a light coating rather than saturation.
A filled layer cake usually needs 60-90 minutes of chilling before decoration or transport.
Soft curd, whipped cream, and loose fruit fillings need a buttercream dam and careful refrigeration.
The safest serving window for perishable fillings is governed by temperature and time, not by the cake’s appearance.
What Is a Naked Cake?
A naked cake is a decorated layer cake whose sides have no outer frosting or only a very thin coating. The exposed sponge becomes part of the design, so the bake, crumb color, layer thickness, filling lines, and stacking accuracy all remain visible.
Traditional frosting hides small defects and slows moisture loss. A naked finish removes that visual and protective layer. The result looks simple, but the method demands more control over baking, leveling, filling consistency, and storage.
The term covers several finishes rather than one exact recipe. A cake with completely bare sides is fully naked; a cake with a scraped veil of frosting is semi-naked. Bakers sometimes use “rustic naked cake” for a deliberately irregular finish, but rustic does not mean unstable or poorly assembled.
What makes a naked cake different?
A naked cake depends on the interior assembly for both appearance and strength. The filling must remain inside the perimeter, the layers must sit level, and the sponge must retain enough moisture to remain pleasant after the sides are exposed.
Naked cakes work well for small celebrations, rustic weddings, birthdays, and fruit-forward designs. They are less suitable for long uncovered displays, hot outdoor events, or fillings that soften quickly unless the cake has strong refrigeration and support.
Which Cake Base Works Best?
The best naked cake base is a firm, even-crumbed butter cake with enough fat and structure to survive trimming and stacking. A pound cake, oil-enriched chocolate cake, or sturdy vanilla layer cake generally performs better than an airy angel food cake or fragile chiffon.
Choose a recipe designed for layers, not a shallow snacking cake. The cake should rise evenly, release cleanly, and slice without shedding large crumbs. A domed, overbaked, or very soft sponge creates visible problems because the exterior cannot be covered generously.
| Cake base | Typical layer behavior | Best filling match | Main limitation |
|---|---|---|---|
| Vanilla butter cake | Firm crumb, clean slices | Swiss meringue buttercream, lemon curd | Can dry if overbaked |
| Pound cake | Dense crumb, excellent stacking | Berry compote, mascarpone frosting | Heavy for tall tiers |
| Chocolate mud cake | Moist, stable, dark color | Ganache, chocolate buttercream | Requires longer cooling |
| Chiffon cake | Light, tender, delicate | Whipped cream, fresh fruit | Tears easily when leveled |
For a first attempt, use two or three layers measuring 15-18 cm, or 6-7 inches, across. A taller cake increases the pressure on the filling and makes a slight tilt more obvious.
How should you bake the layers?
Bake cake layers at the temperature specified by the recipe, usually 160-175°C, or 325-350°F, in a fully preheated oven. The lower end of that range can reduce doming, but oven calibration, pan color, batter depth, and recipe chemistry matter more than a universal temperature.
Line the pan base with parchment and grease the sides lightly. Weigh batter into each pan when possible; equal batter weights produce layers that require less trimming. Rotate pans only when the cake has developed enough structure, usually after two-thirds of the baking time.
A cake is ready when the center springs back lightly, the edges pull away slightly, and a skewer emerges with a few moist crumbs rather than wet batter. Record the actual bake time for your pan and oven. A dark metal pan often browns faster than a light aluminum pan.
What Do You Need Before Starting?
A two-layer, 18 cm, or 7-inch naked cake typically requires two cooled cake layers, 300-450 g of buttercream, 120-180 g of filling, and 30-60 g of simple syrup. The exact quantity changes with layer count, cake diameter, and whether the sides are fully bare or semi-naked.
Before you start
| Requirement | Typical quantity or time | Why it matters |
|---|---|---|
| Cake layers | 2-3 layers, 15-20 cm wide | Provides the visible structure |
| Buttercream | 300-450 g for 18 cm cake | Fills, dams, and coats |
| Soft filling | 120-180 g total | Adds flavor without excess pressure |
| Chilling time | 4 hours for layers, 60-90 minutes assembled | Firms crumb and filling |
| Total project time | 5-7 hours including cooling | Prevents rushed assembly |
You will need a turntable, cake board, offset spatula, bench scraper, long serrated knife, digital scale, piping bag, round piping tip, pastry brush, parchment, and a refrigerator shelf large enough for the assembled cake.
A cake leveler is optional. A serrated knife provides more control for home bakers because you can remove thin slices gradually rather than cutting the entire crown in one motion.
How to Make a Naked Cake in Seven Steps
Step 1: Bake and cool the cake layers
Bake the batter in prepared pans, then cool the cakes in their pans for 10-15 minutes before turning them onto a rack. Allow the layers to cool completely, then wrap each one tightly and refrigerate for at least 4 hours.
Cold cake produces fewer crumbs and resists tearing during trimming. Room-temperature cake is easier to dent, especially when the sponge contains oil or a high proportion of liquid.
You will know it worked when: the center feels cool, the layer lifts without bending, and the wrapped cake has no trapped steam.
Common mistake: wrapping a hot cake tightly. Condensation can make the crust sticky and the crumb gummy.
Step 2: Level and split the layers
Place the chilled cake on a nonslip surface and use a serrated knife to remove the dome. Keep the blade parallel to the work surface and rotate the cake gradually rather than sawing deeply from one side.
If the recipe makes thick layers, split each layer horizontally into two even discs. Measure layer height with a ruler before cutting; four layers that differ by 5 mm will make the finished cake visibly uneven.
Reserve the trimmings for crumbs, dessert cups, or a baker’s snack. Do not use a heavily browned or dry crown as a visible top layer.
You will know it worked when: each disc has a flat top, consistent thickness, and no torn edge.
Common mistake: leveling warm cake. Warm crumbs compress under the knife and create sloping layers.
Step 3: Prepare the syrup and fillings
Make simple syrup by combining equal parts sugar and water, heating until the sugar dissolves, and cooling the mixture completely. For an 18 cm cake, prepare about 100 g syrup and expect to use only 30-60 g.
Brush the cut surface lightly with syrup. One pass is usually enough; wait 2-3 minutes before adding more because the syrup continues moving into the crumb. Excess syrup weakens the layer and can make filling slide.
Prepare buttercream until it is smooth and pipeable. Chill curd, compote, and whipped fillings before assembly. A filling should hold a soft ridge when piped or spooned, not flow across a plate.
You will know it worked when: the crumb feels supple but not wet, and the filling stays in a mound.
Common mistake: treating syrup as a cure for overbaking. Syrup improves perceived moisture, but it cannot restore a hard, burnt crust or fix a crumb that has collapsed.
Step 4: Pipe a buttercream dam
Set the first cake layer on a cake board with a small amount of buttercream underneath to prevent movement. Pipe a continuous ring of firm buttercream around the perimeter, leaving the ring about 1-1.5 cm, or 0.4-0.6 inches, from the edge.
Spread the filling inside the ring. Keep the filling layer about 5-8 mm thick for a two- or three-layer cake. A thicker filling looks generous but creates greater outward pressure when the next sponge is added.
| Filling | Amount for 18 cm cake | Stability after chilling | Recommended handling |
|---|---|---|---|
| Lemon or passion-fruit curd | 120-150 g | Medium | Use inside a 1 cm buttercream dam |
| Thick berry compote | 150-180 g | Medium-high | Cool fully and remove excess liquid |
| Chocolate ganache | 150-200 g | High | Use at spreadable consistency |
| Whipped cream | 120-150 g | Low-medium | Refrigerate continuously and serve promptly |
A dam is not decorative frosting. It is a containment wall. The dam must be continuous, with no gaps where curd or cream can escape.
You will know it worked when: the filling sits below the dam’s top edge and the dam remains visible around the entire circumference.
Common mistake: using soft frosting for the dam. Beat the buttercream until it holds a defined ridge; briefly chill the piping bag if the room is warm.
Step 5: Stack and settle the cake
Lower the next layer onto the filling, checking alignment from directly above. Press gently with a flat hand until the layer makes contact with the dam, but do not compress the sponge.
Repeat the syrup, dam, filling, and stacking process. After the final layer, place a sheet of parchment on top and apply light, even pressure with a flat cake board. Chill the assembled cake for 30-60 minutes before scraping or decorating.
A short settling period allows filling to distribute without being forced rapidly through weak points. If filling squeezes out, remove the excess immediately and reinforce the edge with chilled buttercream.
You will know it worked when: the sides form a near-vertical cylinder and the top does not visibly slope.
Common mistake: correcting alignment after several layers are stacked. Check every layer as it is placed; later movement usually damages the filling.
Step 6: Choose the bare or semi-naked finish
For a fully naked cake, scrape away any buttercream that has squeezed beyond the filling line and leave the sponge perimeter exposed. For a semi-naked cake, apply a thin coat of buttercream, then hold a bench scraper vertically against the side while rotating the turntable.
Use enough frosting to fill visible gaps, not enough to create an opaque outer shell. A semi-naked 18 cm cake commonly needs an additional 100-180 g buttercream beyond the filling and dams.
Keep the scraper steady and rotate the cake slowly. Patch low areas with a small amount of frosting, then scrape again. The goal is a thin, translucent coat with visible cake, not a thick coat that happens to contain crumbs.
You will know it worked when: the sides look intentionally thin, the filling lines remain visible, and no deep channels expose the filling.
Common mistake: scraping aggressively before the cake is cold. Warm filling smears, while chilled buttercream leaves cleaner edges.
Step 7: Chill, decorate, and serve
Chill the finished cake for 60-90 minutes before moving it. Decorate with food-safe items such as berries, edible flowers, chocolate pieces, piped buttercream, or cleanly washed herbs that are confirmed safe for food contact.
Do not push unwrapped florist stems directly into cake. Use food-safe flower picks, barrier straws, or a separate arrangement placed beside the cake. Remove all non-edible supports before serving.
Keep cakes containing cream, curd, mascarpone, or cut fruit refrigerated. The United States Department of Agriculture advises discarding perishable food left at room temperature for more than 2 hours, or more than 1 hour when temperatures exceed 32°C, or 90°F.
You will know it worked when: the cake can be lifted by its board without shifting and the filling remains contained after 10 minutes at serving temperature.
Common mistake: decorating several hours before serving and leaving the cake uncovered. Exposed sponge dries faster than a fully frosted cake.
How Do Fully Naked and Semi-Naked Cakes Compare?
A semi-naked cake is the better starting point for most home bakers because its thin frosting layer protects moisture and conceals minor leveling marks. A fully naked cake gives the clearest rustic appearance, but it requires more even baking and a shorter uncovered display.
| Attribute | Fully naked | Semi-naked | Rustic scraped | Fully frosted |
|---|---|---|---|---|
| Exterior frosting | 0 g on sides | 100-180 g for 18 cm cake | 180-300 g for 18 cm cake | 350-600 g for 18 cm cake |
| Visible sponge | 100% of side wall | 60-90% of side wall | 20-60% of side wall | 0% of side wall |
| Skill demand | High | Medium | Medium-high | Medium |
| Moisture protection | Low | Medium | Medium-high | High |
| Best display window | 1-4 hours | 2-6 hours | 2-8 hours | 4-12 hours, refrigerated |
A fully naked finish is not automatically healthier, cheaper, or easier. It uses less outer buttercream, but it places more value on accurate cake baking and may require extra syrup, refrigeration, or a more expensive sturdy sponge.
Which Fillings Are Stable in a Naked Cake?
Ganache and thick buttercream are the most structurally reliable fillings, while loose fruit, whipped cream, and warm curd require containment and refrigeration. The filling should match the expected display time, room temperature, and number of layers.
For fruit flavor, reduce berries or stone fruit until excess water evaporates, then cool the compote completely. For curd, use a restrained layer inside a buttercream dam. For whipped cream, choose a stabilized formula and plan to serve the cake soon after assembly.
Avoid placing wet sliced fruit directly against the sponge. Drain fruit on paper towels and use a thin layer; free liquid migrates into the crumb and can soften the dam.
Can a naked cake use cream cheese frosting?
A naked cake can use cream cheese frosting when the frosting is firm, cold, and made with enough structure to hold a dam. Cream cheese frosting softens more quickly than many buttercreams, so it suits refrigerated cakes and short serving windows rather than warm outdoor displays.
How Long Does a Naked Cake Last?
A naked cake is best assembled within 24 hours of serving and displayed uncovered for the shortest practical period. Wrapped unfrosted layers can usually be refrigerated for 2-3 days, while the safe storage period for the completed cake depends on its filling and refrigerator temperature.
Store unfrosted layers airtight to prevent moisture loss. Store the assembled cake in a covered container or cake carrier, with enough clearance that the lid does not touch the top decoration.
| Cake condition | Typical storage period | Storage temperature | Quality concern |
|---|---|---|---|
| Wrapped plain sponge | 2-3 days | 2-5°C, 36-41°F | Crust gradually dries |
| Syrup-brushed, unfilled layers | 24 hours | 2-5°C, 36-41°F | Surface may become tacky |
| Buttercream-filled cake | 2-3 days | 2-5°C, 36-41°F | Buttercream firms noticeably |
| Cream or cut-fruit cake | 1-2 days | 2-5°C, 36-41°F | Food safety and weeping risk |
These are quality-focused typical ranges, not a substitute for the recipe’s storage instructions. Let refrigerated cake stand for 30-60 minutes before serving so buttercream softens, but do not leave perishable fillings at room temperature beyond safe limits.
How Do You Transport a Naked Cake?
Transport a naked cake fully chilled in a rigid cake carrier on a flat vehicle surface. A nonslip mat under the cake box, a correctly sized cake board, and air-conditioning during the journey reduce sliding and condensation.
For a cake taller than three layers, use a central support only when the design and board system require it. For stacked tiers, each upper tier needs its own board, and dowels in the lower tier must reach the supporting board above.
Do not transport a naked cake loose on a plate. The plate does not prevent lateral movement, and the exposed sides provide no frosting barrier against contact, dust, or dry airflow.
How do you support a tiered naked cake?
Support each tier with a cake board and a set of dowels cut flush with the lower tier’s top surface. The dowels transfer the upper tier’s weight to the board rather than asking the sponge and filling to bear the load.
Typical home projects should use a tested support system from a cake-decorating supplier. Insert dowels after chilling, check that every dowel touches the board, and transport the tiers separately when the route is long or the room is warm.
Common Naked Cake Problems and Fixes
Most naked cake failures come from excess moisture, inadequate chilling, uneven layers, or fillings that are too soft. Repair depends on whether the problem affects appearance, stability, or food safety.
| Problem | Likely cause | Immediate fix | Prevention |
|---|---|---|---|
| Bulging filling | Filling layer too thick or dam too weak | Chill, scrape excess, reinforce edge | Keep filling 5-8 mm thick |
| Leaning stack | Uneven discs or soft filling | Chill 30 minutes and realign gently | Level every layer |
| Dry exposed sponge | Overbaking or long uncovered display | Brush a small amount of syrup | Wrap layers and assemble near serving |
| Crumbly sides | Fragile recipe or warm cake | Apply a thin semi-naked coat | Chill at least 4 hours |
| Sliding layers | Warm buttercream or wet fruit | Refrigerate until firm | Drain fruit and chill between stages |
| Dark outer crust | High heat or dark pan | Trim the crust carefully | Reduce heat slightly and use parchment |
A leaning cake should not be forced upright while warm. Chilling first prevents the filling from acting as lubricant during correction. If the cake has cracked, patch the crack with buttercream and choose a semi-naked finish rather than exposing the damaged area.
A dry cake should not be flooded with syrup. Apply a measured amount with a brush, wait, and reassess. Too much liquid creates a different defect, a slippery stack that may look moist but cannot remain square.
What changes in a warm room?
In a room above approximately 24°C, or 75°F, shorten the working intervals and chill the cake between filling, scraping, and decorating. Swiss meringue buttercream, American buttercream, or ganache generally holds shape more reliably than soft whipped cream.
Keep the cake refrigerated until close to service. Use an insulated carrier for transport, but avoid sealing a warm cake into a container because condensation can make the exposed crust sticky.
How Much Does a Naked Cake Cost and How Long Does It Take?
A typical homemade 18 cm naked cake costs approximately $15-$35 in ingredients and takes 5-7 hours including cooling and chilling. The outer frosting uses less butter and sugar, but the cake still requires accurate baking, trimming, refrigeration, and decoration.
| Project | Ingredient cost, typical | Active work | Total elapsed time |
|---|---|---|---|
| Two-layer 15 cm cake | $12-$22 | 90 minutes | 4-5 hours |
| Three-layer 18 cm cake | $18-$35 | 2-2.5 hours | 5-7 hours |
| Two-tier celebration cake | $40-$80 | 4-6 hours | 8-12 hours |
| Three-tier event cake | $70-$150 | 6-10 hours | 1-2 days |
Prices vary with chocolate, berries, edible flowers, specialty flour, and local ingredient costs. A naked cake is not inexpensive when premium fruit, stabilized fillings, boards, carriers, and support systems are included.
Can You Adapt the Method for Eggless or Dairy-Free Cakes?
Eggless and dairy-free naked cakes are possible, but the recipe must produce a firm crumb rather than relying on extra syrup or frosting for structure. Choose a tested layer-cake formula with a reliable egg replacer, plant fat, and adequate cooling time.
Eggless cakes can be more fragile during leveling, particularly when warm. Chill the layers overnight when practical and use a semi-naked finish if the cut surfaces shed crumbs.
For dairy-free assembly, use plant-based buttercream or a firm ganache made with a compatible plant cream. Test the frosting at the expected room temperature before committing to a tall cake, because plant fats vary widely in melting behavior.
How Should You Decorate a Naked Cake?
Decorate a naked cake with elements that reinforce the visible layers without adding uncontrolled moisture or unsafe materials. Fresh berries, edible flowers, piped buttercream, chocolate curls, and a light dusting of powdered sugar are practical options.
Add wet fruit shortly before serving. Place berries on a paper towel first, and avoid fruit with leaking cuts. If using flowers, confirm that the flowers are edible or create a physical barrier between stems and cake; florists’ flowers may carry treatments unsuitable for food contact.
A small amount of decoration usually looks more deliberate than a heavy arrangement on a cake with exposed sides. Keep the top weight low on tall cakes because large fruit clusters can shift the upper layer.
FAQ
Can I make a naked cake the day before?
You can make a naked cake the day before if you refrigerate it in a covered container and use a stable filling. Assemble the cake 12-24 hours before serving, then add delicate fruit or flowers shortly before presentation. Keep cream, curd, and cut-fruit fillings continuously refrigerated.
Do I have to use simple syrup on a naked cake?
You do not have to use simple syrup when the sponge is moist and the cake will be served soon. Use a light syrup application when the layers are slightly dry, the cake is made ahead, or the recipe has a naturally firm crumb. Excess syrup can cause sliding and soggy edges.
Why is my naked cake leaning?
A naked cake usually leans because the layers are uneven, the filling is too thick, or the buttercream dam has gaps. Chill the cake for 30-60 minutes, check whether the layers can be realigned, and remove excess filling from the bulging side before reinforcing the perimeter.
Can I freeze naked cake layers?
You can freeze unfrosted cake layers for approximately 1-2 months when wrapped tightly in plastic film and placed in a freezer bag or airtight container. Thaw the layers while wrapped so condensation forms on the wrapping rather than directly on the sponge.
What is the best size for a first naked cake?
A 15-18 cm, or 6-7 inch, two- or three-layer cake is a practical first size. The diameter is large enough for clean filling lines but small enough to chill, level, and transport without specialized tier supports.
Should a naked cake be refrigerated?
A naked cake should be refrigerated when it contains buttercream, curd, cream, mascarpone, or fresh fruit, especially before transport. Refrigeration firms the filling and slows spoilage, but the cake should be covered to prevent the exposed sponge from absorbing refrigerator odors and drying.
