
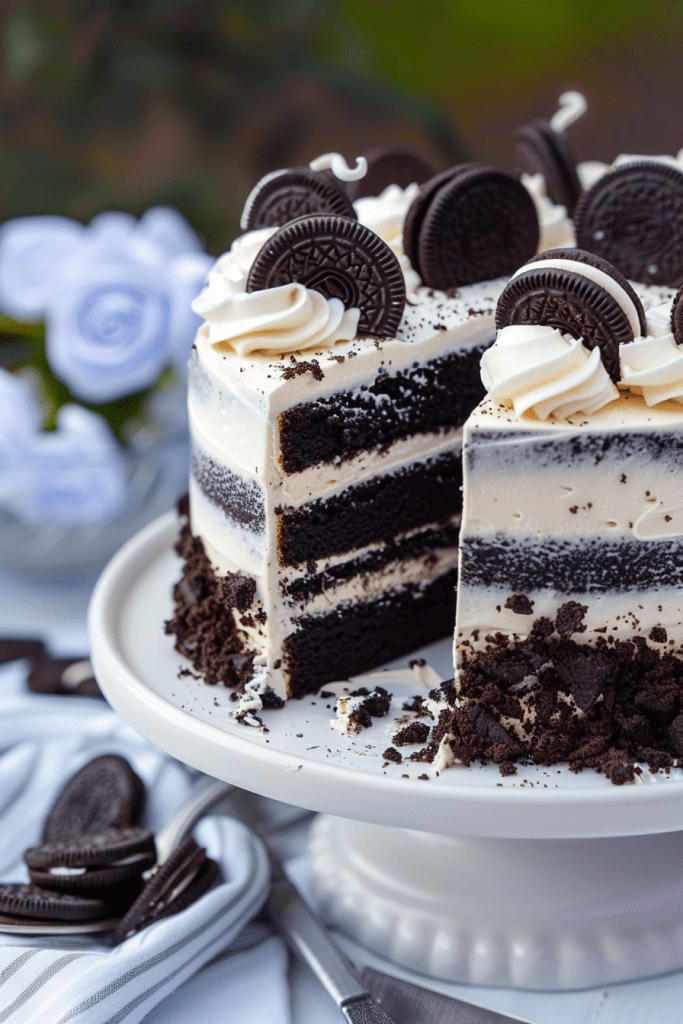
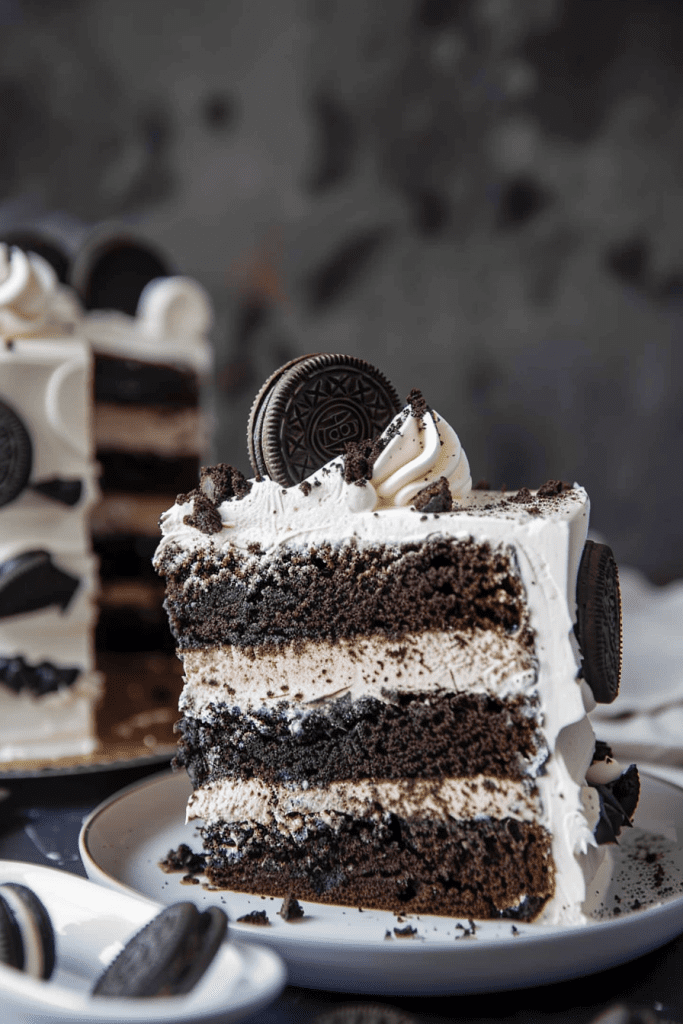
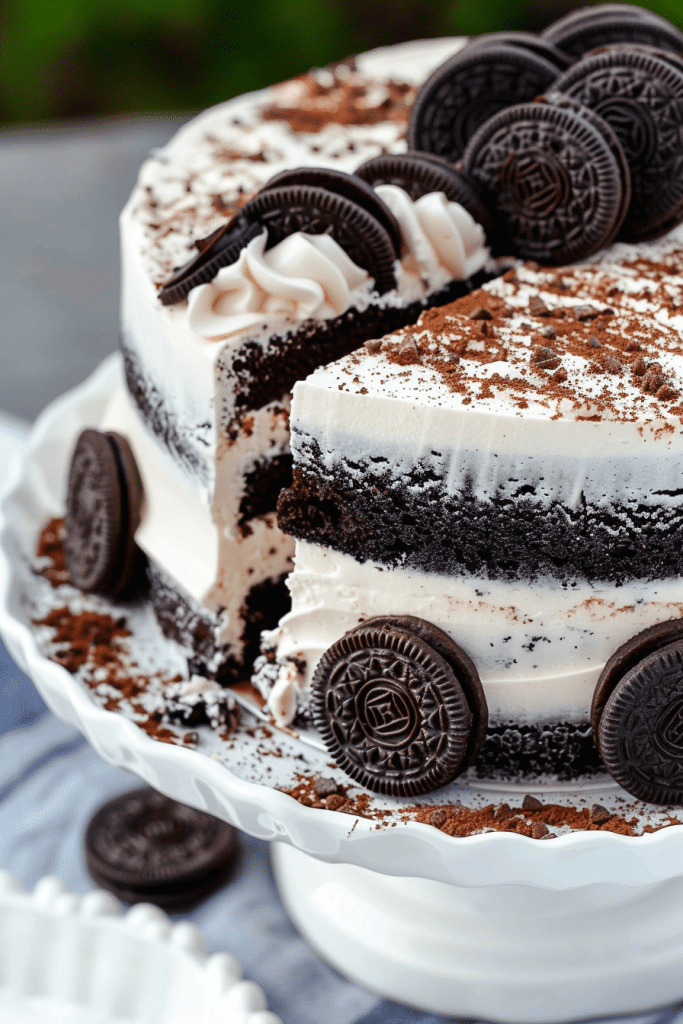
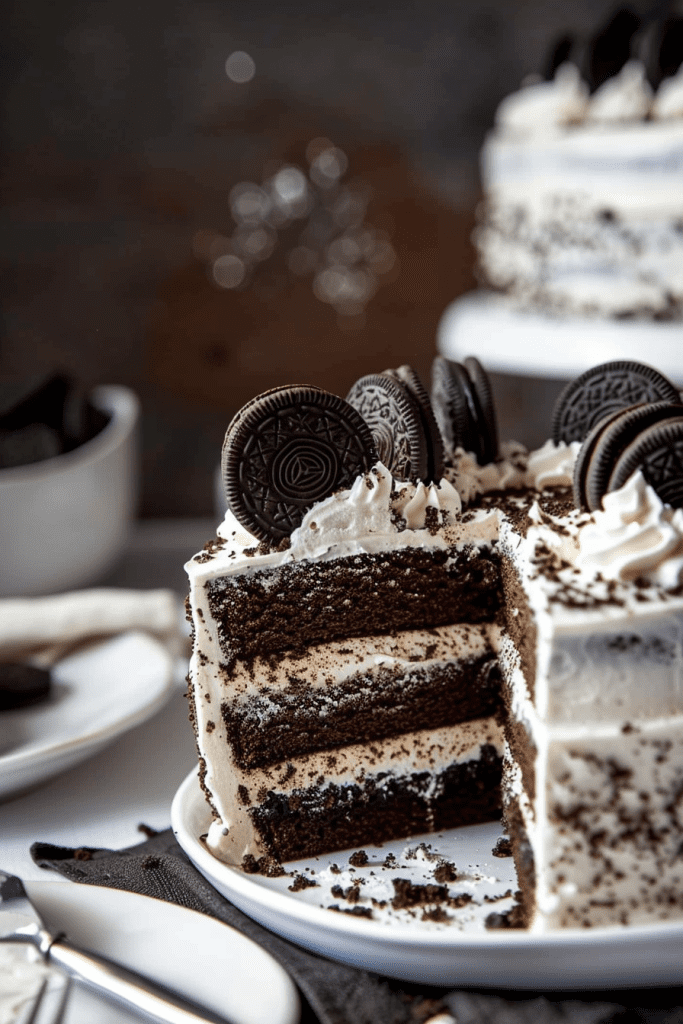
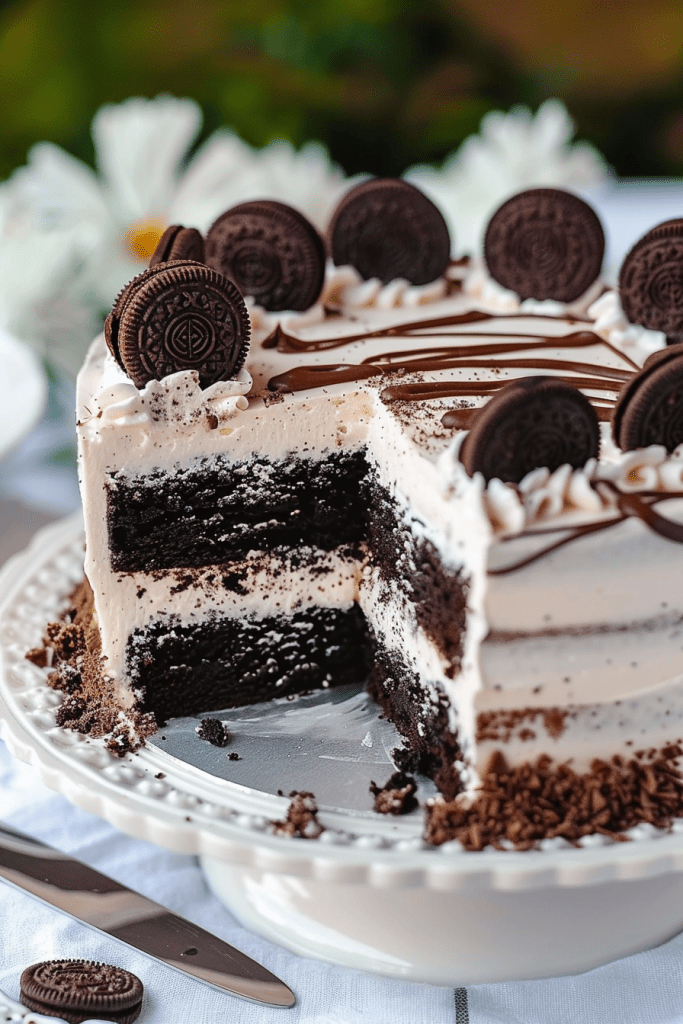
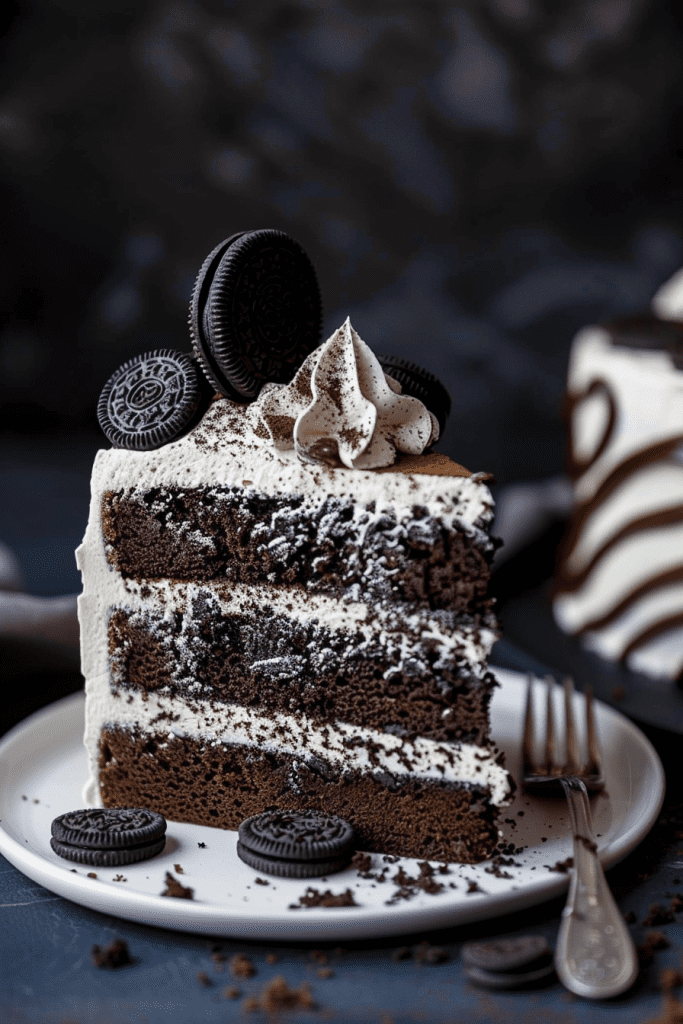
Indulge in the decadence of a moist and rich chocolate Oreo cake that will tantalize your taste buds. This delightful treat features layers of velvety chocolate cake generously frosted with luscious Oreo buttercream. The marriage of soft cake crumb and silky Oreo frosting creates a symphony of flavors that will leave you craving more.
Crafted with simplicity in mind, this one-bowl chocolate Oreo cake recipe ensures a hassle-free baking experience. Loaded with chunks of Oreos, this cake is a dream come true for Oreo enthusiasts. Whether you’re a cookies and cream aficionado or simply looking for a show-stopping dessert, this Oreo-packed delight is sure to impress.
Prepare to be captivated by the irresistible combination of chocolate and Oreo goodness in every bite. With its freezer-friendly nature, you can enjoy this delectable chocolate Oreo cake at any time by having it ready in advance. Get ready to elevate your baking game with this ultimate chocolate Oreo cake recipe.
Ingredients
Indulge in the perfect combination of rich chocolate flavors and Oreo goodness with this decadent chocolate Oreo cake. Let’s gather the ingredients you’ll need for the cake layers, the luscious Oreo buttercream, and the irresistible chocolate ganache.
For the Chocolate Cake
- 2 cups all-purpose flour
- 2 cups granulated sugar
- 3/4 cup dark cocoa powder
- 2 tsp baking powder
- 1 1/2 tsp baking soda
- 1 tsp salt
- 2 large eggs
- 1 cup buttermilk
- 1/2 cup vegetable oil
- 2 tsp vanilla extract
- 1 cup hot coffee
For the Oreo Buttercream
- 1 cup unsalted butter, softened
- 4 cups powdered sugar
- 1/4 cup heavy cream
- 1 tsp vanilla extract
- 1 cup finely crushed Oreo cookies
- 1/2 cup heavy cream
- 1 cup semisweet chocolate chips
- Additional crushed Oreo cookies for decoration
Equipment Needed
To prepare this delicious chocolate Oreo cake, you will need the following equipment ready:
- Stand mixer or handheld electric mixer
- Mixing bowls (various sizes)
- Measuring cups and spoons
- Cake pans (8-inch rounds recommended)
- Cooling rack
- Offset spatula for frosting
- Piping bag and decorating tip (optional)
- Saucepan for making ganache
- Whisk or spoon for stirring
- Microwave-safe bowl
Having these essential tools on hand will make the process of creating this indulgent chocolate Oreo cake smooth and enjoyable.
Directions
Preparing the Cake Batter
I always start by preparing the cake batter for my chocolate Oreo cake. First, cream together the sugar, oil, eggs, and vanilla until smooth. Then, mix in the sour cream for that perfect texture. Sift together the dry ingredients separately and gradually add them to the wet batter, alternating with brewed coffee for that rich flavor.
Baking the Cake Layers
Once the batter is well mixed, it’s time to divide it evenly between three greased and lined 8-inch round pans. I bake the cakes at 350ºF for about 20-24 minutes, making sure to rotate the pans halfway through to ensure an even bake. After baking, allow the cakes to cool completely before frosting.
Making the Oreo Buttercream
For the luscious Oreo buttercream, I blend 14 Oreos into fine crumbs and mix them with unsalted butter, icing sugar, vanilla extract, and a splash of milk. The creamy and indulgent frosting adds the perfect Oreo touch between the cake layers, creating a delightful texture and flavor contrast.
Creating the Chocolate Ganache
To top off this decadent cake, I prepare a rich chocolate ganache. In a saucepan, I heat heavy whipping cream until simmering, then pour it over semi-sweet or dark chocolate chips. Stir gently until smooth and glossy. This luxurious ganache provides a smooth and chocolatey finish to the cake, adding an extra layer of indulgence.
Assembly
Assembling this decadent chocolate Oreo cake is as delightful as it sounds. Layering and frosting the cake with the luscious Oreo buttercream and drizzling the rich chocolate ganache creates a visually stunning and mouthwatering dessert.
Layering and Frosting
- Flatten the Cakes: After the cake layers have fully cooled, use a serrated knife to carefully remove the domes from the cakes to create even, flat layers.
- Stack and Fill: Begin by placing the first cake layer on a cake plate and spreading half of the Oreo buttercream with chopped Oreos on top in an even layer. Repeat this process with the second cake layer and the remaining buttercream and Oreos. Finally, place the last cake layer on top.
- Frost the Outside: Use the remaining Oreo buttercream to frost the outside of the cake, ensuring a smooth and even coating.
- Make the Chocolate Ganache: Heat the heavy whipping cream until it starts to boil. Pour the hot cream over the chocolate chips and let it sit for 2-3 minutes. Whisk the mixture until smooth to create a glossy chocolate ganache.
- Finish the Cake: Drizzle the chocolate ganache around the edge of the cake, allowing it to drip down the sides. Spread the remaining ganache over the top of the cake for a beautiful finish. Once the ganache firms up slightly, pipe the remaining Oreo buttercream around the top edge of the cake and add Oreos between the swirls for an elegant touch.
Storing and Serving
After creating this delightful chocolate Oreo cake, it’s essential to know how to store it properly to maintain its freshness. Here’s a guide on handling the storage and serving of this delectable dessert.
How to Store
For storing your chocolate Oreo cake, ensure to keep it in an airtight container in the refrigerator. If you have leftovers, tightly wrap individual slices with plastic to retain their flavor and texture. Alternatively, you can also use a cake carrier to preserve the cake’s freshness for up to four days in the refrigerator.
Make Ahead Tips
When preparing this decadent chocolate Oreo cake, I understand the need for efficiency and planning, especially for special occasions. Here are some make-ahead tips to help you enjoy this delicious dessert stress-free:
1. Advance Preparation
Before diving into the baking process, take some time to plan. You can bake the cake layers in advance and freeze them. Simply wrap each layer tightly in plastic wrap and aluminum foil before freezing. This step not only saves time but also enhances the flavors as the layers settle.
2. Oreo Buttercream and Ganache
The Oreo buttercream and chocolate ganache can also be made ahead of time to simplify the final assembly. Store the Oreo buttercream in an airtight container in the refrigerator, ensuring it stays fresh. Similarly, prepare the chocolate ganache, let it cool, and cover it with plastic wrap directly touching the surface to prevent a skin from forming.
3. Cake Assembly
When ready to assemble the cake, allow the frozen cake layers, Oreo buttercream, and chocolate ganache to come to room temperature. If the cake layers are slightly frozen, they are easier to work with during assembly, making the process smoother.
By following these make-ahead tips, you can efficiently prepare this chocolate Oreo cake without compromising on taste or texture. Enjoy the convenience of having key components ready in advance, allowing you to focus on the final touches and presentation of this delectable dessert.
Conclusion
Creating a chocolate Oreo cake is a delightful experience that combines the richness of chocolate with the crunch of Oreo cookies. This freezer-friendly dessert offers convenience without sacrificing flavor. By following the provided steps and make-ahead tips, you can effortlessly prepare this decadent treat for any occasion. From the easy one-bowl preparation to the layering process with Oreo buttercream and chocolate ganache, each step contributes to the cake’s irresistible taste. Remember to store the cake properly to maintain its freshness for up to four days. With its simple yet indulgent recipe, this chocolate Oreo cake is sure to impress your taste buds and leave a lasting impression on your guests. Enjoy the process of creating this delicious masterpiece and savor every bite of this heavenly dessert.