
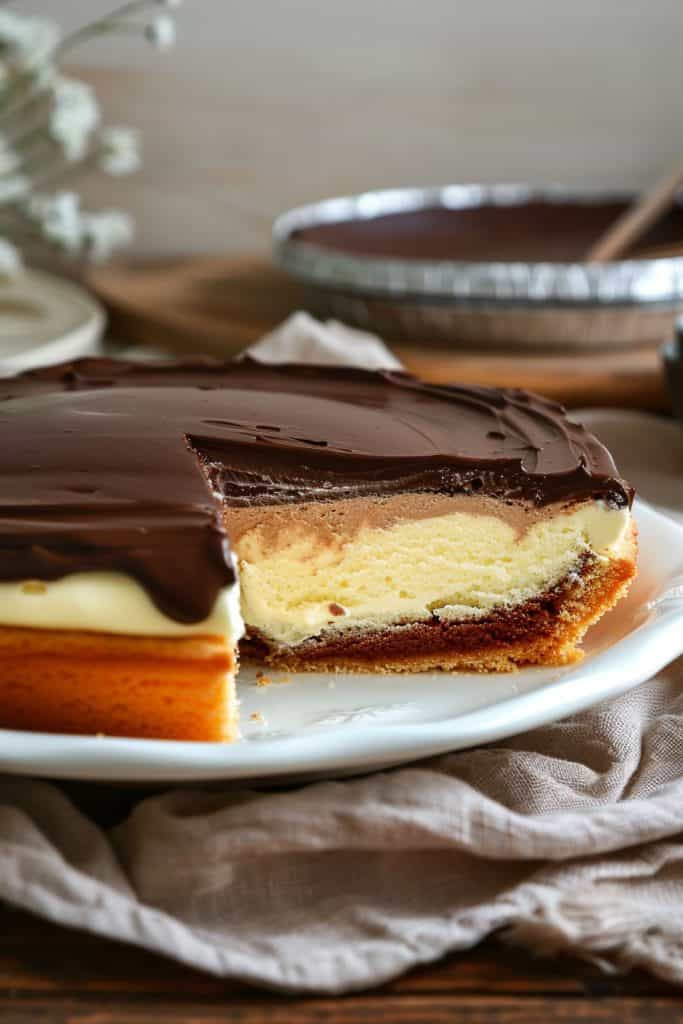
Boston Cream Pie, a classic American dessert, is a delightful combination of moist sponge cake, rich custard filling, and a glossy chocolate ganache topping. This iconic treat, despite its name, is not actually a pie but a cake that has been enjoyed for generations.
In this article, I’ll share my favorite Boston Cream Pie recipe that’s sure to impress your family and friends. With its origins dating back to the 19th century in Massachusetts, this dessert has stood the test of time and remains a beloved choice for any special occasion.
Get ready to indulge in a slice of nostalgia with this timeless dessert that perfectly balances sweetness and decadence. Let’s dive into the steps to create your own luscious Boston Cream Pie at home.
Ingredients
For the Sponge Cake
- 1 cup all-purpose flour, sifted
- 1 teaspoon baking powder
- 1/4 teaspoon salt
- 1/2 cup unsalted butter, softened
- 3/4 cup granulated sugar
- 2 large eggs, at room temperature
- 1 teaspoon vanilla extract
- 1/2 cup whole milk
For the Custard Filling
- 2 cups whole milk
- 1/2 cup granulated sugar
- 1/4 cup cornstarch
- 1/4 teaspoon salt
- 4 large egg yolks
- 2 tablespoons unsalted butter
- 1 teaspoon vanilla extract
- 1/2 cup heavy cream
- 6 ounces semi-sweet chocolate, chopped
- 1 tablespoon unsalted butter
Equipment Needed
To bring this delightful Boston Cream Pie to life, you will need the following essential equipment:
For the Sponge Cake:
- 2 round 9-inch cake pans
- Parchment paper
- Mixing bowls
- Electric mixer or stand mixer
- Whisk
- Cooling rack
For the Custard Filling:
- Saucepan
- Whisk
- Mixing bowl
- Plastic wrap
- Heatproof bowl
- Saucepan
- Whisk
- Offset spatula
Having these tools at hand will ensure a smooth baking experience and a delectable end result for your homemade Boston Cream Pie.
Instructions
Let’s dive into the steps to make this delightful Boston Cream Pie!
Prepare the Sponge Cake
- Preheat the oven to 350°F (175°C) and grease two 9-inch round cake pans. Line the bottom of the pans with parchment paper for easy removal later.
- In a mixing bowl, cream together 1/2 cup of unsalted butter and 1 cup of sugar until light and fluffy.
- Beat in 2 large eggs, one at a time, then add 1 teaspoon of vanilla extract.
- In a separate bowl, sift together 1 1/2 cups of all-purpose flour, 1 3/4 teaspoons of baking powder, and 1/2 teaspoon of salt.
- Gradually add the dry ingredients to the wet ingredients, alternating with 3/4 cup of milk, and mix until well combined.
- Divide the batter evenly between the prepared cake pans and bake for 25-30 minutes or until a toothpick inserted into the center comes out clean.
- Allow the cakes to cool in the pans for 10 minutes, then transfer them to a wire rack to cool completely.
Make the Custard Filling
- In a saucepan, heat 1 1/2 cups of whole milk over medium heat until steaming but not boiling.
- In a mixing bowl, whisk together 1/3 cup of sugar, 2 tablespoons of cornstarch, a pinch of salt, and 3 large egg yolks until smooth.
- Gradually pour the hot milk into the egg mixture, whisking constantly.
- Return the mixture to the saucepan and cook over medium heat, stirring constantly, until thickened.
- Remove the custard from the heat and stir in 1 teaspoon of vanilla extract and 2 tablespoons of unsalted butter.
- Cover the custard with plastic wrap, pressing it directly onto the surface to prevent a skin from forming, and chill in the refrigerator for at least 2 hours.
- In a heatproof bowl, place 6 ounces of chopped semi-sweet chocolate.
- In a saucepan, heat 1/2 cup of heavy cream until it just begins to simmer.
- Pour the hot cream over the chocolate and let it sit for 2-3 minutes.
- Gently whisk the chocolate and cream together until smooth and glossy.
- Let the ganache cool slightly before assembling the Boston Cream Pie.
Now, with the sponge cake baked, the custard chilled, and the ganache ready, it’s time to assemble this iconic dessert.
Assembly
Layering the Cake and Custard
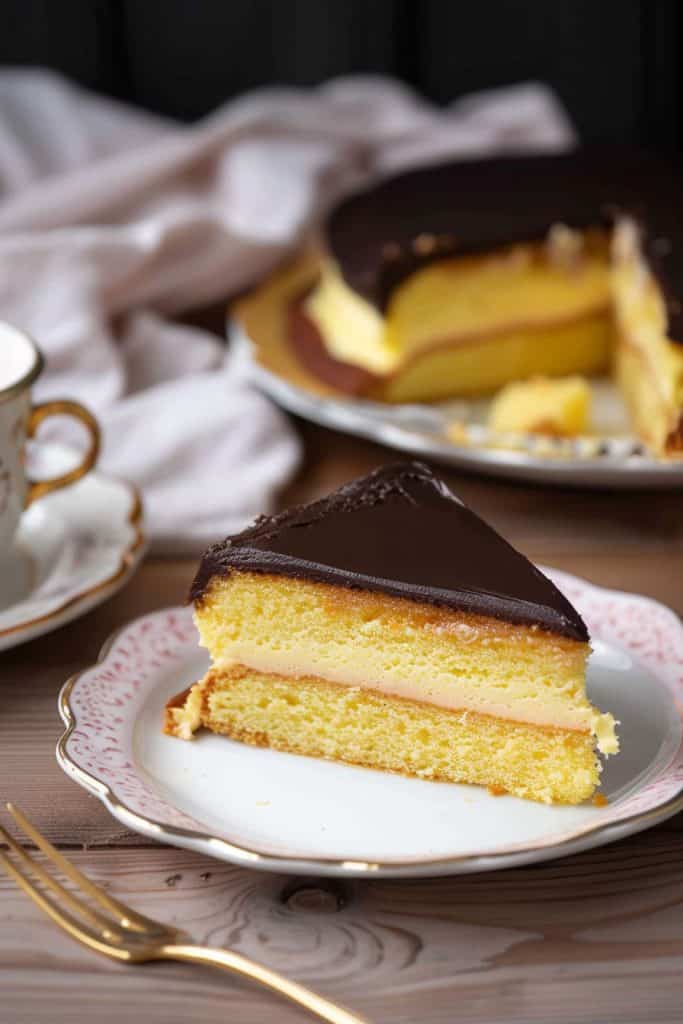
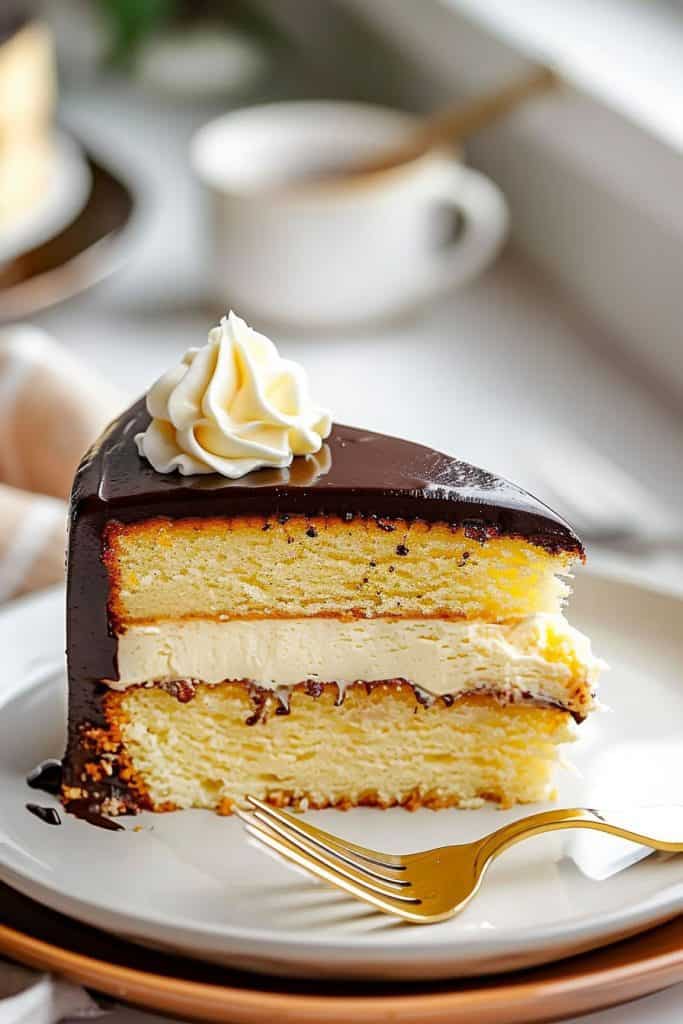
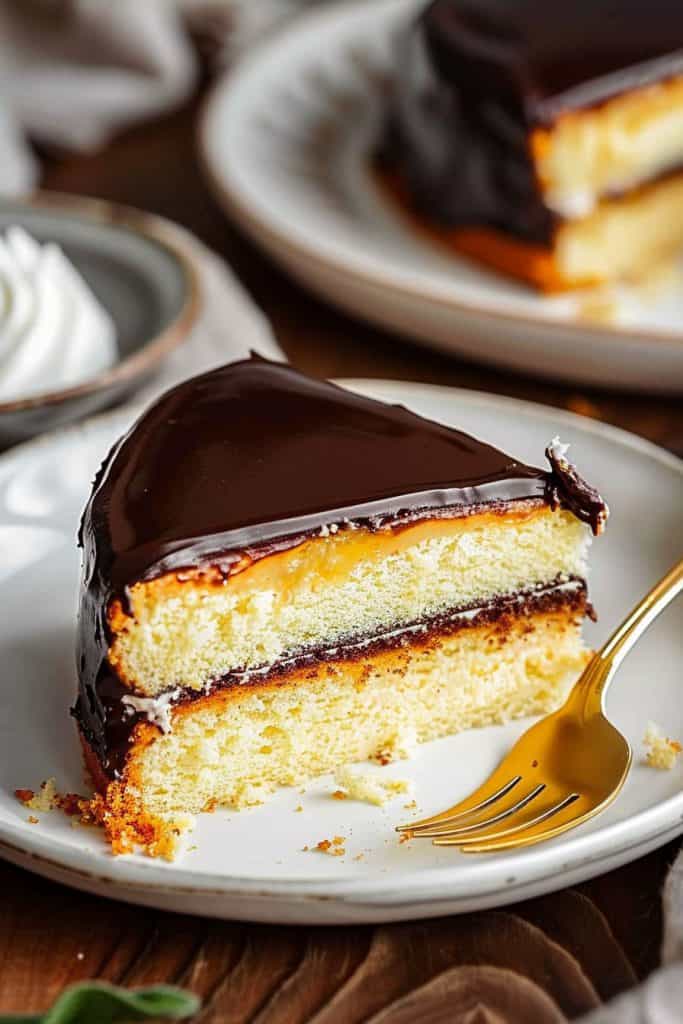
- Begin by placing one layer of the sponge cake on a serving plate.
- Spread the prepared custard evenly over the top of the first cake layer.
- Gently place the second cake layer on top of the custard to create a cake-custard-cake sandwich.
- Press down slightly to secure the layers together but be careful not to squeeze out the custard.
- Pour the smooth, glossy chocolate ganache over the assembled cake.
- Use a spatula to spread the ganache evenly, allowing it to drip over the edges for a decadent look.
- Ensure the top is completely covered with the rich chocolate ganache, creating a luscious finishing touch to your Boston Cream Pie.
Baking Tips
As I delve into sharing baking tips for mastering the art of creating the perfect Boston Cream Pie, keep in mind that precision and patience are key to achieving a delightful outcome. Here are some expert suggestions to enhance your baking experience:
1. Room Temperature Ingredients
Use room temperature eggs, butter, and milk for your sponge cake batter to ensure even mixing and a smoother texture.
2. Sifting Dry Ingredients
Sift your flour and baking powder together before adding them to the wet ingredients. This step guarantees a lighter and more delicate sponge cake.
3. Gentle Folding Technique
When incorporating the dry ingredients into the wet mixture, use a gentle folding technique to prevent overmixing, which can result in a tough cake texture.
4. Chilled Custard Filling
Ensure your custard filling is thoroughly chilled before assembling the cake. A cold custard filling helps the layers set properly and prevents them from sliding.
5. Ganache Thickness
Adjust the thickness of your chocolate ganache by varying the ratio of chocolate to cream. A thicker ganache is ideal for a more decadent topping, while a thinner consistency creates a glossy finish.
6. Patience in Assembly
Take your time when assembling the Boston Cream Pie layers. Allow each component to set before moving on to the next step for a well-structured and visually appealing dessert.
7. Uniform Cake Layers
For a professional presentation, ensure your sponge cake layers are even in thickness. Trim any excess to create uniformity when stacking the cake with the custard filling.
8. Chocolate Ganache Drip
When pouring the chocolate ganache over the assembled cake, let it drip gently down the sides for a luscious aesthetic. Control the flow to achieve a beautifully coated finish.
9. Chill Before Serving
After completing the final assembly, refrigerate the Boston Cream Pie for at least an hour before serving. Chilling allows the flavors to meld and the cake to set for a delectable slice.

Storage Instructions
To keep your Boston Cream Pie fresh and delicious, follow these storage instructions:
Tupperware Container:
After enjoying a slice of the Boston Cream Pie, store the remaining cake in an airtight Tupperware container. Make sure the lid is secure to prevent air exposure.
Refrigeration:
Refrigerate the Boston Cream Pie to maintain its freshness and prevent spoilage. The cool temperature will help preserve the custard filling and sponge cake texture.
Chill Time:
Allow the cake to chill in the refrigerator for up to 3-4 days. This will help the flavors meld together, enhancing the taste of the dessert.
Plastic Wrap:
If you’ve cut the cake into slices, wrap each slice in plastic wrap before placing it in the fridge. This extra layer of protection will prevent drying out and keep the cake moist.
Freezing:
For longer storage, you can freeze the Boston Cream Pie. Wrap the whole cake or individual slices tightly in plastic wrap and aluminum foil. Be sure to label with the date for easy tracking.
Thawing:
When you’re ready to enjoy the frozen Boston Cream Pie, move it to the refrigerator to thaw overnight. This gradual thawing process will help maintain the cake’s texture and taste.
By following these storage instructions, you can enjoy your homemade Boston Cream Pie for several days or even weeks, ensuring that every bite is as delightful as the first.
Conclusion
Creating a delectable Boston Cream Pie is a delightful culinary journey that combines the richness of custard, the lightness of sponge cake, and the decadence of chocolate ganache. By following the outlined steps and storage tips, you can savor this iconic dessert for days to come. Remember, the key lies in precision and patience – from baking the perfect sponge cake to mastering the art of custard filling. With these insights, you’re equipped to impress your guests or indulge in a sweet treat for yourself. So, roll up your sleeves, gather your ingredients, and embark on a baking adventure that promises to satisfy every craving. Enjoy the process, relish the flavors, and let the magic of Boston Cream Pie elevate your culinary skills to new heights.