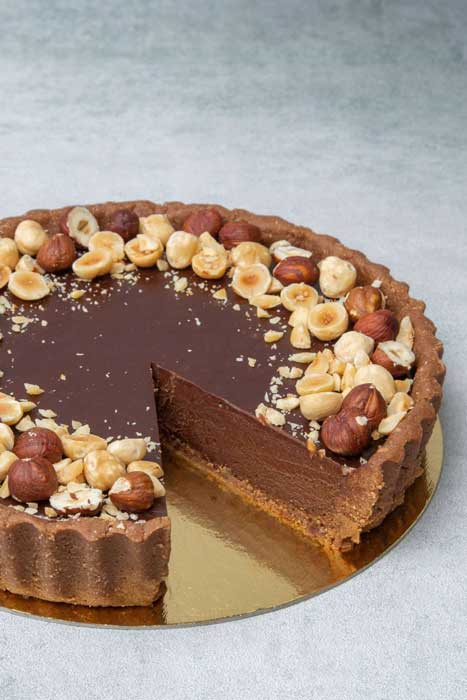
Indulge your senses with my Chocolate Hazelnut Tart, a dessert that marries the rich decadence of chocolate with the nutty crunch of hazelnuts. This tart is a dream come true for anyone who loves the classic combination of chocolate and hazelnuts, reminiscent of a beloved chocolate spread. With a homemade hazelnut crust and a creamy Nutella ganache filling, it’s the ultimate treat for satisfying chocolate cravings.
The beauty of this tart lies in its simplicity and elegance. The crunchy hazelnut crust provides the perfect foundation for the velvety smooth ganache, creating a delightful contrast in textures. Each bite offers a harmonious blend of flavors, making it a showstopper at any gathering or a luxurious treat for yourself. Whether you’re a seasoned baker or a dessert enthusiast, this Chocolate Hazelnut Tart is sure to impress and delight.
Ingredients
Here, I will break down the essential components needed to create a luxurious Chocolate Hazelnut Tart. Gather these ingredients carefully to ensure the best results.
Crust
- 2 cups toasted hazelnuts, divided
- 1/2 cup all-purpose flour
- 1/4 cup granulated sugar
- Pinch of salt
- 1/2 cup cold unsalted butter, cubed
- 2 teaspoons vanilla extract
- Ice water as needed
Hazelnut Filling
- 1 cup Nutella or hazelnut spread
- 1/2 cup heavy cream
- 2 tablespoons cornstarch
- 1 teaspoon vanilla extract
- Pinch of salt
- 1 cup dark chocolate chips
- 1/2 cup heavy cream
- 1 tablespoon hazelnut paste (optional)
Equipment and Tools
Creating a delectable Chocolate Hazelnut Tart requires a selection of essential equipment and tools. Here’s what you’ll need for a smooth and successful baking experience:
- Tart Pan: I recommend using a 9-inch or 10-inch tart pan with a removable bottom. This makes it easier to remove the tart once it’s baked and helps in shaping the crust perfectly.
- Oven: Preheating and using the oven is crucial for both the hazelnut crust and any fillings that might need a gentle bake.
- Double Boiler or Heatproof Bowl: This is indispensable for melting the chocolate ganache without burning it. It ensures a smooth and creamy consistency.
- Food Processor: Grinding the hazelnuts to a fine texture and blending ingredients becomes simple with this tool. A food processor is key in achieving the perfect crust.
- Stand Mixer or Hand Mixer: Whipping cream or beating ingredients to just the right texture is vital, and either of these mixers will do the job efficiently.
- Whisk: Ideal for mixing the chocolate ganache and ensuring that the ingredients are well combined.
- Rubber Spatula: Essential for scraping down the sides of bowls and folding mixtures, ensuring nothing is wasted and everything is well incorporated.
- Pastry Brush: If needed, use this to apply egg wash or melted butter to the crust for an even, golden finish.
- Measuring Cups and Spoons: Accurate measurements are the backbone of successful baking. Ensure you have these on hand for precise ingredient portions.
Equipped with these tools, you’ll be ready to craft the Chocolate Hazelnut Tart with ease and confidence, paving the way for a deliciously rich and smooth dessert that’s sure to impress.
Directions
I’m excited to guide you through crafting a delicious chocolate hazelnut tart. Follow these steps to create a crunchy hazelnut crust and creamy, luxurious filling that will surely delight anyone lucky enough to enjoy it.
Prepare the Crust
- Toast Hazelnuts: Preheat the oven to 300°F (149°C). Spread 1 cup (120g) of chopped hazelnuts on a lined baking sheet and toast for 5-7 minutes. Let them cool for 5 minutes.
- Pulse Ingredients: In a food processor, pulse 3/4 cup of the toasted hazelnuts, 1 cup (125g) of all-purpose flour, 2 tablespoons (25g) of granulated sugar, and 1/2 teaspoon of salt until it resembles a coarse meal.
- Press and Freeze: Add cold unsalted butter. Pulse until combined, adding 2-3 tablespoons of ice water until it just holds together. Press the dough into a 9-inch tart pan and freeze for about 10 minutes to firm up.
- Bake the Crust: Preheat the oven to 350°F. Line the crust with parchment and fill with pie weights. Bake for 20 minutes, remove the weights and paper, then bake for an additional 10 minutes until golden. Cool slightly before filling.
Make the Hazelnut Filling
- Combine Ingredients: In a medium bowl, mix 1 cup of Nutella, 1 cup heavy cream, 1 tablespoon cornstarch, 1 teaspoon vanilla extract, and a pinch of salt until smooth.
- Fold and Chill: Gently fold in 1/2 cup of whipped cream for a lighter texture. Keep the rest of the whipped cream for later. Chill the filling while preparing the ganache.
Prepare the Chocolate Ganache
- Heat Cream: In a small saucepan, bring 1/2 cup heavy cream just to a simmer over medium heat.
- Melt Chocolate: Remove from heat and add 1 cup of dark chocolate chips. Let sit for 2 minutes, then stir until smooth and glossy.
- Spread Filling: Pour the hazelnut filling into the cooled tart crust, using a spatula to spread it evenly.
- Add Ganache: Carefully pour the chocolate ganache over the hazelnut filling, spreading it smoothly.
- Chill: Let the tart chill in the refrigerator for at least 1-2 hours until set.
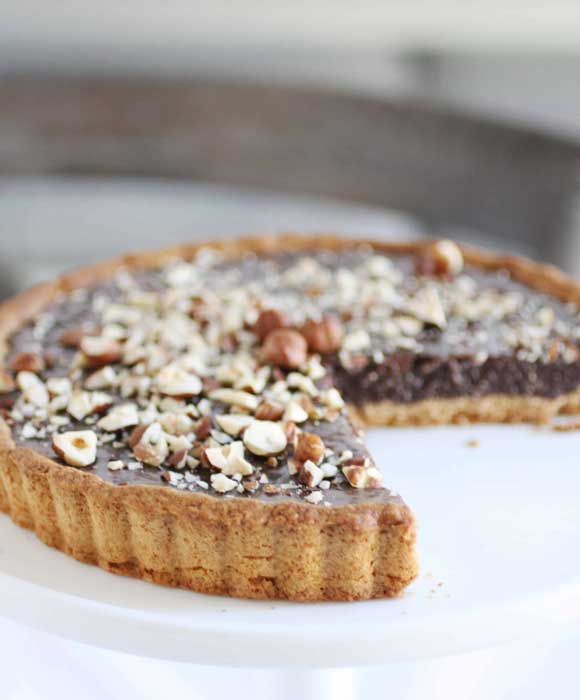
- Serve: Optionally, garnish with remaining whipped cream or more toasted hazelnuts before serving. Enjoy the rich, nutty flavors in each bite!

Make Ahead and Storage Tips
When baking a chocolate hazelnut tart, planning ahead can simplify the process. Here are some practical tips for preparing and storing your tart to ensure maximum freshness and flavor:
Make Ahead Tips
- Crust Preparation: I often prepare the crust a day or two in advance. Whether using hazelnuts, graham crackers, or a traditional pastry, grinding the nuts and mixing the crust ingredients ahead of time can save effort on the baking day. Simply store the mixture until ready and bake the crust fresh for the best texture and taste.
- Chocolate Filling: The chocolate ganache or filling is perfect for making ahead. I usually prepare it a day or two before assembling the tart. Store it in the refrigerator, and when you’re ready to use it, warm it slightly to achieve the ideal consistency for easy spreading.
- Whipped Cream: Freshness is key for whipped cream, especially if you’re adding a hazelnut twist. I recommend preparing it just before serving, as it doesn’t hold well over extended refrigeration.
- Assembled Tart: After assembling the tart, I keep it refrigerated to maintain its structure and taste. This dessert keeps well for up to 2-3 days when stored in an airtight container, ensuring a delicious taste that lasts.
Tips for a Perfect Tart
Creating the ultimate Chocolate Hazelnut Tart demands attention to detail and meticulous adherence to each step. Here are my expert tips to ensure your tart achieves perfection:
Perfectly Toasted Hazelnuts
Toasting hazelnuts is not just about browning them; it’s about unlocking their rich, nutty flavor. Toast them in the oven at 350°F for 5 to 7 minutes until aromatic and slightly darkened. This step is crucial for the crust’s depth of flavor.
Mastering the Crust
For a successful hazelnut crust, precision is key. Use a food processor to blend toasted hazelnuts, flour, sugar, salt, and cold butter until coarse. Bind the mixture with ice water, ensuring it isn’t too wet. Press this evenly into your tart pan. Pre-bake using pie weights to hold its shape until golden brown, giving it that signature crunch.
Optimal Filling Consistency
Achieving the right filling texture requires gentle folding. As you mix the Nutella with heavy cream and other ingredients, fold with care to maintain a smooth and airy consistency. This will complement the firm crust perfectly.
Chilling for Stability
Chilling the tart is indispensable. Once you pour the ganache over the hazelnut filling, refrigerate the tart for at least 4 hours, or overnight, to let the flavors meld and set the tart impeccably.
Presentation Matters
Finally, elevate your tart’s presentation by garnishing with a touch of whipped cream or a sprinkle of toasted hazelnuts before serving. This finishing touch adds visual appeal and an extra layer of taste.
By following these expert tips, each slice of your Chocolate Hazelnut Tart will balance rich flavors with beautiful textures, impressing any dessert connoisseur.
Conclusion
Creating a Chocolate Hazelnut Tart is a rewarding experience that combines rich flavors and textures into a truly indulgent dessert. With the right ingredients and tools, crafting this tart becomes a delightful journey for both novice and seasoned bakers. By paying attention to each step, from toasting hazelnuts to perfecting the ganache, the result is a dessert that not only satisfies the sweet tooth but also impresses with its elegance. Whether you’re making it for a special occasion or simply to treat yourself, this tart promises to deliver a memorable taste experience with every bite.