
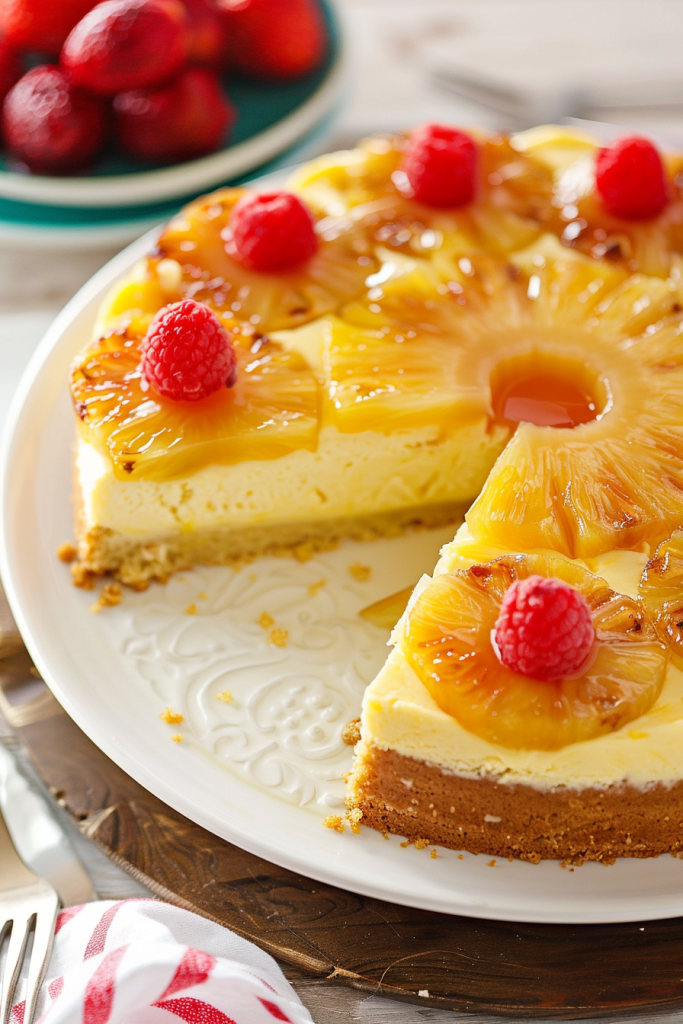
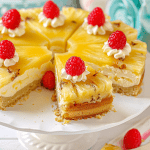
Craving a delightful fusion of two classic desserts? Dive into the world of Pineapple Upside Down Cheesecake – a heavenly combination of pineapple upside-down cake and creamy cheesecake. This indulgent treat is a surefire way to elevate your dessert game and impress your loved ones on any occasion.
Imagine two layers of moist pineapple upside-down cake embracing a luscious pineapple cheesecake filling – reminiscent of the iconic Cheesecake Factory creation but with a homemade touch. Perfect for satisfying your sweet tooth cravings, this dessert is a showstopper that guarantees to leave everyone craving for more.
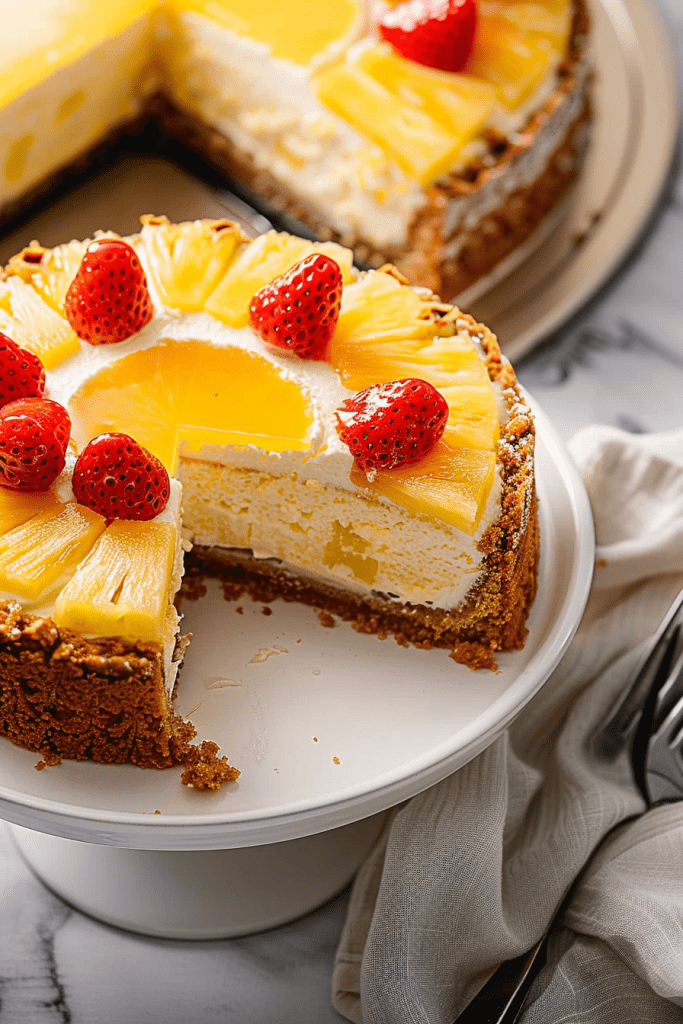
Whether it’s a special celebration or simply a weekend indulgence, this Pineapple Upside Down Cheesecake Cake promises a delightful experience that blends the best of both worlds. Get ready to embark on a culinary adventure that combines the familiar comfort of pineapple upside-down cake with the luxurious creaminess of cheesecake in every decadent bite.
Prep Time: 20 minutes
Cook Time: 1 hour 35 minutes
Cooling Time: 8 hours
Total Time: 7 hours 40 minutes
Servings: 18 servings
Ingredients
Creating this delicious Pineapple Upside Down Cheesecake requires gathering a variety of key ingredients. Below, I’ve detailed the specific components necessary for the Pineapple Base, Cheesecake Filling, and Cake Batter.
For the Cheesecake Filling
- 16 ounces cream cheese, room temperature
- 1/2 cup granulated sugar
- 2 large eggs
- 1/2 cup sour cream
- 2 tablespoons pineapple juice
- 1 teaspoon vanilla extract
For the Pineapple Upside-Down Cake Topping
- 1/2 cup unsalted butter, melted
- 1 cup packed light brown sugar
- 14 slices canned or fresh pineapple rings
- 14 maraschino cherries
For the Pineapple Upside-Down Cake Batter
- 1 1/2 cup + 3 tablespoons all-purpose flour, sifted
- 1/2 teaspoon baking powder
- 1/4 teaspoon baking soda
- 1/2 teaspoon salt
- 1/2 cup unsalted butter, melted
- 3/4 cup light brown sugar, packed
- 1/4 cup granulated sugar
- 1 large egg
- 1/4 cup sour cream
- 1/2 cup milk
- 1/4 cup pineapple juice
- 1 tablespoon vanilla extract
Ensure you have all these ingredients prepared and ready to create this delightful Pineapple Upside Down Cheesecake experience.
Equipment Needed
For this Pineapple Upside Down Cheesecake recipe, you will need a few essential baking tools and measuring equipment to ensure accurate and successful results.
Baking Tools
- Springform Pan: A 9-inch springform pan is ideal for baking this cheesecake as it allows for easy removal without damaging the structure.
- Cake Pans: Two 9-inch cake pans for the pineapple upside-down cake layers.
- Mixer: An electric mixer, either hand-held or stand mixer, will be handy for smoothly mixing the cheesecake filling and cake batter.
- Mixing Bowls: Have a set of mixing bowls in different sizes to prepare various components of the recipe simultaneously.
- Spatula: A rubber spatula is essential for scraping down the sides of the bowl and ensuring all ingredients are well combined.
- Oven: Of course, you’ll need an oven preheated to the specified temperature for baking the cheesecake.
- Measuring Cups and Spoons: Ensure you have a set of measuring cups and spoons for accurately measuring both dry and liquid ingredients.
- Kitchen Scale: While not necessary, a kitchen scale can be helpful for precise measurements, especially for the cheesecake filling ingredients.
- Measuring Jug: A measuring jug with clear markings will come in handy for measuring liquids like milk, pineapple juice and vanilla extract accurately.
Preparation
Preparing the Pineapple Base
I begin by dividing the melted butter equally between two 9-inch cake pans, ensuring each pan is well-coated to prevent sticking. I sprinkle 1/2 cup of the brown sugar into each pan, creating a sweet, caramelized layer for the pineapple and cherries to rest upon. I carefully arrange the pineapple slices and cherries as pictured, creating an appealing design that will be showcased once the cake is inverted, and set aside.
Making the Cake
Preheat oven to 350°F (175°C) to ensure even baking. In a large bowl, add the sifted flour, baking powder, baking soda, and salt and whisk to combine, ensuring the dry ingredients are evenly distributed. This step is crucial for a consistent cake texture. In a medium-sized bowl, whisk together the melted butter, brown sugar, and granulated sugar until smooth, creating a rich, moist base for the cake. Whisk in the eggs, sour cream, milk, pineapple juice and vanilla until combined, ensuring all wet ingredients are fully incorporated for a smooth batter. Add the wet mixture to the dry mixture and stir until just combined, being careful not to overmix, which can result in a tough cake. Ensure there are no dry spots or lumps for a uniform batter.
Evenly divide the batter between the two prepared pans, gently smoothing out the top to ensure even baking, and be careful not to disrupt the pineapple and cherries on the bottom. Bake for 25-30 minutes, or until the cakes are golden brown and a toothpick inserted in the middle comes out clean, indicating they are fully baked. Place cakes on a wired rack to cool for 10 minutes in the pan before inverting, allowing them to settle and release easily.
Cheesecake Filling Preparation
Mixing the Ingredients
Preheat the oven to 325°F (160°C) to prepare for baking the cheesecake. Grease a 9-inch springform pan thoroughly to prevent sticking, wrap it in heavy-duty foil to protect from water bath seepage, and set aside. Whip the cream cheese with the sugar until smooth in a large bowl with an electric hand mixer, ensuring there are no lumps for a creamy texture. Mix in one egg at a time until fully combined, scraping down the sides as needed to ensure even mixing and a smooth batter. Add the sour cream, pineapple juice, and vanilla, and mix until completely smooth, incorporating all ingredients for a consistent flavor.
Layering the Cheesecake
Pour the cheesecake batter into the prepared pan, spreading evenly, and place into a large roasting dish. Reduce the oven temperature to 300°F (150°C) to ensure gentle baking. Place the cheesecake with the roasting pan into the oven. Fill the roasting pan with hot water from the tap halfway up the sides of the cheesecake pan to create a water bath, which helps the cheesecake bake evenly and prevents cracking. Bake for 45 minutes, then turn off the heat and leave in the oven for an additional 20 minutes to set, allowing the residual heat to finish cooking the cheesecake gently.
Take the cheesecake out of the oven and out of the roasting pan carefully to avoid any sudden temperature changes. Let it cool on the counter to room temperature to stabilize. Cover with plastic wrap and place it in the fridge for at least 8 hours, or overnight is best, to allow the cheesecake to fully set and flavors to meld.
Cake assembly
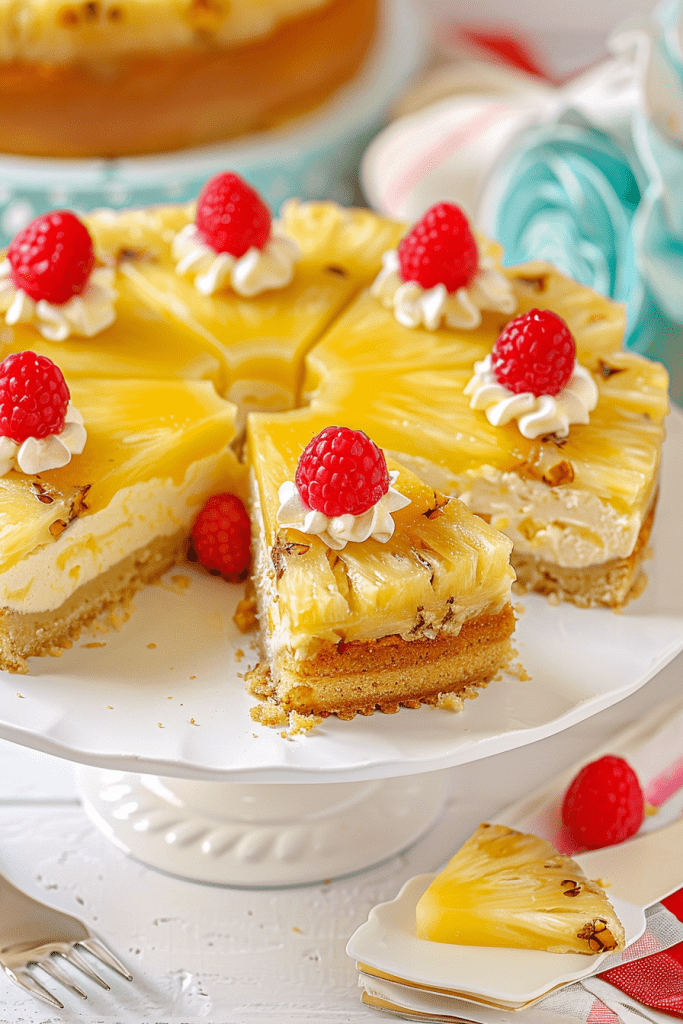
Invert the cakes, one onto a flat surface like a cutting board and the other on the plate you will be presenting on, ensuring a smooth transfer and beautiful presentation. Take the pineapple cheesecake out of the ring and lift it off the bottom of the pan carefully; you may need to use a tool like an offset spatula to help, ensuring the cheesecake remains intact. Place the cheesecake on top of the first cake layer, centering it for an appealing look. Place the second layer of cake on top, aligning it carefully. You can serve it immediately or place it in the fridge until ready to serve, allowing the flavors to meld further. Garnish with whipped cream if desired for an extra touch of indulgence.
Cooling
Cooling Instructions
After baking your pineapple upside-down cheesecake, allow it to cool in the turned-off oven with the door slightly ajar for about 60 minutes. This gradual cooling process helps prevent cracks on the surface of the cheesecake.
Serving Suggestions
When serving this delightful Pineapple Upside Down Cheesecake, consider adding a touch of creativity to enhance the overall experience.
Topping Ideas
For an extra burst of flavor and visual appeal, top each slice of the cheesecake with a generous drizzle of warm caramel sauce. The combination of creamy cheesecake with the sweetness of the caramel adds a luxurious touch to every serving.
Presentation Tips
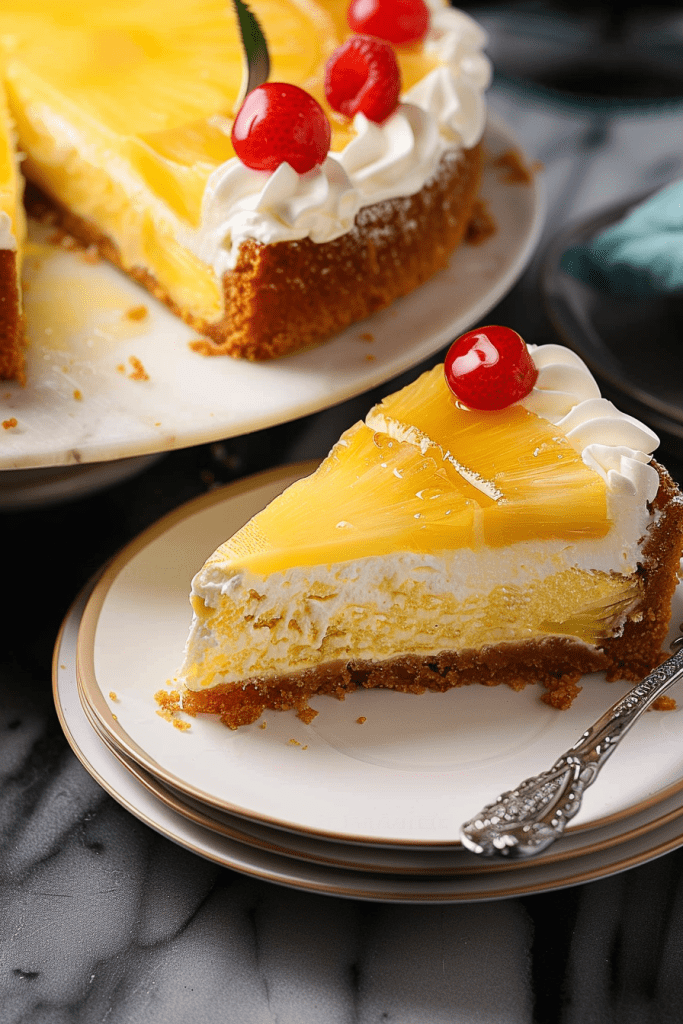
To elevate the presentation of your Pineapple Upside Down Cheesecake, consider garnishing each slice with a maraschino cherry on top. The vibrant color of the cherries adds a pop of brightness against the golden brown pineapple, creating a dessert that looks as good as it tastes.
Storage and Leftovers
After indulging in the delightful Pineapple Upside Down Cheesecake, here are some tips on how to store any remaining slices for future enjoyment.
Refrigeration Guidelines
Store leftover Pineapple Upside Down Cheesecake slices in an airtight container in the refrigerator. Make sure to cover the container to prevent the cheesecake from absorbing any odors. The cheesecake can be stored in the fridge for up to 3-4 days while maintaining its freshness and flavor. Before serving again, allow the cheesecake slices to come to room temperature for the best taste and texture.
Freezing Instructions
If you want to freeze the Pineapple Upside Down Cheesecake for longer storage, wrap individual slices tightly in plastic wrap and place them in a freezer-safe bag or container. Properly stored, the cheesecake can last in the freezer for up to 1-2 months. To thaw, transfer the slices to the refrigerator overnight. Enjoy the frozen cheesecake within a few days of thawing for the best experience.
Conclusion
Creating a Pineapple Upside Down Cheesecake is a delightful way to indulge in a fusion of flavors. This unique dessert brings together the best of both worlds – the tropical sweetness of pineapple upside-down cake and the creamy richness of cheesecake. By following the simple steps outlined in this recipe, you can impress your guests with a homemade masterpiece that is sure to be a hit at any gathering.
Remember to add your personal touch with garnishes like whipped cream and cherries for that perfect finishing touch. With proper storage techniques, you can enjoy the deliciousness of this Pineapple Upside Down Cheesecake even days after it’s made. So go ahead, give this recipe a try, and treat yourself to a slice of heaven!
PrintPineapple Upside Down Cheesecake
Get ready for a slice of heaven! This isn’t just any dessert; it’s a spectacular showstopper where the tropical charm of pineapple upside-down cake meets the rich, creamy dreaminess of cheesecake. Perfect for making any occasion extra special, or simply treating yourself to something truly indulgent. Let’s bake some joy!
- Prep Time: 20 minutes
- Cook Time: 1 hour 35 minutes
- Total Time: Approx. 1 hour 55 minutes (User provided: 7 hours 40 minutes, this may include some initial cooling/inactive periods beyond active prep/cook but before the main 8hr chill. For clarity, active prep/cook is under 2 hours before the long chill).
- Yield: 18 generous servings 1x
- Category: Dessert, Cake, Cheesecake
- Cuisine: American (Fusion)
Ingredients
For the Luscious Pineapple Cheesecake:
- 16 ounces cream cheese, softened to room temp (this is key!)
- 1/2 cup granulated sugar
- 2 large eggs
- 1/2 cup sour cream
- 2 tablespoons pineapple juice (from your canned pineapples is great!)
- 1 teaspoon vanilla extract
For the Golden Pineapple Upside-Down Cake Topping:
- 1/2 cup unsalted butter, melted
- 1 cup packed light brown sugar
- 14 slices canned or fresh pineapple rings
- 14 maraschino cherries (for that classic pop of color!)
For the Moist Pineapple Upside-Down Cake Batter:
- 1 1/2 cup + 3 tablespoons all-purpose flour, sifted
- 1/2 teaspoon baking powder
- 1/4 teaspoon baking soda
- 1/2 teaspoon salt
- 1/2 cup unsalted butter, melted
- 3/4 cup light brown sugar, packed
- 1/4 cup granulated sugar
- 1 large egg
- 1/4 cup sour cream
- 1/2 cup milk
- 1/4 cup pineapple juice
- 1 tablespoon vanilla extract
Instructions
1. Crafting the Creamy Cheesecake Layer:
- First things first, let’s get your oven preheated to 325°F (160°C). Grease your 9-inch springform pan and wrap the outside bottom and sides securely in heavy-duty foil (this is for our water bath later!).
- In a large bowl, grab your electric hand mixer and whip the room temperature cream cheese with the granulated sugar until it’s beautifully smooth.
- Beat in the eggs one at a time, just until each is combined. Don’t forget to scrape down the sides of the bowl!
- Gently mix in the sour cream, pineapple juice, and vanilla extract until everything is silky smooth.
- Pour this lovely batter into your prepared springform pan. Now, place this pan into a larger roasting dish.
- Reduce your oven temperature to 300°F (150°C). Carefully place the roasting dish (with the cheesecake pan inside) into the oven.
- Pour hot water into the roasting pan, letting it come about halfway up the sides of your cheesecake pan. This water bath is the secret to a crack-free, perfectly moist cheesecake!
- Bake for 45 minutes. Then, turn off the oven heat and let the cheesecake sit in the warm oven for another 20 minutes to set up.
- Take the cheesecake out of the oven and lift it from the water bath. Let it cool completely on a wire rack to room temperature. Once cooled, cover it with plastic wrap and pop it into the fridge to chill for at least 8 hours – overnight is even better for the ultimate texture!
2. Preparing the Pineapple-Cherry Topping (for the Cakes):
- Grab two 9-inch round cake pans. Divide the 1/2 cup of melted unsalted butter evenly between them.
- Sprinkle 1/2 cup of packed light brown sugar into each pan, right over the butter.
- Now for the fun part! Arrange your pineapple slices and maraschino cherries in a pretty pattern at the bottom of each pan. Set these aside while we make the cake batter.
3. Mixing the Pineapple Cake Batter:
- Preheat your oven to 350°F (175°C).
- In a large bowl, whisk together your sifted all-purpose flour, baking powder, baking soda, and salt.
- In a separate medium-sized bowl, whisk the 1/2 cup melted unsalted butter with the 3/4 cup light brown sugar and 1/4 cup granulated sugar until smooth.
- To this sweet mixture, whisk in the egg, sour cream, milk, pineapple juice, and vanilla extract until everything is just combined.
- Time to bring it all together! Add the wet ingredients to the dry ingredients and stir gently until just combined. Try not to overmix – we want a tender cake! Make sure there are no dry floury bits left.
- Carefully divide this batter evenly between your two cake pans with the pineapple topping, smoothing the top gently so you don’t disturb your beautiful fruit arrangement.
- Bake for 25-30 minutes. The cakes are ready when they’re golden brown and a toothpick inserted into the center comes out clean.
- Let the cakes cool in their pans on a wire rack for about 10 minutes before you invert them.
4. Assembling Your Masterpiece:
- Carefully invert one cake layer onto a cutting board or flat surface (this will be your middle layer). Invert the second cake layer onto your final serving plate (this is your base).
- Gently release your chilled cheesecake from its springform pan. You might need a thin offset spatula to help lift it from the pan bottom.
- Carefully place the cheesecake layer on top of the cake layer that’s on your serving plate.
- Finally, gently place the second cake layer (pineapple side up!) on top of the cheesecake.
- Voilà! You can serve your Pineapple Upside Down Cheesecake immediately, or pop it back in the fridge to keep it cool until you’re ready to dazzle your guests.
Notes
- Serving Suggestions: A dollop of freshly whipped cream is divine! For extra decadence, try a light drizzle of caramel sauce or a few extra cherries on top of each slice.
- Tips & Tricks for Success:
- Room Temp is Your Friend: Ensure your cream cheese, eggs, and sour cream for the cheesecake are truly at room temperature for the smoothest, creamiest result.
- Don’t Overmix: For both the cheesecake and the cake batter, mix until just combined to keep them tender and light.
- Water Bath Magic: Don’t skip the water bath for the cheesecake! It’s key to even baking and preventing cracks.
- Patience with Chilling: That 8-hour (or overnight) chill for the cheesecake is essential for it to set properly and for the flavors to meld.
- Storage & Enjoying Later:
- Refrigerator: Store any leftover cheesecake covered in an airtight container in the fridge for up to 3-4 days.
- Freezer: For longer storage, wrap individual slices tightly in plastic wrap, then in foil, and place them in a freezer-safe container or bag for up to 1-2 months.
- Thawing: Thaw frozen slices overnight in the refrigerator. Enjoy chilled or let them sit at room temperature for about 20-30 minutes before serving for the best flavor.
Enjoy every single bite of this incredible dessert! You’ve earned it!