
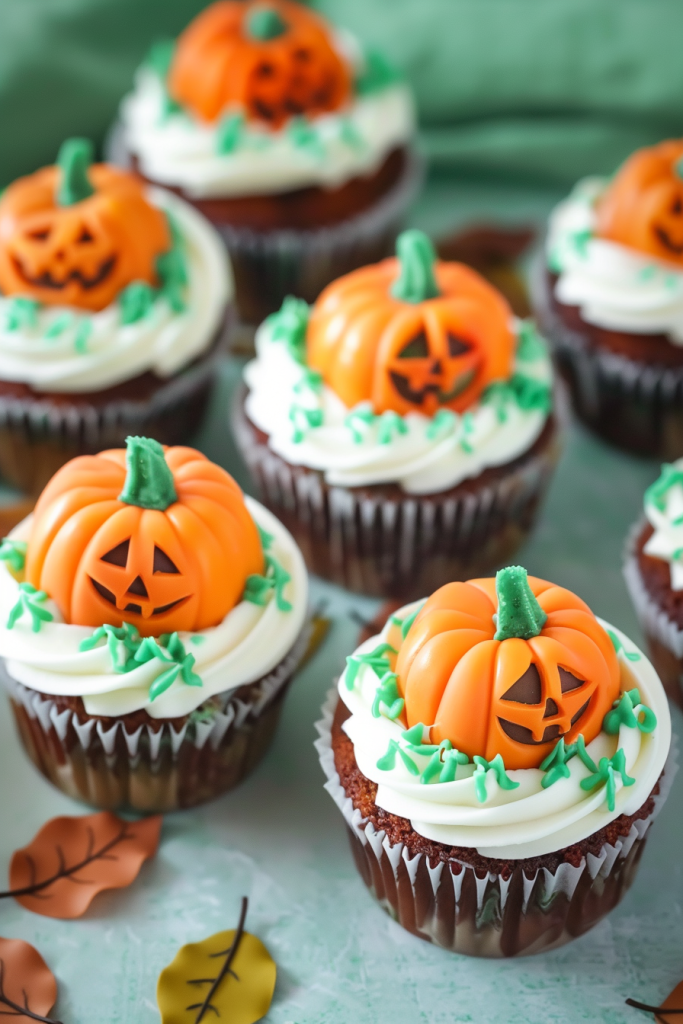
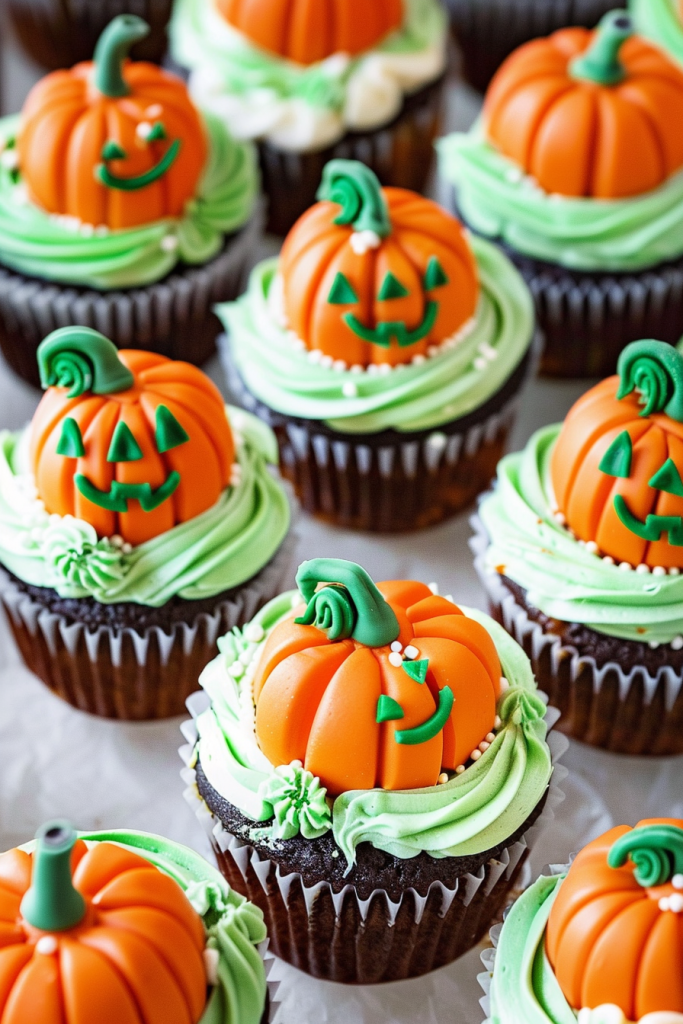
Fall into the spirit of autumn with my delightful pumpkin patch cupcakes recipe. These charming treats are a perfect blend of moist chocolate cupcakes, creamy homemade frosting, and whimsical decorations. Celebrate the season with a dessert that not only looks adorable but also tastes scrumptious.
Inspired by memories of visiting the pumpkin patch with my loved ones, these pumpkin cupcakes are a delightful nod to the joys of fall. The chocolate cupcake base is topped with a rich frosting and adorned with chocolate trees, fallen leaves, and cute pumpkins, making it a festive and fun dessert for harvest parties or family gatherings.
Join me in capturing the essence of autumn with these gourdgeous pumpkin patch cupcakes. Whether you’re a seasoned baker or just starting out, follow my simple steps to create a batch of these seasonal delights that are sure to impress both young and old alike.
Ingredients
Creating the perfect pumpkin patch cupcakes requires a few key ingredients to bring together the rich flavors and delightful decorations. Let’s gather everything we need to make these whimsical and delicious treats.
Cupcake Base
- 2 cups all-purpose flour (240 grams)
- ¾ cup cocoa powder, natural unsweetened or Dutch-processed (63 grams)
- 1 tsp instant coffee granules (optional)
- ½ tsp baking soda
- 1 tsp baking powder
- 1 tsp salt
- 1 stick unsalted butter, room temperature
- 1 ½ cups granulated sugar
- 2 large eggs
- 1 cup buttermilk
- ½ cup hot tap water
Frosting
- 3 sticks unsalted butter (1 ½ cups), room temperature
- 1 tsp vanilla extract
- 2 ⅓ cups powdered sugar
- Dash of milk or heavy cream (if frosting becomes too thick)
- Piping bag
- Wilton 4 piping tip
- Wilton 2 piping tip
- Orange and green gel food coloring
- Pretzel sticks
Necessary Tools and Equipment
When preparing these delightful pumpkin patch cupcakes, having the right tools and equipment is essential to bring the charming pumpkin patch theme to life. Here are the necessary items you will need:
- Piping bag: To expertly frost the cupcakes with the orange cream cheese frosting.
- Wilton piping tips: These tips will help you create intricate designs on the cupcakes, mimicking pumpkins and vines.
- Gel food coloring: Use orange food coloring to give the frosting its vibrant pumpkin hue.
- Pretzel sticks: Perfect for creating adorable edible pumpkin stems to top off your cupcakes.
With these tools at hand, you’ll be ready to craft the perfect pumpkin patch cupcakes that will delight both young and old alike.
Instructions
Let’s dive into preparing these delightful Pumpkin Patch Cupcakes step by step.
Preparing the Cupcake Batter
- Start by preheating the oven to 350 degrees. Line a 12-cup muffin tin with paper liners.
- In a small microwavesafe bowl, melt together butter and dark chocolate until smooth. Let the mixture cool slightly.
- In a large bowl, whisk together the melted butter mixture, cocoa powder, sugar, egg, vanilla extract, and buttermilk until smooth.
- Add in flour, baking soda, and salt, and whisk to incorporate. Pour in hot coffee and whisk until the batter is smooth.
- Divide the batter evenly into the prepared muffin cups.
- Bake for 16-19 minutes or until the cupcakes are set and a toothpick inserted into the center comes out clean.
- Transfer the cupcakes to a wire rack to cool completely.
Baking the Cupcakes
- Prepare the white cake mix in a bowl. Add orange food coloring to achieve the desired color.
- Bake the cupcakes in cupcake liners and let them cool completely.
- Remove two cooled cupcakes from the liners. Top the first cupcake with one layer of orange icing using a round tip.
- Flip the second cupcake and place it upside down on top of the orange icing layer.
- Add a dab of icing on the back of two Eyeballs decors and place them on the top cupcake.
- Using the round tip, create small tooth-shaped rectangles between the two cupcakes with White Tube Icing.
- Using the Green Tube Icing and the leaf tip, create two small leaves at the center of the top cupcake.
- Place a thin pretzel stick in the center of the top of the pumpkin face cupcake.
- In a bowl, prepare the frosting by mixing butter, confectioners sugar, milk, and vanilla extract until smooth.
- Divide the frosting into orange and green, adding food coloring as needed.
- Frost the cooled cupcakes all the way to the liner, creating a rounded top.
- Mold a Tootsie Roll to look like a stem and push it into the top of the frosting.
- Mold Laffy Taffy into a leaf and vine shape and push it into the frosting.
- Optionally, add candy eyes for extra fun.
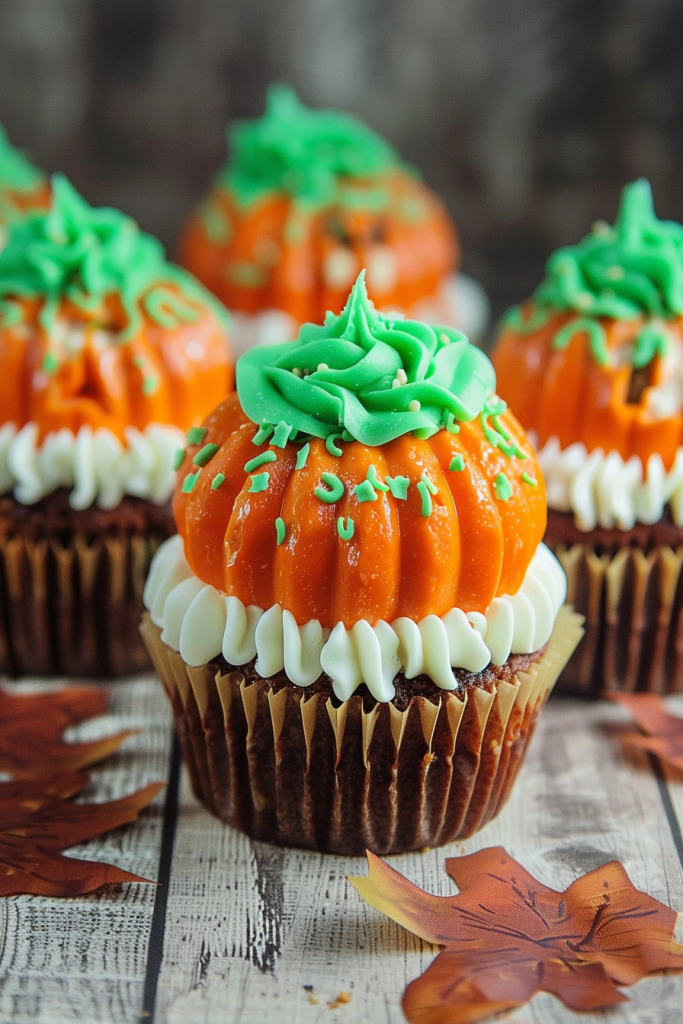
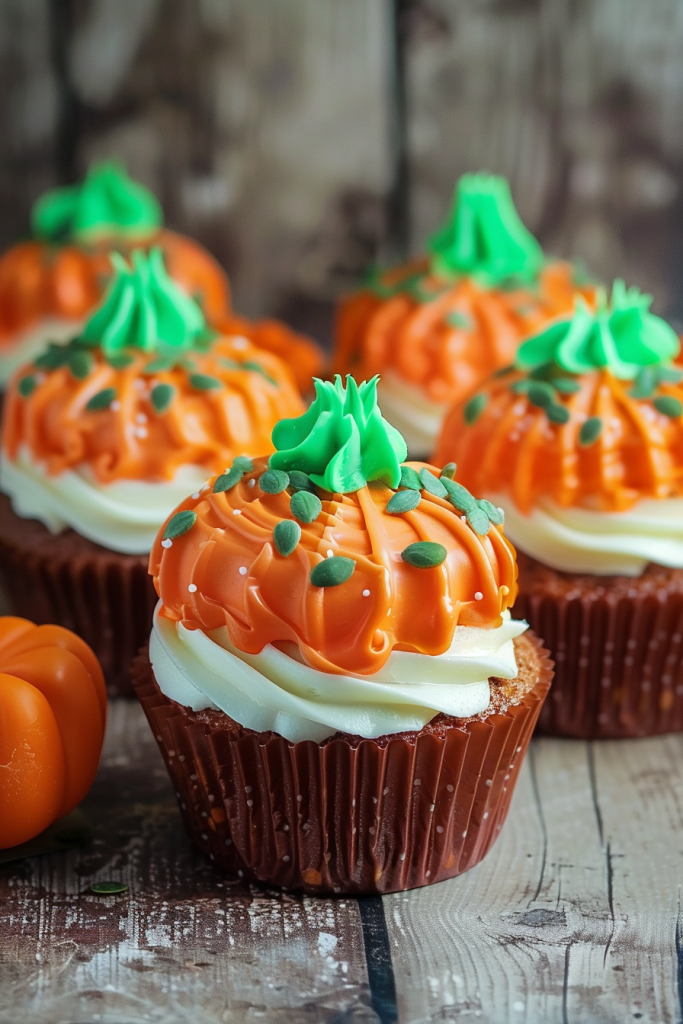
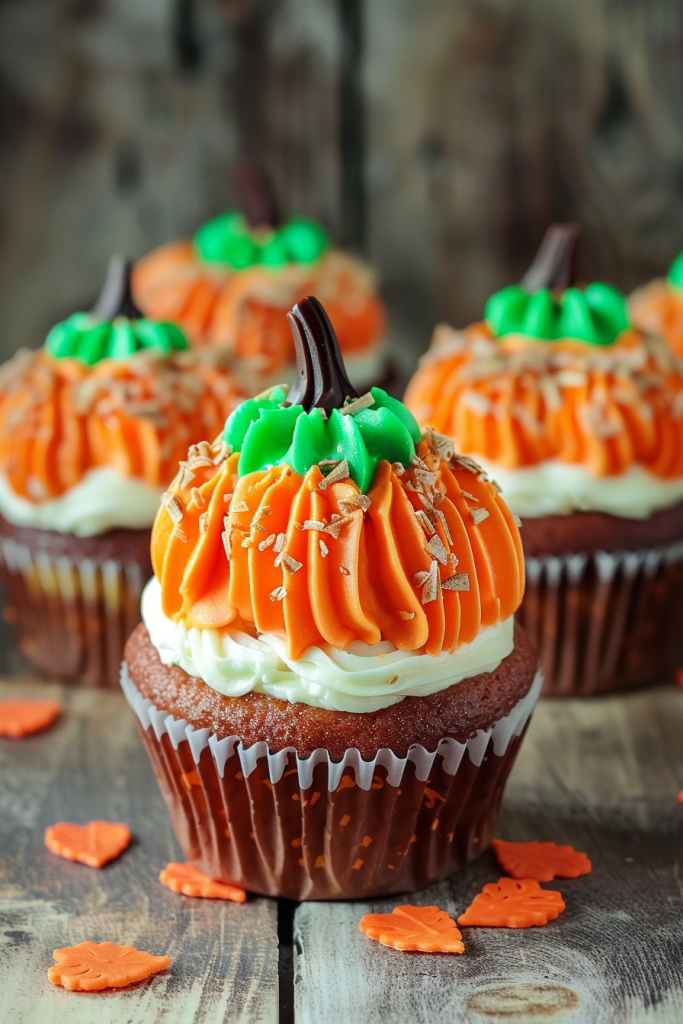
Decorating Your Pumpkin Patch Cupcakes
Elevate your pumpkin patch cupcakes with charming decorations that bring the essence of fall to life. Follow these simple steps to create whimsical grass effects, adorable mini pumpkins, and assemble your cupcakes for a delightful presentation.
Creating Grass Effects
- Prepare green frosting by mixing white frosting with suitable green coloring until you achieve a vibrant grass-like hue.
- Place a 1M star tip at the bottom of your frosting bag to achieve the perfect grass effect.
- Pipe the green frosting onto the cupcakes in a circular motion, resembling tufts of grass.
- Insert a pretzel stick into the center of each cupcake to mimic a pumpkin vine.
- Use a small hole in a ziplock bag to pipe additional vines on the cupcakes with the green frosting.
- Serve your cupcakes to showcase a whimsical pumpkin patch scene that delights both kids and adults alike.
Making Mini Pumpkins
- Prepare a white cake mix in a bowl and add orange food coloring to achieve the desired pumpkin hue.
- Bake the cupcakes in festive cupcake liners, allowing them to cool completely before decorating.
- Take two cooled cupcakes and top one with a layer of orange frosting using a round tip 12.
- Invert the second cupcake on top of the first one to create a pumpkin shape.
- Decorate the top with a Tootsie Roll stem and a Laffy Taffy leaf and vine to complete the mini pumpkin look.
- For a picturesque pumpkin patch display, arrange the decorated pumpkin cupcakes on a platter or cake stand.
- If desired, add optional candy eyes to some of the pumpkins for a fun twist.
- To complete the pumpkin patch theme, sprinkle edible dirt around the base of the cupcakes using any leftover cake crumbs.
- Your pumpkin patch cupcakes are now ready to be served and enjoyed, creating a festive and delicious treat for any autumn occasion.
Make-Ahead Tips
When it comes to preparing these delightful Pumpkin Patch Cupcakes in advance, I have a few smart tips to make your baking experience smoother and stress-free. Here are some helpful steps to ensure your cupcakes turn out fresh and perfect whenever you’re ready to enjoy them:
- Freezing Cupcakes: After baking and allowing the cupcakes to cool completely, you can freeze them unfrosted. Place the cupcakes in an airtight container or freezer-safe bag, ensuring they are well-sealed to prevent freezer burn. They can last in the freezer for up to 2-3 months.
- Thawing Instructions: When you’re ready to serve the frozen cupcakes, simply remove them from the freezer and let them thaw in the refrigerator overnight. This gradual thawing process helps maintain the cupcakes’ moisture and texture.
- Frosting Preparation: If you prefer freshly frosted cupcakes, you can prepare the cream cheese frosting in advance and store it in the refrigerator for up to 2-3 days. Before serving, let the frosting come to room temperature and give it a quick whip to restore its creamy consistency.
- Decorating Tips: While you can fully assemble and decorate the cupcakes in advance, I recommend adding the candy pumpkins and decorative elements closer to serving to keep them looking their best. This way, the stems and candy pumpkins will maintain their vibrant colors and whimsical appearance.
By following these make-ahead tips, you can effortlessly create a batch of Pumpkin Patch Cupcakes that taste as fresh and delightful as the day you baked them, allowing you to savor the flavors of autumn whenever you desire.
Storage and Serving Suggestions
After creating these delightful pumpkin patch cupcakes, it’s essential to store them properly to maintain their freshness and ensure they are ready to serve at a moment’s notice. Here are some tips on storing and serving these festive treats:
Storing Tips:
- Room Temperature: Once the cupcakes have completely cooled, store them in an airtight container at room temperature. Be sure to seal the container tightly to prevent them from drying out.
- Refrigeration: If you live in a warmer climate or if the cupcakes have perishable fillings like cream cheese frosting, it’s best to store them in the refrigerator. Place them in a container with a lid to avoid absorbing any odors from the fridge.
- Freezing: To enjoy these cupcakes later on, you can freeze them. Wrap each cupcake individually in plastic wrap and then place them in a freezer-safe container. They can be frozen for up to 2-3 months.
- Thawing: If you’ve frozen the cupcakes, allow them to thaw in the refrigerator or at room temperature before serving. This will help maintain their texture and flavors.
- Frosting Refresh: Before serving, consider giving the cupcakes a fresh dollop of frosting to enhance their appearance and taste.
- Decorative Touch: Sprinkle some orange sanding sugar on top of the frosting to give them a festive look resembling a pumpkin patch.
- Charming Decor: For an extra special touch, place small chunks of chocolate on top of the cupcakes to mimic pumpkin stems. If available, add candy eyes for a whimsical pumpkin patch effect.
By following these storage and serving suggestions, you can ensure that your pumpkin patch cupcakes remain fresh, visually appealing, and ready to impress your guests at any event.
Conclusion
Creating these pumpkin patch cupcakes has been a delightful journey, capturing the essence of autumn in a sweet treat. The combination of moist chocolate cake, creamy frosting, and whimsical decorations brings joy to any harvest gathering. With simple steps and essential ingredients, these cupcakes are perfect for both seasoned bakers and beginners. By following the detailed instructions provided, you can easily recreate the magic of a pumpkin patch in your own kitchen. Make-ahead tips ensure that you can enjoy these cupcakes whenever the craving strikes, with storage and serving suggestions to keep them fresh and visually appealing. Let these pumpkin patch cupcakes be a highlight of your fall celebrations, impressing guests with their flavor and charm.