
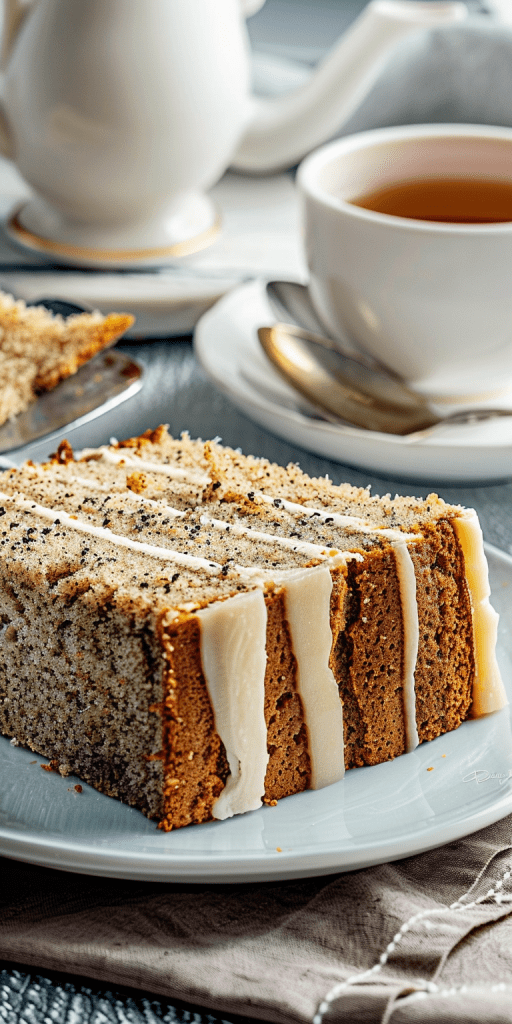
Dreaming of a delightful dessert that combines the essence of your favorite tea with a luscious cake? Look no further than this Earl Grey Tea Cake recipe. As a pastry chef, I’m always on the lookout for unique flavors, and this cake, inspired by the aromatic Earl Grey tea, is a true standout. Infused with the delicate notes of Earl Grey tea, this cake boasts a moist texture and aromatic flavor that elevates its taste to perfection.
This Earl Grey Tea Cake is a treat for the senses, with each bite offering a burst of tea-infused flavor that lingers on your palate. The layers of this cake are lovingly infused with tea, ensuring a moist and flavorful experience that lasts for days. Whether you’re a tea enthusiast or a cake lover, this recipe is sure to become a favorite in your baking repertoire. Indulge in the magic of Earl Grey tea with every slice of this delectable cake.

Ingredients
- 2 large Eggs
- 1 1/2 cup Caster Sugar
- 1 cup Plain Yogurt
- 1 cup Vegetable Oil
- 3 tablespoons Earl Grey loose leaf tea or tea from 3 tea bags
- 2 tablespoons vanilla essence ( if using Vanilla extract use 1 -2 teaspoon)
- 100g Dark Chocolate, roughly chopped ,optional
- 2 cups Self Raising Flour
- Finely grated zest of 1 Orange
- Raw or Brown Sugar for sprinkling
Ingredient Substitution Guide (for reference): Here
Nutritional information per serving: *Nutritional information will vary based on ingredient selection and portion size.
Necessary Equipment
To prepare this delightful Earl Grey Tea Cake recipe, you will need the following equipment:
- 21 x 13x 6cm loaf pan or similar volume cake tin: Ensure you have the correct size cake pan for baking the cake.
- Whisk: A whisk is essential for mixing the cake batter thoroughly.
- Mixing Bowls: Have a few mixing bowls on hand for combining ingredients.
- Measuring Cups and Spoons: Accurate measurements are crucial, so grab your measuring cups and spoons.
- Spatula: A spatula will be handy for folding in ingredients gently.
Having these essential tools at your disposal will make the process of creating this Earl Grey Tea Cake seamless and enjoyable.

Preparation
Preparing an Earl Grey tea cake is a delightful adventure in flavors. Let’s dive into the key steps to infuse the Earl Grey essence and prep the necessary ingredients for this delectable cake.
Infusing the Earl Grey
To infuse the Earl Grey tea flavor into the cake layers, start by preparing the tea leaves for the batter. This step imparts a fragrant note that elevates the overall taste of the cake. Keep in mind that the infusion process is crucial for capturing the essence of Earl Grey in every bite.
Prepping the Ingredients
Gathering and prepping the ingredients is a foundational step in creating a successful Earl Grey tea cake. Ensure you have all the necessary items at hand. Precise measurements and proper preparation of the ingredients set the stage for a seamless baking experience.
Directions
I’m excited to guide you through creating this delicious Earl Grey Tea Cake. Below are step-by-step instructions to ensure your cake turns out perfectly.
- Begin by preheating your oven to 160°C (320°F). Prepare your 21 x 13x 6cm loaf pan (or a similar volume cake tin) by spraying it with cooking spray to prevent sticking. Then, line the bottom and sides of the pan with baking paper, ensuring that the paper extends slightly over the edges for easy removal later.
- In a large mixing bowl, whisk together the eggs and caster sugar until the mixture becomes pale and fluffy. This step is crucial for incorporating air into the batter, resulting in a lighter and more tender cake.
- Add the plain yogurt, vanilla essence (or vanilla extract), lemon zest, and Earl Grey tea leaves to the bowl. Whisk until the ingredients are just combined, being careful not to overmix. Gradually add the vegetable oil while continuing to whisk, ensuring that it is fully incorporated into the mixture.
- Add the self-raising flour and chocolate pieces (if using) to the bowl. Use a spatula to gently fold the dry ingredients into the wet ingredients until they are just combined. Be careful not to overmix the batter, as this can result in a tough cake.
- Pour the batter into the prepared loaf pan and smooth the top with the back of a spoon or a spatula. Gently tap the baking tin against the counter to release any trapped air bubbles from the batter. Sprinkle the top of the batter evenly with raw sugar or brown sugar for added sweetness and a delightful crust.
- Place the baking tin in the preheated oven and bake for approximately one hour, or until a wooden skewer inserted into the center of the cake comes out clean. To ensure even baking, turn the pan halfway through the baking time, after about 30 minutes.
- Once the cake is baked, remove it from the oven and let it cool in the pan for 15 minutes. After 15 minutes, use the baking paper liner to gently lift the loaf out of the tin and transfer it to a wire rack to cool completely.
- Serve the Earl Grey Tea Cake warm or at room temperature. Leftover slices are great toasted and slathered with butter. Enjoy!
Assembly
After baking the Earl Grey tea cake, it’s time to enjoy the final masterpiece.
Final Touches
To complete the Earl Grey tea cake, consider dusting the top with confectioners’ sugar or adding a simple glaze. Serve the cake warm or at room temperature to enjoy the full aroma and taste of the Earl Grey tea-infused layers. Enjoy this sophisticated and flavorful dessert with friends and family for a memorable dining experience.
Tips for the Best Flavor
When it comes to achieving the best flavor in your Earl Grey tea cake, a few extra steps can truly elevate the taste experience. Here are some tips to ensure your cake turns out perfectly:
Infusion is Key
To fully enhance the Earl Grey flavor in your cake, make sure to use high-quality tea leaves and incorporate them evenly into the batter. This infusion process allows the tea’s aroma and taste to permeate through the entire cake, providing a rich and authentic flavor profile.
Quality Ingredients
Using high-quality ingredients can make a significant difference in the final taste of your cake. Additionally, using fresh ingredients can further enhance the overall taste and texture of the cake.
Resting Time
Allowing your Earl Grey tea cake to cool properly after baking is crucial for the flavors to meld together. This cooling period allows the tea-infused flavors to deepen, resulting in a more nuanced and delicious cake.
Serving Temperature
For the best flavor and texture, serve your Earl Grey tea cake at room temperature or slightly warmed.
Storage and Serving
After preparing your delicious Earl Grey Tea Cake, it’s essential to store it properly to maintain its freshness and flavor. Here are some tips on how to store and serve your Earl Grey Tea Cake:
Storage:
Once the Earl Grey Tea Cake has cooled completely, wrap it tightly in plastic wrap or aluminum foil to prevent it from drying out.
Store the wrapped cake at room temperature for up to 2-3 days or in the refrigerator for up to 4-5 days.
To prevent any odors from affecting the cake, consider placing it in an airtight container before storing.
Serving:
Before serving, you can garnish the Earl Grey Tea Cake with a dusting of powdered sugar for an elegant presentation.
To enhance the flavors of the cake, consider serving it at room temperature. This allows the subtle notes of Earl Grey tea and vanilla to shine through.
Pair slices of the Earl Grey Tea Cake with a hot cup of Earl Grey tea or a dollop of whipped cream for a delightful treat.
When serving the cake, use a sharp knife to ensure clean slices.
By following these storage and serving tips, you can enjoy your Earl Grey Tea Cake at its best, savoring the delicate flavors and textures with each bite.
Conclusion
Creating an Earl Grey Tea Cake is a delightful way to infuse your baking with the fragrant notes of Earl Grey tea. By following the detailed instructions provided, you can achieve a moist and flavorful cake that is sure to impress your guests. Remember to incorporate the tips shared in this article, from infusing the tea leaves to storing and serving the cake, to ensure a perfect treat every time. Whether enjoyed with a cup of Earl Grey tea, this Earl Grey Tea Cake recipe promises a delicious experience that will leave you craving more.
PrintEarl Grey Tea Cake
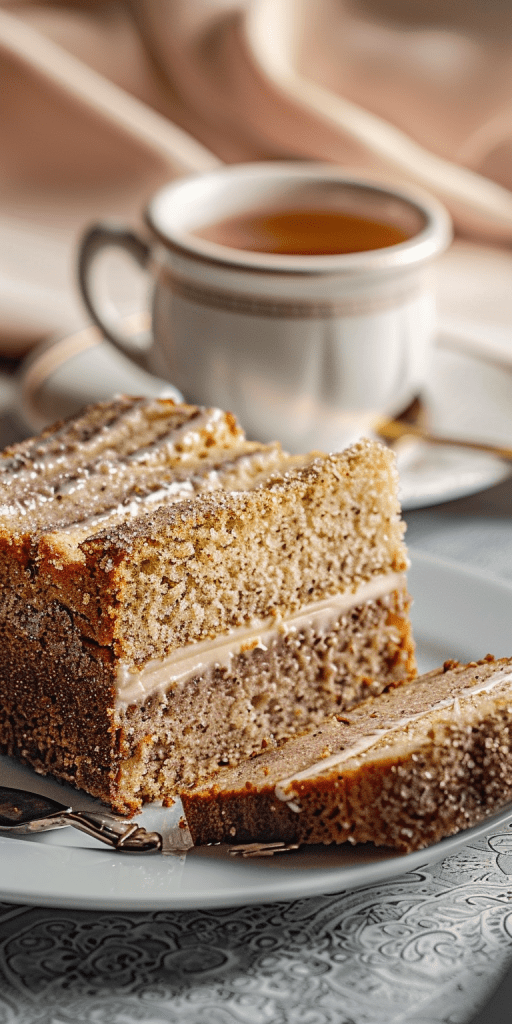
Whip up this wonderfully aromatic Earl Grey Tea Cake, a moist and flavorful loaf perfect for any tea lover! Infused with delicate tea notes, a hint of bright orange, and optional rich dark chocolate, it’s a truly delightful treat for a cozy afternoon or sharing with friends.
- Prep Time: 15 minutes
- Cook Time: 1 hour
- Total Time: 1 hour 15 minutes (plus cooling)
- Yield: 12 slices 1x
- Category: Dessert, Loaf Cake
- Cuisine: Modern British-Inspired
Ingredients
- 2 large Eggs
- 1 1/2 cups Caster Sugar
- 1 cup Plain Yogurt
- 1 cup Vegetable Oil
- 3 tablespoons Earl Grey loose leaf tea (or tea from 3 tea bags)
- 2 tablespoons vanilla essence (or 1–2 teaspoons vanilla extract)
- 100g Dark Chocolate, roughly chopped (optional)
- 2 cups Self Raising Flour
- Finely grated zest of 1 Orange
- Raw or Brown Sugar, for sprinkling
Instructions
- Get Ready: Preheat your oven to 160°C (320°F). Lightly grease a 21 x 13 x 6cm loaf pan and line it with baking paper, leaving a little overhang for easy lifting.
- Mix the Wet Ingredients: In a bowl, whisk the eggs and caster sugar together until they’re pale and fluffy. Stir in the plain yogurt, vanilla, orange zest, and Earl Grey tea leaves until just combined. Then, gradually whisk in the vegetable oil.
- Combine with Dry: Add the self-raising flour and the optional chopped dark chocolate to the bowl. Gently fold everything together with a spatula until just combined – be careful not to overmix!
- Bake to Perfection: Pour the batter into your prepared loaf pan and smooth the top. Give the pan a gentle tap on the counter to release any air bubbles. Sprinkle generously with raw or brown sugar. Bake for about 1 hour, turning the pan halfway through (after 30 minutes), or until a skewer inserted into the center comes out clean.
- Cool Down: Let the cake cool in the pan for 15 minutes before using the baking paper overhang to lift it out. Transfer to a wire rack to cool completely.
Notes
- Serving Ideas: This cake is delicious served warm or at room temperature. Enjoy a slice with your favorite cup of tea (Earl Grey, of course!), a dollop of whipped cream, or a spread of good butter.
- Tips & Tricks:
- For the best tea flavor, use good quality loose leaf Earl Grey. If using tea bags, ensure the tea is finely ground.
- The dark chocolate is optional but adds a lovely decadent touch.
- Don’t overmix the batter once the flour is added; this keeps the cake tender.
- Storage & Reheating:
- Store your Earl Grey Tea Cake in an airtight container at room temperature for up to 3 days, or in the refrigerator for up to 5 days.
- Leftover slices are wonderful lightly toasted! You can also gently warm them in the microwave.