

If you have ever found yourself strolling through a bustling night market in Bangkok or sitting at your favorite local Thai restaurant, you know that unmistakable aroma: sweet, rich black tea infused with fragrant star anise, crushed tamarind seed, cardamom, and a luxurious cloud of sweetened condensed milk. Thai iced tea (Cha Yen) is not merely a refreshing beverage—it is a beloved culinary icon.
Combining that deep, spiced tea essence with the velvety, tangy richness of a classic baked cheesecake creates pure magic. The first time I baked this Thai Tea Cheesecake, I wanted to capture everything I adored about afternoon tea runs with friends: the warm vanilla notes, the mesmerizing amber-orange glow, and that comforting, sweet-cream finish. Most fusion cheesecakes require complicated water baths, hours of steeping loose leaves, or delicate gelatin handling. This tested recipe strips away the intimidation factor, giving you a restaurant-worthy, show-stopping dessert that comes together with minimal fuss and maximum flavor. Whether you are celebrating a special anniversary, hosting a dinner party, or simply treating yourself to something extraordinary, this velvety cake is guaranteed to win hearts.
Everything You Need to Know Before Baking
One of the greatest joys of this recipe is how approachable it is. From start to finish, the active preparation takes a breezy 30 minutes, followed by a gentle 35-minute bake in the oven. While the resting and chilling period requires at least 4 hours (or ideally overnight in the fridge), the wait is entirely hands-off and rewards you with clean, silky, bakery-perfect slices.
This recipe yields one stunning 9-inch cheesecake, which comfortably serves 8 to 10 generous portions. If you are baking for an intimate gathering or a two-person date night, you can easily cut the ingredients in half and bake the mixture in a 6-inch springform pan, reducing your bake time by roughly 8 to 10 minutes.
If you have ever felt nervous about baking cheesecakes because of horror stories involving water bath leaks or sunken, cracked tops, take a deep breath. This recipe is fundamentally beginner-friendly. Because we use concentrated Thai tea powder rather than adding cups of liquid cream, the moisture ratio stays balanced, allowing the custard to bake evenly without requiring a water bath.
For equipment, a 9-inch heart-shaped springform pan lends an elegant, celebratory visual, but a standard 8-inch or 9-inch round springform pan works equally well. You will also need a food processor (or a sturdy zip-top bag and a rolling pin) for crushing the crackers, an electric hand mixer or stand mixer, a silicone spatula, a flat-bottomed drinking glass, and aluminum foil.
Planning ahead is the secret to stress-free hosting. You can bake this cake up to two days in advance; in fact, the flavor profile matures and deepens as the spiced tea melds with the tangy cream cheese overnight in the refrigerator.
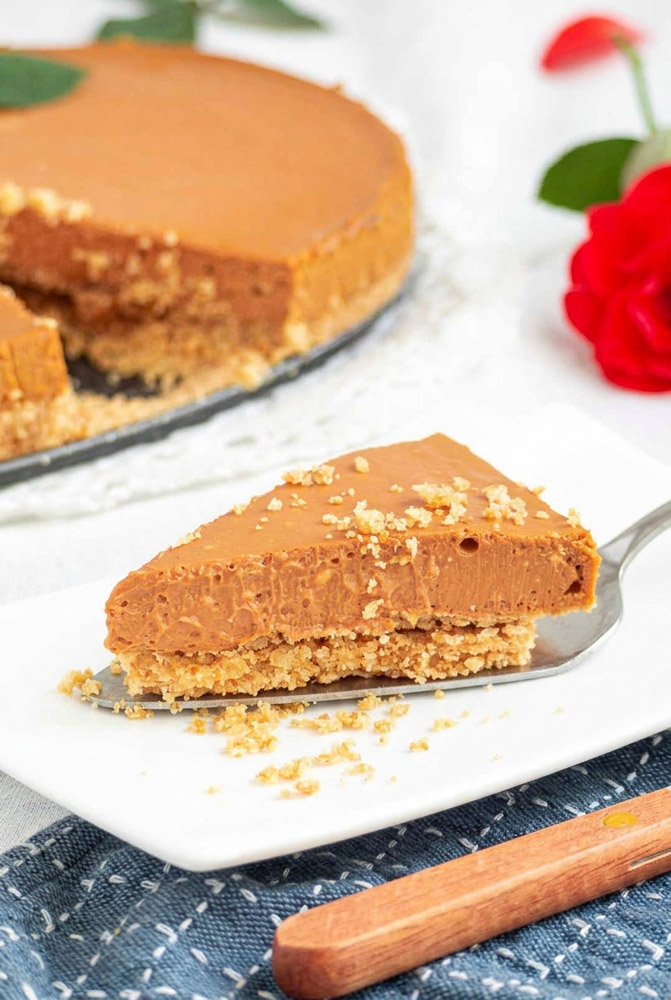
The Ingredients: Selecting Quality & Understanding Roles
Every single ingredient in this tight, six-item lineup serves a distinct structural and flavor purpose:
- Graham Crackers (6.5 oz / 180g): The crushed cracker base provides a toasty, honeyed crunch that grounds the ultra-creamy filling. For the best texture, grind the crackers into fine, sandy crumbs so your crust stays compact and does not crumble when sliced. If you live in an area where standard honey graham crackers are hard to find, plain digestive biscuits (such as McVitie’s) or Marie biscuits provide an identical structural result.
- Unsalted Butter (3.53 oz / 100g): Melted butter binds the crumbs into a firm, sliceable foundation while delivering rich pastry notes. Using unsalted butter allows you to control the exact salt balance of your crust.
- Cream Cheese (16 oz / 2 x 227g): The undisputed backbone of the dessert. For that authentic, dense, velvety mouthfeel, stick exclusively with full-fat brick-style cream cheese. Whipped tub varieties or low-fat versions contain elevated water contents and stabilizers that can lead to a runny or spongy bake. Crucial prep note: Ensure your cream cheese is completely softened to room temperature before beating. Cold cream cheese resists smooth blending and creates persistent white lumps in your vibrant orange batter.
- Granulated Sugar (½ cup): Granulated white sugar dissolves seamlessly into the cream cheese, sweetening the cake while softening the protein network of the eggs to keep the custard silky and tender.
- Concentrated Thai Tea Powder (1 tablespoon): This is the star of the show. High-grade concentrated Thai tea powder delivers the iconic reddish-amber hue and that unmistakable blend of black tea, vanilla, and warm Southeast Asian spice without watering down the batter. You can find this in the tea aisle of local Asian supermarkets or order it readily online (popular brands include ChaTraMue 3-in-1 or instant pure Thai tea powder).
- Eggs (2 large): Whole eggs provide emulsification, structure, and rich lift. As the proteins gently set in the oven, they lock in the creamy texture. Like the cream cheese, ensure your eggs are at room temperature to prevent the melted fats from seizing during mixing.
Step-by-Step Method: Crafting the Perfect Cheesecake
- ● Crush Graham Crackers + Butter
- ● Press firmly into 9" pan
- ● Beat Cream Cheese smooth
- ● Add Sugar & Eggs
- ● Whisk in Thai Tea Powder
- ● Bake @ 170°C (35 min)
- ● Tent foil at 20 min mark
- ● Cool 1h, chill 4h+
Step 1: Pan Preparation and Oven Setup
Begin by preheating your oven to 170°C (338°F / 350°F standard bake). Position your oven rack squarely in the middle position to ensure gentle, ambient heat distribution. Melt your 100 grams of unsalted butter in a microwave-safe bowl in brief 20-second bursts until fully liquefied. Take a pastry brush or paper towel and use the residual melted butter clinging to the bowl to lightly grease the bottom and sides of your 9-inch heart-shaped springform pan. This smart step prevents sticking without wasting extra butter.
Step 2: Building the Golden Crust
Place your 180 grams of graham crackers into the bowl of a food processor and pulse until you achieve fine, uniform crumbs with no large fragments remaining. If you don’t have a food processor, seal the crackers inside a durable gallon-sized zip-top bag and crush them firmly with a rolling pin. Pour the melted butter over the crumbs and fold them together using a flexible rubber spatula until every granule is coated and resembles damp beach sand.
Transfer the mixture into your greased springform pan. Using the flat, smooth base of a drinking glass or measuring cup, press the crumbs firmly and evenly across the bottom. Packing the crust tightly is the professional secret to a base that holds its integrity during slicing rather than crumbling onto the plate.
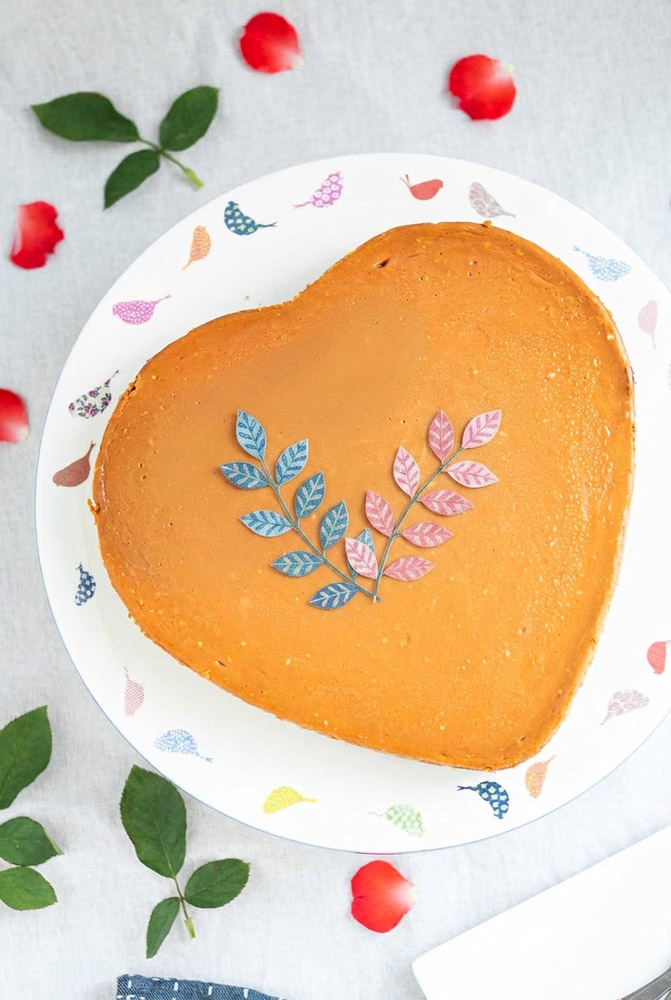
Step 3: Aerating the Cream Cheese Base
In a large mixing bowl, combine your softened room-temperature cream cheese and ½ cup of granulated sugar. Using an electric hand mixer set to medium-low speed, beat the mixture for approximately 2 minutes until it transforms into a glossy, completely lump-free, satin cream. Keep the speed moderate; whipping at high speed incorporates excess air bubbles, which can cause the cheesecake to puff up dramatically during baking and collapse into a crater as it cools.
Step 4: Incorporating the Eggs
Add your room-temperature eggs one at a time, beating on low speed just until each egg is fully incorporated before adding the next. Stop your mixer once or twice to scrape down the sides and bottom of the bowl with your rubber spatula. This guarantees that unmixed pockets of plain cream cheese do not hide at the bottom.
Step 5: Infusing the Thai Tea Essence
Sprinkle the 1 tablespoon of concentrated Thai tea powder evenly over the batter. Mix on low speed until the powder fully dissolves and the pale batter instantly transforms into a rich, luminous, sunset-orange hue. The kitchen will fill with an intoxicating scent reminiscent of caramel, vanilla, and sweet spices.
Step 6: Pouring and Smoothing
Pour the velvety orange batter over your prepared graham cracker base. Use an offset spatula or the back of a rubber spatula to smooth the surface into a level, mirror-like finish. Gently tap the pan twice on the countertop to bring any trapped micro-bubbles to the surface.
Step 7: The Precision Bake & Foil Shield
Slide the pan into your preheated oven and set a timer for 35 minutes total bake time. Watch the clock: at exactly 20 minutes, carefully open the oven door and loosely drape a sheet of aluminum foil over the top of the pan. This critical shield prevents the direct upper heat from browning or dulling the top, keeping that bright, cheerful orange color vibrant.
Step 8: The Sensory Doneness Check
At the 35-minute mark, check the cake’s doneness. Gently nudge the side of the pan with an oven mitt. The edges should appear matte, slightly puffed, and set, while a small 2-inch circle in the very center should still show a gentle, custard-like jiggle. Do not wait for the center to become solid; it will firm up naturally as the residual heat settles.
Step 9: Gradual Cooling and Chilling
Remove the cheesecake from the oven and set it on a wire cooling rack at room temperature for exactly one hour. Never rush a hot cheesecake straight into the refrigerator, as rapid temperature drops cause condensation under the foil and can create cracks. Once cooled to room temperature, loosely tent the pan with foil or plastic wrap and transfer it to the refrigerator for at least 4 hours, or ideally overnight. Chilling allows the fats and proteins to set into that signature dense, melt-in-your-mouth texture.
Wide liquid wobble across entire surface.
Set, matte outer ring with gentle center wobble.
Puffed high, browned top, dry cracked surface.
Variations & Customization
- Lotus Biscoff Speculoos Crust: For an even warmer spice profile, replace the graham crackers with an equal weight of Lotus Biscoff cookies. The caramelized cinnamon notes of speculoos harmonize flawlessly with the star anise of the Thai tea.
- Condensed Milk Drizzle (Café Style): Recreate the classic Thai street beverage by lightly drizzling 2 tablespoons of sweetened condensed milk over each slice right before serving.
- Boba / Tapioca Pearl Topping: Elevate this dessert for parties by simmering fresh brown sugar boba pearls, letting them cool to room temperature, and spooning them over the chilled cheesecake just prior to slicing.
- Gluten-Free Adaptation: Swap standard graham crackers 1:1 with certified gluten-free graham-style cookies or crushed almond flour shortbread biscuits.
Serving, Slicing & Storage Mastery
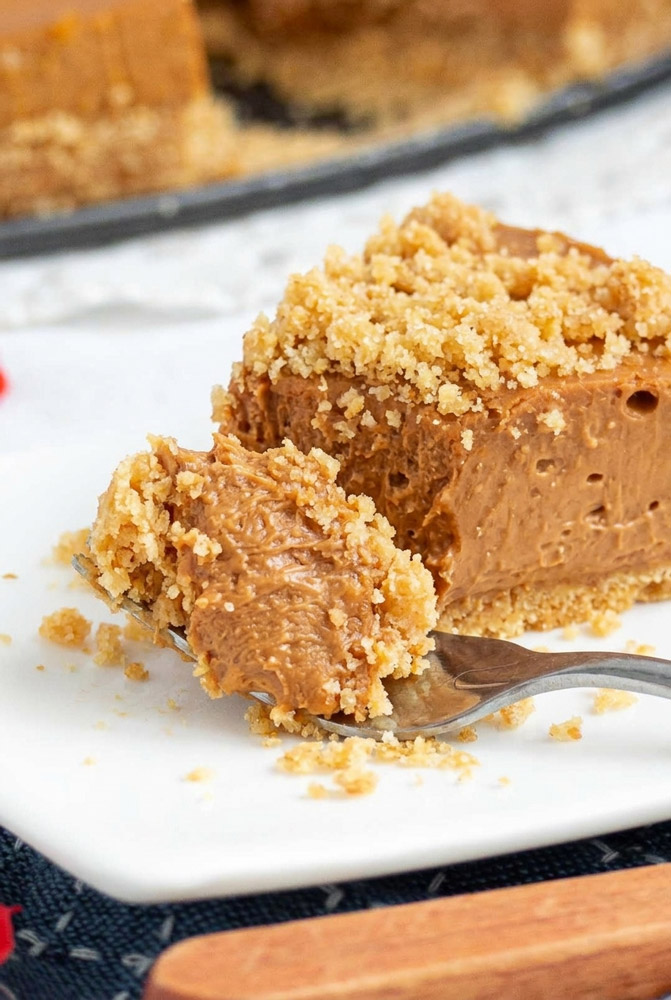
For clean, razor-sharp bakery slices, run a large chef’s knife under hot running water for 10 seconds, dry the blade completely with a kitchen towel, and make a single downward cut. Wipe the blade completely clean and repeat the hot-water dip between every single slice.
Beverage & Wine Pairings
Pair this dessert with an unsweetened iced jasmine green tea or hot oolong tea to cut through the rich dairy fats. If serving with dessert wine, choose a lightly chilled, aromatic Late Harvest Riesling or a sparkling Moscato d’Asti, whose peach and floral notes complement the spice bouquet of the Thai tea.
Storage & Freezing
- Refrigeration: Store leftover slices in an airtight container or cover the springform pan tightly with plastic wrap in the refrigerator for up to 5 days.
- Freezing: This cheesecake freezes beautifully for up to 2 months. Freeze the fully chilled cake (whole or individual slices) uncovered on a parchment-lined tray for 1 hour until solid, then wrap tightly in double layers of plastic wrap followed by a layer of heavy-duty aluminum foil. Thaw overnight in the refrigerator before serving.
Thai Tea Cheesecake
A show-stopping Asian fusion dessert featuring the comforting, spiced vanilla aroma of traditional Thai iced tea infused into a rich, silky cream cheese custard over a golden graham cracker crust. Simple, crack-free, and baked without a water bath!
- Prep Time: 30 minutes
- Cook Time: 35 minutes
- Total Time: 6 hours 5 minutes (1 hr cool + 4 hrs chill)
- Yield: 8–10 slices 1x
- Category: Dessert
- Cuisine: Asian Fusion / American
Ingredients
Crust Base:
- 6.5 oz (180g) Graham crackers, finely crushed
- 3.53 oz (100g) Unsalted butter, melted
Cheesecake Filling:
- 16 oz (2 x 227g / 454g) Brick cream cheese, softened to room temperature
- ½ cup (100g) Granulated white sugar
- 2 Large eggs, room temperature
- 1 tbsp Concentrated Thai tea powder
Instructions
- Preheat & Grease: Heat oven to 170°C (338°F). Grease a 9-inch springform pan using residual melted butter from your bowl.
- Form Crust: Pulse graham crackers into fine crumbs, stir thoroughly with melted butter, and press firmly into the bottom of the pan using a flat-bottomed cup.
- Cream Cheese & Sugar: Beat room-temperature cream cheese and sugar on medium-low speed until silky and free of lumps (approx. 2 minutes).
- Incorporate Eggs: Add eggs one at a time, mixing on low speed after each addition until just blended.
- Flavor & Tint: Beat in the concentrated Thai tea powder on low speed until the batter turns uniformly bright orange and smooth.
- Fill Pan: Pour the mixture over the crust and level the top with a spatula.
- Bake & Shield: Bake at 170°C for 35 minutes. At the 20-minute mark, loosely tent the top with aluminum foil to prevent browning.
- Cool & Chill: Rest on a wire rack at room temperature for 1 hour, then cover and chill in the refrigerator for at least 4 hours (or overnight) before unmolding and slicing.
Notes
- Lump Prevention: Ensure cream cheese and eggs are truly room temperature before blending to guarantee a flawless, smooth batter.
- No Water Bath Secret: Tent with foil at minute 20 to protect the sunset-orange color while the center finishes setting gently.
- Clean Slicing: Wipe your knife clean and warm the blade under hot water between cuts.
- Storage: Keep refrigerated in an airtight container for up to 5 days, or freeze wrapped in foil for up to 2 months.
