

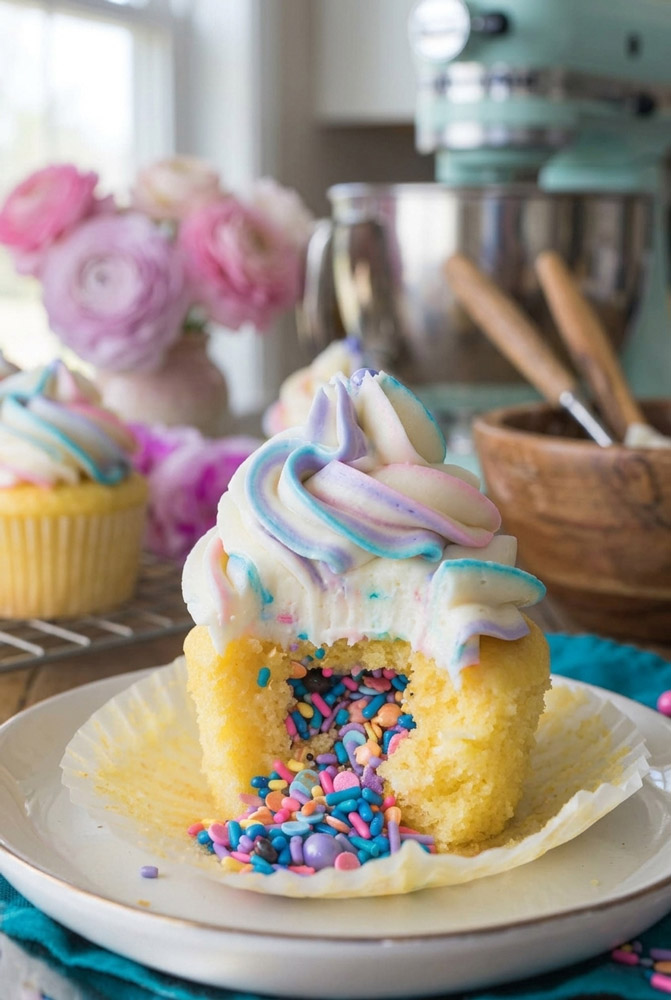
There is something so magical about a dessert that hides a secret. That is exactly why I fell in love with these easy pinata cupcakes. The idea comes from traditional Mexican piñatas. You know, the fun party staples made of papier-mâché, packed with candies, and smashed open at parties?
But instead of swinging a big stick, your guests just bite or cut into a fluffy vanilla cupcake. Boom. A bright burst of sprinkles spills out.
I wanted to make a cupcake that tastes like it came from a fancy bakery but is totally easy to make at home. My secret weapon? Mixing real butter with oil. The butter gives it that amazing, rich flavor. The oil keeps the cake super moist. It makes a cake that is strong enough to hold the candy but still melts in your mouth.
I recently made these for a friend’s kid’s birthday, and they were a massive hit. They are perfect for birthdays, parties, or just a rainy Sunday afternoon when you want to have some fun in the kitchen.
Let’s get baking!
The Plan
Before we turn on the oven, let’s look at the clock so you can plan your time.
- Prep Time: 15 minutes
- Cook Time: 17 to 20 minutes
- Total Time: 35 minutes (plus 30 minutes to cool)
- Yield: 12 standard cupcakes
- Skill Level: Easy
What You Need
Grab a standard 12-cup muffin tin and some paper liners. For mixing, a stand mixer or a simple hand mixer works great. To hollow out the cakes, a small knife does the trick. An apple corer works even faster if you have one.
For the frosting, grab a large piping bag and a star tip. I like the Ateco 848 or Wilton 2D. You will also need a small, clean paintbrush. Yes, a paintbrush! More on that later. No piping bag? No worries. A large Ziploc bag with the corner cut off works in a pinch.
Ingredients
Getting the best texture depends on ingredient temperature. Make sure your cold items sit out on the counter for a bit before you start.
- ¼ cup unsalted butter: Softened to room temperature. When you press it, your thumb should leave a mark easily.
- ¼ cup oil (avocado, vegetable, or canola): Using oil and butter together is a pro move. Butter adds taste. Oil stops the cake from drying out.
- ¾ cup sugar: Plain white sugar is best.
- 2 large eggs: Room temperature. Cold eggs will ruin your smooth batter.
- 1 ½ teaspoons vanilla extract: Go for the real stuff here, not imitation.
- 1 ½ cups all-purpose flour: Fluff it with a spoon before you measure. Don’t pack it down!
- 1 ½ teaspoons baking powder: Check the date to make sure it is fresh.
- ¼ teaspoon fine sea salt: A little salt makes the sweet vanilla flavor pop.
- ⅔ cup buttermilk: This makes the cake incredibly tender.
- 1 batch vanilla frosting: Your favorite homemade or store-bought buttercream works fine.
- Gel food coloring & sprinkles: Use gel color, not liquid drops. Gels give you bright colors without making the frosting runny. You will also need about ¾ cup of sprinkles for the hidden center.
Missing something? If you don’t have buttermilk, add two teaspoons of lemon juice or white vinegar to a cup of regular milk. Let it sit for five minutes until it looks curdled.
Let’s Bake!
Step 1: Mix the base
Preheat your oven to 350°F. Line your muffin tin. In your bowl, mix the soft butter, oil, and sugar. Beat it on medium-high for about three to four minutes. Look for a big change here. The mixture should turn pale, fluffy, and look like wet sand. This creates tiny air pockets that make the cupcakes light. Add your eggs one at a time, mixing well. Stir in the vanilla.
Step 2: Add the dry stuff
In another bowl, whisk the flour, baking powder, and salt. Now, put away the electric mixer. Grab a rubber spatula instead. Over-mixing makes cakes tough, like cardboard. Add one-third of the flour to the wet mix. Fold it gently. Pour in half the buttermilk. Stir softly. Repeat this, alternating dry and wet, until it is just combined. Stop mixing the second the white flour disappears.
Step 3: The bake
Scoop the batter into the liners. Fill them about two-thirds full. Do not overfill them. If you fill them to the top, they will spill over and get flat, ugly tops. That makes them super hard to cut later. Bake for 17 minutes.
Your kitchen should smell like heaven. Touch the top of a cupcake. It should spring back. You can also stick a toothpick in the middle. If it comes out clean, they are done. Let them cool in the pan for five minutes, then move them to a wire rack. They must be completely cool before the next step. Otherwise, your frosting will melt into a sad puddle.
Step 4: The big surprise
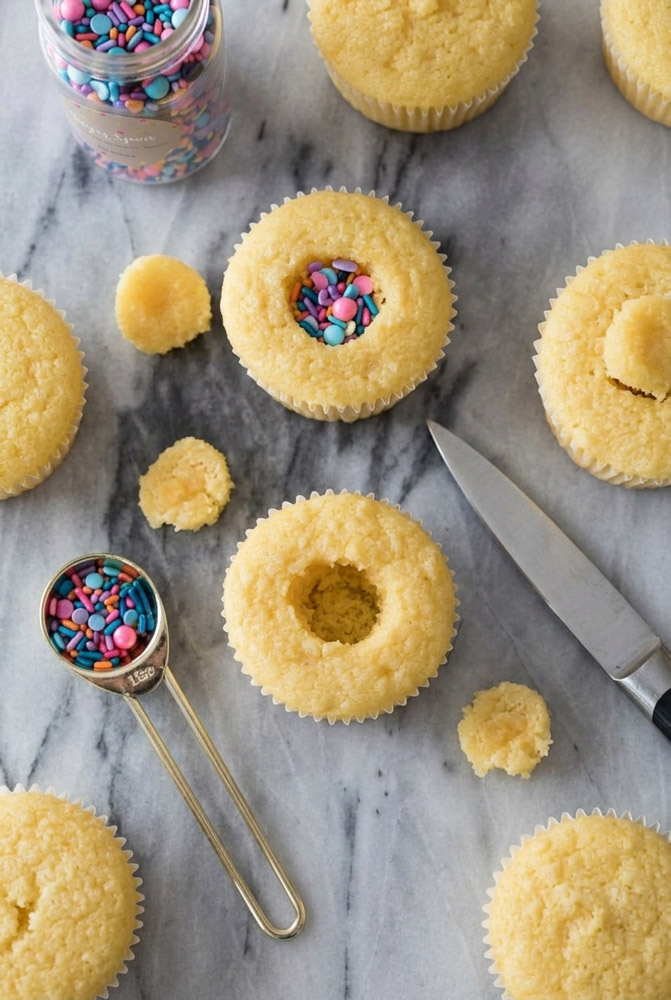
Once the cupcakes are cool, it is time to turn them into piñatas. Take a small knife and cut a circle about one inch wide and one inch deep into the top of the cupcake. Tilt the knife inward as you cut. Lift out the cone-shaped piece of cake.
Take that piece of cake and cut off the pointy bottom. You are left with a flat little cake disc. This is your lid. Now, pour a tablespoon of sprinkles right into the hole. Put the cake lid right back over the sprinkles. Press it down gently until it is flat.
Step 5: The paintbrush trick
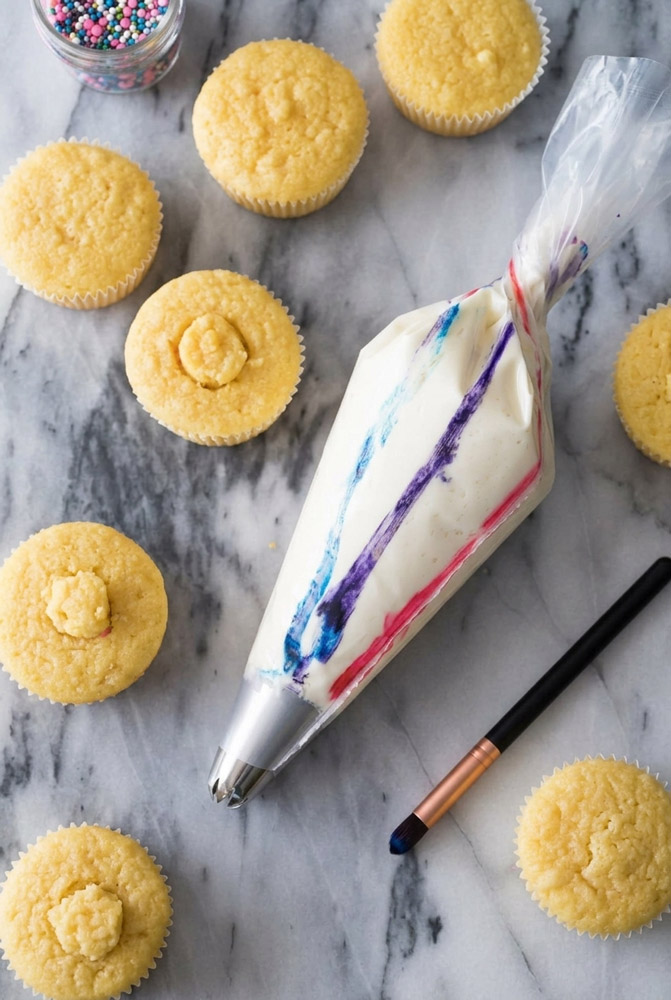
Want beautiful colorful swirls without making a huge mess? Try this. Take your empty piping bag with the star tip inside. Dip your clean paintbrush into a gel color. Paint a straight line of color from the tip of the bag all the way up the inside wall. Clean the brush, pick a new color, and paint another line.
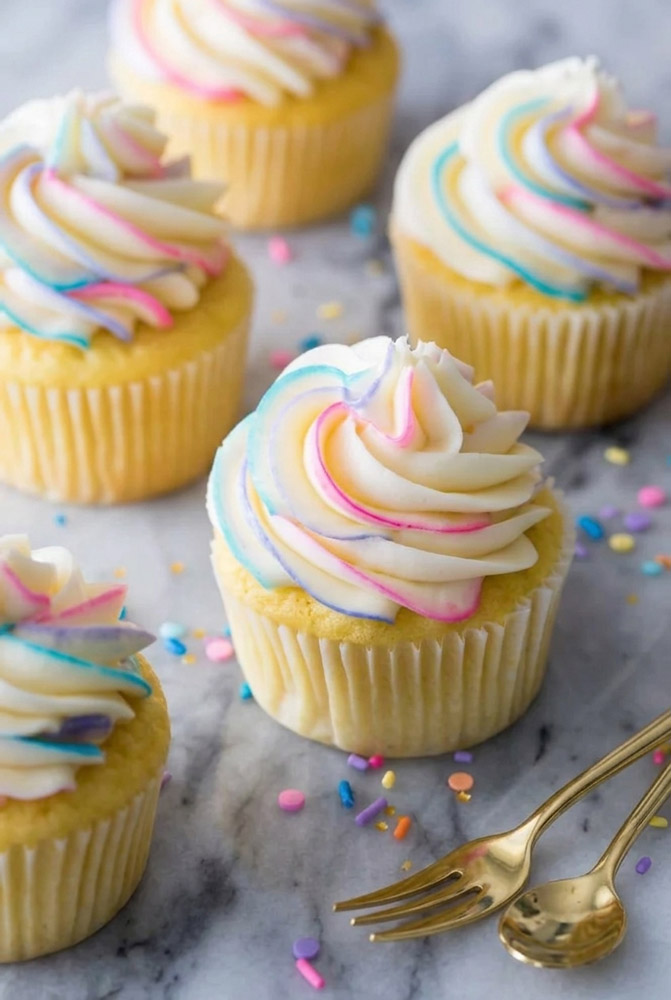
Spoon your plain white frosting right down the middle of the bag. Twist the top closed. Squeeze a little bit out onto a plate until you see the colors start to show up. Now, hold the bag straight up over a cupcake. Squeeze to make a star, then move the bag in a smooth circle, working up into a nice peak. The frosting will grab the color lines as it pushes out, creating a beautiful carnival swirl.
Fun Twists
This recipe is super easy to change up.
- Make it gluten-free: Just swap the flour for a 1-to-1 gluten-free baking flour. Let the batter rest in the bowl for 10 minutes before baking so it doesn’t taste gritty.
- Make it vegan: Use vegan butter, soy milk mixed with apple cider vinegar, and a store-bought egg replacer.
- For adults: Swap the rainbow sprinkles for metallic gold sugar pearls. Fill the inside with fancy chocolate pearls.
- Holidays: Use orange and purple frosting for Halloween. Or, fill the centers with all-pink or all-blue sprinkles for a gender reveal party!
How to Serve and Store
Put these on a pretty platter to show off the frosting. Here is a fun tip: give everyone a small knife. Encourage your guests to cut the cupcake right down the middle. It is so fun to watch the sprinkles spill out onto the plate!
Storing them is a breeze. The butter and oil mix keeps them soft for days. Put them in a tall container at room temperature for two to three days. Make sure the lid is high enough so it doesn’t squash your beautiful frosting. If you live somewhere super hot, keep them in the fridge for up to a week. Just take them out 20 minutes before eating so they soften up again!
PrintPinata Cupcakes
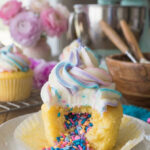
These fluffy vanilla cupcakes hide a joyful secret inside. Cut or bite into the golden sponge to reveal a vibrant cascade of hidden sprinkles. Made with a blend of butter for rich flavor and oil for lasting moisture, they deliver maximum party magic with zero stress.
- Prep Time: 15 minutes
- Cook Time: 17-20 minutes
- Total Time: 35 minutes (plus cooling)
- Yield: 12 cupcakes 1x
- Category: Dessert / Baking
- Cuisine: American / Festive
Ingredients
For the Cupcakes:
- ¼ cup unsalted butter, thoroughly softened
- ¼ cup neutral oil (avocado, canola, or vegetable)
- ¾ cup granulated sugar
- 2 large eggs, room temperature
- 1 ½ tsp pure vanilla extract
- 1 ½ cups all-purpose flour
- 1 ½ tsp baking powder
- ¼ tsp fine sea salt
- ⅔ cup buttermilk
For the Surprise & Topping:
- 1 batch vanilla frosting (buttercream or cream cheese)
- ¾ cup small candies or rainbow sprinkles
- Gel food coloring (your favorite colors)
Instructions
- Prep and Cream: Preheat your oven to 350°F (175°C) and line a 12-count muffin tin. Beat the soft butter, oil, and sugar on medium-high for 3-4 minutes until pale, fluffy, and textured like wet sand.
- Add Wet Ingredients: Beat in the room-temperature eggs one at a time, mixing well after each. Stir in the vanilla extract.
- Alternate the Dry Mix: Whisk the flour, baking powder, and salt in a separate bowl. Switch to a rubber spatula and alternate adding the flour mix and buttermilk to the wet ingredients, starting and ending with flour. Fold gently by hand and stop the second the last white streak disappears.
- Bake: Divide the batter into the liners, filling them only ⅔ to ¾ full. Bake on the center rack for 17-20 minutes. They are done when the tops spring back or a toothpick comes out clean. Cool in the tin for 5 minutes, then move to a wire rack to cool completely.
- Core and Stuff: Cut a 1-inch wide, 1-inch deep cone out of the top of each cooled cupcake. Slice off the pointy bottom of the cake cone to leave a flat, thin disc—this is your lid. Pour 1 tablespoon of sprinkles into the hole, then gently press the cake lid back on flush with the top.
- Paint and Decorate: Drop a star nozzle into a piping bag. Use a small, clean paintbrush to paint vertical stripes of gel food coloring up the inside walls of the bag. Spoon your plain white frosting down the center. Pipe a classic swirl over the cake lid to seal the secret inside.
Notes
- Serving Suggestion: Set a small dessert knife next to each plate. Encourage guests to slice their cupcake straight down the middle to enjoy the full visual payoff of the spilling sprinkles. Pairs beautifully with a glass of ice-cold milk.
- The Painter’s Trick: Squeeze a tiny bit of frosting onto a paper towel first until the color stripes show through evenly before you start piping onto the cupcakes.
- Quick Buttermilk Swap: Out of buttermilk? Stir 2 teaspoons of lemon juice or white vinegar into ⅔ cup of regular milk and let it sit for 5 minutes until slightly curdled.
- Storage Instructions: Keep these in a deep, airtight container at room temperature for 2-3 days (make sure the lid doesn’t crush your piped peaks). You can also store them in the fridge for up to a week. If refrigerated, let them sit out on the counter for 20-30 minutes before serving to restore their melt-in-your-mouth softness.
