

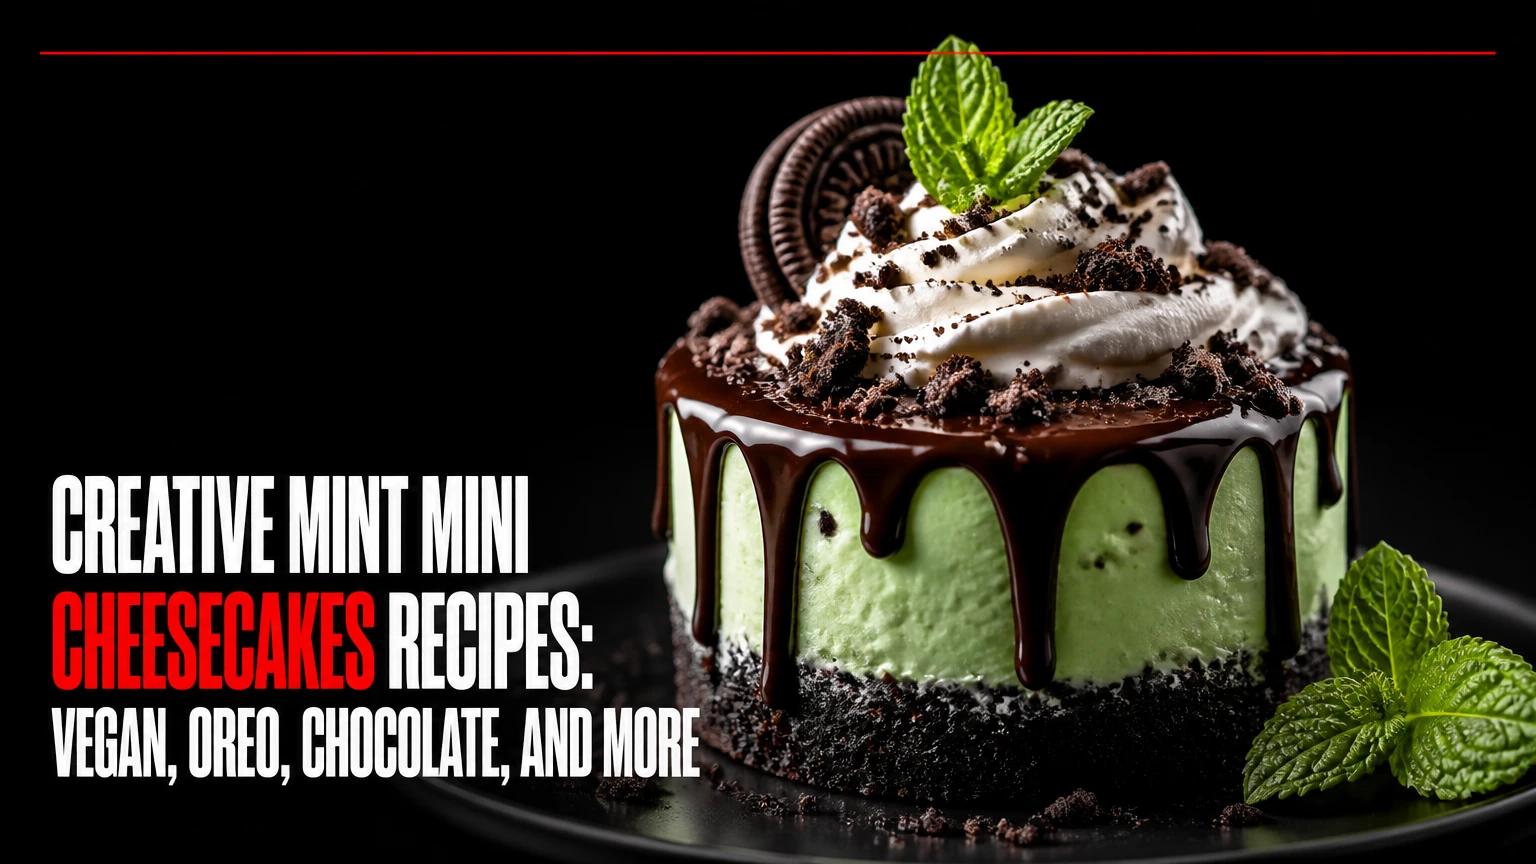
There’s something undeniably refreshing about the combination of mint and cheesecake. Imagine the creamy, tangy goodness of a classic cheesecake infused with the cool, invigorating flavor of mint. These mint mini cheesecakes are the perfect bite-sized treats for any occasion, offering a delightful twist on a beloved dessert.
Originating from the classic New York cheesecake, these mini versions add a splash of creativity and convenience. Each bite delivers a harmonious blend of rich cream cheese and minty freshness, making them an irresistible treat. Whether you’re hosting a party or simply indulging in a sweet craving, these mint mini cheesecakes are sure to impress.
Ingredients
To create these delectable mint mini cheesecakes, you need a handful of readily available ingredients. Here’s what you’ll need for the different components:
Crust
- 1 cup graham cracker crumbs
- 2 tablespoons granulated sugar
- 1/4 cup unsalted butter, melted
Cheesecake Filling
- 16 ounces cream cheese, softened
- 1/2 cup granulated sugar
- 2 large eggs
- 1/2 teaspoon peppermint extract
- 1/2 teaspoon vanilla extract
- 1/4 cup sour cream
- Green food coloring (optional)
- 1 cup heavy whipping cream
- 2 tablespoons powdered sugar
- 2 tablespoons cocoa powder
- 1/2 teaspoon vanilla extract
These ingredients will blend seamlessly to create the perfect mint mini cheesecakes, offering a refreshing twist on the classic dessert.
Tools
To create the perfect mint mini cheesecakes, having the right tools on hand is crucial. Here’s a list of essential tools that will help you achieve sheer perfection with ease:
- Muffin Tin: You’ll need a standard 12-cup muffin tin. This allows you to create individual portions of the mini cheesecakes.
- Paper Liners: Line the muffin tin with these to make removing the cheesecakes easier and to simplify cleanup.
- Mixing Bowls: Use various sizes for combining and mixing ingredients. A large bowl for the cheesecake mixture and a smaller one for the crust work well.
- Electric Mixer: A hand mixer or a stand mixer will save time and ensure a smooth, lump-free cheesecake batter.
- Measuring Cups and Spoons: Accurate measurements are key. Use these to ensure the right balance of ingredients.
- Food Processor: This is ideal for grinding the graham crackers into fine crumbs for the crust.
- Spatula: A rubber spatula will help you scrape down the bowl and spread the batter evenly.
- Cooling Rack: After baking, you’ll place your mini cheesecakes on this to cool them down uniformly.
- Piping Bag and Tips (Optional): For decorating, if you want to add some whipped cream or other decorative elements on top.
- Knife or Offset Spatula: Use this to separate the cheesecakes from the liners if they stick, allowing for clean edges.
Directions
Creating mint mini cheesecakes involves a few simple steps. Follow these directions to achieve perfect results every time.
For the Crust
- Preheat Oven: Preheat your oven to 325°F (163°C).
- Prepare Muffin Tin: Line a 12-cup muffin tin with paper liners.
- Mix Ingredients: In a food processor, combine 1 cup of chocolate wafer crumbs and 2 tablespoons of granulated sugar. Pulse until well combined.
- Add Butter: Melt 5 tablespoons of unsalted butter, then gradually add it to the crumbs while pulsing until the mixture resembles wet sand.
- Form Crust: Divide the crumb mixture evenly among the muffin cups, pressing it firmly into the bottom using the back of a spoon or a small glass.
- Bake Crust: Bake the crust for 10 minutes, then remove from the oven and allow it to cool while you prepare the filling.
For the Cheesecake Filling
- Blend Cream Cheese: In a large mixing bowl, beat 16 ounces of softened cream cheese with an electric mixer on medium speed until smooth.
- Add Sugar: Gradually add 3/4 cup of granulated sugar, continuing to beat until creamy and well combined.
- Incorporate Eggs: Add 2 large eggs, one at a time, beating well after each addition.
- Flavor: Mix in 1 teaspoon of pure vanilla extract and 1 teaspoon of peppermint extract.
- Color: If desired, add a few drops of green food coloring to achieve a minty hue, beating until the color is evenly distributed.
- Fill Muffin Cups: Pour the filling over the prepared crusts, filling each muffin cup almost to the top.
- Bake Cheesecakes: Bake the mini cheesecakes in the preheated oven for 20-25 minutes, or until the centers are set and the edges are slightly puffed.
- Cool: Remove from the oven and allow the cheesecakes to cool in the muffin tin for about 15 minutes. Then, transfer them to a cooling rack to cool completely.
- Chill: Refrigerate the cheesecakes for at least 2 hours, or until fully chilled.
- Decorate: Optionally, top each mini cheesecake with a dollop of whipped cream and a small mint leaf or sprinkle with chocolate shavings for a decorative touch.
By following these steps, you’ll create delightful mint mini cheesecakes that are as visually appealing as they are delicious.
Tips for Making Mint Mini Cheesecakes
Use Fresh Ingredients
Using the freshest ingredients is crucial for achieving the best flavor in your mint mini cheesecakes. Fresh cream cheese will give you that rich, tangy base, while fresh mint can elevate the freshness of the cheesecake. Make sure your eggs are fresh to ensure a smooth, creamy consistency.
Prep Ahead
If you want to save time, consider preparing your crust in advance. Simply mix your chocolate wafer crumbs, melted butter, and sugar, then press the mixture into your muffin tin. Store it in the refrigerator until you are ready to add the cheesecake filling.
Ensure Room Temperature Ingredients
Make sure your cream cheese is at room temperature before beginning. This makes it easier to blend and helps you avoid lumps in your cheesecake mixture. Room temperature eggs also incorporate more smoothly into the batter.
Avoid Overmixing
When mixing your cheesecake batter, blend just until everything is combined. Overmixing can incorporate too much air, leading to cracks in your baked cheesecakes. Mix on a low speed and be patient.
Perfect Baking Time
Keep an eye on your mini cheesecakes as they bake. Bake them at 325°F for about 18-22 minutes. They should be slightly jiggly in the center when done. Overbaking can result in a dry texture, while underbaking will leave your cheesecakes too soft.
Use a Water Bath
A water bath can help prevent cracks in your cheesecakes by providing a moist baking environment. Place your muffin tin in a larger pan filled with about an inch of hot water. This method ensures even baking and a smooth top.
Cooling is Key
Allow your mini cheesecakes to cool gradually. First, let them cool in the oven with the door slightly ajar for about an hour to prevent rapid temperature changes. Then, transfer them to a wire rack before refrigerating them for several hours or overnight.
Garnishing
Consider garnishing your mint mini cheesecakes with a dollop of whipped cream, a small mint leaf, or a sprinkle of chocolate shavings. These toppings can add an extra layer of flavor and visual appeal to your desserts.
By following these tips, you can create scrumptious, visually appealing mint mini cheesecakes that will impress any crowd.
How to Store
To keep your mint mini cheesecakes fresh and delicious, proper storage is essential. Here’s how I recommend storing them:
Refrigeration
- Cool Completely: After baking, allow the mint mini cheesecakes to cool completely at room temperature.
- Cover with Plastic Wrap: Place the mini cheesecakes in an airtight container or cover them tightly with plastic wrap to prevent them from drying out and absorbing fridge odors.
- Refrigerate: Store the covered mini cheesecakes in the refrigerator for up to 5 days. The cold will help maintain their creamy texture and minty freshness.
Freezing
- Initial Freeze: If you want to store your mint mini cheesecakes for a longer period, after they’ve cooled completely, place them on a baking sheet and freeze them uncovered for about an hour. This step helps firm up the cheesecakes.
- Wrap Individually: Once they are firmly frozen, wrap each mini cheesecake individually in plastic wrap. This prevents freezer burn and keeps them fresh.
- Airtight Container: Place the wrapped cheesecakes in an airtight container or a freezer-safe bag. Label with the date for reference.
- Freezing Time: You can freeze the mint mini cheesecakes for up to 2 months. When ready to enjoy, thaw them overnight in the refrigerator.
- Refrigerated Cheesecakes: For cheesecakes stored in the refrigerator, simply remove them and serve straight away or let them come to room temperature for about 20 minutes for the best texture and flavor.
- Frozen Cheesecakes: Thaw in the refrigerator overnight, then let them sit at room temperature for around 20 minutes before serving to enhance their creamy texture and taste.
By following these storage tips, your mint mini cheesecakes will retain their delightful flavor and creamy consistency, ready to be enjoyed at any time.
Can I Freeze This Mint Cheesecake?
Absolutely, you can freeze these mint mini cheesecakes to savor their delightful flavor at a later date. Here’s how you can do it effectively:
Preparation for Freezing
- Cool Completely: Make sure the mini cheesecakes are completely cooled to room temperature. This helps prevent condensation inside the freezer.
- Initial Freeze: Place the cooled cheesecakes on a baking sheet lined with parchment paper. Put them in the freezer uncovered for about 1-2 hours until they’re firm. This step prevents them from sticking together.
Wrapping and Storing
- Wrap Individually: Once firm, wrap each mini cheesecake tightly in plastic wrap. Ensure there are no exposed parts to prevent freezer burn.
- Group Packing: After wrapping individually, place the cheesecakes in an airtight container or a heavy-duty freezer bag. Label the bag with the date for easy tracking.
Freezing and Shelf Life
- Storage Duration: Properly wrapped and stored, these mint mini cheesecakes can be frozen for up to 2 months without losing their flavor and texture.
- Thaw Gradually: When you’re ready to enjoy, move the desired quantity of cheesecakes to the refrigerator and let them thaw overnight. This slow thawing process helps maintain their creamy consistency.
- Serve Cold: After thawing, serve the cheesecakes chilled for the best taste. They’ll have preserved their minty freshness and smooth texture.
Variations
Creating mint mini cheesecakes allows for endless creativity and fun twists on the classic recipe. Here are some variations to suit different preferences and occasions:
Chocolate Mint Mini Cheesecakes
If you love the combination of chocolate and mint, consider this variation. Start by adding 1/4 cup of cocoa powder to the cheesecake mixture before baking. This will infuse the batter with a rich chocolate flavor. For an extra touch, drizzle melted dark chocolate over the top of each cooled cheesecake and garnish with chocolate shavings.
Mint Oreo Mini Cheesecakes
Incorporate the beloved taste of Oreo cookies into your mint mini cheesecakes by using mint-flavored Oreos. Crush 15 mint Oreos and mix with 3 tablespoons of melted butter to form the crust. Additionally, chop 5 more Oreos and fold them into the cheesecake mixture for a delightful crunch in every bite.
Peppermint Patty Mini Cheesecakes
Bring a touch of indulgence with Peppermint Patty mini cheesecakes. After preparing the standard mint cheesecake mixture, place a miniature Peppermint Patty in the center of each cheesecake before baking. This creates a delicious surprise inside each bite. Decorate with a dollop of whipped cream and a sprinkle of crushed peppermint candies for a festive look.
Lemon Mint Mini Cheesecakes
For a refreshing twist, combine lemon and mint flavors. Add 2 tablespoons of lemon zest and 1 tablespoon of lemon juice to the cheesecake batter. The tangy lemon perfectly complements the mint’s coolness. Top with candied lemon slices for an elegant presentation.
Matcha Mint Mini Cheesecakes
Those who love matcha will enjoy this variant. Mix 2 teaspoons of matcha powder into the cheesecake batter for a beautiful green hue and earthy flavor. Incorporate mint extract as usual and garnish with a light dusting of matcha powder or a small mint leaf.
Vegan Mint Mini Cheesecakes
For a plant-based version, substitute the cream cheese with vegan cream cheese and use a flaxseed egg (1 tablespoon flaxseed meal + 2.5 tablespoons water) instead of a regular egg. Replace the crust with a mixture of 1 cup of nuts, 1 cup of dates, and a pinch of sea salt, blended until sticky. Proceed with the rest of the recipe, ensuring all components are vegan-friendly.
By experimenting with these variations, you can tailor mint mini cheesecakes to any palate, celebration, or dietary requirement.
Conclusion
Exploring the world of mint mini cheesecakes has been a delightful journey. With a range of creative variations, there’s something for everyone to enjoy. Whether you’re a fan of the classic mint flavor or looking to try something new like Matcha Mint or a Vegan option, these recipes offer endless possibilities. Don’t forget the handy tips on freezing and thawing to keep your treats fresh. Happy baking!
