

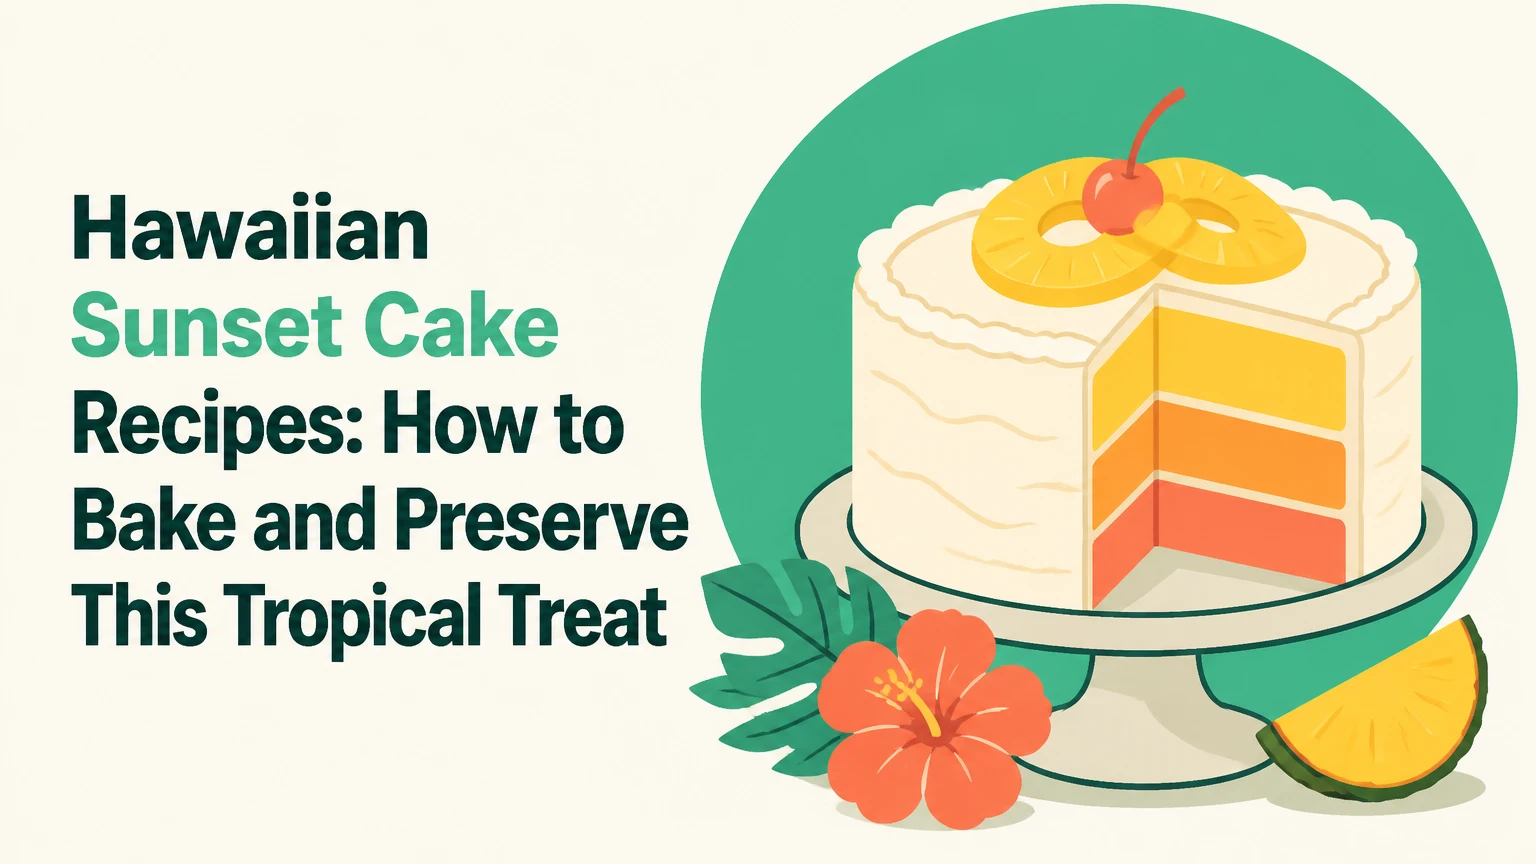
Imagine slicing into a cake that captures the vibrant hues of a Hawaiian sunset. My Hawaiian Sunset Cake does just that, blending tropical flavors with stunning layers of color. This dessert isn’t just a treat for your taste buds; it’s a feast for your eyes too.
Ingredients
To make this delightful Hawaiian Sunset Cake, you’ll need a blend of fresh ingredients and a touch of vibrant food coloring. Here’s the list of ingredients you’ll need, prepared for optimal results:
- 2 1/2 cups all-purpose flour, sifted
- 2 1/2 teaspoons baking powder
- 1/2 teaspoon baking soda
- 1/2 teaspoon salt
- 1 cup unsalted butter, softened
- 2 cups granulated sugar
- 4 large eggs, at room temperature
- 1 teaspoon vanilla extract
- 1 1/2 cups buttermilk, at room temperature
- Gel food coloring (yellow, orange, red)
- 1 cup crushed pineapple, drained
- 1/2 cup sweetened shredded coconut
- 8 oz cream cheese, softened
- 1/2 cup unsalted butter, softened
- 4 cups powdered sugar, sifted
- 1 teaspoon vanilla extract
- 2 tablespoons heavy cream
These ingredients will help you create the colorful, tropical layers that define the Hawaiian Sunset Cake. Make sure you have everything prepped and measured for a smooth baking experience.
Equipments
To create the perfect Hawaiian Sunset Cake, you’ll need the right equipment to ensure each layer comes out flawlessly and all components blend seamlessly. Here’s a list of what you’ll need:
Essential Baking Tools
- Mixing Bowls: I use three medium-sized mixing bowls to separate and mix the different layers of the cake batter.
- Electric Mixer: A stand mixer is highly recommended, but a hand mixer will also work for combining the ingredients smoothly.
- Measuring Cups and Spoons: Accurate measurements are crucial for the success of this cake.
- Rubber Spatula: Useful for scraping down the sides of the bowls and ensuring every bit of batter is used.
Cake Construction Tools
- 8-inch Cake Pans: You’ll need three, one for each colored layer. Ensure they are well-greased or lined with parchment paper to prevent sticking.
- Cooling Rack: Essential for cooling the cake layers evenly after baking.
- Offset Spatula: Perfect for spreading the frosting evenly over the cake layers.
- Cake Leveler or Serrated Knife: Helps in leveling each cake layer for a more even assembly.
- Cake Turntable: Not necessary, but makes the frosting process much easier and more professional-looking.
Final Touch Tools
- Piping Bag and Tips: For adding decorative touches with the frosting and adding coconut on top.
- Microplane or Zester: Ideal for zesting the pineapple or adding a citrus hint to the frosting.
- Pastry Brush: Helpful for brushing the cake layers with any syrup or juices to keep the cake moist.
| Equipment | Purpose |
|---|---|
| Mixing Bowls | Mixing different layers of cake batter |
| Electric Mixer | Combining ingredients smoothly |
| Measuring Cups and Spoons | Accurate measurement |
| Rubber Spatula | Scraping down the sides of bowls |
| 8-inch Cake Pans | Baking each colored layer |
| Cooling Rack | Cooling the cake layers evenly |
| Offset Spatula | Spreading frosting evenly |
| Cake Leveler/Serrated Knife | Leveling each cake layer |
| Cake Turntable | Easier cake frosting |
| Piping Bag and Tips | Adding decorative touches |
| Microplane/Zester | Zesting pineapple or adding citrus hint to frosting |
| Pastry Brush | Brushing layers with syrup or juices |
Equipped with these tools, you’ll be well-prepared to bake and assemble a stunning Hawaiian Sunset Cake that will impress both visually and in taste.
Directions
Now that we’ve gathered our ingredients and equipment, let’s dive into creating this beautiful and delicious Hawaiian Sunset Cake. Follow these steps precisely to ensure your cake is a tropical masterpiece.
Prep
- Preheat the Oven: Set your oven to 350°F (175°C) and allow it to preheat while you prepare the batter.
- Prepare Cake Pans: Grease and flour three 9-inch round cake pans. Line the bottoms with parchment paper for easy removal.
- Mix Dry Ingredients: In a medium bowl, whisk together 3 cups of all-purpose flour, 2 ½ teaspoons of baking powder, 1 teaspoon of baking soda, and ½ teaspoon of salt.
- Mix Wet Ingredients: In a large bowl or stand mixer, beat 1 cup of unsalted butter until creamy. Gradually add 2 cups of granulated sugar and beat until fluffy. Add 4 large eggs, one at a time, ensuring each is well-incorporated before adding the next.
- Combine Ingredients: Slowly add the dry ingredient mixture to the wet ingredients, alternating with 1 cup of buttermilk. Begin and end with the flour mixture. Add the zest of 1 orange and 1 tablespoon of vanilla extract. Mix until just combined.
Cook
- Bake Cake Layers: Divide the batter evenly among the three prepared cake pans, smoothing the tops with a rubber spatula. Bake in the preheated oven for 25-30 minutes or until a toothpick inserted into the center comes out clean.
- Cool Cake Layers: Allow the cakes to cool in the pans for 10 minutes. Then, remove the cakes from the pans and let them cool completely on a cooling rack.
- Level the Cakes: Once the cakes are completely cool, use a cake leveler or serrated knife to trim the tops, ensuring even layers.
- Prepare Frosting: In a large bowl, beat 2 cups of chilled heavy cream until soft peaks form. Gradually add 1 cup of powdered sugar and 1 teaspoon of vanilla extract, continuing to beat until stiff peaks form.
- Assemble the Cake: Place the first cake layer on a cake turntable. Spread an even layer of frosting on top using an offset spatula. Repeat with the second and third layers.
- Frost the Cake: Apply a thin crumb coat of frosting all over the cake and chill for 15 minutes. Afterwards, apply the final layer of frosting, smoothing it evenly around the cake.
- Decorate: Use a piping bag fitted with a star tip to pipe decorative borders along the top and bottom edges of the cake. Garnish with fresh pineapple slices, toasted coconut flakes, and maraschino cherries for a tropical finishing touch.
Enjoy crafting and savoring this Hawaiian Sunset Cake, bursting with tropical flavors and vibrant colors.
Cake Tips
Here are some useful tips to ensure your Hawaiian Sunset Cake turns out perfectly each time.
How to Drain Pineapple for the Filling
- Use a Sieve: Pour the canned pineapple into a sieve or strainer. Allow the excess juice to drain into a bowl for about 10 minutes.
- Press Gently: Use the back of a spoon to press the pineapple gently in the strainer. This helps remove more liquid without mashing the fruit.
- Pat Dry: Transfer the drained pineapple onto paper towels. Pat it dry to remove any remaining moisture, ensuring your filling is not overly wet.
- Reserve Juice: Don’t discard the drained juice. You can use it to enhance the flavor of your frosting or as a simple syrup for brushing the cake layers.
- Flavor Variations: You can swap out the pineapple for other tropical fruits like mango or passion fruit for a different twist.
- Frosting Options: Try using coconut cream cheese frosting or add a hint of lime zest to your standard frosting for a zesty kick.
- Layer Adjustments: Incorporate a layer of coconut or macadamia nuts between the cake layers for added texture.
- Decoration: Top the cake with a mix of fresh tropical fruits like kiwi, papaya, and star fruit for an eye-catching presentation. You can also add edible flowers for extra flair.
- Dietary Alternatives: Make the cake gluten-free by using a gluten-free flour blend, or opt for a dairy-free version by using plant-based milk and butter alternatives.
Variations
Creating a Hawaiian Sunset Cake provides opportunities to infuse various creative touches. Here are some options to tailor the cake to personal preferences:
Tropical Fruit Infusions
For a unique twist, you can swap or add fruits to the layers or the filling:
- Mango: Replace pineapple with finely chopped mango for a slightly different tropical taste.
- Passion Fruit: Add fresh passion fruit pulp to the filling for a tangy contrast.
- Papaya: Use puréed papaya in the batter for an extra tropical flavor.
Frosting Alternatives
Changing the frosting can also add a new dimension to the cake:
- Coconut Cream Cheese Frosting: Combine cream cheese, butter, powdered sugar, and coconut extract for a creamy and flavorful frosting.
- Lime Zest Buttercream: Add freshly grated lime zest to traditional buttercream frosting for a zesty kick.
- Whipped Coconut Cream: For a lighter option, use whipped coconut cream with a hint of vanilla extract.
Layer Adjustments
Incorporate additional ingredients into the cake layers for texture and flavor:
- Toasted Coconut: Add toasted shredded coconut to the batter for a crunchy texture.
- Macadamia Nuts: Chopped macadamia nuts in the layers can introduce a nutty flavor.
- Fresh Pineapple Slices: Place fresh pineapple slices between the layers for added moisture and flavor.
Decorative Ideas
Elevate the presentation with creative decorations:
- Tropical Fruits: Garnish with slices of kiwi, mango, pineapple, and papaya.
- Edible Flowers: Use edible flowers like hibiscus or orchids for a vibrant and colorful finish.
- Shredded Coconut: Sprinkle toasted or untoasted shredded coconut on the frosting for a simple yet elegant touch.
Dietary Alternatives
Accommodate dietary needs without sacrificing flavor:
- Gluten-Free: Use a gluten-free flour blend to replace all-purpose flour.
- Dairy-Free: Substitute dairy-based ingredients with plant-based alternatives like coconut milk or almond butter.
- Sugar-Free: Opt for natural sweeteners like stevia or monk fruit extract instead of sugar.
These variations will ensure your Hawaiian Sunset Cake remains fresh and exciting, catering to diverse tastes and dietary requirements. Experimenting with these options can help create a truly personalized and memorable dessert that captures the essence of a tropical paradise.
How to Store Hawaiian Sunset Cake
Storing your Hawaiian Sunset Cake properly is vital to maintain its freshness and flavors. Follow these steps to ensure your cake stays just as delightful as when first baked.
Make-Ahead Instructions
If you want to make your Hawaiian Sunset Cake ahead of time, you can do so without sacrificing its quality. Once the cake has completely cooled, wrap each layer tightly in plastic wrap. Then, place the wrapped layers in an airtight container or a large, resealable plastic bag. This will prevent the cake from drying out and preserve its tropical flavors. Store the wrapped layers in the refrigerator for up to three days or in the freezer for up to one month.
To thaw frozen layers, transfer them from the freezer to the refrigerator and let them thaw overnight. Assemble and frost your cake once all layers are fully thawed.
Preventing Maraschino Cherries from Leaking
Maraschino cherries can add a delightful burst of color and flavor to your Hawaiian Sunset Cake, but their liquid can sometimes seep into the cake layers or frosting, affecting the texture. To prevent this, drain the cherries thoroughly on a paper towel before adding them to your cake. Pat them dry gently to remove excess moisture.
For an extra layer of protection, coat each cherry lightly in a small amount of flour or cornstarch before incorporating them into the cake. This will help absorb any remaining moisture and prevent leaking, keeping your cake’s texture intact and delicious.
Conclusion
Creating a Hawaiian Sunset Cake is a delightful way to bring a touch of the tropics to any occasion. With its vibrant layers and exotic flavors, it’s sure to impress both visually and taste-wise. By following the detailed instructions and tips provided, you can ensure your cake remains fresh and delicious. Whether you’re making it ahead or serving it fresh, this cake is a beautiful and tasty centerpiece. Enjoy the process and the smiles it brings to your table!
