

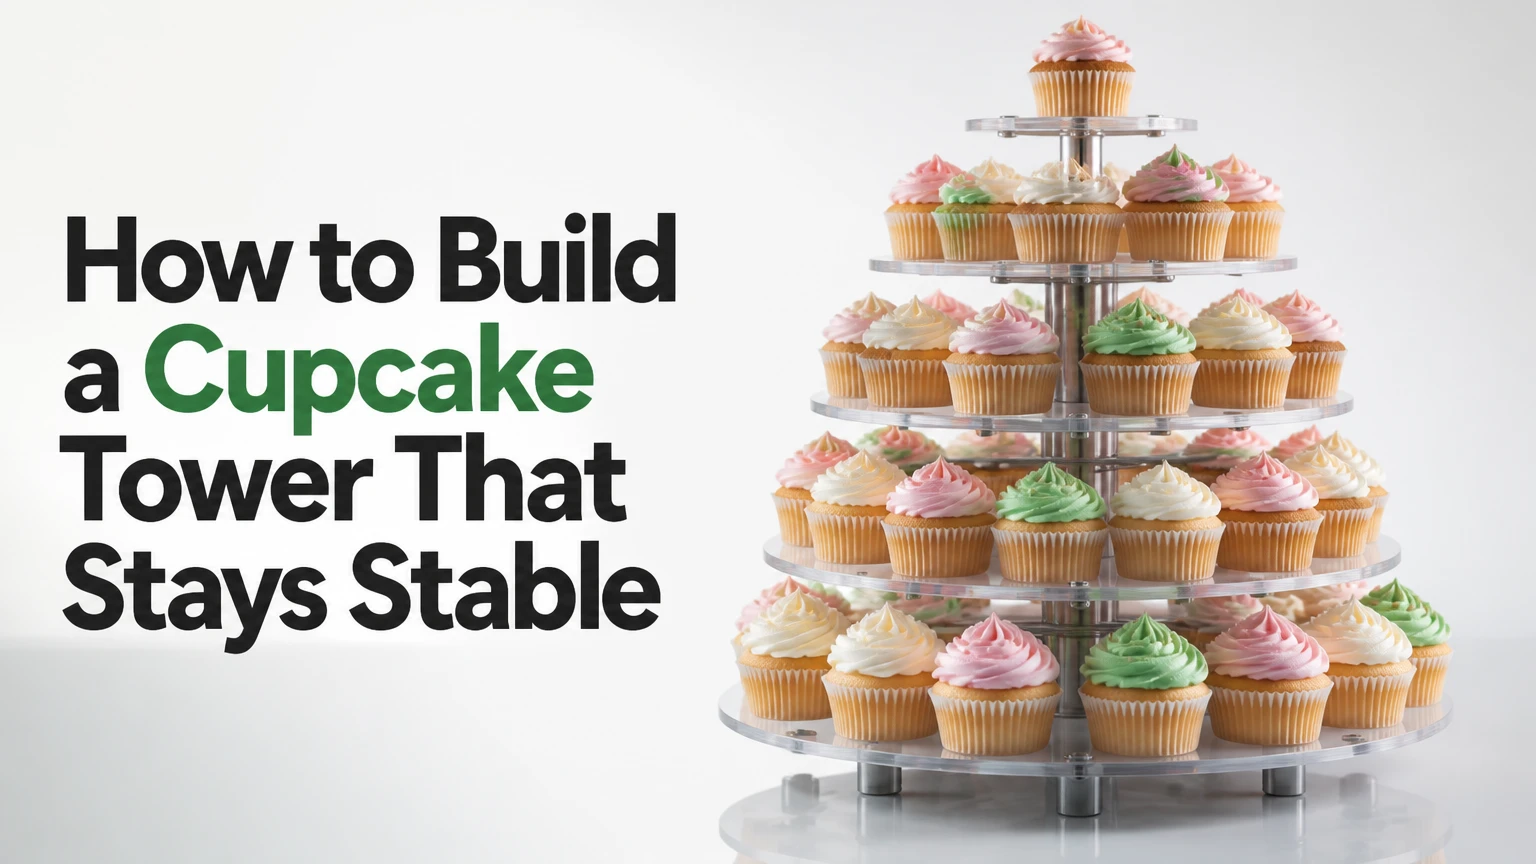
To build a cupcake tower, assemble a level, food-safe tier stand from the largest base upward, tighten every connector, and load cupcakes symmetrically from the bottom tier to the top. A typical three-to-five-tier tower takes 30-45 minutes to assemble and fill, with stability determined mainly by the base, connector fit, and cupcake clearance.
Key Facts
A cupcake tower should be assembled on a level, rigid surface with its largest plate at the bottom.
Standard 2.5-inch cupcakes usually need 2.75-3.25 inches of usable diameter per position, including retrieval space.
Load the bottom tier first, then work upward while distributing cupcakes around each plate.
A 4-6-inch cutting cake belongs only on a stand rated for its weight and diameter.
Typical stand prices range from $10-$20 for cardboard, $30-$80 for acrylic, and $70-$150 or more for custom wood or metal.
The safest transport method is to carry the empty stand separately and load cupcakes at the venue.
What Is a Cupcake Tower?
A cupcake tower is a tiered display stand that arranges individual cupcakes on stacked plates, shelves, rings, or platforms. The structure replaces most of the visual volume of a large celebration cake while allowing guests to select separate portions.
Unlike a traditional stacked cake, a cupcake tower does not rely on cake boards and dowels between edible layers. The stand carries the load through plates, feet, pillars, rods, screws, or side supports. Cupcakes remain separate, so a baker can offer multiple flavors without cutting and plating a single dessert.
Cupcake towers work well for weddings, birthdays, school events, baby showers, and dessert tables. They are less suitable when the event requires a large cake to remain outdoors for hours, when the stand has no verified weight rating, or when guests need very rapid buffet service from a crowded table.
How Does the Structure Work?
A tiered cupcake stand transfers weight vertically through its support system. The broadest plate creates the footprint, the central pillar or side supports carry the upper tiers, and the lowest tier keeps the center of gravity close to the table.
A stable tower has four conditions: a level base, tight connections, adequate vertical clearance, and balanced loading. A tall stand with a narrow footprint can remain upright when untouched but tip when a guest pulls a cupcake from one side, so serving access matters as much as static weight.
Before You Start
Prepare the stand, cupcakes, tools, and serving area before assembly. The following figures are typical planning values for a clean indoor setup, not guarantees for every product.
| Preparation item | Typical requirement | Why it matters |
|---|---|---|
| Assembly time | 10-15 minutes | Covers stand construction only |
| Cupcake loading time | 15-30 minutes | Covers 50-100 standard cupcakes |
| Total working time | 30-45 minutes | Excludes baking and decoration |
| Stand cost | $10-$150+ | Depends on material and tier count |
| Work surface | 24-36 inches wide | Allows rotation and inspection |
| Non-slip mat | 1 mat, base-sized | Limits movement on smooth tables |
Tools and Materials
Use the stand’s original screws, washers, pillars, plates, and feet whenever possible. Add a soft, clean cloth, food-safe surface cleaner, paper towels, a small screwdriver if the manufacturer permits one, and a phone-level application or bubble level.
For the display, prepare standard cupcakes with fully set frosting, a ruler, spare liners, a cake board if a top cake is used, and a transport box with a flat base. Do not place unwrapped cardboard, painted wood, or unknown plastic directly beneath exposed food unless the material is intended for food contact.
How to Build a Cupcake Tower
Build a cupcake tower in six stages: inspect and clean the components, level the base, attach the lowest support, stack the plates, load the cupcakes, and add any top cake or decoration. Reserve 30-45 minutes, and perform the final stability test before guests arrive.
Step 1: Inspect and Sanitize Every Component
Wash reusable plates and supports according to the manufacturer’s instructions, then use a food-contact-safe sanitizer when the material allows it. Let every part dry completely because moisture weakens cardboard, makes acrylic slippery, and can encourage cupcake liners to slide.
Check each plate for cracks, bent edges, sharp burrs, or residue in screw holes. Inspect threads and washers for missing pieces. A loose washer can create a wobble that tightening the visible top screw will not fix.
Place the dry parts on a clean towel in assembly order. Set a non-slip mat beneath the future base, but keep the mat flat so it does not create a raised edge.
You will know Step 1 worked when: every plate is dry, clean, undamaged, and matched with its connector.
Common mistake: assembling damp plates. Moisture is especially damaging to disposable cardboard towers.
Step 2: Level and Secure the Base
Put the largest plate or base platform on a rigid table, then attach its feet or bottom pillar exactly as the product instructions show. Check the base from two directions with a bubble level or phone-level application.
A base that is only slightly tilted can become visibly unstable after four or five tiers. Correct the table or use a thin, stable shim beneath the base, never a loose napkin that can compress during service.
Do not use a tablecloth fold as the main leveling device. A folded cloth can shift when a guest reaches across the display, while a thin rigid shim stays in one position.
You will know Step 2 worked when: the base does not rock when you press opposite edges with two fingers.
Common mistake: placing a tall stand on a soft buffet cloth without checking the underlying table.
Step 3: Attach the First Support
Screw or fit the first central pillar, rod, or side support into the base. Tighten it by hand first, then use only the tool and pressure permitted by the stand’s instructions.
Over-tightening acrylic components can create stress cracks around screw holes. Under-tightening leaves play between the pillar and plate, which becomes amplified at the top of the tower.
If the design uses a central axis, hold the pillar vertical while tightening the connection. If the design uses side columns, attach each column evenly so one side does not carry more load.
You will know Step 3 worked when: the first support remains vertical while you gently rotate the base.
Common mistake: tightening one side-support screw fully before fitting the matching support.
Step 4: Stack Plates With Clearance
Install the second-largest plate over the first support, add its washer or connector, and tighten it before adding the next pillar. Repeat the sequence from the widest tier to the narrowest tier.
Measure the vertical opening between tiers before adding cupcakes. A practical target is at least 2 inches of usable clearance, but tall buttercream swirls, fondant decorations, and toppers may require 3-4 inches.
| Cupcake style | Typical total height | Recommended vertical clearance |
|---|---|---|
| Flat buttercream swirl | 2.75-3.25 inches | 2.0-2.5 inches |
| Tall piped buttercream | 3.5-4.5 inches | 3.0-4.0 inches |
| Fondant topper | 4.0-5.0 inches | 3.5-4.5 inches |
| Mini cupcake | 1.5-2.25 inches | 1.5-2.0 inches |
| Top cutting cake | 4-6 inches diameter | Product-specific clearance |
A measurement between empty plates is not the same as usable clearance. Subtract the height of the cupcake liner and frosting peak, then check whether a guest can grip the liner without touching the tier above.
You will know Step 4 worked when: every plate is level, every connector is tight, and the tallest decoration clears the plate above it.
Common mistake: assuming a standard pillar fits every frosting style.
Step 5: Load Cupcakes From the Bottom Up
Load the lowest tier first, placing cupcakes in opposite positions around the plate rather than filling one side at a time. Continue upward only after each lower tier has enough weight to keep the base stable.
Leave approximately 0.5 inch between cupcake liners when the frosting is narrow, and increase the gap when frosting extends beyond the liner. The correct test is practical: a guest should be able to remove one cupcake vertically without brushing the neighboring frosting.
Use the capacity figures below as planning estimates for standard 2.5-inch cupcakes. Actual capacity changes with liner diameter, frosting width, plate rim, pillar size, and the space needed for fingers.
| Tier diameter | Typical standard cupcake capacity | Practical filled count |
|---|---|---|
| 6 inches | 4-6 cupcakes | 4 |
| 8 inches | 8-12 cupcakes | 8-10 |
| 10 inches | 12-16 cupcakes | 12-14 |
| 12 inches | 18-24 cupcakes | 18-20 |
| 14 inches | 25-32 cupcakes | 25-28 |
| 16 inches | 35-45 cupcakes | 35-40 |
The lower end is safer for tall frosting and guest access. The upper end may work for compact liners and a display that will not be served directly from the stand.
You will know Step 5 worked when: cupcakes remain upright after a gentle table vibration and every position has a clear removal path.
Common mistake: filling the visible front of a tier first while leaving a heavy cluster at the back.
Step 6: Add the Cutting Cake or Topper
Place a small cutting cake on the top tier only after confirming the stand’s weight rating, platform diameter, and vertical clearance. A 4-inch cake usually weighs less than a 6-inch cake, but frosting, filling, fondant, and a thick cake board can change the load substantially.
Use a cake board that fits inside the top platform rather than extending beyond its edge. If the top tier is decorative only, choose a lightweight topper, flowers approved for food display, or a small sign instead of a heavy edible cake.
A cutting cake creates a traditional focal point, but the arrangement is optional. A cupcake tower without a cake is easier to transport and often gives guests more usable portions.
You will know Step 6 worked when: the top element is centered, stable, accessible for photographs, and not pressing against the next tier.
Common mistake: placing a full-size celebration cake on a top plate designed only for cupcakes.
How Many Cupcakes Do You Need?
Plan one standard cupcake per guest for a dessert-only service, then add 10-15% for seconds, handling damage, and uneven flavor demand. For a meal followed by other desserts, 0.75-1 cupcake per guest is often a practical planning range.
A 100-guest wedding, for example, might require 100-115 cupcakes when cupcakes are the primary dessert. A dessert table with fruit, cookies, and a cutting cake may need closer to 75-90 cupcakes, depending on serving size.
| Guest count | Dessert-only quantity | Shared dessert-table quantity | Typical stand arrangement |
|---|---|---|---|
| 24 guests | 27-28 cupcakes | 20-24 cupcakes | 3 tiers |
| 50 guests | 55-58 cupcakes | 40-50 cupcakes | 3-4 tiers |
| 75 guests | 83-86 cupcakes | 60-75 cupcakes | 4 tiers |
| 100 guests | 110-115 cupcakes | 75-100 cupcakes | 4-5 tiers |
| 150 guests | 165-173 cupcakes | 115-150 cupcakes | 5 tiers or two towers |
The stand’s nominal capacity is not always its service capacity. Reserve several positions for decorative spacing, leave the outer edge clear enough for removal, and replenish from covered boxes instead of overloading the display at the beginning.
Which Cupcake Tower Material Should You Choose?
Acrylic is usually the best reusable choice for formal events, cardboard is the lowest-cost option for one-time parties, wood offers the greatest visual weight, and metal works well when its fixed ring spacing matches the cupcake size. Material selection should follow the event’s handling, weather, cleaning, and storage demands.
| Stand material | Typical price | Typical use | Main limitation |
|---|---|---|---|
| Cardboard | $10-$20 | Birthday or school party | Moisture and low lateral strength |
| Acrylic | $30-$80 | Wedding or reusable display | Scratches and visible fingerprints |
| Wood | $70-$150+ | Rustic event or permanent prop | Heavy, bulky, harder to sanitize |
| Metal | $40-$120 typical | Vintage display or compact service | Fixed ring size and limited flexibility |
| Foam-board DIY | $15-$35 materials | Short indoor display | Low moisture and weight tolerance |
Cardboard should remain dry and should not carry a heavy top cake unless the manufacturer explicitly rates it for that load. Acrylic is easier to wipe clean, but transparent surfaces reveal dust and fingerprints, so final polishing should happen after structural assembly and before loading.
Wooden platforms need a sealed, food-safe finish and a cleaning method that does not saturate the material. Metal rings may hold cupcakes securely, although they can restrict liner size and make large frosting swirls difficult to remove.
How Much Does a Cupcake Tower Cost and Take?
A cupcake tower typically costs $10-$150 or more for the stand, while physical assembly and loading take 30-45 minutes for 50-100 cupcakes. Baking, cooling, frosting, packaging, venue travel, and replenishment require separate time and budget.
| Cost or time component | Typical range | Applies to |
|---|---|---|
| Disposable cardboard stand | $10-$20 | One event |
| Reusable acrylic stand | $30-$80 | Three-to-five tiers |
| Custom wood or metal stand | $70-$150+ | Specialty styling |
| Structural assembly | 10-15 minutes | Empty stand |
| Loading 50 cupcakes | 10-20 minutes | Moderate spacing |
| Loading 100 cupcakes | 20-30 minutes | Careful arrangement |
| Venue setup buffer | 15-30 minutes | Leveling and inspection |
A professional setup should include extra cupcakes in closed transport boxes, spare liners, napkins, serving tongs if appropriate, and a small leveling shim. These inexpensive supplies prevent a display problem from becoming a dessert shortage.
How Should You Transport a Cupcake Tower?
Transport the stand empty and assemble it at the venue whenever possible. Carry frosted cupcakes in single-layer boxes with enough headroom, keep the boxes level, and place them on a flat vehicle surface rather than a passenger seat.
For a short indoor event, assemble the tower at the venue, verify the base, and load cupcakes 20-40 minutes before service. For a long drive, keep cupcakes chilled only as appropriate for the recipe and packaging, then allow condensation and frosting texture to stabilize before display.
Do not drive with a fully loaded tall tower unless the stand manufacturer specifically provides a transport system. Braking, cornering, road vibration, and a guest-ready tablecloth can apply lateral force that static countertop testing never reproduces.
Outdoor and Warm-Room Variations
Buttercream, cream cheese frosting, whipped toppings, and filled cupcakes have different temperature limits. The U.S. Food and Drug Administration advises refrigerating perishable foods within two hours, or within one hour when ambient temperatures exceed 90°F, so an outdoor display needs shade, short service windows, or suitable chilled storage.
Use a low tower or two smaller towers in windy conditions. Keep the base away from table edges, use a rigid non-slip mat, and replenish small groups of cupcakes rather than exposing the full quantity to heat.
Common Mistakes and How to Fix Them
The most common cupcake tower failures are loose connectors, an uneven base, overcrowded cupcakes, top-heavy loading, insufficient clearance, and premature transport. Diagnose the structure before adjusting the cupcakes because decoration cannot compensate for a weak foundation.
| Failure | Likely cause | Immediate fix | Prevention |
|---|---|---|---|
| Tower wobbles | Loose base or pillar thread | Unload upper tiers, retighten base | Inspect every connector before loading |
| Cupcakes slide | Leaning plate or slick surface | Level base, add approved grip | Test an empty plate first |
| Frosting touches above | Short pillar or tall swirl | Move cupcakes to a lower tier | Measure decorated height |
| Stand tips | Heavy upper load | Remove top cake and upper tier | Load bottom upward |
| Cardboard bends | Moisture or excess weight | Replace damaged section | Keep stand dry and within rating |
| Guests cannot remove cakes | Overcrowding | Remove every second cupcake | Preserve a finger-width access path |
A small dot of buttercream beneath a liner can reduce sliding on a clean, slick plate, but the technique is a secondary aid, not a repair for a tilted stand. Never use adhesive, tape, or non-food-safe putty where it could contact food.
An expert rule of thumb is to perform a “two-finger test” before service: press opposite edges of the base lightly, then touch the top tier. Any delayed sway indicates that the tower needs unloading and correction.
What Are the Best DIY Alternatives?
A DIY cupcake tower can use sturdy cake boards, food-safe risers, upside-down serving bowls, or decorated boxes, provided the materials are rigid, clean, level, and strong enough for the intended load. The safest homemade designs keep tiers wide, short, and easy to inspect.
A practical disposable design uses three or four food-safe cardboard platforms separated by inverted boxes wrapped in clean decorative paper. Keep the cupcake contact surfaces uncovered or line them with food-safe boards, and avoid loose glitter, fibrous tissue, or paper that can shed onto frosting.
For a rustic design, use sealed wooden rounds with non-slip feet and independent risers. Do not use untreated tree slices directly under food because porous wood can retain moisture and is difficult to clean reliably.
Expert Rules for a Reliable Display
Professional cake decorators usually treat the tower as a serving fixture, not merely a photograph prop. Three rules prevent most failures:
- Design for removal, not maximum capacity. A plate that holds 24 cupcakes on paper may serve only 18 comfortably when frosting is tall and guests must reach from one side.
- Test the exact decorated cupcake. A 2.5-inch liner measurement does not predict the footprint of a 4-inch buttercream swirl or a topper.
- Separate visual height from structural height. A short, broad tower with flowers or a backdrop can look taller while remaining more stable than a narrow five-tier stand.
A cupcake tower is also a poor choice for unsupervised service when the top tiers sit above young children’s reach or when the display blocks the only route to plates and napkins. Place the table where guests can approach from at least two sides, or reserve a server to replenish and hand out upper-tier cupcakes.
Frequently Asked Questions
Can I Put a Regular Cake on a Cupcake Tower?
Only if the top platform and support system are rated for the cake’s weight, diameter, and board. A small 4-6-inch cutting cake is the usual practical limit for many display stands, but the manufacturer’s specifications control. A full-size cake can overload a cardboard, wire-ring, or decorative acrylic tower.
Should Cupcakes Be Refrigerated Before Display?
Refrigerate cupcakes when the recipe requires it, especially products containing cream cheese, custard, whipped cream, or other perishable fillings. Bring them to the serving area in covered boxes, protect them from condensation, and follow FDA two-hour guidance, reduced to one hour above 90°F.
How Do I Decorate a Cupcake Tower?
Decorate the stand with a table runner, flowers approved for food display, ribbon attached away from food, a backdrop, or coordinated cupcake wrappers. Keep loose glitter, small beads, and shedding materials away from exposed frosting, and place heavy decorations on the table rather than the upper tiers.
Can I Mix Cupcake Flavors on One Tower?
Yes. Group flavors by tier or alternate them in a repeating pattern, then label each flavor at table level. Keeping similar frosting colors together makes the display orderly, while a small flavor map prevents guests from repeatedly handling cupcakes to identify them.
How Do I Store Leftover Cupcakes After the Event?
Move leftover cupcakes into covered, single-layer containers as soon as service ends. Store them according to the frosting and filling requirements, separate fragile decorations from the lids, and avoid leaving perishable cupcakes at room temperature beyond the applicable food-safety window.
The Bottom Line
To build a cupcake tower successfully, start with a clean, level base, assemble the widest tier first, tighten every support, measure frosting clearance, and load cupcakes symmetrically from the bottom upward. Choose acrylic for repeat formal use, cardboard for a dry one-time party, wood for a stable rustic display, and metal when fixed cupcake rings fit the decoration. Transport the empty tower whenever possible, then perform a final two-finger stability test before guests serve themselves. A well-planned cupcake tower is defined by safe access and reliable balance, not by the maximum number of cupcakes squeezed onto its plates.
