

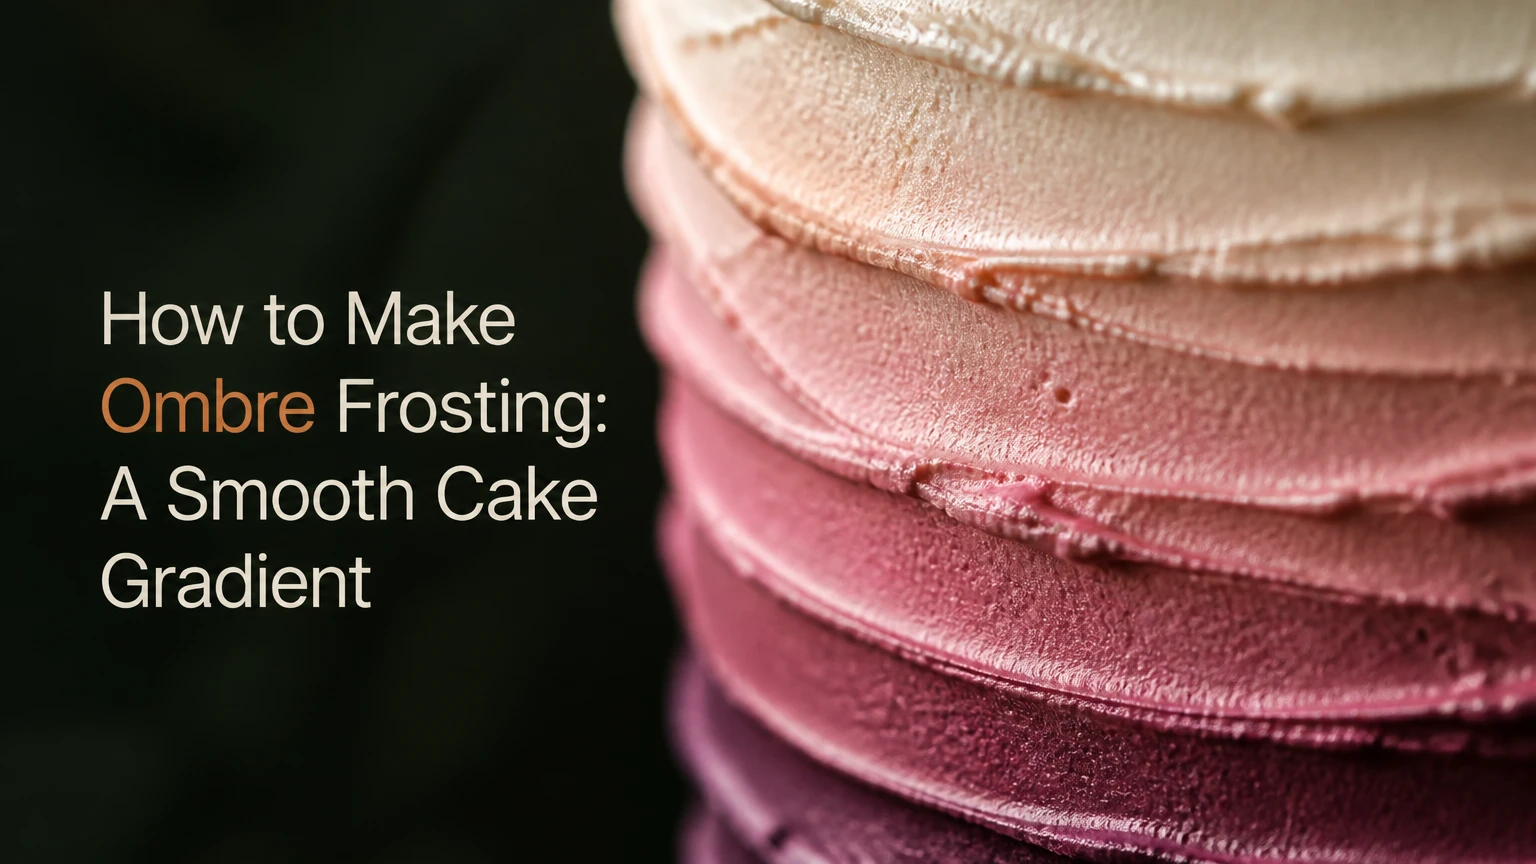
Ombre frosting is a cake-decorating finish in which buttercream or another spreadable icing changes gradually from a dark shade at the bottom to a pale shade at the top. The most reliable method uses three to five related colors, pipes connected bands around a chilled crumb-coated cake, then smooths the surface with a bench scraper.
Key Facts at a Glance
- Three to five shades create a readable ombre gradient without excessive mixing or cleanup.
- Gel or paste food coloring preserves frosting structure better than large amounts of liquid coloring.
- A 6-inch cake usually needs about 4-5 cups of frosting for filling, crumb coating, and decoration.
- A chilled crumb coat prevents cake crumbs from streaking through the colored outer frosting.
- The bench scraper should be cleaned after each rotation when adjacent shades begin mixing.
- Typical preparation and decoration time is 30-45 minutes after the cake layers have cooled.
What Ombre Frosting Means
Ombre frosting is a controlled color transition, not a series of unrelated stripes. A traditional cake moves from the deepest shade at the base through progressively lighter versions of the same hue toward the top, although reverse gradients and multicolor progressions also work.
The technique depends on two opposing goals: the color bands must touch closely enough to blend, but they must not be scraped so aggressively that the entire cake becomes one dull color. Frosting consistency matters as much as color selection. Soft buttercream spreads easily but can slide, while stiff buttercream holds a band but may tear during smoothing.
A monochromatic gradient is the easiest starting point. For example, pink, soft pink, blush, pale pink, and white are visually related because they share one base hue. Complementary colors, such as purple fading into yellow, need a deliberate intermediate shade because direct blending can create a gray or brown transition.
Ombre Directions and Color Structures
| Style | Color direction | Suitable example | Difficulty |
|---|---|---|---|
| Classic vertical | Dark bottom to pale top | Navy, blue, sky blue, white | Low |
| Reverse vertical | Pale bottom to dark top | White, blush, rose, burgundy | Medium |
| Two-tone | Dark side to light side | Teal fading into white | Medium |
| Rainbow ombre | Several adjacent hues | Coral, orange, yellow, green | Medium |
| Horizontal tier fade | Dark lower tier to pale upper tier | Plum, lavender, ivory | High |
How Does the Ombre Gradient Work?
An ombre gradient works because adjacent frosting bands are mechanically softened at their borders by a scraper. The scraper removes excess icing, levels ridges, and drags a small amount of one shade into the next; a smooth result requires connected bands, moderate pressure, and limited passes.
The scraper does not create color from nothing. If a gap remains between rings, scraping exposes the crumb coat instead of producing a clean transition. If the frosting is too warm, the scraper pushes rather than cuts the icing, causing bulges and bleeding. If the frosting is too cold, the scraper catches hard ridges and pulls pieces away.
A turntable gives the most even result because the cake rotates while the scraper remains nearly stationary. The decorator controls pressure, not speed. One or two deliberate rotations usually produce a cleaner gradient than repeated corrective scraping.
The Three Controls That Determine the Finish
- Color spacing: Use visibly different shades, but avoid extreme jumps between neighboring bands.
- Frosting temperature: Aim for smooth, spreadable buttercream that holds a ridge for several seconds.
- Scraper pressure: Press firmly enough to level the surface, but stop when the bands become smooth and identifiable.
Before You Start
Prepare the cake, frosting, coloring, and tools before tinting any shade. For a 6-inch, two-layer cake, plan on 4-5 cups of finished frosting, 30-45 minutes of decorating time, and a chilled cake surface.
| Requirement | Typical specification | Why it matters |
|---|---|---|
| Cake size | 6-inch, 2 layers | Uses approximately 4-5 cups frosting |
| Cake condition | Fully cool, below room warmth | Warm cake softens buttercream |
| Crumb coat | 1/8-1/4 inch thick | Traps loose crumbs |
| Chill time | 20-30 minutes | Firms the outer surface |
| Frosting portions | 3-5 equal bowls | Creates distinct gradient levels |
| Piping opening | 1/2 inch, or round tip 806 | Produces continuous bands |
| Main tools | Turntable, scraper, offset spatula | Controls rotation and edges |
Use a stable American buttercream for a first attempt. A typical batch for a 6-inch cake contains butter, confectioners’ sugar, a small amount of milk or cream, vanilla, and salt, but the exact recipe can vary. The frosting should be thick enough to stay on the cake and soft enough to flatten without tearing.
The U.S. Food and Drug Administration identifies gel and paste color additives as concentrated options that add less liquid than liquid coloring. That distinction matters because excessive liquid can loosen buttercream and reduce its ability to hold a piped band.
Step 1: Build and Crumb-Coat the Cake
Stack the completely cooled cake layers with a thin filling layer, cover the exterior with a 1/8-1/4-inch crumb coat, and chill the cake for 20-30 minutes. You will know the surface is ready when a fingertip can touch the frosting without lifting crumbs or leaving a deep impression.
Trim domed layers before stacking so the cake sides remain vertical. A leaning cake creates uneven color bands because the piping bag changes distance from the surface as the turntable rotates. Press the layers gently into alignment, then fill gaps around the edges before applying the crumb coat.
A refrigerated cake should feel firm, not frozen. In a warm kitchen above approximately 24°C, use the longer chilling time and return the cake to the refrigerator whenever the frosting begins to shine or slide.
Common mistake: Applying colored frosting directly to a loose, crumb-filled surface.
Fix: Scrape away unstable frosting, patch visible crumbs with plain buttercream, and chill again for 10 minutes.
Step 2: Mix the Gradient
Divide the frosting into three to five equal portions, reserve the lightest portion as white or nearly white, and tint the remaining portions with decreasing amounts of gel color. Mix the darkest shade first, then use a clean spatula to compare every bowl against the previous shade before piping.
For a five-color blue gradient, the following starting ratios work well when using a concentrated gel. These are typical working ratios, not universal formulas, because brands differ in strength.
| Shade | Approximate gel amount per 1 cup frosting | Visual target | Mixing note |
|---|---|---|---|
| Deepest | 1/8-1/4 teaspoon | Cobalt or navy | Develops darker after resting |
| Dark-medium | 1/16-1/8 teaspoon | Medium blue | Keep clearly lighter than base |
| Middle | 1/32-1/16 teaspoon | Cornflower blue | Compare in daylight |
| Light-medium | 1-3 drops | Powder blue | Avoid gray cast |
| Lightest | 0-1 drop | White or pale blue | Reserve plain frosting if desired |
Dark colors often deepen after 30-60 minutes, especially in buttercream with a white fat base. Tint the darkest bowl slightly lighter than the final target, then reassess before adding more color. Adding a large amount at once can create a bitter taste, a soft texture, or a shade that cannot be corrected.
Use the same frosting quantity in each bowl. Unequal portions make the bands different heights and can cause the darkest color to run out before the cake is covered.
Common mistake: Mixing colors only by counting drops.
Fix: Judge the actual shade on a white plate under the same lighting where the cake will be displayed.
Step 3: Pipe Connected Bands
Load each shade into a separate piping bag, cut a uniform opening of about 1/2 inch, and pipe continuous rings from the cake’s bottom upward. Hold the bag at a right angle to the side, keep the tip close to the cake, and rotate the turntable at a steady pace.
Begin with two or three rows of the darkest shade at the bottom. Add two or three rows of the next shade, continuing until the top edge receives the lightest color. Pipe the top surface separately with the palest frosting, leaving enough excess at the outer rim for final smoothing.
The rings should touch without overlapping heavily. Maintain consistent pressure so each band has a similar thickness. If the cake is 4 inches tall and uses five shades, each color zone will occupy roughly 0.8 inches before smoothing.
Success checkpoint: Every ring touches the ring below it, and no crumb coat is visible between bands.
Common mistake: Moving the bag around the cake instead of rotating the turntable.
Fix: Keep your piping hand steady, rotate the cake with the other hand, and patch any gap with the matching shade.
Piping Requirements by Cake Size
| Cake size | Frosting for decoration | Typical band count | Approximate bag opening |
|---|---|---|---|
| 4-inch cake | 2-3 cups | 2 rows per shade | 3/8 inch |
| 6-inch cake | 3-4 cups | 2-3 rows per shade | 1/2 inch |
| 8-inch cake | 4-6 cups | 3 rows per shade | 1/2-5/8 inch |
| 10-inch cake | 6-8 cups | 3-4 rows per shade | 5/8 inch |
Step 4: Scrape and Blend the Frosting
Place a tall bench scraper against the side of the cake with its lower edge resting on the cake board, then rotate the turntable in one continuous motion while maintaining light, even pressure. Clean the scraper after each full rotation, and stop when the surface is smooth and the color sequence remains visible.
Hold the scraper nearly vertical for straight sides. A slight angle, approximately 5-10 degrees from vertical, can help remove excess frosting, but a 45-degree side angle is generally too aggressive for a tall cake and may pull the bands upward. Use an offset spatula to refill exposed spots before the final pass.
After the sides are smooth, push the frosting lip inward from the outside edge toward the center. Wipe the spatula between strokes. Chill the cake for 10-15 minutes if the top edge softens before it can be sharpened.
Success checkpoint: The side has no deep ridges, the color order is intact, and the cake board is visible around the base.
Common mistake: Continuing to scrape after the frosting already looks smooth.
Fix: Stop immediately, chill the cake, and repair only visible dents with a small amount of matching frosting.
Which Ombre Method Should You Use?
The bowl separation method is the best choice for beginners and precise color matching because every shade is mixed independently. The single-bag method is faster and more organic, while airbrushing creates the thinnest gradient but requires specialized equipment and a fully finished white cake.
| Method | Setup time | Precision | Equipment | Best use |
|---|---|---|---|---|
| Separate bowls | 15-25 minutes | High | 3-5 bowls and bags | First cakes and exact colors |
| Single-bag bleed | 5-10 minutes | Low-medium | 1 bag and gel color | Fast rustic finishes |
| Airbrush | 10-20 minutes | High after practice | Airbrush and compressor | Production work and fine fades |
| Spatula blending | 10-15 minutes | Medium | Offset spatula | Small cakes and textured sides |
The single-bag method uses stripes of gel color painted inside one piping bag before filling it with pale frosting. It can produce attractive variation, but the gradient location is difficult to predict and the bag may release a stronger color late in the process.
Airbrushing is unsuitable when the decorator lacks ventilation, a compressor, or food-safe color designed for airbrush use. Overspray can stain nearby surfaces, and spraying too close can create visible spots rather than a controlled fade.
Which Frosting Works Best?
American buttercream is the most forgiving frosting for ombre decoration because its firm structure holds piped bands and tolerates brief room-temperature handling. Swiss meringue buttercream gives a silkier finish, but its higher sensitivity to warmth makes chilling and temperature control more important.
| Frosting | Working stability | Color result | Best temperature range | Main limitation |
|---|---|---|---|---|
| American buttercream | High | Opaque, bright | 18-22°C | Can taste sweet |
| Swiss meringue buttercream | Medium | Smooth, satiny | 16-20°C | Softens quickly in warmth |
| White chocolate ganache | High after setting | Dense, opaque | 18-21°C | Requires careful ratio |
| Cream cheese frosting | Low-medium | Soft, pale | 16-18°C | Weak structure for tall bands |
White chocolate ganache can create clean color zones when properly emulsified, but the ratio of chocolate to cream controls stiffness. Cream cheese frosting is better for a lightly textured finish than a sharply scraped ombre cake because its moisture and softness reduce structural control.
How Should You Choose the Colors?
Choose one dominant hue and create three to five lightness levels rather than selecting five unrelated colors. A useful gradient has enough contrast for each zone to remain visible at arm’s length, yet neighboring shades should share an undertone.
White provides the clearest light endpoint. Ivory, pale gray, or a pastel version of the dominant hue creates a softer finish. For saturated colors, add a small amount of the same gel to each bowl instead of diluting one dark bowl with large amounts of white frosting, which can produce inconsistent undertones.
| Theme | Darkest shade | Middle shades | Lightest shade |
|---|---|---|---|
| Blue ocean | Navy | Royal blue, cornflower | White |
| Pink blush | Raspberry | Rose, dusty pink | Ivory |
| Green garden | Forest green | Emerald, sage | Pale mint |
| Purple twilight | Plum | Violet, lavender | White |
| Sunset | Coral | Peach, apricot | Pale yellow |
The Wilton Color Right system and AmeriColor Soft Gel Paste are examples of concentrated products often used for buttercream tinting, but gel strength varies by brand. Add color gradually, scrape the bowl sides, and allow dark shades to rest before final adjustment.
Can Dark Ombre Frosting Taste Bitter?
Dark ombre frosting can taste bitter when a large quantity of concentrated gel or paste coloring is needed to reach a deep shade. Keep the darkest zone narrower, choose a naturally strong color base, or use a small amount of cocoa-free navy or purple gel designed for high-tint applications.
Do not add black color to a pale frosting in one large dose. Black can turn gray, soften the icing, and overwhelm the flavor. For a deep blue, begin with blue and add a trace of violet; for deep pink, start with a strong magenta or raspberry gel rather than repeatedly adding red.
Common Mistakes and How to Fix Them
Why Does Ombre Frosting Look Muddy?
Muddy ombre frosting usually results from excessive scraping, dirty tools, or adjacent colors with incompatible undertones. The fix is to stop after one or two smoothing rotations, wipe the scraper clean between rotations, and use neighboring shades from one color family.
If the cake is already muddy, chill it for 15 minutes and apply a thin fresh layer of each shade over the affected zones. Rescrape once. Repeatedly dragging a contaminated scraper across the cake spreads the problem instead of correcting it.
Why Are There Gaps Between the Bands?
Gaps occur when the piping tip is held too far from the cake, pressure changes during rotation, or the decorator skips a section behind the cake. Patch each gap with the matching color before scraping, then rotate the cake slowly to inspect the entire circumference.
A gap smaller than 1/8 inch is usually easy to fill. A gap exposing the crumb coat may require a thicker patch and an additional chill because the loose crumbs can contaminate the replacement frosting.
Why Is the Frosting Sliding?
Sliding frosting indicates excessive warmth, insufficiently firm buttercream, a warm cake, or too much liquid in the recipe. Refrigerate the piped cake for 15-20 minutes, then resume with a clean scraper and shorter rotations.
A cake should never be decorated while its layers still retain baking heat. The National Center for Home Food Preservation emphasizes temperature control for perishable dairy-based foods, and cream-containing frostings deserve the same practical caution during storage and transport.
Why Did the Top Edge Tear?
Top-edge tears usually happen when the decorator pulls frosting inward before the side frosting has been fully set. Chill the cake for 10 minutes, add a narrow ridge of pale frosting to the rim, and use a clean offset spatula with short inward strokes.
Keep the spatula almost horizontal. Pressing downward can expose the darker band below the lightest zone.
Why Did the Dark Shade Run Out?
Running out of the darkest shade occurs when the lower rows are taller than planned or the frosting portions were not equal. Reserve approximately 10% of every tinted portion for repairs, and pipe the lower band in two even rows before adding height.
For a tall cake, divide the side into measured zones with a toothpick mark on the crumb coat. This simple guide prevents the bottom color from consuming half the cake.
Variations for Different Situations
How Do You Make Ombre Cupcakes?
Pipe two or three color shades inside one piping bag, or pipe separate frosting rosettes in graduated colors from the cupcake base upward. Cupcakes do not require a bench scraper because the ridged swirl preserves the color separation.
Use smaller amounts of frosting, about 1/3-1/2 cup per 6 cupcakes depending on the piping style. A closed-star tip such as a Wilton 1M creates taller swirls, while a round tip gives clearer horizontal color bands.
How Do You Make Ombre on a Small Cake?
Use three shades for a 4-inch cake because five narrow bands can disappear after smoothing. Pipe one or two rows per color, chill for 10 minutes, and use a small scraper or flexible pastry card.
Small cakes lose heat quickly, so excessive chilling can make the frosting brittle. Let the cake sit for 3-5 minutes after refrigeration if the scraper begins removing chunks.
How Do You Make a Reverse Ombre Cake?
Pipe the darkest shade at the top and the palest shade at the bottom, then smooth with the same controlled rotation used for a classic gradient. Reverse ombre works particularly well with a dark top edge, pale base, and matching flowers or sprinkles.
The top zone needs enough extra frosting to create a clean rim. Without that excess, inward smoothing can expose the crumb coat at the most visible edge.
Storage, Transport, Time, and Cost
A completed buttercream ombre cake can usually be refrigerated for 2-3 days when protected from odors and condensation, although decorations may soften or lose crispness. Bring the cake toward serving temperature gradually, keeping it boxed until the surface no longer feels cold and wet.
Do not leave dairy-based frosting in a warm room for extended periods. For transport, chill the cake until firm, use a level non-slip surface, and keep the box away from direct sunlight.
| Cake size | Typical frosting amount | Decorating time | Typical ingredient and color cost |
|---|---|---|---|
| 4-inch | 2-3 cups | 20-30 minutes | $6-$12 |
| 6-inch | 4-5 cups | 30-45 minutes | $8-$18 |
| 8-inch | 6-7 cups | 40-60 minutes | $12-$25 |
| 10-inch | 8-10 cups | 50-75 minutes | $16-$35 |
The ranges above are typical home-baking estimates in the United States and exclude the cake itself, specialized airbrush equipment, and labor. Bakery pricing varies by region, size, filling, delivery distance, and decorative additions, so a custom ombre cake commonly costs several times the ingredient total.
Expert Rules for a Cleaner Gradient
- Tint before final whipping: Excessive whipping after coloring can introduce air pockets that appear as holes during scraping.
- Use a white test smear: Spread a teaspoon of each shade on parchment before piping; neighboring colors should remain distinct under the actual display lighting.
- Reserve repair frosting: Keep a spoonful of every shade in covered containers, because a matching repair is nearly invisible while a mixed replacement creates a spot.
- Scrape less than feels necessary: The first pass removes ridges, the second pass refines the surface, and a third pass often reduces contrast.
- Plan for color development: Deep shades frequently intensify after resting, so final color judgment should occur 30-60 minutes after mixing.
These rules matter because ombre frosting is a surface-engineering task as much as a coloring task. Color cannot compensate for a leaning cake, unstable icing, or uneven piping pressure.
FAQ
Can I Make Ombre Frosting Without a Turntable?
Yes, but a turntable produces more even rings and requires fewer corrective passes. Without one, rotate the cake board by hand in small increments while keeping the piping bag fixed relative to the cake. A cake stand with a smooth, level base can work for a 4-inch cake, although tall cakes are harder to keep uniform.
How Far Ahead Can I Tint the Frosting?
Tint frosting 1-24 hours before decorating when convenient, especially for dark shades that deepen over time. Store each color in an airtight container at room temperature for a short period if the recipe permits, or refrigerate perishable frosting and rewhip it briefly before use. Let chilled frosting soften before piping.
Should I Use Liquid or Gel Food Coloring?
Use gel or paste coloring for ombre buttercream because concentrated color adds less moisture and produces stronger shades with smaller quantities. Liquid coloring is acceptable for very pale pastel gradients, but several teaspoons can loosen the frosting enough to make piping and scraping difficult.
Can I Use a Piping Tip Instead of a Cut Bag?
Yes. A large plain round tip, such as an open round 806-style tip, produces consistent bands with less variation than an unevenly cut bag. A smaller tip can work on a narrow cake, but thin ropes require more rows and create more seams that need smoothing.
Why Is My White Frosting Turning Yellow?
Butter, vanilla, and warm lighting can make white frosting appear cream-colored. Use a small amount of violet food color to visually neutralize yellow, but add it sparingly because excess violet creates a gray or lavender cast. White chocolate ganache and shortening-based frosting can provide a paler base than standard butter buttercream.
How Do I Fix Ombre Frosting After It Has Been Refrigerated?
Let the cake sit for 5-10 minutes, then inspect the surface for condensation, cracks, or hardened ridges. Blot moisture gently with a clean paper towel, patch cracks with the reserved matching frosting, and make one light scraper pass. Avoid scraping a very cold cake aggressively because firm buttercream can chip away from the crumb coat.
The Bottom Line
To make ombre frosting, use three to five related shades, pipe connected bands around a chilled crumb-coated cake, and smooth them with a clean bench scraper using one or two controlled rotations. American buttercream offers the easiest starting point, while gel coloring, equal frosting portions, stable piping pressure, and restrained scraping determine whether the gradient stays clean. With those controls, how to make ombre frosting becomes a repeatable decorating process rather than a guessing exercise.
