

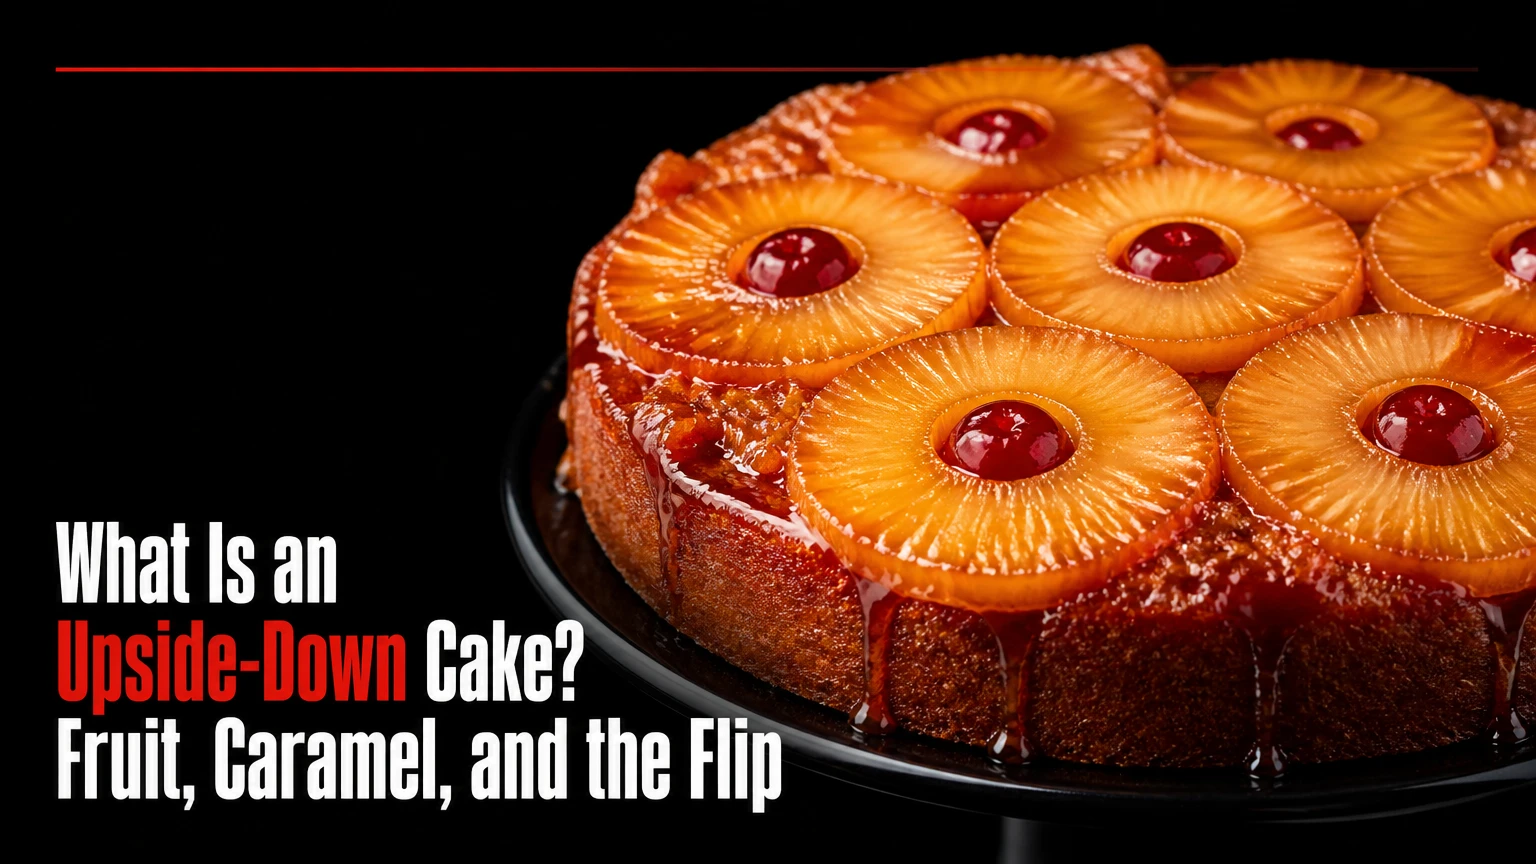
An upside-down cake is a baked dessert assembled with fruit and a butter-sugar topping beneath cake batter. During baking, the fruit softens and the sugar mixture becomes syrupy; after a brief rest, the baker inverts the warm cake so the glazed fruit appears on top. The method produces a single-layer cake without piped frosting.
What Is an Upside-Down Cake?
An upside-down cake is defined by its assembly order and final inversion: the decorative topping goes into the pan first, the batter goes over it, and the finished cake is turned onto a serving plate. Pineapple rings with maraschino cherries are the best-known version, but apples, peaches, plums, citrus, cranberries, pears, and tomatoes can also work.
The topping usually contains butter and brown sugar or granulated sugar. Fruit adds water, acidity, color, and flavor. The cake beneath it needs enough structure to support the fruit while remaining tender after contact with the syrup.
The style is different from a frosted layer cake because the visual finish is created before baking, not after it. It is also different from a fruit-topped coffee cake, where fruit remains on the upper surface during baking and does not require inversion.
Key Facts at a Glance
- An upside-down cake bakes with its fruit topping under the batter.
- Inversion changes the baked bottom into the presentation top.
- A typical home version takes 20-30 minutes to assemble and 35-50 minutes to bake.
- The cake is usually inverted after 5-15 minutes of resting, while the syrup remains fluid.
- Canned pineapple offers predictable moisture and shape for beginners.
- A 9-inch cake commonly serves 8-10 portions, depending on slice size.
How Does an Upside-Down Cake Work?
An upside-down cake works through three linked changes: butter and sugar create a syrupy coating, fruit releases moisture as it heats, and the batter sets into a supporting crumb around the topping. The cake must be inverted while the coating is warm enough to release but cool enough to hold the fruit in place.
Before baking, the topping is spread across the pan base. A typical 9-inch cake uses 4-6 tablespoons of butter and 1/2-3/4 cup of packed brown sugar, although recipes vary. The sugar dissolves partly in melted butter and combines with fruit juice in the oven.
Fruit does not undergo pure caramelization in the same way as dry sugar, because its water content keeps the mixture near the boiling point of water until enough moisture evaporates. The topping becomes a cooked syrup with browned edges and concentrated flavor. Calling every stage “caramelization” is convenient, but technically imprecise.
The batter rises and sets above the topping. Some syrup may soak into the bottom crumb, especially around fruit edges. That moisture is desirable in moderation. Excess liquid can leave a dense or gummy layer.
Why Does the Cake Need to Be Flipped?
The cake needs to be flipped because the fruit and syrup are assembled on the pan base, where they cook most directly against the heat. Inverting the cake transfers that cooked layer to the serving surface and reveals the planned fruit pattern.
The release timing matters more than an exact universal minute. A cake inverted immediately may be fragile, while a cake left until completely cold may have a hardened sugar layer that adheres to the pan. A practical starting point is 5-10 minutes for a metal pan and 10-15 minutes for a heavy skillet, followed by a controlled inversion.
Use a plate with a rim if the topping is very fluid. A flat plate can allow syrup to run onto the counter.
What Happens to the Fruit During Baking?
Fruit softens as heat breaks down cell structure and drives juice into the surrounding sugar mixture. Pineapple rings retain their shape well, while berries burst and create a looser, jam-like layer.
Fresh fruit varies considerably in water content. Peaches, plums, and pears may need blotting, while canned pineapple requires thorough draining. Frozen berries usually work without thawing, but they release more liquid and may lengthen baking time by several minutes.
Acidic fruit can sharpen the sweetness of the topping. Pineapple and cranberries provide more acidity than ripe pear or banana, so the same sugar quantity will taste different even when the recipe volume remains unchanged.
Which Fruits Work Best?
Pineapple is the most forgiving fruit because canned rings have consistent thickness, shape, and moisture. Apples, peaches, plums, pears, citrus, and berries each require different preparation because their water content and firmness affect the syrup and cake structure.
| Fruit | Preparation | Typical amount for 9-inch cake | Main adjustment |
|---|---|---|---|
| Canned pineapple | Drain and blot rings | 8-10 rings | Reserve no more than 2 tablespoons juice |
| Fresh apple | Peel if desired, slice 1/8-1/4 inch | 2 medium apples | Cook firm slices briefly if very hard |
| Peach or nectarine | Pit and slice 1/4 inch | 3 medium fruits | Blot cut surfaces before arranging |
| Plum | Pit and slice 1/4 inch | 4 medium plums | Use less sugar if very ripe |
| Cranberry | Use fresh or frozen whole berries | 1 1/2-2 cups | Expect a looser, tart topping |
| Pear | Use firm, not overripe fruit | 2 medium pears | Avoid thin slices that collapse |
| Orange | Remove peel and excess pith | 2 large oranges | Pat segments dry to limit liquid |
A single layer is safer than overlapping fruit deeply. Overlap can look attractive, but thick piles hold steam and prevent the batter from setting evenly above them.
Bananas and very ripe mangoes are less predictable. They soften quickly, add substantial moisture, and can produce a soft topping that tears during inversion. They are usable in tested recipes, but they are not the easiest starting point.
Can Fresh Fruit Replace Canned Fruit?
Fresh fruit can replace canned fruit when the pieces are firm, dry on the surface, and cut to a consistent thickness. Fresh pineapple contains active enzymes that can interfere with some dairy-based preparations, although baking heat neutralizes those enzymes; canned pineapple is more consistent because it has already been heat-treated.
Fresh fruit usually has less standardized moisture than canned fruit. Weighing or measuring the prepared fruit improves repeatability. If the fruit looks wet after cutting, blot it rather than adding extra flour to the batter.
What Cake Batter Is Used?
A sturdy butter cake, yellow cake, vanilla cake, or mild sponge works best because the batter must support fruit and syrup during baking. Extremely delicate foam cakes can compress under a wet topping, while very dense pound cake can become heavy where it contacts the fruit.
A typical scratch batter for a 9-inch cake contains about 1 1/2 cups flour, 1-2 teaspoons baking powder, 1/2 cup butter, 2 eggs, 1/2-3/4 cup sugar, and 1/2-3/4 cup milk or another liquid. Those quantities are representative rather than a universal formula.
Boxed yellow cake mix is a practical beginner shortcut. It reduces measuring errors and gives a consistent crumb, but it may produce a softer cake that needs a complete bake before inversion. A scratch batter offers more control over sweetness, spice, acidity, and texture.
The batter should be spooned over the fruit rather than poured aggressively into one spot. Start around the perimeter and fill the center last. This protects the arrangement and reduces the chance that fruit shifts into piles.
How Do You Make One Successfully?
A standard upside-down cake takes about 20-30 minutes to assemble, 35-50 minutes to bake at 350°F (175°C), and another 5-15 minutes before inversion. The most important variables are drained fruit, an even topping layer, a fully baked center, and timely release.
Before You Start
| Item | Typical requirement | Why it matters |
|---|---|---|
| Pan | 9-inch round metal cake pan or 10-inch oven-safe skillet | Provides an 8-10 portion cake |
| Oven | 350°F (175°C) | Sets batter without rapidly burning sugar |
| Butter | 4-6 tablespoons | Carries sugar across the pan base |
| Brown sugar | 1/2-3/4 cup packed | Forms the sweet topping syrup |
| Fruit | 1 1/2-2 cups prepared | Creates one relatively even layer |
| Tools | Scale or cups, knife, spatula, wire rack | Improves repeatability and release |
Step 1: Prepare the Pan
Grease the sides and base thoroughly. Add melted butter and distribute the brown sugar evenly across the base, or prepare the butter-sugar layer in the pan according to the recipe.
Avoid parchment on top of the syrup unless the recipe specifically accounts for it. Parchment can wrinkle under fruit and distort the design, although a correctly cut round can improve release in some metal pans.
You will know this step worked when no bare, dry patch larger than a teaspoon remains on the pan base. A thick mound of sugar is more likely to remain gritty or hard after baking.
Step 2: Arrange and Dry the Fruit
Drain canned fruit for at least 5 minutes in a sieve, then pat it with paper towels. Arrange the pieces in one layer with narrow gaps rather than building a thick stack.
You will know the fruit is ready when its surface looks moist but does not leave a visible puddle on the towel. A common mistake is using the liquid from a can without reducing the recipe’s other liquid.
Step 3: Mix the Batter
Mix the dry ingredients separately, cream or beat the fat and sugar as directed, then add eggs and liquid without overmixing. Scrape the bowl so the leavening and flour distribute evenly.
You will know the batter is ready when it is cohesive and spreadable, with no dry flour pockets. Overmixing after flour addition can create a tight crumb that resists the fruit syrup.
Step 4: Cover the Fruit Gently
Spoon batter over the arranged fruit, working from the outside toward the center. Spread the surface level with a small offset spatula, but do not press heavily into the fruit.
You will know the assembly is sound when the fruit remains in a single layer and the batter covers it without large exposed gaps. A common mistake is pouring from height, which dislodges rings and concentrates batter in the middle.
Step 5: Bake Until the Center Sets
Bake at 350°F (175°C) for 35-50 minutes, depending on pan material, batter depth, and fruit moisture. Begin checking at 35 minutes, but rely on multiple doneness signals rather than a single timer.
A skewer inserted into the cake portion should emerge with a few moist crumbs, not wet batter. The center should spring back lightly, and an instant-read thermometer should generally register about 200-210°F (93-99°C) in the cake crumb.
Step 6: Rest and Invert
Cool the pan on a rack for 5-15 minutes. Loosen the sides with a thin knife, place a rimmed plate over the pan, and invert in one controlled motion while holding the plate firmly against the pan.
You will know the release succeeded when the pan lifts cleanly and the fruit remains attached to the syrup layer. If a piece stays behind, replace it immediately with a fork and spoon a little warm syrup over the seam.
Which Pan Is Best?
A light or medium-colored metal cake pan provides the most predictable result because it heats evenly and makes browning easier to monitor. Cast iron gives strong browning and retains heat, but it can continue cooking the sugar after removal from the oven and may require a shorter rest.
| Pan type | Typical size | Heat behavior | Best use |
|---|---|---|---|
| Light metal round | 9 inches | Moderate, even heating | Beginner fruit cakes |
| Dark metal round | 9 inches | Faster edge browning | Recipes reduced to 340°F |
| Cast-iron skillet | 10 inches | High heat retention | Apples, peaches, firm fruit |
| Glass baking dish | 8 or 9 inches | Slower heating, visible sides | Recipes allowing 5-10 extra minutes |
| Springform pan | 9 inches | Leak risk at base | Only with sealed, tested design |
Springform pans are risky because melted butter and fruit juice can leak through the seam. If one must be used, wrap the exterior with foil and place it on a tray, but a solid pan remains safer.
How Much Does an Upside-Down Cake Cost?
A typical homemade 9-inch upside-down cake costs about $8-$18 in the United States, depending on fruit, butter, and whether the batter is scratch-made or boxed. Bakery prices often range from $25-$60 for a whole cake, with specialty fruit and labor increasing the price.
| Version | Assembly time | Bake time | Typical home cost | Typical yield |
|---|---|---|---|---|
| Boxed pineapple | 15-20 minutes | 35-45 minutes | $8-$12 | 8-10 slices |
| Scratch pineapple | 25-35 minutes | 40-50 minutes | $10-$16 | 8-10 slices |
| Fresh stone fruit | 25-35 minutes | 40-50 minutes | $12-$20 | 8-10 slices |
| Cranberry orange | 20-30 minutes | 40-50 minutes | $10-$18 | 10-12 slices |
| Specialty bakery cake | Not applicable | Not applicable | $25-$60 | 10-14 slices |
Prices vary by region and season. Fruit is usually the largest variable, while flour, sugar, eggs, and leavening contribute less to the total cost.
How Does It Compare With Similar Desserts?
An upside-down cake uses cake batter and a fruit-syrup layer, while tarte Tatin uses pastry over caramelized fruit and is usually served as a pastry rather than a cake. A standard layer cake is assembled upright and finished with frosting after baking.
| Dessert | Base | Fruit position during baking | Main finish | Typical difficulty |
|---|---|---|---|---|
| Upside-down cake | Butter cake or sponge | Under batter | Inverted fruit syrup | Moderate |
| Tarte Tatin | Puff pastry or short pastry | Under pastry | Inverted caramelized fruit | Moderate to high |
| Layer cake | Butter cake or sponge | No baked fruit layer | Frosting after baking | High |
| Clafoutis | Egg-rich custard batter | Mixed into batter | Powdered sugar or plain surface | Low to moderate |
| Fruit cobbler | Biscuit or soft dough | Under or over fruit | Spoonable baked topping | Low |
Tarte Tatin should not be treated as a direct synonym. The two desserts share inversion and caramelized fruit, but their structural bases, texture, and pastry techniques differ.
Upside-Down Cake Versus a Standard Layer Cake
An upside-down cake is faster when one pan and a built-in finish are valuable, while a layer cake is better for tall designs, transport, and precise decoration. The choice depends on whether the priority is fruit flavor and assembly speed or visual customization and stability.
| Criterion | Upside-down cake | Standard layer cake |
|---|---|---|
| Typical pan count | 1 pan | 2-3 pans |
| Finish time after baking | 5-15 minute inversion | 30-90 minutes frosting |
| Decoration method | Fruit pattern before baking | Frosting, piping, fillings |
| Transport stability | Best for short trips under 30 minutes | Better for boxed travel |
| Typical height | 2-3 inches | 4-8 inches |
| Moisture source | Fruit syrup and cake crumb | Frosting, filling, or soak |
An upside-down cake is not ideal for hot-weather delivery or long transport because syrup can migrate and fruit can slide. A frosted layer cake handles those situations more reliably when properly chilled.
What Are the Common Failure Modes?
Most upside-down cake failures come from water management, uneven heating, or delayed inversion. The most useful fixes target the cause, because adding flour or forcing the cake from the pan often creates a second problem.
| Problem | Likely cause | Recovery action | Prevention |
|---|---|---|---|
| Fruit sticks to pan | Cake cooled fully or sugar layer too thin | Warm base 20-30 seconds, then loosen | Invert after 5-15 minutes |
| Gummy lower crumb | Excess fruit juice or underbaking | Return cake to pan and bake 5-10 minutes | Drain and blot fruit |
| Burnt edges | Dark pan or skillet heat | Trim only the hard edge | Reduce oven by 10°F |
| Sunken center | Underbaked batter or excessive liquid | Bake until center reaches 200-210°F | Use one fruit layer |
| Broken fruit pattern | Batter poured forcefully | Reposition pieces while warm | Spoon batter gently |
| Dry cake | Overbaking or thin batter layer | Serve with warm fruit syrup | Check at the early time |
If the cake sticks, place the pan on a low burner for about 20-30 seconds if the pan is stovetop-safe, or set the base in a little hot water for 1-2 minutes. Do not heat a glass dish directly on a burner. The goal is to soften the sugar, not cook the cake further.
A collapsed center is not usually caused by fruit slices alone. Thick fruit can contribute weight and liquid, but underbaking, excessive leavening, opening the oven early, or a weak batter structure are more common explanations.
How Can You Prevent a Soggy Bottom?
Prevent a soggy bottom by controlling fruit liquid and baking until the crumb is fully set. Drain canned fruit, blot fresh fruit, avoid overlapping wet pieces, and do not add reserved juice unless the recipe specifically includes it.
A little syrup-soaked crumb is part of the dessert’s intended texture. A translucent, paste-like band several millimeters thick indicates excess moisture or insufficient baking. Letting the cake sit in the pan after it has cooled does not solve that problem.
What Should You Do if the Cake Breaks?
If the cake breaks during inversion, assemble the pieces on the serving plate while they are still warm and cover the joins with reserved fruit and syrup. The flavor remains sound, although the presentation becomes rustic.
For a major collapse, cut the cake into squares and serve it as a warm fruit dessert with yogurt or whipped topping. Do not attempt to invert a completely cold cake by force, because the hardened syrup can tear away the crumb and fruit together.
Can You Store and Transport It?
An upside-down cake keeps for 1-2 days at room temperature when covered, or about 3-4 days refrigerated, although the fruit layer may become wetter and the crumb firmer. Bring refrigerated slices toward room temperature before serving for better texture.
Store the cake in a shallow covered container rather than wrapping the fruit directly in plastic. Direct contact can pull fruit from the surface. Refrigerate versions containing custard, cream, or other perishable fillings within 2 hours.
For transport, cool the cake fully, keep it level, and use a container with headroom above the fruit. A 9-inch cake is safest for trips under 30 minutes. Longer travel requires chilling and a firm, non-skid base, but the dessert remains less stable than a frosted layer cake.
Can You Freeze an Upside-Down Cake?
You can freeze an upside-down cake for about 1-2 months, but the fruit texture may soften after thawing. Freeze individual slices on a tray, wrap them after firming, and thaw them in the refrigerator before warming gently.
Freezing is most successful with apples or pineapple. Berries and very juicy stone fruit release more liquid during thawing, so their topping may lose its clean pattern.
Which Version Suits Your Skill Level?
Beginners should choose canned pineapple in a light metal pan and a boxed yellow cake mix because the fruit shape and batter behavior are predictable. Intermediate bakers can move to fresh apples or stone fruit, while advanced bakers may explore thin citrus slices, layered flavoring, or a tarte Tatin-style pastry method.
| Baker profile | Recommended version | Pan | Main skill developed |
|---|---|---|---|
| Beginner | Canned pineapple with boxed mix | 9-inch light metal | Even arrangement and inversion |
| Developing baker | Apple cinnamon scratch cake | 10-inch skillet | Moisture and heat management |
| Confident baker | Peach almond butter cake | 9-inch round | Batter balance and fruit selection |
| Advanced baker | Citrus or pear spice cake | 9-inch metal pan | Thin slicing and pattern control |
| Pastry-focused baker | Apple tarte Tatin | 10-inch skillet | Caramel and pastry timing |
A boxed mix is not an inferior choice when the goal is to practice pan release. It isolates the most failure-prone part of the method, the topping and inversion, before the baker adds scratch-batter variables.
Expert Rules That Improve Reliability
- Treat fruit moisture as an ingredient. Two cups of canned fruit that is fully drained does not behave like two cups of fruit packed in syrup.
- Use a thermometer when appearance is misleading. A browned top cannot prove that the cake crumb above the fruit has set; 200-210°F (93-99°C) gives a more useful checkpoint.
- Prefer a single shallow fruit layer. Decorative overlap increases the distance heat must travel through wet fruit and creates uneven support beneath the batter.
- Do not trust a fixed release minute blindly. Pan material, sugar quantity, fruit temperature, and room temperature change how quickly the syrup thickens.
- Reserve presentation decisions until after release. If the cake is stuck, gentle warming is safer than aggressive knife work around every fruit piece.
Frequently Asked Questions
Is an upside-down cake the same as tarte Tatin?
No. An upside-down cake uses a cake batter beneath fruit and syrup, while tarte Tatin uses pastry beneath caramelized fruit. Both are inverted after cooking, but tarte Tatin has a crisp pastry base and the cake has a tender crumb.
Can you make an upside-down cake without a skillet?
Yes. A solid 9-inch metal cake pan is often easier for beginners than cast iron because it heats more predictably and releases with less residual heat. Avoid springform pans unless the base is sealed, because butter and fruit juice can leak through the seam.
Why is my upside-down cake wet in the middle?
A wet center usually indicates excess fruit liquid, an overlapping fruit layer, or insufficient baking. Drain and blot the fruit, check the center with a skewer, and continue baking until the crumb reaches roughly 200-210°F (93-99°C).
Can a boxed cake mix be used?
Yes. Boxed yellow or vanilla cake mix works well with canned pineapple, apples, and other firm fruit. Follow the package batter directions, but begin checking doneness at 35 minutes because the fruit layer can extend the baking time.
Should you refrigerate an upside-down cake?
Refrigerate an upside-down cake when it contains cream, custard, or other perishable fillings, and refrigerate leftovers after about 2 hours at room temperature. A plain fruit cake can remain covered at room temperature for 1-2 days.
How do you reheat an upside-down cake?
Reheat individual slices in a microwave for 10-20 seconds or in a 300°F (150°C) oven for about 10 minutes. Gentle heat loosens the syrup without drying the crumb or scorching the fruit.
The Bottom Line
An upside-down cake is a fruit-and-syrup dessert baked beneath cake batter and inverted while warm. The method rewards careful draining, a single fruit layer, a fully baked center, and a release window of roughly 5-15 minutes. For a first attempt, use canned pineapple, a 9-inch metal pan, and a sturdy yellow cake batter.
The dessert is not the best choice for tall decoration or long-distance transport, but it is efficient, visually finished, and adaptable to seasonal fruit. What is an upside-down cake at its best is a practical baking technique: the topping cooks first, the cake supports it, and one controlled flip creates the final presentation.
