

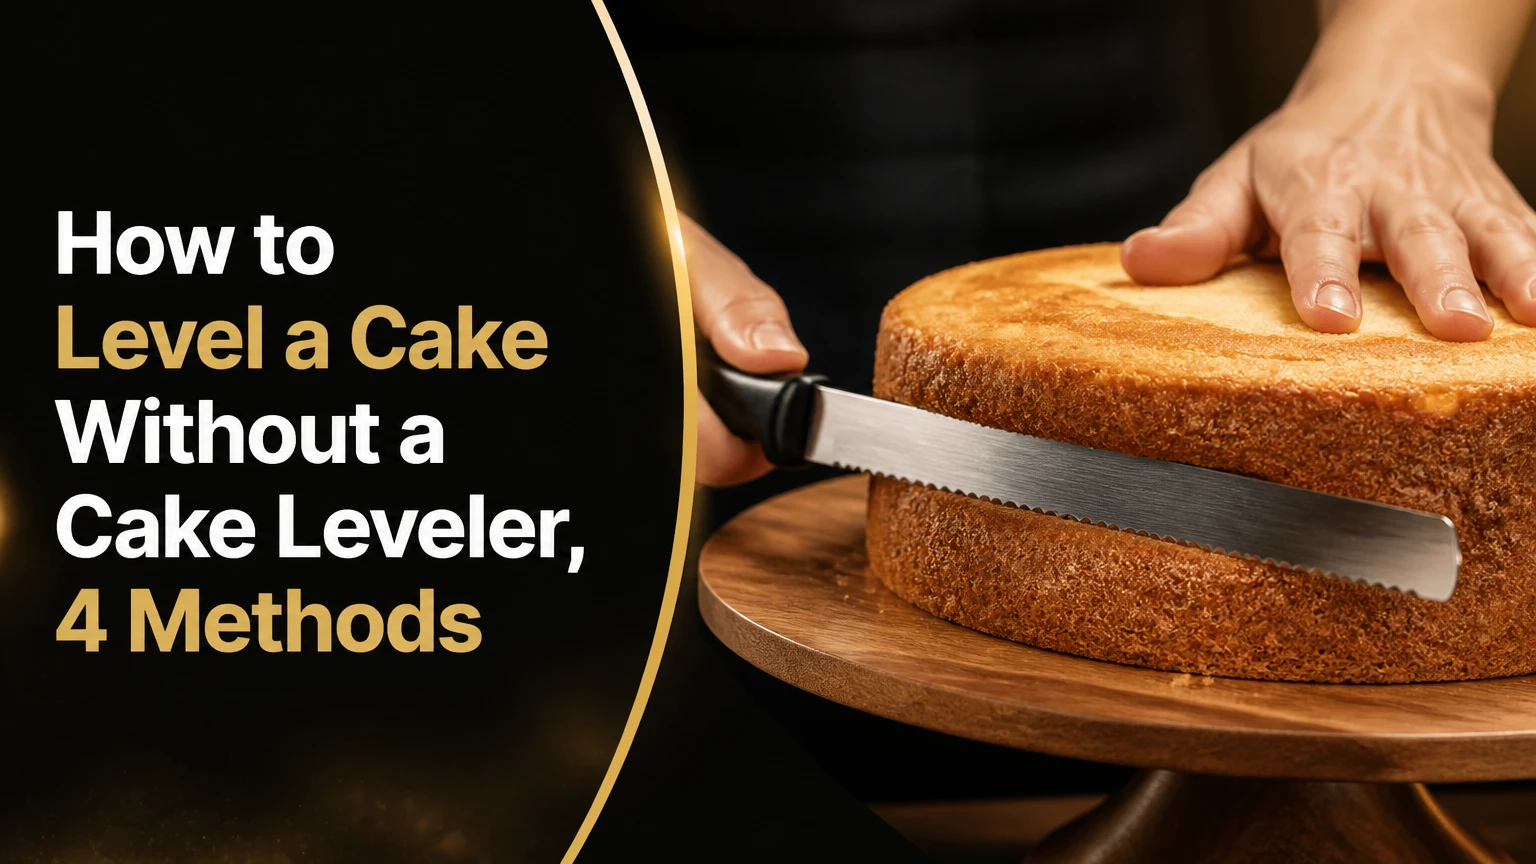
To level a cake without a cake leveler, chill the fully cooled cake, mark a horizontal cutting line, and use a long serrated knife while rotating the layer. A 10-12 inch bread knife gives the most reliable result for ordinary sponge and butter cakes; toothpicks provide a visual guide, while floss suits only soft, tender cakes.
Key Facts at a Glance
- A cake layer should cool completely before leveling, usually 2 hours at room temperature or 30-45 minutes in a refrigerator.
- A serrated knife should extend across at least half the cake’s diameter and ideally reach from edge toward center in one pass.
- The safest manual cut uses light sawing, steady rotation, and no downward pressure on the dome.
- A cake leveler removes the dome from the top; torting divides a cake into thinner layers.
- A 15-minute freezer rest can firm a fragile crumb, but a frozen cake can crack under a knife.
- Typical home-kitchen leveling takes 3-7 minutes per layer and costs nothing when existing tools are used.
What Does Leveling a Cake Actually Do?
Cake leveling removes the raised crown from a baked layer so the remaining surface becomes stable, horizontal, and easier to fill. The process is different from torting, which cuts a level cake horizontally into two or more thinner layers.
A domed cake forms because the outside edges heat and set before the center finishes expanding. Batter near the sides can also rise less than batter in the middle, particularly in a deep pan or an oven that runs hot. Leveling corrects the shape after baking, but it does not repair a sunken center, a wet streak, or a layer that has collapsed from underbaking.
A flat layer matters most when stacking several cakes. Buttercream, ganache, jam, or curd spreads more evenly across a level surface, and the finished cake places less sideways pressure on the filling. A small crown can remain on a single-layer snack cake, where appearance and stack stability are less important.
Leveling Versus Torting
| Technique | Material removed | Main purpose | Typical cut |
|---|---|---|---|
| Leveling | 0.25-1.5 inches from the crown | Flatten one cake layer | One shallow horizontal cut |
| Torting | 0-0.25 inches from the crown first | Create multiple thin layers | Two or more horizontal cuts |
| Trimming edges | 0.125-0.5 inches from sides | Expose an even crumb or shape a tier | Vertical perimeter cuts |
| Carving | Variable, often 0.5-3 inches | Build a sculpted form | Several angled cuts |
Why Do Cakes Dome in the Oven?
Cakes dome when the center continues expanding after the edges have set, with batter depth, oven heat, and pan material influencing the height of the crown. A deep 8-inch cake generally domes more than a shallow 9-inch layer made from the same batter.
Oven temperature is a frequent contributor. If the oven runs hotter than the recipe specifies, the perimeter can set quickly and force the still-expanding center upward. A dark metal pan also absorbs heat differently from a light aluminum pan, while glass often requires a temperature adjustment stated by the recipe.
Can You Prevent a Large Dome?
You can reduce doming by using the recipe’s specified pan, distributing batter evenly, and checking oven temperature with an independent thermometer. Bake-even strips or a damp fabric strip around the pan can slow edge setting, but they must be rated for oven use and secured away from heating elements.
| Cause | Typical symptom | Preventive adjustment | Leveling implication |
|---|---|---|---|
| Overheated oven | Dark edges and tall center | Verify temperature with an oven thermometer | Expect a firmer crust |
| Deep batter layer | Crown rises 0.5-1.5 inches | Use the specified pan size | Remove more cake |
| Uneven batter | One-sided slope | Weigh or spread batter evenly | Mark the lowest edge |
| Dark pan | Fast browning around edges | Follow pan-specific temperature guidance | Chill longer before cutting |
| Underbaking | Wet or gummy center | Bake to recipe indicators | Do not level until fully baked |
A leveler cannot make an underbaked cake safe or structurally sound. If the center is wet, return the cake to the oven when practical rather than disguising the problem with frosting.
How to Level a Cake Without a Cake Leveler
The most dependable method uses a chilled cake, a long serrated knife, and a rotating work surface. Plan on 5-10 minutes including setup, and remove the crown in several shallow passes instead of trying to cut through the entire diameter at once.
Before You Start
| Requirement | Typical specification | Why it matters |
|---|---|---|
| Cooling | 2 hours at room temperature or 30-45 minutes refrigerated | Prevents tearing and compression |
| Optional freezer rest | 10-15 minutes | Firms a delicate crumb |
| Serrated knife | 10-12 inches long | Reaches farther across the layer |
| Work surface | Turntable, plate, or parchment | Allows controlled rotation |
| Cutting height | Lowest point of the crown | Produces the maximum usable layer |
| Execution time | 3-7 minutes | Covers scoring and final removal |
Gather a serrated bread knife, a small ruler, toothpicks, a cake board or flat plate, and a clean towel. Use a turntable if available, but a plate on a sheet of parchment can rotate adequately on a smooth counter.
Step 1: Cool and Firm the Cake
Cool the cake in its pan for the period specified by the recipe, then remove it and let it reach room temperature before wrapping it. Refrigerate the wrapped layer for 30-45 minutes, or freeze it for 10-15 minutes when the crumb is unusually soft.
Do not level a warm cake. Heat leaves butter and other fats soft, so the knife drags rather than slices, and steam can make the crumb gummy. A chilled cake should feel firm when pressed lightly at the edge, not hard like a frozen block.
You’ll know it worked when: the layer lifts without bending and the top no longer feels warm.
Common mistake: placing an uncovered cake in the refrigerator, where exposed surfaces dry and absorb odors.
Step 2: Choose the Cutting Height
Place the cake on a flat board and inspect the crown from eye level. Identify the lowest point where the dome rises above the otherwise usable layer, because cutting at the tallest point removes more cake than necessary.
For a 2-inch layer with a 0.5-inch crown, the cut may remove only 0.25-0.5 inches. A severe dome can require more trimming, but preserve as much height as the stacking plan allows.
You’ll know it worked when: the intended cut line sits below the crown at every edge.
Common mistake: measuring from the countertop instead of the cake’s lowest edge, which creates a sloped reference.
Step 3: Mark a Perimeter Guide
Hold the knife horizontally and make a shallow score around the cake’s circumference at the chosen height. Rotate the cake gradually as the knife remains almost stationary, creating a continuous track approximately 2-3 millimeters deep.
If the cake is fragile, insert toothpicks horizontally at the intended height every 1.5-2 inches around the perimeter. The toothpicks should enter straight and remain parallel to the work surface; they are visual markers, not a rigid track for forcing the knife.
You’ll know it worked when: the score forms one even ring and meets itself cleanly.
Common mistake: cutting deeply from one side before the ring is complete, which creates a downward angle.
Step 4: Saw Around the Cake While Rotating
Place the serrated blade in the scored track and use short, gentle sawing motions. Rotate the cake with your free hand, keeping the knife at the same height and allowing the blade to advance inward a little at a time.
Keep your cutting elbow close to your body for control. Do not press down on the dome; a resting hand can steady the cake, but downward force compresses the center and changes the blade angle.
You’ll know it worked when: the cut line remains visible around the full perimeter and the knife enters at a consistent depth.
Common mistake: moving both the knife and cake quickly, which makes the blade wander.
Step 5: Finish the Center and Lift the Crown
Continue rotating and sawing until the blade reaches the center from several directions. When the crown separates, lift it with a cake lifter or a broad spatula rather than pinching the soft cut surface.
Place a clean ruler across the layer to check the result. A small uneven area can be corrected with a second shallow pass, but repeated trimming wastes height and increases crumb damage.
You’ll know it worked when: the ruler touches the layer across its width without a visible gap greater than about 2-3 millimeters.
Common mistake: twisting the crown upward before the center is fully cut, which tears the remaining crumb.
Which Manual Cake-Leveling Method Is Best?
A serrated bread knife is the best overall choice because it handles most butter cakes, sponge cakes, and chocolate layers without special purchases. Toothpicks improve visual control for beginners, while unflavored floss can make a clean cut through a soft cake but performs poorly against firm crusts.
| Method | Best cake texture | Typical time | Typical cost | Main limitation |
|---|---|---|---|---|
| Serrated bread knife | Sponge, butter, chocolate | 3-7 minutes | $0-$25 if purchased | Requires hand control |
| Toothpick guide | Soft or medium crumb | 5-10 minutes | $0-$3 | Pins can snag the blade |
| Unflavored dental floss | Very soft sponge | 3-5 minutes | $1-$4 | Fails on crusty or dense cakes |
| Sewing thread | Soft, tender layer | 3-5 minutes | $1-$5 | Must be clean and food-safe |
| Cookie cutter ring | Small, thick layer | 5-8 minutes | $0-$10 | Removes usable perimeter |
| Cake wire leveler | Repeated standard layers | 2-4 minutes | $10-$30 | Requires buying a specialty tool |
When Should You Use a Serrated Knife?
Use a serrated knife for cakes with a defined crust, a medium crumb, or a diameter of 8-10 inches. The teeth cut the surface with less downward pressure than a smooth chef’s knife, and a 10-12 inch blade gives enough reach for controlled passes.
A knife shorter than the cake diameter can still work, because the blade need not cross the full cake in one movement. However, a short blade requires more passes and creates more opportunities for height variation.
Does Dental Floss Really Work?
Unflavored, clean dental floss can level a soft cake if the cake has a shallow perimeter track and the floss is pulled horizontally through the crumb. Waxed floss may glide more easily, but unflavored floss avoids mint or other flavor transfer; never use floss that has contacted food, cosmetics, or cleaning products.
Floss is not a universal substitute for a knife. It cannot cut a thick crust reliably, tends to compress very moist cake, and may break in dense pound cake. Use it for a tender sponge that would shred under repeated sawing.
Is the Toothpick Guide Safe and Precise?
A toothpick guide gives beginners a visible height reference, but the knife should not be forced against protruding toothpicks. Pins can catch between serrations, snap, or push crumbs out of the side.
Insert toothpicks only after choosing the height, keep them level, and remove each pin as the blade approaches it. A ruler and a shallow perimeter score usually provide nearly the same benefit with fewer obstructions.
How Do You Level Different Cake Types?
Cake texture determines whether a knife, floss, brief freeze, or minimal trimming will produce the cleanest surface. Soft sponge needs support and low friction, while pound cake needs a sharp blade and controlled pressure because its compact crumb resists a loose sawing motion.
| Cake type | Recommended preparation | Preferred tool | Cutting approach |
|---|---|---|---|
| Vanilla sponge | Chill 30-45 minutes | Serrated knife | Short passes with rotation |
| Moist chocolate cake | Chill 45 minutes | Serrated knife | Score twice before deepening |
| Gluten-free sponge | Freeze 10-15 minutes | Knife or floss | Support layer on a board |
| Pound cake | Chill 30 minutes | Serrated knife | Firm, shallow strokes |
| Chiffon cake | Cool completely, then chill | Serrated knife | Minimal pressure and slow rotation |
| Carrot cake with inclusions | Chill 45-60 minutes | Serrated knife | Avoid large nuts at the cut line |
Soft Sponge or Chiffon
For chiffon and very light sponge, chill the wrapped cake first and use a serrated knife with almost no downward force. Floss can work when the crown is soft and the surface has no thick crust, but a knife gives better control near raisins, fruit pieces, or air pockets.
Support the cake from below with a rigid board. Lifting a fragile layer by its edges can create a crack before cutting begins.
Dense Pound Cake
For pound cake, use a sharp serrated knife and make shallow passes around the perimeter. A smooth chef’s knife often wedges into the dense crumb, while aggressive sawing can create a rough, compressed cut face.
A brief 20-30 minute refrigerator rest firms the butter without making the cake brittle. If the cake is cold and hard, allow 5-10 minutes at room temperature before cutting.
Gluten-Free or Crumbly Cake
Gluten-free cake can benefit from 10-15 minutes in the freezer because reduced temperature firms the starch-based crumb. The cake still needs complete cooling first, and freezing for much longer can make the edge fracture under pressure.
If crumbs continue to fall, brush away loose particles, apply a thin crumb coat, and chill the layer before final frosting. Do not keep sawing at a cake that is breaking apart.
What Are the Most Common Leveling Mistakes?
Most uneven cake tops result from heat, angle, or pressure rather than from a missing cake leveler. The fastest recovery is usually to stop cutting, chill the layer, identify the high side, and remove only the visible ridge.
| Problem | Likely cause | Immediate fix | Prevention |
|---|---|---|---|
| Slanted top | No rotation during cutting | Re-score from the low side | Rotate continuously |
| Ragged crumbs | Warm cake or dull blade | Chill 15 minutes and change blade | Use a sharp serrated knife |
| Gouged center | Pressing on the dome | Stop and let the crumb recover | Steady without compressing |
| Torn edge | Knife pushed downward | Return to shallow sawing | Keep blade parallel |
| Excessive waste | Cut at the crown’s highest point | Use the trimmed piece for crumbs | Find the lowest cut height |
| Cracked layer | Cake too cold or unsupported | Warm 5 minutes and support board | Avoid hard freezing |
Why Is the Cake Slanted?
A cake becomes slanted when the knife advances across the layer from one side without regular rotation. The blade naturally drops as the baker reaches farther across the cake.
Return the layer to the board and inspect it at eye level. If only one side is high, make a shallow corrective pass from that side, rotating the cake rather than trying to flatten the entire surface at once.
Why Is the Cake Crumbling?
Crumbs usually indicate a warm, fragile, overbaked, or poorly supported layer, although a dull knife can also drag the surface. Chill the cake for 15 minutes, use a serrated blade, and place the layer on a rigid board before trying again.
A crumb coat hides loose surface particles but cannot stabilize a wet center. If the cake has a gummy streak, leveling is not the appropriate repair.
Why Did the Knife Gouge the Center?
A gouged center usually occurs when the baker presses the dome down while cutting. Compression lowers the center temporarily, so the blade follows a distorted surface and rises or falls as pressure changes.
Keep the palm lightly above the crown or remove it entirely once the cake is stable. Let the knife teeth remove the crumb instead of using force to drive the blade.
Can You Level a Cake Without Cutting It?
You can avoid leveling by baking flatter layers, using a cake collar or acetate support, or filling the shallow side with frosting, but these options do not produce the same structural accuracy as trimming. A modest dome may be hidden in a single-layer cake, while a tall stacked cake usually benefits from a true flat surface.
If the top is only 3-5 millimeters higher in the center, press the cooled layer gently with a flat board for a short period only when the recipe and crumb can tolerate compression. Do not flatten delicate chiffon this way, because the method can collapse its air structure.
A cake baked in a shallow pan may need no leveling. Dividing batter between two pans reduces depth and often limits the dome, although the two layers still need inspection before stacking.
What Can You Use Instead of a Turntable?
A flat plate on parchment, a cake board on a smooth countertop, or a lazy Susan can replace a professional turntable. The substitute must rotate without lifting the cake and must remain stable when the knife meets the crust.
Avoid balancing a cake on a narrow bowl or rotating it while holding the knife in midair. Stability matters more than speed, especially with a large layer.
| Household setup | Suitable cake size | Stability adjustment | Typical cost |
|---|---|---|---|
| Cake board on parchment | 6-10 inches | Use two parchment sheets | $0-$2 |
| Flat dinner plate | 6-9 inches | Wipe base dry | $0 if owned |
| Lazy Susan | 8-12 inches | Add nonslip shelf liner | $5-$20 |
| Inverted sheet pan | 8-12 inches | Secure with damp towel underneath | $0 if owned |
| Plastic cutting board | 6-10 inches | Check food-safe surface | $5-$15 |
A damp towel under the rotating plate can reduce sliding, but keep moisture away from the cake board and cut surface. Parchment should lie flat, since wrinkles can tilt a layer by several millimeters.
How Much Time and Money Does Manual Leveling Take?
Manual cake leveling typically costs $0 when a household already has a serrated knife and takes 3-7 minutes per layer after cooling. Buying a suitable bread knife usually costs $10-$25, while toothpicks, floss, and parchment add roughly $1-$5.
Cooling is the longest part of the process. The actual cut is short, but rushing a warm cake creates more waste than the saved time justifies.
| Scenario | Cooling or firming time | Cutting time | Typical added cost |
|---|---|---|---|
| Firm butter cake | 30-45 minutes refrigerated | 3-5 minutes | $0 |
| Soft sponge | 45 minutes refrigerated | 4-7 minutes | $0-$2 |
| Fragile gluten-free cake | 10-15 minutes frozen after cooling | 5-8 minutes | $0-$3 |
| Three-layer celebration cake | 30-60 minutes per batch | 10-20 minutes total | $0-$5 |
| New serrated knife purchase | 30-45 minutes refrigerated | 3-7 minutes | $10-$25 |
A specialty leveler becomes economically reasonable for frequent production, especially when several identical layers are made each week. For occasional home baking, setup quality and technique usually matter more than the extra tool.
What Should You Do With the Cake Dome?
Use the trimmed dome for crumbs, cake truffles, a plated dessert, or a baker’s sample. Store it airtight at room temperature for up to 2 days if the cake is plain, or refrigerate it when the recipe contains perishable filling or frosting.
Cake crumbs can cover a frosted cake’s sides, thicken a dessert topping, or provide texture over ice cream. Do not use a moldy, sour-smelling, or visibly underbaked piece, and do not taste raw batter from an underbaked center.
Expert Rules for a Straighter Cake
Professional results depend on controlling the reference line before cutting, not on making the final cut quickly. Three practical rules prevent most failures:
- Cut to the lowest usable edge, not the highest point of the dome. This preserves height and avoids creating a thin side that weakens the stack.
- Rotate the cake, not the blade. A stable knife hand creates a consistent plane while the rotating base brings fresh cake to the teeth.
- Use frosting to fill tiny gaps, not major slopes. Buttercream can hide a 2-3 millimeter imperfection, but a larger angle transfers through every stacked layer.
A fourth rule matters for delicate cakes: chill for structure, not for hardness. A firm crumb cuts cleanly, while a frozen crumb can fracture and leave a gap that frosting cannot reliably support.
FAQ
Can I Level a Cake the Same Day I Bake It?
Yes, after the cake has cooled completely and firmed in the refrigerator. Allow approximately 2 hours at room temperature for a typical layer, followed by 30-45 minutes wrapped in the refrigerator. Cutting while warm can compress the crumb, smear fat, and produce a slanted surface.
What Knife Is Best for Cutting a Cake Flat?
A sharp 10-12 inch serrated bread knife is the best general-purpose choice for leveling cake. The serrations remove crust and crumb with less downward force than a smooth knife. A blade shorter than the cake can work, but it requires more passes and demands closer attention to the horizontal guide.
Should I Level the Bottom of a Cake?
Usually, level only the domed top and leave the flat baked bottom intact. If the bottom has a pronounced ridge, parchment imprint, or uneven bulge, trim it lightly after the cake is fully chilled. Removing too much from both surfaces reduces height and can expose a crumb that dries faster.
Can I Use a Regular Knife Instead of a Serrated Knife?
A regular chef’s knife can level a soft cake, but it is less forgiving on crusty or dense layers. The smooth blade tends to push and compress the crumb unless it is very sharp and used with short, controlled strokes. A serrated bread knife remains the more reliable household substitute.
How Do I Level a Cake Without Making Many Crumbs?
Chill the wrapped cake, use a sharp serrated knife, and score the complete perimeter before cutting inward. Soft sponge can also be cut with clean unflavored floss, provided the cake has a shallow track and no hard crust. A thin crumb coat after leveling controls remaining loose particles.
Is a Cake Leveler Worth Buying?
A cake leveler is worth buying when you repeatedly make identical layers and want a fixed height with minimal practice. It is less useful for irregularly domed cakes, very soft cakes, or unusual pan sizes. For occasional baking, a serrated knife, a rotating plate, and a ruler provide a capable substitute.
The Bottom Line
To level a cake without a cake leveler, cool and firm the layer, mark the lowest practical cutting height, score a complete perimeter, and saw gently while rotating the cake. Use a serrated bread knife for most cakes, toothpicks for visual guidance, and floss only for soft sponge. The exact keyword answer is simple: how to level a cake without a cake leveler depends mainly on a cold crumb, a horizontal guide, and steady rotation, not on special equipment.
