

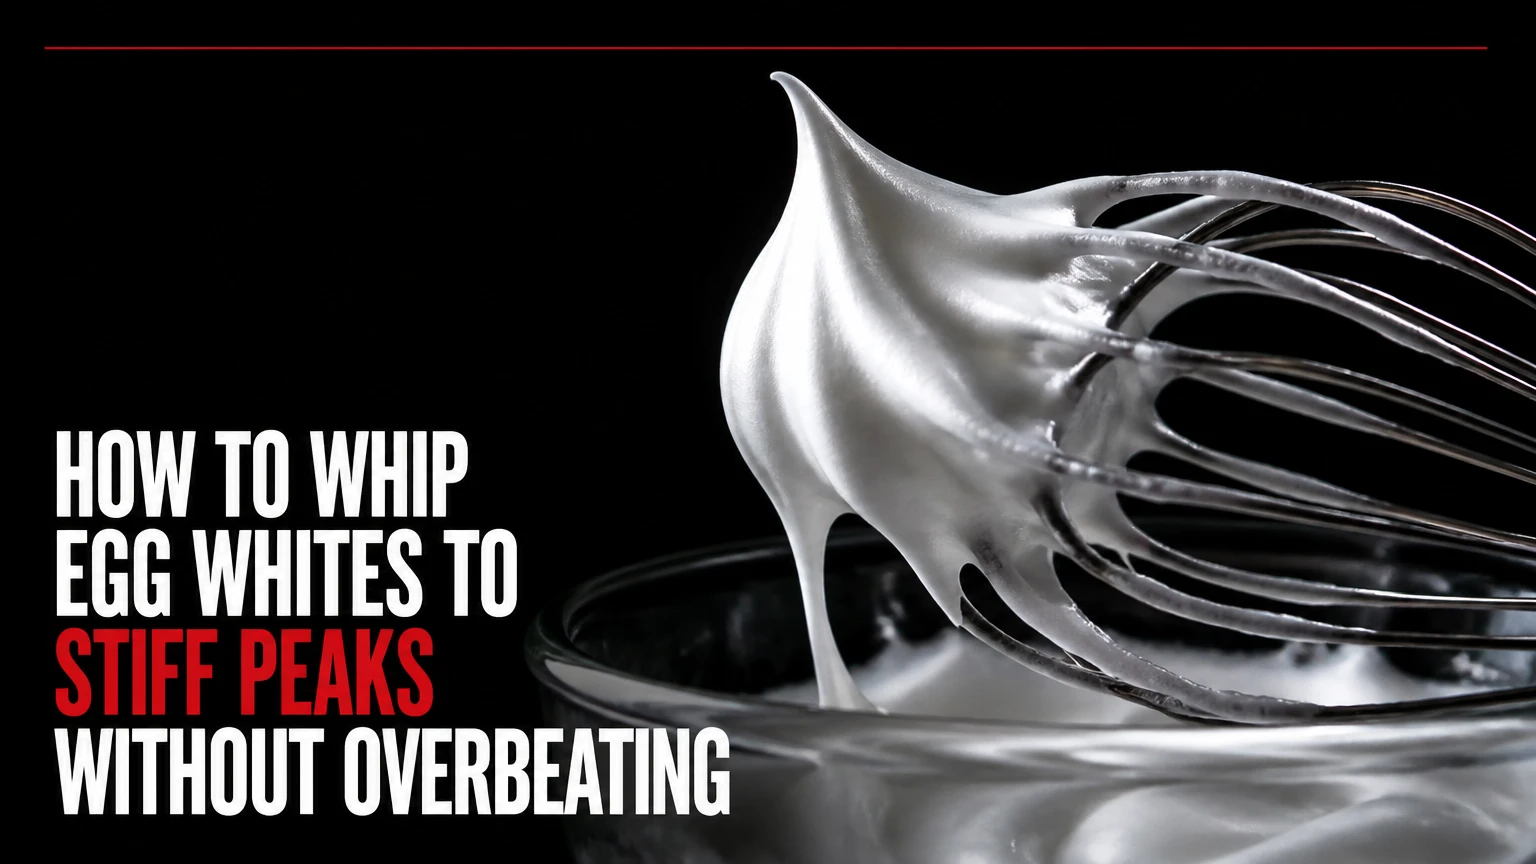
To whip egg whites to stiff peaks, beat clean, fat-free egg whites from low speed to medium-high until the foam becomes glossy and the peaks stand straight without bending. Separate cold eggs, warm the whites briefly, add cream of tartar after foaming, and stop immediately when the structure holds its shape, usually within 4-8 minutes.
Key facts at a glance
One large egg white weighs about 30 g and usually takes 4-8 minutes to reach stiff peaks with an electric mixer.
Egg whites whip best at approximately 20-23°C, although cold whites can produce a stable foam with slightly less volume.
Use about 1/8 teaspoon cream of tartar per large egg white when the recipe permits an acidic stabilizer.
A trace of egg yolk or grease can prevent egg whites from developing a strong foam.
Sugar belongs in gradually after soft peaks for meringue, but many cake and soufflé recipes require unsweetened whites.
Stiff peaks hold a sharp point when the whisk lifts, while overbeaten whites look dry, grainy, and separated.
What Are Stiff Peaks?
Stiff peaks are the final stage of an aerated egg-white foam in which the whisk leaves a sharp ridge and the lifted peak remains upright. The foam should look dense, smooth, and glossy rather than bubbly, dull, or cottage-cheese-like.
A stiff peak is a visual and structural test, not a fixed time target. Mixer power, bowl diameter, egg freshness, white temperature, batch size, and added sugar all change the timing. A stand mixer may reach the stage in 2-4 minutes, while a hand whisk commonly needs 8-12 minutes of sustained effort.
How do soft, firm, and stiff peaks differ?
| Stage | Typical electric-mixer time | Visual test | Best recipe uses |
|---|---|---|---|
| Foamy | 30-90 seconds | Large and small bubbles remain visible | Adding acid or beginning a meringue |
| Soft peaks | 2-4 minutes | Tip bends immediately | Folding into sponge batter |
| Firm peaks | 3-6 minutes | Tip bends slightly | Soufflé base, some frostings |
| Stiff peaks | 4-8 minutes | Tip stands vertically | Meringue, pavlova, macarons |
| Overbeaten | After stiff peaks | Dry clumps and liquid separation | Usually unsuitable for delicate foam |
The peak test is more reliable than the clock. Stop the mixer, lift the whisk straight up, and inspect the point. If the peak bends, continue for 10-20 seconds and test again.
Why Do Egg Whites Form a Foam?
Egg-white proteins unfold around air bubbles as mechanical beating incorporates air, then form a thin elastic network at the air-water boundary. The proteins stabilize the bubbles, while the liquid portion of the egg white supplies moisture and soluble protein.
Fat interferes with that network because lipids compete with proteins at the air-water interface. Sugar slows foam formation because it attracts water, but sugar also produces a finer, more stable meringue once the initial foam already exists.
Harold McGee describes the practical effect in On Food and Cooking: “Egg whites are mostly water, with about 10% protein.” That high water content explains why a foam can look substantial yet still collapse when the protein network is damaged or the whites are overbeaten.
Why does cream of tartar help?
Cream of tartar lowers the pH of egg whites and helps the protein network remain flexible during whipping. The acid is especially useful for meringues, where the foam must survive sugar, drying, piping, and baking.
Use approximately 1/8 teaspoon of cream of tartar per large egg white. Lemon juice can substitute at roughly 1/2 teaspoon per four whites, although the added liquid and flavor may matter in a delicate recipe. Acid improves stability, but it cannot overcome yolk contamination.
What Do You Need Before Whipping?
You need egg whites, a completely clean bowl, clean beaters, and a mixer or whisk. A stainless-steel or glass bowl is the safest general choice because both materials resist retained grease and tolerate thorough washing.
Before-you-start checklist
| Item | Practical specification | Typical amount or cost | Why it matters |
|---|---|---|---|
| Large eggs | Fresh shell eggs, separated individually | 1 egg gives about 30 g white | Individual separation limits yolk loss |
| Mixing bowl | Stainless steel or glass, 2-3 L capacity | $8-$35 | A deep bowl contains splatter |
| Electric mixer | Hand or stand mixer with wire beaters | $25-$450 | Medium-high speed builds foam efficiently |
| Cream of tartar | Food-grade acidic stabilizer | $4-$8 per container | Adds stability at 1/8 teaspoon per white |
| Silicone spatula | Flexible, clean, dry blade | $5-$15 | Folds foam without excessive deflation |
| Kitchen scale | Digital scale accurate to 1 g | $10-$30 | Controls egg-white and sugar ratios |
Copper bowls can produce exceptionally stable foams because copper ions interact with specific egg proteins. Copper is a specialized option, not a requirement, and unlined copper should not contact acidic ingredients for extended periods because copper can migrate into food.
Clean equipment with dish soap and hot water, rinse thoroughly, and dry it completely. Wiping the bowl with lemon juice alone is unreliable if grease remains; washing removes lipid residue more effectively.
How to Whip Egg Whites to Stiff Peaks
The complete method takes about 5-10 minutes with an electric mixer and 8-15 minutes by hand. The most important control is stopping at the first glossy, upright peak because additional beating can turn a stable foam dry and grainy.
Step 1: Separate the eggs while cold
Separate each egg while it is refrigerator-cold, placing the white in one small cup before adding it to the main bowl. Cold yolks are firmer and less likely to break during separation.
Let the collected whites stand for 20-30 minutes until they approach 20-23°C. Room-temperature whites generally whip faster and can reach greater volume, but warming is optional when the recipe prioritizes convenience or when the kitchen is hot.
You will know it worked when: the bowl contains clear, yolk-free whites with no shell fragments.
Common mistake: separating eggs directly over the mixing bowl, which can ruin the entire batch when one yolk breaks.
Step 2: Degrease and dry the equipment
Wash the bowl and beaters with dish soap, rinse them, and dry them fully before adding the whites. Stainless steel and glass are dependable; plastic can retain invisible grease in scratches.
For extra insurance, rub the bowl with a small amount of lemon juice or white vinegar, then wipe it dry. Do not leave liquid acid pooled in the bowl because excess liquid dilutes the foam.
You will know it worked when: the bowl feels clean and shows no oily sheen under bright light.
Common mistake: using a bowl that previously held buttercream, cooking oil, or nut butter.
Step 3: Beat the whites at low speed
Add the whites without sugar and beat on low speed for 30-60 seconds. The liquid should become uniformly foamy, with bubbles distributed from the center to the sides.
Low speed creates smaller, more even bubbles and reduces splashing. A high-speed start can still work, but it often produces a coarse foam that requires more careful finishing.
You will know it worked when: no clear liquid remains at the bottom and the foam has many small bubbles.
Common mistake: adding sugar before the whites have formed a visible foam.
Step 4: Add the stabilizer
Add cream of tartar once the whites are foamy, using 1/8 teaspoon per large white. Continue beating for 30-60 seconds at low or medium speed to distribute it evenly.
Acid is optional for many recipes. Use it for a meringue, pavlova, or any preparation where the whites must remain stable for several minutes before baking.
You will know it worked when: the foam becomes finer and the whites begin to turn opaque.
Common mistake: assuming extra acid will rescue a contaminated batch. Stabilizer supports clean whites; it does not neutralize fat.
Step 5: Increase to medium-high speed
Raise the mixer to medium-high, roughly speed 6-8 on a 10-speed hand mixer, and continue beating until soft peaks appear. Scrape the bowl only if the whisk leaves a large amount of liquid white around the edges.
Soft peaks fold over when the whisk lifts. Continue in 15-30 second intervals, checking frequently as the foam moves rapidly from firm to stiff.
You will know it worked when: the whisk leaves ridges and a lifted peak bends at the tip.
Common mistake: walking away while a powerful stand mixer runs, because a small batch can overbeat within seconds.
Step 6: Add sugar gradually when the recipe requires it
Add granulated or superfine sugar slowly after soft peaks form, using about 1 tablespoon at a time. Wait 15-30 seconds between additions so each portion dissolves into the foam instead of weighing down a weak structure.
Sugar is not part of the basic stiff-peak technique unless the recipe calls for it. A soufflé, mousse, or cake batter may require plain whites, while French meringue and pavlova require sweetened whites.
You will know it worked when: the mixture remains glossy and feels smooth between clean fingertips.
Common mistake: dumping sugar into liquid or barely foamy whites, which delays whipping and can produce a heavy, unstable foam.
Step 7: Stop at glossy stiff peaks
Lift the beaters straight up and inspect the peaks. Stiff peaks point upward, hold a sharp tip, and remain attached to the whisk without sliding back into the bowl.
For meringue, rub a small amount between your fingertips to detect undissolved sugar. For plain whipped whites, judge texture and shape rather than sweetness.
You will know it worked when: the peak stands vertically and the foam looks smooth, dense, and glossy.
Common mistake: continuing to beat because the foam seems able to become “stiffer.” Once the point stands upright, the useful whipping stage is complete.
Which Equipment Whips Egg Whites Best?
A hand mixer is the best general-purpose choice for home cooks because it offers speed control, visibility, and a lower risk of leaving a small batch unattended. A stand mixer is efficient for larger quantities, while a copper bowl and balloon whisk provide traditional stability at a higher cost and with more labor.
| Method | Typical price | Typical time for 4 whites | Control | Main limitation |
|---|---|---|---|---|
| Balloon whisk | $8-$25 | 8-15 minutes | Direct tactile feedback | Arm fatigue |
| Hand mixer | $25-$70 | 4-7 minutes | High visual control | Requires constant attention |
| Stand mixer | $250-$500 | 2-5 minutes | Hands-free operation | Small batches may not reach whisk |
| Copper bowl and whisk | $50-$150 | 6-12 minutes | High foam stability | Cost and cleaning requirements |
A balloon whisk is useful when equipment is unavailable, but the whisk must be large enough to move air through the whites. A narrow whisk creates less aeration and extends the process.
The stand mixer is most useful for six or more whites, especially when sugar must be added gradually. For two whites, the whisk may sit above the mixture, making the stand mixer slower or less effective than a hand mixer.
How Much Acid, Sugar, and Egg White Should You Use?
Use 1/8 teaspoon cream of tartar per large egg white, but treat sugar quantity as a recipe specification rather than a universal whipping ratio. Stiff peaks depend more on foam structure and stopping time than on a fixed sugar amount.
| Preparation | Egg-white quantity | Sugar guideline | Acid guidance | Target texture |
|---|---|---|---|---|
| Plain cake folding | 2-6 whites | 0 g unless specified | Optional | Firm peaks |
| Soufflé | 2-6 whites | 0-15 g | 1/8 tsp per white | Firm to stiff peaks |
| French meringue | 2-6 whites | 40-60 g per white | 1/8 tsp per white | Glossy stiff peaks |
| Pavlova | 4-6 whites | 50-65 g per white | Acid specified by recipe | Dense, stable peaks |
| Macarons | 2-4 whites | Powdered sugar in batter | Usually recipe-dependent | Stiff before folding |
Sugar ratios vary because recipes use different stabilizers, drying times, and textures. Adding the full amount from a pavlova recipe to a cake’s egg whites can make folding difficult and alter the batter’s moisture balance.
Does sugar make stiff peaks stronger?
Sugar makes a meringue smoother and more stable after it dissolves, but sugar slows the initial formation of foam. Granulated sugar dissolves more slowly than superfine sugar, so gradual addition and adequate beating time matter.
For a meringue, the finished foam should be glossy rather than merely stiff. A stiff foam with gritty sugar can release moisture during storage or baking.
How Do You Know When Egg Whites Are Overbeaten?
Overbeaten egg whites look dull, dry, lumpy, or curdled, and watery liquid may collect beneath the clumps. The protein network has tightened and expelled moisture, so the foam no longer spreads smoothly or folds cleanly.
| Symptom | Likely cause | Immediate response | Usable outcome |
|---|---|---|---|
| Dry, grainy clumps | Beating past stiff peaks | Stop immediately | Sometimes usable in rustic baked goods |
| Liquid at bottom | Severe overbeating | Do not keep mixing | Usually restart for meringue |
| Peak bends slightly | Underbeating | Beat 15-30 seconds more | Suitable for folding |
| Foam remains translucent | Insufficient aeration | Increase speed gradually | Continue if equipment is clean |
| Glossy foam collapses | Sugar too early or warm mixture | Assess contamination and sugar | Often unsuitable for delicate desserts |
A slightly overbeaten foam may be folded into a forgiving cake batter, but adding a fresh white is not a dependable repair. The new white can dilute the original foam and create uneven texture. For macarons, soufflés, and meringue, restarting is usually the better decision.
Why Will Egg Whites Not Reach Stiff Peaks?
Egg whites usually fail because of fat contamination, excessive liquid, unsuitable equipment, or pasteurization effects. A trace of yolk is enough to weaken the foam, although the claim that one microscopic drop always makes whipping mathematically impossible is too absolute; even small contamination can make the result unreliable.
Troubleshooting table
| Problem | Check first | Corrective action | Restart decision |
|---|---|---|---|
| Whites stay liquid | Yolk, grease, or wet bowl | Wash and dry all equipment | Restart if contamination exists |
| Foam is large and loose | Mixer started too fast | Continue at medium speed | Continue if whites remain clean |
| Whites whip slowly | Whites are cold or batch is large | Warm 20-23°C and allow time | No restart needed |
| Foam collapses after sugar | Sugar added before soft peaks | Use for a less delicate bake | Restart for meringue |
| Pasteurized whites lag | Processed albumen whips less readily | Use a stabilizer and longer time | Follow package guidance |
| Peaks become watery | Overbeating or humid storage | Stop and assess texture | Restart if separation is severe |
Egg freshness creates a trade-off. Older whites are often easier to separate and may spread quickly, while very fresh whites tend to produce a thicker, more stable foam. For maximum volume, some bakers prefer whites that have rested after separation, but they must remain refrigerated if held for longer than a short warming period.
Can You Whip Egg Whites by Hand?
You can whip egg whites by hand with a large balloon whisk, but the process usually takes 8-15 minutes for four whites and requires continuous motion. Hand-whisking gives excellent control over peak development, although it becomes tiring when sugar must be incorporated gradually.
Use a deep bowl and move the whisk in broad circles that repeatedly lift the whites. Start slowly until foamy, add acid if required, then increase the pace as the foam thickens. A copper bowl can reduce collapse, but a clean stainless-steel bowl works well.
Hand-whisked foam can be excellent for a two-white soufflé or small meringue. It is inefficient for large batches because fatigue encourages inconsistent aeration and makes overbeating harder to detect.
How Should You Whip Whites for Different Recipes?
The correct endpoint depends on how the foam will be used. Cake folding generally needs firm peaks that remain flexible, while meringue requires glossy stiff peaks with dissolved sugar and enough stability to hold piping or shaping.
For soufflé
Whip the whites to firm or stiff peaks, depending on the recipe. The tip should hold briefly but remain moist enough to fold into the base without leaving dry lumps.
Fold in one-quarter of the whites first to loosen the base, then fold in the remainder with a silicone spatula. Use broad cuts from the bottom upward and stop when only a few faint white streaks remain.
For French meringue
Whip clean whites with cream of tartar until soft peaks, then add sugar gradually. Continue until the meringue is glossy, holds stiff peaks, and feels smooth rather than gritty.
Pipe or shape the meringue immediately. Waiting allows bubbles to merge and can cause the surface to lose definition.
For pavlova
Pavlova needs a stable, glossy meringue that can hold a broad shape. Acid and the recipe’s starch component help create the characteristic crisp exterior and marshmallow-like center.
Avoid baking based only on peak appearance. Pavlova texture also depends on oven temperature, drying time, humidity, and cooling inside the oven.
For macarons
Whip the whites to a stable stiff peak before folding in the dry ingredients, but do not rely on peak stiffness alone. Macaron batter must reach a specific flow consistency after folding, so overbeaten whites can resist incorporation and produce uneven shells.
What Changes in Humid Kitchens or at High Altitude?
Humidity softens meringue surfaces and prolongs drying, while high altitude can change evaporation and expansion during baking. Whipping itself usually remains manageable, but the finished foam may require recipe adjustments.
| Situation | Likely effect | Practical adjustment | Main warning |
|---|---|---|---|
| Humidity above 65% | Sticky meringue surface | Add drying time and limit standing time | Sugar attracts ambient moisture |
| Kitchen above 27°C | Softer, less stable foam | Chill bowl briefly and work promptly | Cold whites whip more slowly |
| High altitude | Faster moisture loss | Follow altitude-specific bake changes | Do not alter sugar blindly |
| Pasteurized carton whites | Slower foam development | Beat longer and use acid if allowed | Results vary by brand |
| Very small batch | Whisk may miss whites | Use a narrow bowl or hand mixer | Stand mixer may be inefficient |
Pasteurized carton whites are convenient and safer for some preparations, but their whipping performance varies because processing changes protein behavior. Read the package instructions, especially if the product includes additives intended for cooking rather than foaming.
How Should You Fold Stiff Peaks Into Batter?
Fold stiff egg whites into a heavier mixture in stages, using a broad silicone spatula and minimal strokes. The first portion loosens the base, while the remaining foam contributes most of the final volume.
Add one-quarter of the whites and stir more firmly to combine. Add the rest in two portions, cutting down through the center, sweeping along the bottom, and lifting the mixture over itself.
Stop when the batter is nearly uniform. A few pale streaks are safer than repeated folding, because every extra stroke breaks bubbles and reduces lift.
How long can whipped egg whites sit?
Use plain whipped whites immediately, ideally within 5-10 minutes. Sweetened meringue can stand longer, but it may lose volume or release liquid if exposed to heat or humidity.
Do not store raw whipped whites at room temperature for extended periods. Refrigerate covered mixtures according to the recipe and applicable food-safety guidance, especially when using eggs for preparations that will not receive sufficient cooking.
The Bottom Line
To whip egg whites to stiff peaks, separate cold eggs carefully, warm the whites briefly, clean and dry the bowl, beat slowly until foamy, add cream of tartar if appropriate, increase to medium-high speed, and stop when glossy peaks stand upright. The exact keyword technique succeeds through clean equipment and visual timing, not maximum mixer speed or a rigid number of minutes.
A hand mixer offers the best balance for most kitchens. Add sugar only after soft peaks when making meringue, and restart immediately if yolk or grease contaminates the whites. For folding into cake, soufflé, or macaron batter, preserve the foam by stopping at the correct peak stage and using controlled spatula strokes.
Frequently Asked Questions
Can I use a plastic bowl to whip egg whites?
A plastic bowl can work if it is completely free from grease, but glass or stainless steel is more dependable. Plastic surfaces can retain oily residue in scratches, even after washing. Use plastic only when it is clean, dry, smooth, and reserved for low-fat preparation.
Should I add salt to egg whites?
Salt is unnecessary for achieving stiff peaks and may weaken foam stability in some preparations. Use cream of tartar, lemon juice, or the stabilizer specified by the recipe instead. Add salt to the complete batter or meringue only when the formula calls for it.
Can I whip frozen egg whites?
Thawed egg whites can whip, but they may take longer and produce a different texture depending on how they were frozen. Thaw them in the refrigerator, bring them near room temperature, and inspect for yolk contamination before beating. Do not thaw raw whites on a warm countertop for extended periods.
Why do egg whites whip better at room temperature?
Room-temperature egg whites usually incorporate air more readily and reach greater volume because their proteins and liquid move more freely. Cold whites still whip successfully and are easier to separate. Separate eggs cold, then warm the whites for 20-30 minutes when maximum volume matters.
Can I use a blender or food processor?
A blender or food processor is a poor substitute for a whisk attachment because the blades do not create the same controlled air incorporation. The equipment can shear the whites unevenly and make the foam difficult to monitor. Use a balloon whisk, hand mixer, or stand mixer instead.
Is the upside-down bowl test safe?
An upside-down bowl test is unnecessary and risks spilling the foam. Lift the whisk and inspect the peak directly, then tilt the bowl slightly if you need a second check. A stiff peak should remain upright without requiring an upside-down demonstration.
