

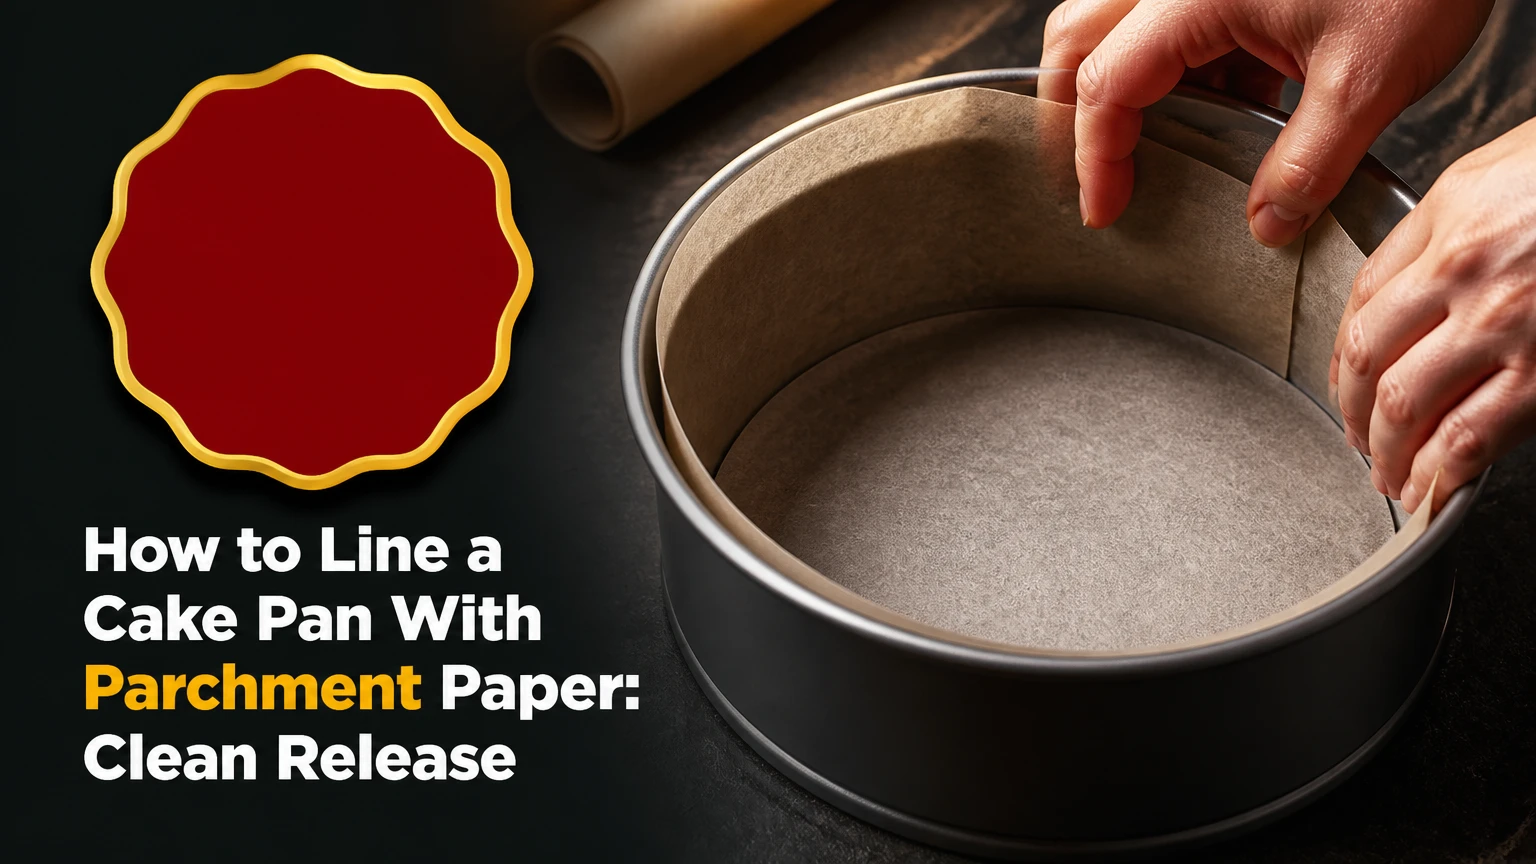
To line a cake pan with parchment paper, grease the pan lightly, cut parchment to match the base, press it flat, and grease the exposed sides if the recipe requires it. A round pan usually needs one parchment circle, while square pans work best with a paper sling. The process takes 2-5 minutes.
Key Facts at a Glance
Parchment paper belongs between the cake batter and the pan base because its silicone coating reduces sticking.
Cut round parchment circles 1-3 millimeters inside the pan’s base so the paper does not fold up the wall.
A light smear of butter or oil holds parchment in place; excessive grease can make paper slide.
Line cake-pan sides for delicate, sticky, or tall cakes, but leave no paper close to an exposed oven heating element.
Wax paper is not an interchangeable substitute for parchment paper in a hot oven.
Cool the cake for 10-20 minutes before lifting it from a parchment-lined pan.
Before You Start
Parchment lining requires a cake pan, food-safe parchment paper, scissors, and a small amount of butter, oil, or pan spray. A pencil is useful for tracing circles, while a ruler helps cut straight side strips. The pan should be clean and dry before lining.
| Requirement | Typical amount or range | Practical target |
|---|---|---|
| Preparation time | 2-5 minutes | 1 minute with a pre-cut circle |
| Parchment needed | 1 base sheet plus side strip | 12 x 16 inches for a 9-inch round pan |
| Grease | 1/4-1/2 teaspoon | Enough to create a thin film |
| Tools | 4-5 items | Pan, parchment, scissors, brush, pencil |
| Difficulty | Beginner level | No special baking equipment required |
Choose parchment labeled for baking, preferably with a stated temperature limit. Reynolds Kitchens lists its parchment products as oven-safe up to 425°F, while some other products list 450°F. The package instructions control because coatings and paper weights differ between brands.
Which Paper Should You Use?
Use silicone-coated parchment paper for cake pans because parchment resists moisture and releases baked batter more reliably than untreated paper. Wax paper has a wax coating intended for cold or low-heat food handling, so wax paper can soften, smoke, or transfer an unwanted flavor when exposed to normal cake-baking temperatures.
| Material | Typical oven rating | Reuse | Best application |
|---|---|---|---|
| Parchment roll | 425-450°F | 1 baking session | Custom round, square, and loaf pans |
| Pre-cut parchment circle | 425-450°F | 1 baking session | 8-10-inch round cake pans |
| Silicone liner | Brand-specific, often 400-480°F | Hundreds of uses | Repeated baking with matching pan sizes |
| Wax paper | Not a general oven liner | 0 hot-oven uses | Cold wrapping and countertop tasks |
| Grease and flour | Pan-temperature dependent | No paper waste | Bundt and fluted pans |
Parchment paper is cellulose paper treated with a silicone coating. The coating creates a low-adhesion barrier, but it does not make every cake release automatically. Sticky syrups, caramelized fruit, and batter that flows beneath a loose edge can still attach to the pan.
Bleached white parchment and unbleached brown parchment perform similarly when both products are designed for baking. Color does not determine release quality. The temperature rating, sheet dimensions, coating, and fit matter more.
How to Line a Cake Pan With Parchment Paper
For a round cake pan, grease the base, cut a parchment circle slightly smaller than the interior base, press the circle flat, and add a greased side collar when the cake is delicate or rises above the rim. Start with the base because a flat circle prevents bottom sticking without creating folds in the cake’s side.
Step 1: Prepare the Pan and Parchment
Wash and dry the cake pan, then inspect the interior for baked-on residue or a warped base. Brush approximately 1/4 teaspoon of softened butter or neutral oil across the bottom and into the lower corners. The grease is an adhesive, not the primary release layer.
Place the pan on a level work surface. If the pan has a removable base, confirm that the base is seated correctly before measuring, because a gap can let batter escape under the parchment.
Success checkpoint: The bottom has a thin, even sheen with no pools of oil.
Common mistake: Spraying a heavy layer of release spray causes parchment to skate across the base when batter is poured.
Step 2: Cut a Round Parchment Base
The folded-triangle method is fastest for a round pan, while tracing produces the most exact circle. For the triangle method, cut a square larger than the pan, fold it in half twice, fold the resulting square diagonally, and fold it again into a narrow wedge.
Hold the wedge’s sharp tip at the center of the upside-down pan. Mark or cut the wedge at the pan’s inside radius, which is half the interior diameter. Snip the outer edge, unfold the paper, and place the circle in the greased pan.
For tracing, set the pan on parchment, draw around the outside edge, then cut 1-3 millimeters inside the line. The small reduction prevents the circle from climbing the wall and forming a ridge beneath the cake.
| Pan diameter | Circle diameter to cut | Typical batter capacity |
|---|---|---|
| 6 inches | 5 7/8-5 15/16 inches | 4-5 cups |
| 8 inches | 7 7/8-7 15/16 inches | 6-8 cups |
| 9 inches | 8 7/8-8 15/16 inches | 8-10 cups |
| 10 inches | 9 7/8-9 15/16 inches | 10-12 cups |
Pan capacities vary by depth and manufacturer. Use the circle diameter as the cutting measurement, not the outside diameter of a thick rolled rim.
Success checkpoint: The parchment lies flat with its edge touching the pan wall without rising more than 1/8 inch.
Common mistake: Cutting exactly around the pan’s exterior produces a circle that bunches against the side.
Step 3: Press the Base Flat
Set the parchment circle into the pan, coated side up when the manufacturer identifies a preferred side. Most silicone-coated parchment works in either orientation, but following the package direction removes uncertainty.
Smooth from the center toward the perimeter with dry fingers or a flexible bench scraper. Press the paper into the small curve where the base meets the wall, then lift and reposition any fold rather than forcing it flat.
Pour batter into the center of the parchment. The batter’s weight will hold the sheet down, but securing the paper first prevents batter from flowing underneath the circle.
Success checkpoint: No raised bubbles or loose flaps remain before batter enters the pan.
Common mistake: Leaving a central air bubble creates an uneven cake bottom and can make the parchment adhere in one spot.
Step 4: Add a Side Collar When Needed
A side collar is useful for chiffon-style cakes, sponge cakes, cheesecakes, sticky fruit cakes, and any batter that rises near the top of the pan. Cut a strip 1-2 inches longer than the pan’s inside circumference and 1 inch taller than the pan wall.
Grease the side wall lightly, place the strip inside the pan, and overlap the ends by about 1 inch. The grease holds the collar while the batter is added. For a cake that must climb the wall, avoid greasing the sides unless the recipe specifically requires easy release, because grease can reduce grip.
For a 9-inch round pan, the interior circumference is approximately 28 1/4 inches. A strip about 29-30 inches long usually provides enough overlap, although measuring the actual pan gives a better fit.
Success checkpoint: The collar stands vertically with a single smooth overlap and no pleats.
Common mistake: Making the strip too short leaves an open seam where batter can contact the pan.
Step 5: Make a Parchment Sling
A parchment sling is the most practical lining method for square and rectangular pans because the overhang provides handles for lifting cooled brownies, bars, and sheet cakes. Cut one strip the width of the pan’s base and long enough to cover the base, two opposite walls, and 2-3 inches of overhang on each end.
Grease the pan, lay the strip across the base, and press it into the two opposite corners. For maximum coverage, add a second strip perpendicular to the first. The two strips form a cross and cover all four walls.
Avoid binder clips inside the oven. Metal clips can be used only before baking to hold overhang temporarily, and they must be removed before the pan enters the oven.
| Pan size | First strip width | Recommended overhang | Typical use |
|---|---|---|---|
| 8 x 8 inches | 8 inches | 2 inches per end | Brownies and snack cake |
| 9 x 9 inches | 9 inches | 2-3 inches per end | Bar cookies and square cake |
| 9 x 13 inches | 9 inches | 2 inches per end | Sheet cake and baked slices |
| 10 x 15 inches | 10 inches | 2 inches per end | Thin sponge and tray bake |
Success checkpoint: The sling reaches into both corners without large gaps under the paper.
Common mistake: Cutting the strip to the exact pan length leaves no lifting handles and makes removal awkward.
Step 6: Fill and Bake the Lined Pan
Scrape batter into the center and spread it outward with a silicone spatula. Keep the batter at least 1 inch below a collar’s top edge unless the recipe specifies a high fill level.
Check that no parchment edge extends above the pan close to a top heating element. Paper overhang is safe only when it remains within the oven manufacturer’s clearance and the product’s temperature rating.
Bake according to the recipe. Parchment changes release behavior, not the cake’s recommended oven temperature or baking time.
Success checkpoint: The paper remains flat, the edges stay inside the pan, and no darkening or smoke appears.
Common mistake: Treating parchment as fireproof and allowing a loose corner to touch an element or oven wall.
Parchment, Silicone, or Grease and Flour?
Parchment is the best general choice for round, square, loaf, and rectangular cake pans when clean removal matters. Silicone liners reduce disposable waste, while grease and flour remains more effective for Bundt pans because flour can coat detailed grooves that flat paper cannot reach.
| Lining method | Release performance | Bottom browning | Cleanup time | Typical cost |
|---|---|---|---|---|
| Parchment circle | High on flat bases | Moderate | 1-2 minutes | $0.10-$0.30 |
| Parchment roll | High when fitted | Moderate | 1-3 minutes | $0.08-$0.20 |
| Silicone liner | High on matching pans | Light to moderate | 3-6 minutes | $10-$25 upfront |
| Grease and flour | Medium to high | Moderate to dark | 2-4 minutes | $0.05-$0.15 |
Parchment does not replace greasing in every recipe. A base circle can release cleanly while ungreased sidewalls hold the cake, which is desirable for some sponge cakes and undesirable for cakes that must be inverted.
Silicone mats also have limits. Thick silicone insulates the base, so cakes may brown more slowly and develop a softer bottom crust than cakes baked against metal with parchment.
When Should You Line the Sides?
Line the sides when the cake is fragile, sticky, tall, or likely to rise above the pan’s rim. A base-only lining usually works for standard butter cakes that are cooled briefly and turned onto a rack.
| Cake type | Base lining | Side lining | Release recommendation |
|---|---|---|---|
| Vanilla butter cake | Yes | Optional | Grease sides lightly |
| Flourless chocolate cake | Yes | Yes | Cool fully before turning out |
| Cheesecake | Yes | Usually yes | Use a collar above the batter line |
| Chiffon sponge | Optional | No grease if climbing | Follow the recipe’s pan instructions |
| Bundt cake | No flat base circle | No strip | Grease and flour every groove |
Pan-Specific Variations
Different pan shapes require different release strategies because parchment covers flat surfaces better than curved or fluted surfaces.
Loaf Pans
Cut a strip across the loaf pan’s width, leaving 2-3 inches overhang on the short ends. Press the paper along the base and long walls, then grease any uncovered corners. A second narrow strip can cover the remaining walls if the cake is especially sticky.
Springform Pans
Place a parchment circle over the removable base, then clamp the ring around it. Trim paper that extends beyond the outside edge if the recipe uses a water bath, because loose paper can wick water toward the cake.
For leakage-prone batters, wrap the outside of the springform base with heavy-duty foil only when the recipe calls for a water bath. Foil protects against bath water, not against batter escaping through a poorly seated ring.
Bundt and Fluted Pans
Do not attempt to fold parchment into deep flutes. Brush softened butter or shortening into every groove, dust with flour, and tap out the excess. Cocoa powder can replace flour for a dark chocolate cake when a white flour coating would show.
Muffin and Cupcake Pans
Use paper liners sized for the cavity rather than cutting individual parchment squares unless a rustic oversized liner is intended. Fill liners two-thirds full, because parchment cannot prevent a cup from overflowing when the batter quantity is excessive.
Common Mistakes and How to Fix Them
| Failure mode | Likely cause | Immediate fix | Prevention |
|---|---|---|---|
| Paper curls upward | Roll memory or dry pan | Grease beneath the sheet | Crumple and flatten parchment first |
| Batter runs underneath | Circle is undersized or lifted | Pour batter into the center | Use a 1-3 mm inside cut |
| Cake sticks to sides | Sidewall was not greased | Loosen with a thin knife | Grease the exposed walls |
| Wrinkled cake edge | Side strip is too long or pleated | Remove collar before baking if safe | Cut to circumference plus 1-2 inches |
| Paper browns heavily | Temperature exceeds label limit | Stop using damaged paper | Keep paper away from elements |
| Cake tears during removal | Cake is too warm or fragile | Cool 10-20 minutes longer | Lift with a sling or invert carefully |
A curled sheet can be tamed by crumpling parchment into a loose ball, flattening it, and then fitting it into the pan. Crumpling reduces the roll’s memory without damaging the silicone coating.
If batter has seeped under the parchment but the pan is still unbaked, leave the pan undisturbed and bake it. After cooling, trim the thin baked edge with a serrated knife. Do not pull hot parchment because the cake base may separate.
If parchment sticks after baking, the cake may have a high-sugar syrup layer or the paper may lack a suitable silicone coating. Chill the cake for 15-20 minutes, then peel the paper slowly at a low angle rather than pulling upward.
How Can You Prevent Parchment From Burning?
Prevent parchment from burning by keeping every exposed edge below the pan rim and away from oven walls, heating elements, and convection-fan openings. Follow the product label, because common parchment limits range from 425°F to 450°F, while oven broiling temperatures exceed those limits.
Parchment can darken at its edges without becoming immediately unsafe, but smoke, brittle black paper, or contact with a heating element indicates a serious placement problem. Wax paper is a separate material and should not be used as a cake-pan liner for standard baking temperatures.
Do not use parchment under a broiler, over an open flame, or on a grill unless the product specifically permits that application. Paper liners also should not extend beyond a pan placed in a compact countertop oven where the heating element sits close to the rack.
Time, Cost, and Quantity Guide
A pre-cut circle takes about 30-60 seconds to install, while tracing and cutting a custom shape usually takes 2-5 minutes. Typical grocery-store roll parchment costs approximately $4-$8 for 50 feet, but package width and regional pricing change the per-use figure.
| Task | Typical duration | Parchment quantity | Typical paper cost |
|---|---|---|---|
| 8-inch round base | 1-2 minutes | 1 circle | $0.08-$0.20 |
| 9-inch round plus collar | 3-5 minutes | 1 circle plus 30-inch strip | $0.20-$0.50 |
| 8-inch square sling | 2-3 minutes | 1 strip | $0.15-$0.35 |
| 9 x 13-inch two-strip lining | 4-6 minutes | 2 strips | $0.30-$0.70 |
| Loaf-pan sling | 2-4 minutes | 1 long strip | $0.15-$0.40 |
These are typical household figures, not fixed retail prices. Pre-cut circles reduce preparation time but cost more per sheet and limit you to the listed diameters. A roll is usually the better choice when pan sizes vary.
Expert Rules That Prevent Release Problems
Use the pan’s interior, not its label, for measurement. A pan marketed as 9 inches may measure slightly under or over 9 inches inside, especially when it has rolled edges or a thick nonstick coating.
Do not grease the entire sidewall automatically. Cakes that need vertical support, including some sponge cakes, can lose height when fat coats the wall. Use the recipe’s release instruction rather than applying a universal grease-and-paper routine.
Cool before lifting, but do not wait indefinitely. Ten to twenty minutes allows the structure to firm and steam to escape. Leaving a very moist cake in the pan for several hours can create condensation that softens the crust and makes parchment cling.
A parchment circle cannot correct an overfilled pan. Most cakes need room to expand, and filling beyond roughly two-thirds to three-quarters of the pan’s usable height increases overflow risk regardless of the liner.
Frequently Asked Questions
Should the parchment paper be greased before adding cake batter?
Usually, grease the pan beneath the parchment rather than heavily greasing the paper itself. The thin layer anchors the circle and limits batter seepage. A light coating on top can provide extra insurance for sticky cakes, but too much oil may cause the paper to slide or leave a greasy bottom crust.
Which side of parchment paper faces the cake?
The silicone-coated side should face the cake when the product identifies a coated side. Many modern baking parchment sheets are usable on either side because both surfaces are treated, but package instructions take precedence. Wax paper should not replace parchment simply because the sheets look similar.
Can you reuse parchment paper after baking a cake?
Reuse parchment only when the sheet is clean, dry, intact, and has not reached its temperature limit. A sheet used under a cake may be reused once for a similar low-mess task, but discard paper with burned edges, wet batter residue, folds that compromise fit, or grease that has soaked through.
Do you need parchment paper for a nonstick cake pan?
A nonstick pan can release many cakes without parchment, but parchment adds protection for fragile, sugary, or low-fat cakes. Use a base circle when the cake must remain visually perfect or when the pan’s coating is scratched. Avoid metal utensils that can damage the nonstick surface.
How do you remove a cake from parchment paper?
Cool the cake in the pan for 10-20 minutes, loosen any unlined edge with a thin spatula, and lift using the sling or invert the pan onto a rack. Peel the parchment slowly from one corner at a shallow angle. Pulling while the cake is hot can tear the base.
Can parchment paper go in a 450°F oven?
Parchment paper can be used at 450°F only when the package explicitly lists that limit and the paper stays away from direct heat. Many products list 425°F instead. For a recipe above the paper’s rating, use a properly greased pan or a manufacturer-approved silicone liner.
The Bottom Line
To line a cake pan with parchment paper, lightly grease the pan, cut the paper to the pan’s interior dimensions, smooth it flat, and line the sides only when the cake’s texture or height requires extra protection. Use a circle for round pans, a sling for square pans, and grease plus flour for Bundt pans. Follow the package temperature limit, cool the cake 10-20 minutes, and peel or lift the liner slowly. This method gives How to line a cake pan with parchment paper a predictable result: a cleaner release with fewer torn edges and less scraping.
