

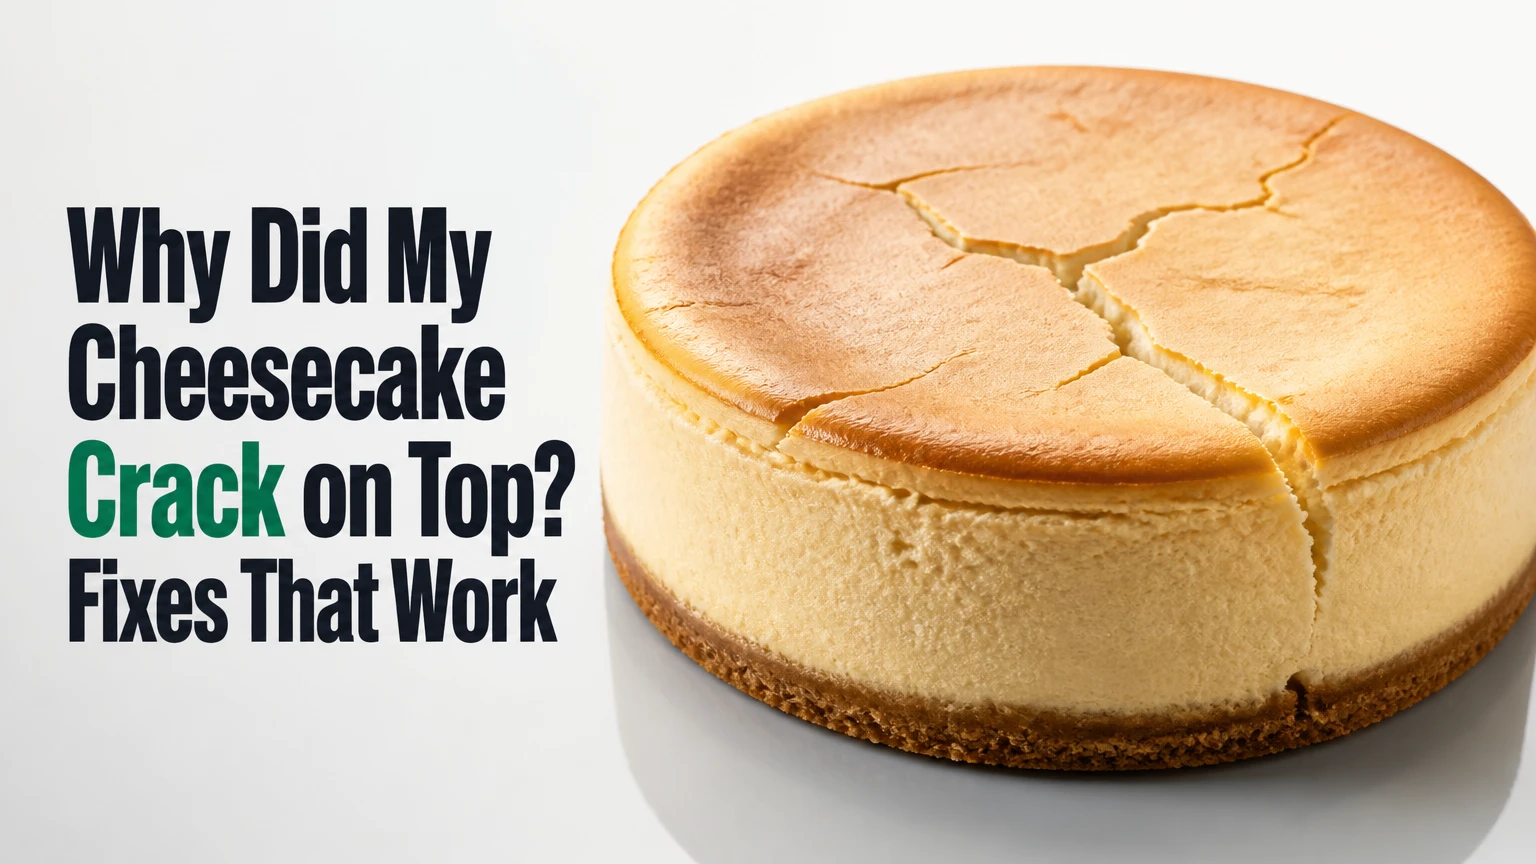
A cheesecake cracks on top when its baked custard sets too quickly, loses too much moisture, expands from trapped air, or sticks to the pan while shrinking. The most common causes are overbaking, excessive mixing, high or uneven oven heat, and rapid cooling. A crack usually affects appearance more than safety or flavor.
Key Facts at a Glance
Baked cheesecake is an egg-based custard, so overcooked proteins contract and push out moisture.
A cheesecake is usually ready when the outer 2 inches look set and the center still wobbles gently.
Overmixing after adding eggs creates air pockets that expand in the oven and collapse during cooling.
Releasing the cheesecake edge after partial cooling reduces tension as the filling contracts.
A water bath moderates heat, but a water pan, lower temperature, and gradual cooling can also reduce cracking.
A crack is generally cosmetic unless the cheesecake remains visibly raw, has been held too warm, or develops spoilage.
What Causes a Cheesecake to Crack on Top?
A cheesecake cracks on top because the filling contracts unevenly while its surface or edge resists that movement. High heat, overbaking, excess air, and rapid cooling all increase the difference between the shrinking center and the more rigid outer structure.
Cheesecake filling contains cream cheese, eggs, sugar, and usually sour cream or another dairy ingredient. Egg proteins form the structure during baking. When those proteins become too firm, the custard cannot accommodate normal moisture loss and cooling shrinkage, so the surface splits at its weakest point.
The crack may form in the oven, during the first hour of cooling, or after refrigeration. Timing helps identify the cause.
| When the crack appears | Most likely cause | Typical visual clue | First correction |
|---|---|---|---|
| During baking | High heat or trapped air | Center rises, then splits | Lower heat and mix eggs briefly |
| Immediately after baking | Overbaking | Firm center and browned rim | Remove cheesecake earlier |
| During oven cooling | Edge friction or temperature drop | Crack begins near the edge | Release the perimeter |
| During refrigeration | Fast contraction or under-set filling | Top sinks around a fissure | Cool gradually and chill uncovered briefly |
| After slicing | Weak or underbaked structure | Wet interior pulls apart | Extend baking slightly next time |
How does cheesecake filling set?
Cheesecake filling sets when egg proteins coagulate and form a network that holds dairy fat and water in place. The network becomes tighter with higher temperature and longer baking, which explains why an overbaked cheesecake often looks dry, puffy, or cracked.
The filling does not need to become rigid in the oven. Residual heat continues cooking the center after the oven turns off, and refrigeration firms the dairy fat and completes the texture. A set cheesecake should therefore have a stable outer ring and a controlled center wobble, rather than a completely motionless surface.
Did Overbaking Make the Crack Worse?
Overbaking is the most common direct cause of a large cheesecake crack. A cheesecake that stays in the oven until the center looks solid has usually lost the flexibility needed to contract without splitting.
Typical signs include a deeply browned top, a dry or crumbly edge, a center temperature above the recipe’s intended range, and a filling that pulls sharply away from the crust. The cheesecake may also sink after cooling because the expanded custard loses steam and structural support.
The exact baking time changes with pan diameter, filling depth, oven type, and starting temperature. A 9-inch cheesecake filled 2 inches deep may finish in 55-75 minutes, while a 6-inch, deeper cheesecake can require longer despite its smaller width.
| Variable | Typical effect on baking | Crack risk | Practical adjustment |
|---|---|---|---|
| 6-inch deep pan | Center heats slowly | Medium to high | Use lower heat and add 10-20 minutes |
| 9-inch standard pan | Even heat penetration | Low to medium | Begin checking at 55 minutes |
| 10-inch shallow pan | Center sets quickly | Medium | Check 10 minutes earlier |
| Dark metal pan | Absorbs more radiant heat | Medium to high | Reduce temperature by 10-15°F |
| Glass pan | Heats more gradually | Medium | Allow a longer bake at steady heat |
| Convection oven | Moves hot air continuously | Medium to high | Reduce recipe temperature by 15-25°F |
How do you know when cheesecake is done?
A cheesecake is done when the outer 1.5-2 inches are visibly set and the center moves as one soft mass when the pan is nudged. The center should wobble like gelatin, not ripple like liquid.
A digital thermometer can provide additional information, but it is not a universal replacement for the visual test. Recipes differ in sugar, dairy, starch, and egg content, and probe placement can produce misleading readings near the crust or in an air pocket. The United States Department of Agriculture advises that egg dishes reach 160°F for food safety, while many cheesecake recipes are removed at a lower reading because carryover cooking continues; follow the tested recipe and use pasteurized eggs when appropriate.
| Doneness signal | Underbaked result | Proper result | Overbaked result |
|---|---|---|---|
| Center movement | Sloshes or ripples | Wobbles as one mass | Barely moves |
| Outer ring | Looks wet | Set for 1.5-2 inches | Puffy and dry |
| Surface color | Pale and glossy | Pale to lightly golden | Brown or blistered |
| Edge position | Level with center | Slightly raised | Pulled sharply inward |
| Chilled texture | Loose or soupy | Smooth and sliceable | Dense, dry, or crumbly |
Did Air Bubbles Make the Cheesecake Crack?
Air bubbles can make a cheesecake crack by expanding during baking and collapsing as the filling cools. Overmixing, whisking at high speed, and adding cold ingredients to a thick batter increase the amount of trapped air.
Cream cheese should be softened before mixing because firm blocks require aggressive beating. Mix the cream cheese and sugar until smooth, then add sour cream and flavorings. Add eggs last, using low speed and stopping as soon as the mixture becomes uniform.
Tapping the filled pan five to ten times on a folded towel can bring large bubbles to the surface. A skewer can remove individual bubbles, but repeated stirring after the eggs are incorporated creates more air than it removes.
Can cold ingredients cause a crack?
Cold ingredients do not automatically cause cracking, but they can produce a lumpy batter that requires overmixing. Unevenly blended cream cheese also creates dense pockets that set at different rates, which increases local stress during cooling.
Use cream cheese, eggs, and sour cream at approximately 68-72°F when the recipe permits. Do not leave dairy or eggs at room temperature for several hours in a warm kitchen. A practical approach is 30-60 minutes for eggs and 45-90 minutes for cream cheese, followed by immediate mixing and baking.
Does a Water Bath Prevent Cheesecake Cracks?
A water bath reduces cracking by surrounding the pan with humid, moderate heat, but it does not guarantee a smooth top. Overbaking, overmixing, or a stuck edge can still split a cheesecake baked in a bain-marie.
Boiling water should reach about 1 inch up the outside of the cheesecake pan. Wrap the springform pan with two overlapping layers of wide foil, or place the pan inside a silicone leakproof sleeve before setting it in the roasting pan.
A water bath also improves texture because the oven environment dries the surface more slowly. Its main disadvantage is leakage, which can soften a crumb crust.
| Baking method | Typical added cost | Heat moderation | Crust risk | Best use |
|---|---|---|---|---|
| Direct oven bake | $0 | Low | None | Firm, rustic cheesecake |
| Water pan on lower rack | $0-$5 | Medium | None | Moderate crack prevention |
| Traditional water bath | $3-$15 | High | Foil leakage possible | Smooth, creamy custard |
| Silicone water-bath sleeve | $12-$25 | High | Low | Frequent springform baking |
| Low-temperature bake | $0 | Medium | None | Bakers without roasting pans |
Which method works without a water bath?
A lower-rack water pan combined with a 300-325°F oven is the strongest simple alternative to a traditional bain-marie. The pan adds humidity without placing the cheesecake directly in water, while gradual cooling limits temperature shock.
A low-temperature bake also works, especially in a well-calibrated oven. The trade-off is time: a cheesecake may need 75-105 minutes rather than 55-75 minutes, and the lower heat does not correct an overmixed batter or a pan edge that remains attached.
Can Cooling Cause a Cheesecake Crack?
Cooling can cause a cheesecake crack when the filling contracts faster than the pan, crust, or surface can accommodate. Moving a hot cheesecake directly into a refrigerator creates a steep temperature change and encourages uneven shrinkage.
Turn the oven off when the cheesecake reaches the correct jiggle, leave the door open 1-2 inches, and let the cheesecake remain inside for 45-60 minutes. Move it to the counter for another 1-2 hours, then refrigerate it for at least 6 hours, preferably overnight.
Release the edge after roughly 30-60 minutes of oven cooling. A thin knife run around the perimeter allows the filling to pull inward and downward instead of tearing at the center.
| Cooling stage | Typical duration | Recommended setting | Purpose |
|---|---|---|---|
| Rest in turned-off oven | 45-60 minutes | Door open 1-2 inches | Reduce thermal shock |
| Counter cooling | 1-2 hours | Room temperature, draft-free | Complete gradual contraction |
| Initial refrigeration | 6-12 hours | 35-40°F | Firm custard and dairy fat |
| Storage after chilling | Up to 5 days | Covered at 40°F or below | Maintain food quality |
| Freezer storage | Up to 1 month | Airtight, sliced or whole | Preserve longer term |
How Does the Pan Create a Crack?
A pan creates a crack when the cheesecake edge sticks to the sides while the center shrinks. The attached edge acts like an anchor, forcing the contracting filling to split across the top.
Grease the sides lightly and line them with a strip of parchment if the recipe allows. Heavy greasing is not always better because excess fat can soften the crust or encourage slippage. The important action is releasing the edge during cooling, not merely coating the pan before baking.
Springform pans vary in seal quality and diameter. A loose base can allow water into the crust, while a warped side can create localized friction. Check the pan for gaps and place it on a sheet pan when using a dry-bake method.
Does parchment paper prevent cheesecake cracks?
Parchment reduces friction between the filling and the pan, but parchment alone cannot prevent cracks caused by overbaking or excessive air. A bottom circle protects the crust, while a side strip helps the filling contract freely.
Use parchment that reaches slightly above the filling line. Secure the strip with a small smear of butter before adding batter, and avoid folds that leave ridges in the finished edge.
How Can You Prevent Cheesecake Cracks From the Start?
Prevent cheesecake cracks by controlling four variables: batter aeration, oven heat, doneness, and cooling. The following process is reliable for a standard 9-inch baked cheesecake with approximately 2-2.5 inches of filling.
- Prepare the pan. Grease the sides, line the base, and add a parchment collar if the recipe supports one. Set the pan on a sheet pan for stability.
- Soften the ingredients. Bring cream cheese to 68-72°F and eggs to about 68°F, but keep the ingredients protected from prolonged room-temperature exposure.
- Mix the base gently. Blend cream cheese and sugar at low or medium-low speed until smooth. Scrape the bowl twice.
- Add eggs last. Incorporate one egg at a time on low speed. Stop immediately when no visible streaks remain.
- Remove bubbles. Pour the batter slowly, tap the pan five to ten times, and pop visible bubbles with a skewer.
- Bake with stable heat. Use a water bath, lower-rack water pan, or steady 300-325°F dry bake. Avoid opening the door during the first 45 minutes.
- Check the center. Remove the cheesecake when the outside is set and the middle has a gelatin-like wobble.
- Cool gradually. Turn off the oven, prop the door open, and leave the cheesecake inside for 45-60 minutes.
- Release and chill. Loosen the edge, cool on the counter for 1-2 hours, then refrigerate for 6-12 hours.
Practitioner rule: Do not judge doneness by surface color. Cheesecake can remain pale while fully set, and a browned surface often indicates that the outer proteins have tightened too far.
What Does the Crack Pattern Tell You?
The crack pattern often identifies the failure point. A central fissure usually points to surface tension, air expansion, or a rapidly shrinking center, while several radial cracks suggest uneven heat or a strongly puffed batter.
A crack around the edge often indicates that the perimeter adhered to the pan. A sunken ring with a raised center commonly signals overbaking or excessive air. A wet, clean split can indicate underbaking rather than heat damage.
| Crack pattern | Likely mechanism | Confirming symptom | Next-bake correction |
|---|---|---|---|
| One deep center line | Center contraction | Puffy center before cooling | Reduce air and remove earlier |
| Several spokes | Uneven heat or bubbles | Cracks radiate outward | Check oven temperature and tap pan |
| Crack beside crust | Edge adhesion | Filling pulls from side | Grease, parchment, and release edge |
| Hairline surface marks | Mild drying | Texture remains creamy | Add humidity or shorten bake |
| Wide canyon with sinking | Severe overbaking | Dry outer ring | Lower heat and stop at jiggle |
| Crack after chilling | Rapid contraction | Smooth surface before refrigeration | Cool longer at room temperature |
Why did my cheesecake sink as well as crack?
A cheesecake sinks as well as cracks when its filling rises from expanding air or steam and then loses that support during cooling. Overmixing, overbaking, and an abrupt temperature drop all make the collapse more noticeable.
A slight dip is normal because cheesecake contracts as it cools. A deep crater, gummy center, or separated liquid indicates a process problem. Topping the cooled surface can conceal a shallow dip, but a raw center requires food-safety judgment rather than decoration.
Can You Repair a Cracked Cheesecake?
You can repair a cracked cheesecake cosmetically, but you usually cannot restore the original smooth surface without adding a topping. Shallow cracks may soften with gentle heat, while deep fissures need a stable cover such as sour cream, ganache, or fruit.
For a shallow crack, chill the cheesecake until firm, dip a small offset spatula in hot water, dry it thoroughly, and smooth the surface with minimal pressure. Do not pour water onto the cake, and do not repeatedly heat the same area.
For a medium crack, spread a thin sour-cream topping over the surface. A common mixture uses 1 cup sour cream, 2 tablespoons sugar, and 1 teaspoon vanilla, baked for approximately 5-10 minutes at the recipe’s finishing temperature. The topping changes the flavor and adds moisture, so it is a repair rather than an invisible restoration.
| Crack condition | Best repair | Quantity or tool | Limitation |
|---|---|---|---|
| Hairline, less than 1/16 inch | Warm spatula | 1 small offset spatula | Works only before excessive drying |
| Shallow, under 1/8 inch | Sour-cream layer | 1 cup sour cream mixture | Alters the top flavor |
| Deep, over 1/4 inch | Fruit compote | 1/2-1 cup thick compote | Must be chilled before spreading |
| Wide or sunken fissure | Ganache or caramel | 1/2-3/4 cup thick topping | Masks rather than repairs structure |
| Broken slices | Crumbled topping | 1/2 cup crumbs plus cream | Best served as individual portions |
What should you not do with a cracked cheesecake?
Do not press a warm cheesecake together with force, flood a deep crack with liquid sauce, or return an already overbaked cheesecake to the oven. Those actions can deform the custard, make the crust soggy, or intensify separation.
If the crack exposes a visibly liquid center, chill the cheesecake first and assess its texture. A topping can hide a fissure, but it cannot make an unsafe or substantially raw filling safe.
Is a Cracked Cheesecake Safe to Eat?
A cracked cheesecake is usually safe to eat when the filling is fully set, the cake was baked and chilled correctly, and it has been stored at 40°F or below. The crack itself is a quality defect, not a food-safety hazard.
Discard cheesecake that has a sour or fermented odor, mold, unusual sliminess, or prolonged room-temperature exposure. Perishable foods should not remain between 40°F and 140°F for more than 2 hours, or more than 1 hour when the surrounding temperature exceeds 90°F.
If the recipe contains uncooked eggs or the center remains liquid after chilling, use pasteurized eggs or follow the recipe’s tested safety guidance. Vulnerable diners, including pregnant people, older adults, and immunocompromised individuals, should receive fully cooked portions.
What Are the Best Alternatives to a Crack-Prone Bake?
A no-bake cheesecake eliminates oven-related cracking because refrigeration, gelatin, whipped cream, or another setting system provides structure instead of coagulated eggs. The result is usually softer and lighter than a traditional baked custard.
A cheesecake bar in a shallow pan is another practical alternative because its lower filling depth sets more evenly. Individual cheesecakes also reduce the distance heat must travel, although they can dry quickly if overbaked.
| Alternative | Setting method | Typical time | Texture | Main limitation |
|---|---|---|---|---|
| No-bake cheesecake | Refrigeration or gelatin | 6-12 hours | Soft and mousse-like | Needs a cold chain |
| Cheesecake bars | Shallow egg custard | 30-45 minutes | Firm and sliceable | Edges can dry |
| Mini cheesecakes | Small baked custards | 18-30 minutes | Dense and creamy | Easy to overbake |
| Pressure-cooker cheesecake | Moist pressurized heat | 25-40 minutes | Very moist | Smaller diameter |
| Baked crustless cheesecake | Egg and dairy set | 45-70 minutes | Custard-like | More difficult to unmold |
The no-bake method is not better for every dessert. It is useful when appearance and convenience matter most, but it cannot reproduce the dense, lightly tangy structure of a baked New York-style cheesecake.
How Do You Store and Serve Cracked Cheesecake?
Store cracked cheesecake covered in the refrigerator for up to 5 days, or freeze it airtight for about 1 month for best quality. Chill the cake fully before adding whipped cream, fruit, caramel, or other moist toppings.
Use a serrated or thin chef’s knife warmed under hot water and dried between cuts. Slice straight down rather than dragging the blade through the filling, because lateral pressure can widen an existing fissure.
Remove only the portion you plan to serve. Repeated warming and chilling creates condensation and weakens the surface, especially where a crack has already exposed the interior.
Frequently Asked Questions
Will a cheesecake crack if I open the oven door once?
A single brief opening does not guarantee a crack, but it can lower the oven temperature during the period when the filling is expanding and setting. Avoid opening the door for at least the first 45 minutes, then check quickly through the glass or use the oven light.
Should I cover cheesecake while it cools?
Do not cover a hot cheesecake tightly because trapped steam can condense on the surface and soften the crust. Cool it uncovered until chilled, then cover it with plastic wrap, foil, or a cake container that does not touch the top.
Can cornstarch stop cheesecake from cracking?
Cornstarch can strengthen a cheesecake filling and reduce curdling because starch limits protein movement, but it cannot correct high heat or overbaking. Typical recipes use about 1-2 tablespoons per 24 ounces of cream cheese, depending on the intended texture.
Why did my cheesecake crack only in the center?
A center-only crack usually means the middle rose, set, and then contracted more than the surrounding filling. Excess air, high heat, or leaving the cheesecake in the oven until the center became firm are the most common explanations.
Does convection baking make cheesecake crack?
Convection baking can increase crack risk because moving hot air transfers heat more efficiently and dries the surface faster. Reduce the recipe temperature by 15-25°F, begin checking earlier, and use a water bath or lower-rack water pan when the recipe permits.
Can I freeze a cracked cheesecake?
You can freeze a fully chilled cracked cheesecake for about 1 month if it is wrapped tightly and protected from freezer odors. Freeze it without fresh whipped cream or wet fruit toppings, then thaw it overnight in the refrigerator before covering the crack.
The Bottom Line
Why did my cheesecake crack on top? In most cases, the filling was overbaked, mixed with too much air, cooled too quickly, or prevented from shrinking by a stuck pan edge. Use low-speed mixing, stable heat around 300-325°F, the jiggle test, gradual cooling, and an early edge release. A crack rarely ruins the dessert, and a chilled cheesecake can be repaired with a warm spatula or an intentional topping.
