

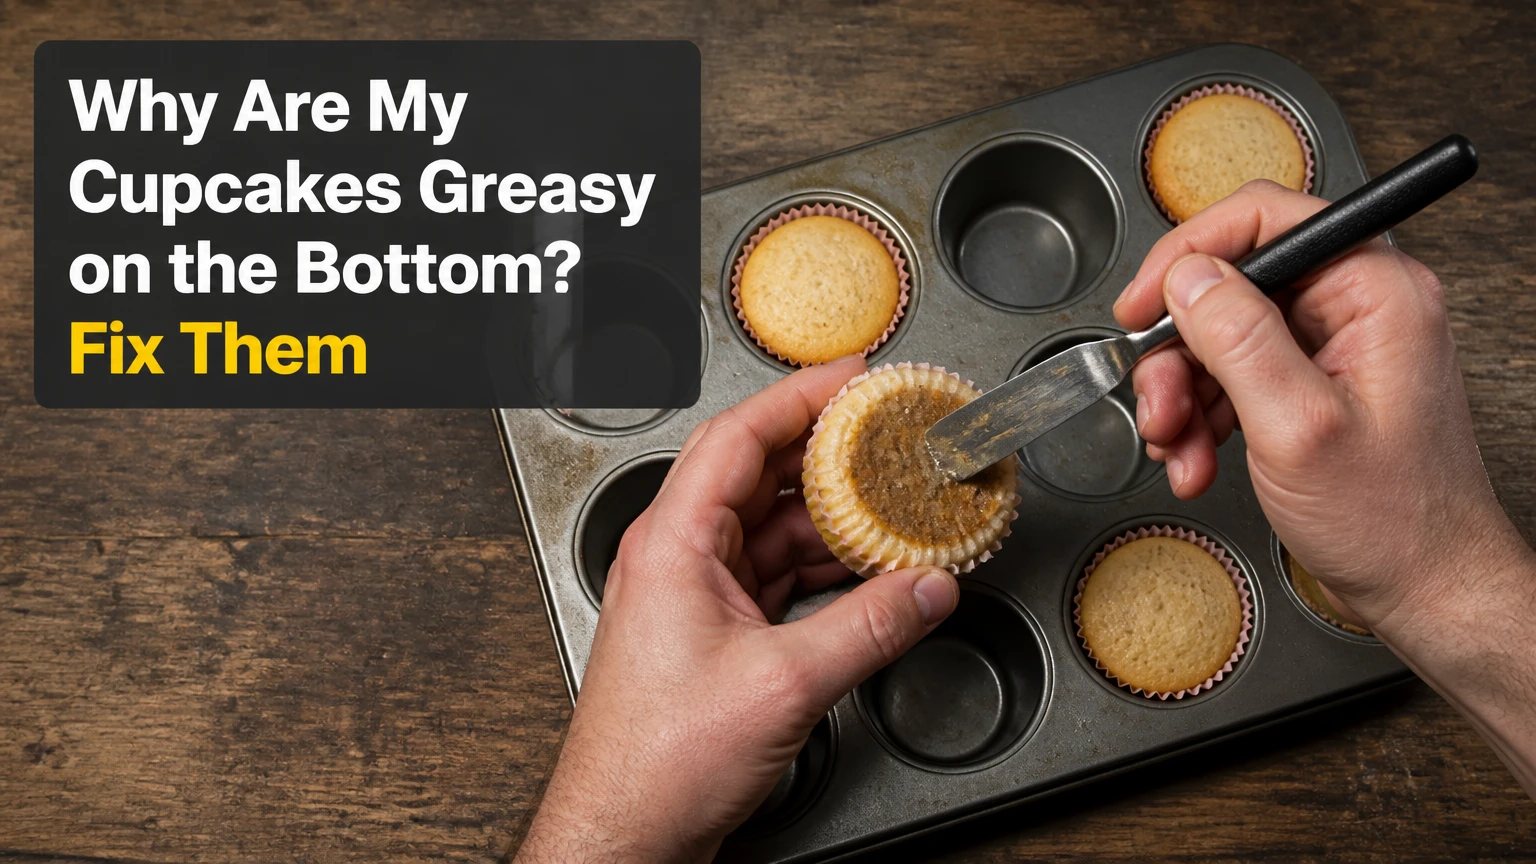
Greasy cupcake bottoms usually mean excess liquid fat separated from the batter or remained unabsorbed as the crumb set. Common causes include too much oil, melted or overheated butter, cold ingredients that curdled a butter emulsion, inaccurate flour measurement, underbaking, and leaving cupcakes in the hot pan too long.
Key Facts at a Glance
- A greasy cupcake bottom usually indicates fat separation, excess fat, or an under-set crumb.
- Butter batter is most stable when butter and eggs are near 18-21°C, or 65-70°F.
- Oil-based cupcakes can still become greasy when the recipe contains too much oil or too little flour.
- Paper liners absorb escaping fat; foil and glassine liners hide or redirect it rather than repairing the batter.
- Transfer cupcakes to a wire rack after about 2-5 minutes in the pan to limit condensation.
- A wet, gummy center requires more attention than a merely translucent or oily liner.
Why Are My Cupcakes Greasy on the Bottom?
Cupcakes become greasy on the bottom when the batter cannot retain all of its fat while the crumb structure forms. The separated butter or oil moves through the soft batter, collects near the base, or migrates into the liner, especially when the recipe has a high fat-to-flour ratio or the cake remains hot in the pan.
The process is more complicated than fat simply being “heavy.” Butterfat is less dense than water, while a cupcake batter contains water, dissolved sugar, starch, proteins, and air. Separation occurs because the fat droplets join together and move through weak or slowly setting batter; gravity, capillary action, steam, and contact with the liner then determine where the oil becomes visible.
A stable cake batter needs three things to happen in sequence: the fat must disperse, the liquid must remain distributed, and flour starches and egg proteins must set before the fat escapes. A recipe can fail at any one of those stages.
What happens inside the oven?
During baking, butter melts, water becomes steam, air expands, and flour starch begins absorbing liquid. Egg proteins coagulate and flour starch gelatinizes as the internal temperature rises. If the batter has too much free fat, too little flour, weak emulsification, or insufficient heat, the crumb sets after the fat has already migrated.
The result may be a shiny base, a damp ring around the liner, a dense lower third, or an oily wrapper with an otherwise acceptable crumb.
What Are the Main Causes of Greasy Cupcake Bottoms?
The most common causes are a recipe imbalance, poor measurement, a broken butter emulsion, excessive mixing heat, or incomplete baking. The visible symptom helps identify which cause deserves attention first.
| Symptom | Most likely cause | First correction |
|---|---|---|
| Oily liner with normal crumb | Paper absorbed surface fat | Use correct fat quantity and transfer cupcakes sooner |
| Shiny, dense base | Fat separated before crumb set | Check batter temperature, flour measurement, and baking time |
| Grease plus sunken center | Underbaking or excess liquid | Bake to a set center and verify oven temperature |
| Curdled batter before baking | Cold eggs or milk | Bring ingredients near 18-21°C before mixing |
| Grease only in chocolate cupcakes | Cocoa, melted chocolate, or added liquid altered balance | Weigh dry ingredients and review the complete formula |
| Grease around fruit pockets | Wet fruit released liquid during baking | Drain and dry fruit, then lightly coat it with flour |
| Grease after refrigeration | Butter solidified and became more noticeable | Let cupcakes warm slightly before judging texture |
Can too much oil make cupcakes greasy?
Yes. Excess oil is one of the clearest causes of greasy cupcake bottoms because liquid oil does not create a solid structure while the cake bakes. A small measuring error matters: adding 15-30 grams more oil to a 12-cupcake batch can produce a noticeably slick crumb, particularly when the recipe already contains yogurt, sour cream, fruit purée, or melted chocolate.
Oil is not inherently unstable. Proper oil-based recipes are designed around the amount of flour, sugar, eggs, and liquid present. The problem begins when the formula is altered, oil is measured in a volume cup rather than weighed, or a baker substitutes oil for butter without accounting for butter’s water content.
Can too little flour cause oily bottoms?
Yes. Under-measured flour leaves less starch and protein available to absorb liquid and set the crumb. Scooping flour directly from a compacted bag can produce inconsistent quantities, while spooning flour into a measuring cup and leveling it or weighing it produces a more repeatable result.
For a typical 12-cupcake batch, weighing flour to the recipe’s stated gram value is more reliable than adding an unverified extra spoonful. Do not automatically add flour after every greasy bake, because a recipe may instead have excessive fat, an incorrect oven temperature, or a timing problem.
How Does Mixing Method Affect Grease?
Mixing method determines whether fat is dispersed through the batter and whether the finished crumb contains enough air and structure. Butter-based cupcakes depend on creaming and emulsification, while oil-based cupcakes depend more heavily on the dry-to-liquid ratio and controlled mixing.
| Fat system | Typical water content | Main structural action | Main greasy-bottom risk |
|---|---|---|---|
| Unsalted butter | About 15-18% | Creaming adds air; water supports steam | Melted butter, cold eggs, or over-creaming |
| Vegetable oil | About 0% | Coats flour and preserves moisture | Excess oil, thin batter, or underbaking |
| Baking margarine | Varies, often 15-25% | Emulsified fat with variable water | Product formula differs from recipe assumption |
| Soft spread | Can exceed 20% water | Designed for spreading, not always baking | Excess water and weak cake structure |
| Shortening | About 0% | Traps air during creaming | Poor aeration or an altered recipe ratio |
Why does creamed butter batter turn greasy?
Creamed butter batter turns greasy when butter becomes too warm, is beaten for too long, or cannot absorb the liquid added later. Properly softened butter should yield under pressure but still hold its shape; melted or glossy butter cannot retain the same air cells.
Cream butter and sugar until the mixture is lighter and aerated, then add eggs gradually. If the batter looks curdled after the eggs, add a small portion of the measured flour before continuing, rather than adding random extra flour at the end. The flour helps stabilize the mixture, but it does not fully repair a recipe with incorrect proportions.
King Arthur Baking’s explanation of curdled cake batter describes the practical principle clearly: a split batter is “not necessarily doomed,” because measured flour can help bring the mixture back together before the remaining liquid and dry ingredients are added. The advice applies only when the recipe quantities are correct.
Is an oil method less likely to become greasy?
An oil method is usually more forgiving of ingredient temperature because oil remains liquid at room temperature and does not require creaming. Oil-based cupcakes often stay moist longer, but they still become greasy when the recipe has excess oil, inadequate flour, too much liquid, or an under-set center.
Do not switch from butter to oil at equal volume without checking the recipe. Butter contains water, so replacing 113 grams of butter with 113 grams of oil adds more pure fat and removes the butter’s water contribution. Use a tested oil-based formula or convert by weight with a recipe designed for substitution.
Which Fat and Liner Choices Reduce Grease?
Butter generally gives a firmer, more aerated crumb when creamed correctly, while oil gives a moister crumb with fewer temperature-sensitive steps. Liners affect where grease appears, but they cannot correct a batter that releases too much fat.
| Choice | Typical result | Advantage | Limitation |
|---|---|---|---|
| Butter, creamed | Light, aromatic crumb | Strong flavor and air incorporation | Sensitive to butter and egg temperature |
| Neutral oil | Moist, tender crumb | Simple mixing and longer softness | Shows excess fat more readily in a soft crumb |
| Shortening | Tender, stable crumb | High tolerance for creaming | Less butter flavor and a different mouthfeel |
| Margarine | Variable crumb | Can lower ingredient cost | Water and emulsifier content differ by brand |
| Standard paper liner | Visible oil absorption | Easy release and low cost | Grease can bleed through the paper |
| Foil liner | Minimal external staining | Strong barrier and neat presentation | Oil may remain pooled inside the liner |
| Glassine liner | Better grease resistance | Cleaner appearance than porous paper | Does not prevent internal separation |
Greaseproof paper can improve presentation, but “greaseproof” does not mean fatproof under every baking condition. A nonporous liner can make the outside look clean while leaving a greasy base inside the wrapper.
Should you change the liners?
Change liners when the cake texture is sound but the paper looks oily. Keep the recipe unchanged for one test batch, use a properly sized grease-resistant liner, and compare the result. If the cupcake itself has a slick, dense, or wet base, changing liners alone will conceal the symptom rather than solve the cause.
How Can You Diagnose the Exact Failure?
Diagnose greasy cupcakes by examining the batter before baking, the crumb after cooling, and the liner separately. A clean crumb with a stained wrapper indicates a presentation problem, while a shiny, dense, or wet base indicates a batter or baking problem.
| Evidence | Interpretation | Diagnostic test |
|---|---|---|
| Crumb is fluffy; liner is translucent | Liner absorbed normal surface fat | Test grease-resistant liners |
| Bottom is compact and shiny | Fat moved before structure set | Check oven heat and batter balance |
| Center is gummy on a toothpick | Cupcake is underbaked | Extend baking until moist crumbs appear |
| Batter was glossy before filling | Butter overheated or oil was excessive | Review mixing temperature and weights |
| Batter was curdled after eggs | Emulsion broke | Warm ingredients and add eggs gradually |
| Cupcakes sat in pan 10-20 minutes | Condensation softened the base | Transfer after 2-5 minutes |
| All batches from one recipe fail | Formula or ingredient substitution issue | Recheck every ingredient by weight |
A practitioner’s useful rule is to cut one cupcake from the center of the batch, not just inspect the wrapper. The liner reports migration. The cut crumb reports whether the cake structure actually failed.
How Do You Fix Greasy Cupcakes After Baking?
Greasy cupcakes can sometimes be made presentable, but baked fat cannot be fully reabsorbed into the crumb. Cool the cupcakes completely, remove them from the pan, and separate a cosmetic liner problem from a texture problem before deciding whether to serve, trim, or repurpose them.
Use this recovery sequence:
- Move the cupcakes to a wire rack. Remove them from the metal pan after about 2-5 minutes so trapped steam can escape.
- Cool completely. Warm cake feels oilier because fat remains liquid; judge the crumb at room temperature.
- Replace the liner. If the crumb is sound, place each cupcake in a fresh grease-resistant liner.
- Blot the base gently. Press the bottom against a paper towel for one second; do not squeeze the cake.
- Trim only a thin layer. Remove a shiny base if the remaining crumb is fully baked and pleasant.
- Repurpose dense cupcakes. Crumble them for cake truffles or layered desserts if the texture is heavy but the flavor is safe.
Do not frost a wet or underbaked center to disguise it. Frosting adds more fat and moisture, and the finished cupcake may collapse or become unpleasantly dense.
Are greasy cupcakes safe to eat?
Greasy cupcakes are generally safe when they are fully baked, made with fresh ingredients, and stored correctly. Grease affects quality more often than safety. A raw center, sour odor, mold, rancid flavor, or prolonged storage at unsafe temperatures is a separate reason to discard the batch.
Egg-containing cake should reach a fully set texture rather than remain batter-like. The exact internal temperature varies by formula, pan size, and ingredients, so visual and toothpick checks should support, not replace, the recipe’s baking time and an accurately calibrated oven.
What Baking Variables Prevent Greasy Bottoms?
Accurate weighing, correct ingredient temperatures, moderate mixing, and complete baking prevent most greasy cupcake bottoms. The most useful prevention plan changes one variable at a time, because replacing the liner, changing the fat, and extending baking simultaneously makes the underlying cause impossible to identify.
What temperature should the ingredients be?
For butter-based cupcakes, use butter that is soft but not shiny, usually around 18-21°C, and eggs and dairy near the same range. Exact room temperature is less important than avoiding a large temperature gap between the fat and liquid ingredients.
Warm refrigerated eggs in a bowl of lukewarm water for about 5 minutes, then dry the shells before cracking. Do not use hot water, which can begin warming the egg unevenly. If butter becomes glossy or partially melted, chill it briefly until it regains a soft, plastic texture.
How long should cupcakes cool in the pan?
Transfer cupcakes after approximately 2-5 minutes in the pan. The short rest lets the crumb firm enough for handling, while a long rest exposes the base to residual metal heat and increases steam condensation between cake and liner.
Cooling time is not an exact universal deadline. A dark metal pan may retain more heat than a light aluminum pan, and mini cupcakes cool faster than standard cupcakes. The practical checkpoint is that the cupcakes should release without collapsing and should no longer sit against a steaming pan.
What oven problems create oily bottoms?
An oven that runs cool can delay starch and protein setting, giving fat more time to migrate before the cupcake structure firms. A filled pan, low rack position, thin batter, or opening the door repeatedly can produce a similar result.
| Oven or pan variable | Typical target | Failure consequence | Correction |
|---|---|---|---|
| Standard cupcake temperature | 175-180°C, or 350-355°F | Slow setting or excessive browning | Verify recipe and oven calibration |
| Fill level | About 50-สอง-thirds full | Overflow or dense lower crumb | Portion batter by weight |
| Rack position | Center rack | Uneven top and bottom heat | Move pan to the center |
| Pan material | Light aluminum or standard steel | Dark pans brown faster | Reduce heat by about 5-10°C if needed |
| Doneness check | Moist crumbs, no liquid batter | Gummy base and sinking | Add 2-4 minutes, then recheck |
| Oven calibration | Within about 5-10°C of setting | Repeated batch failure | Use an oven thermometer |
The stated temperature is a typical range, not a replacement for the recipe’s tested setting. Chocolate, fruit-heavy, gluten-free, and jumbo cupcakes may require different baking times.
How Should You Adjust Special Cupcake Recipes?
High-moisture, gluten-free, filled, and chocolate cupcakes need separate diagnosis because their dry ingredients and liquids behave differently from a basic vanilla formula. Do not apply a universal “add more flour” fix to these recipes.
| Cupcake situation | Added variable | Greasy-bottom risk | Better adjustment |
|---|---|---|---|
| Gluten-free batter | Rice flour and starch blend | Weak structure before cooling | Use the recipe’s binder, often xanthan gum |
| Fruit-filled cupcake | Berries, jam, or purée | Local liquid pockets | Drain fruit and reduce added liquid only if tested |
| Chocolate cupcake | Cocoa or melted chocolate | Dry ingredients absorb differently | Weigh cocoa and follow the formula exactly |
| Yogurt or sour cream cake | Additional dairy water | Soft, slow-setting crumb | Avoid adding extra oil or underbaking |
| Mini cupcakes | Small volume and fast heat transfer | Overbaking edges before base sets | Shorten baking time and monitor early |
| Jumbo cupcakes | Deep batter column | Wet center and oil migration | Lower heat slightly and extend baking |
Gluten-free flour does not automatically cause grease, and gluten is not the only structure-forming system in a cupcake. Starches, egg proteins, gums, milk proteins, and proper baking all contribute. A tested gluten-free blend with a measured binder is more reliable than adding an arbitrary extra quarter teaspoon of xanthan gum.
Filled cupcakes deserve special attention. Jam, fruit, and curd can create a localized wet ring that looks like fat separation even when the cake batter is correct. Dry fresh fruit thoroughly and keep fillings away from the liner wall.
What Are the Most Common Prevention Mistakes?
The most damaging prevention mistakes are changing several ingredients at once, trusting volume measurements for fat and flour, and treating a grease-resistant liner as a structural solution. Each mistake prevents useful feedback from the next bake.
- Adding flour by guesswork: Weigh the original flour first and compare it with the recipe’s gram value.
- Substituting spread for butter: Check the spread’s water content and whether the package identifies it as suitable for baking.
- Melting butter for a creaming recipe: Use softened butter unless the recipe specifically calls for melted butter.
- Overfilling liners: Fill consistently, ideally by weight, because deep batter sets later at the base.
- Opening the oven early: Keep the door closed for at least the first two-thirds of the stated baking time.
- Cooling in the tin too long: Move cupcakes to a rack after the crumb has stabilized.
- Changing the liner first: Inspect the crumb before deciding that paper quality is the main issue.
An expert rule of thumb is to change only one of these variables per test batch. A controlled comparison of weighed ingredients and a verified oven temperature produces more useful evidence than a collection of simultaneous substitutions.
Which Correction Should You Try First?
Start with a measurement and doneness audit, then check the mixing method and cooling process. The correct order is flour and fat weights, oven temperature, batter appearance, baking time, and liner choice, because presentation changes cannot repair a structural defect.
| Priority | Check | Typical action | Expected evidence |
|---|---|---|---|
| 1 | Ingredient weights | Reweigh flour, oil, butter, and sugar | Formula matches stated grams |
| 2 | Oven temperature | Test with an oven thermometer | Actual heat matches the recipe |
| 3 | Batter condition | Check for curdling or gloss | Batter is cohesive, not oily |
| 4 | Baking completion | Add 2-4 minutes if center is wet | Toothpick shows moist crumbs |
| 5 | Cooling | Transfer after 2-5 minutes | Liner is less damp outside |
| 6 | Liner material | Test grease-resistant paper | Cleaner exterior with same crumb |
A recipe that produces the same greasy crumb after correct weighing, verified oven heat, and proper cooling probably needs reformulation. At that point, compare its fat, flour, egg, and liquid quantities with a tested recipe rather than continuing to alter the baking time.
FAQ
Why are my cupcakes greasy on the bottom but dry on top?
Greasy bottoms with dry tops usually indicate uneven baking, often from an oven that is too hot or a pan placed too low. The top sets and loses moisture before the lower crumb finishes. Verify the oven temperature, use the center rack, and reduce the temperature slightly while extending the bake if the recipe allows.
Do silicone cupcake liners cause greasy bottoms?
Silicone liners can make grease more visible because they do not absorb oil like paper. Silicone itself does not normally create fat separation, but it may insulate the sides and alter browning or baking time. Test one batch with the same batter in paper and silicone liners before changing the recipe.
Why are only chocolate cupcakes greasy?
Chocolate cupcakes often contain cocoa, melted chocolate, coffee, sour cream, or extra oil, so their dry-to-liquid balance differs from vanilla batter. Weigh cocoa and flour, check every substitution, and compare the chocolate formula with the original recipe. A greasy base plus gummy crumb usually requires more complete baking or formula correction.
Can I refrigerate greasy cupcakes to firm them up?
Refrigeration can firm butter temporarily, but it does not remove separated oil or correct an underbaked crumb. Chill cupcakes only after they have cooled safely, then judge them at room temperature. If the base remains shiny and dense, trim or repurpose it rather than relying on cold storage.
Why do cupcake liners pull away from the cake?
Liners pull away when excess moisture or fat separates from the crumb, when cupcakes cool rapidly, or when the cake is stored in a humid environment. Greasy bottoms increase the likelihood, but liner size, pan release, and recipe formulation also matter. A stable crumb and completely cooled cake reduce liner separation.
Should I use less oil next time?
Reduce oil only when the recipe was altered, measured inaccurately, or clearly produces a greasy crumb despite correct baking. A small test reduction of about 5-10% is more defensible than removing a large amount, because oil also controls tenderness and moisture. For a published recipe, first verify the ingredients and oven before changing the formula.
The Bottom Line
Why are my cupcakes greasy on the bottom? The most likely answer is separated or excessive fat combined with a crumb that set too slowly or lacked enough structure. Weigh the ingredients, use properly tempered butter or a tested oil formula, avoid overmixing, bake until the center is set, and transfer cupcakes from the pan after about 2-5 minutes. Change liners only after confirming whether the grease affects the cake itself or merely the wrapper.
