

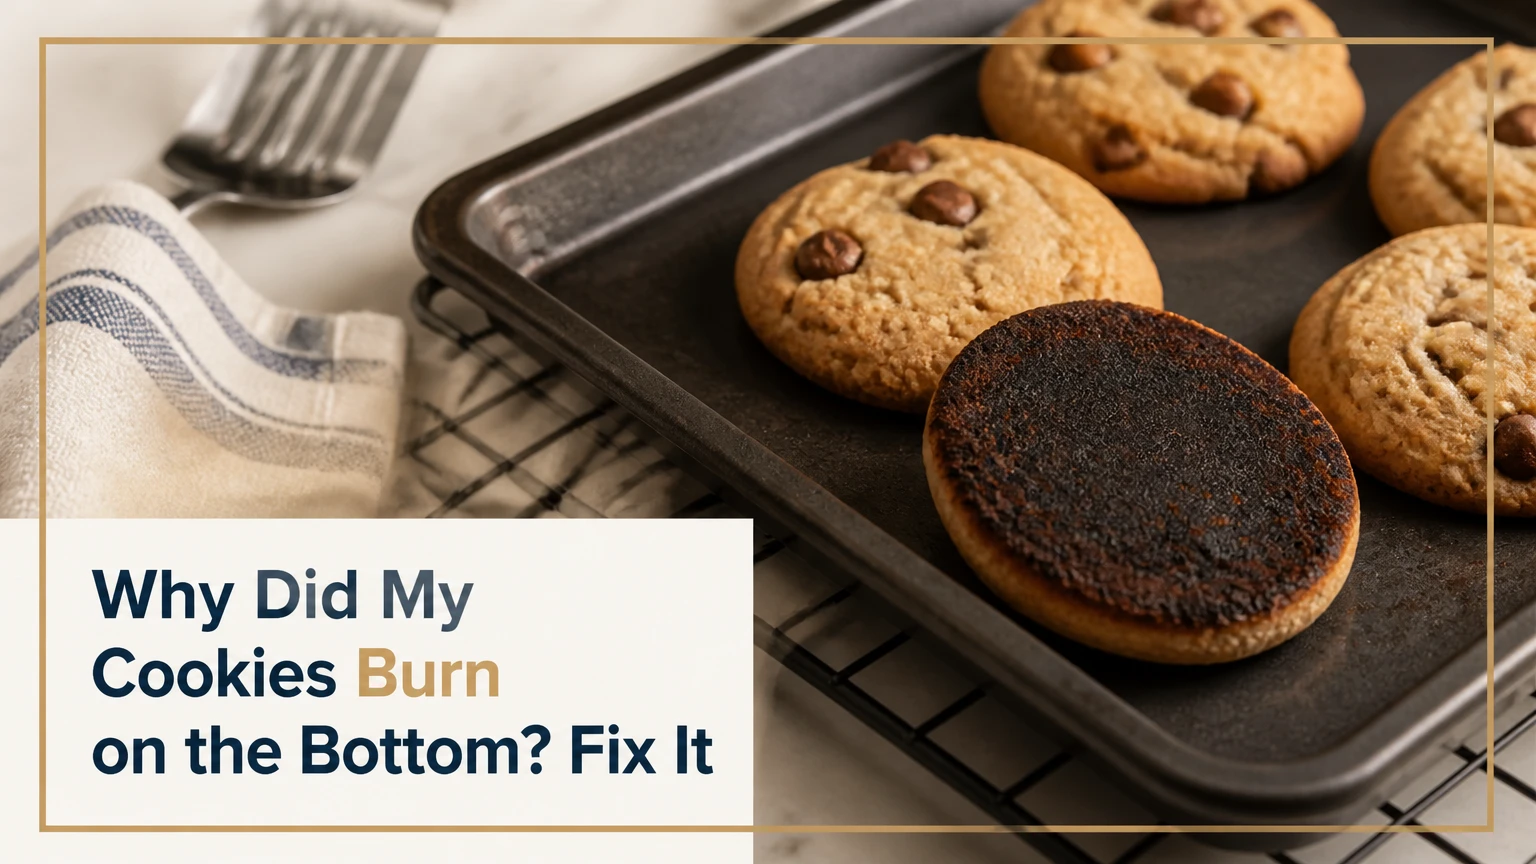
Cookies burn on the bottom when the dough base receives heat faster than the cookie’s top and center can bake. The most common causes are a dark or thin baking sheet, a hot pan from a previous batch, a low oven rack, excessive spread from warm dough, or an oven running hotter than its setting.
Key Facts at a Glance
- A dark, thin metal pan usually browns cookie bottoms faster than a heavy, light-colored aluminum sheet.
- Parchment paper reduces direct contact with hot metal, but it cannot correct an oven that is substantially overheated.
- A cookie sheet from a previous batch can burn the next batch even when the oven temperature is unchanged.
- Chilling dough for 15-30 minutes limits rapid spreading, which keeps the base thicker and less exposed to pan heat.
- An oven thermometer is the fastest way to distinguish a pan problem from a thermostat problem.
- A second empty baking sheet under the cookie sheet usually provides more bottom insulation than lowering the temperature alone.
Why Did My Cookies Burn on the Bottom?
Cookies burn on the bottom because conductive heat from the baking sheet reaches the dough base faster than heat travels through the cookie. The pan can overbrown the underside even when the oven air is close to the recipe temperature, especially when a dark pan, thin metal, hot rack, or excess dough spread creates a concentrated heat path.
Cookie dough receives heat in three ways. The baking sheet transfers heat by conduction, moving air transfers heat by convection, and the oven walls and heating elements transfer infrared energy by radiation. The underside touches the strongest direct heat source, so the bottom can darken while the top still looks pale.
Sugar and proteins undergo browning reactions as temperatures rise. Caramelization and Maillard browning create desirable flavor, but prolonged or intense heat causes charring and bitter, carbonized spots. A recipe temperature of 350°F does not mean every part of the cookie instantly reaches 350°F, and the pan surface can briefly become hotter than the surrounding air.
A useful diagnostic rule is simple: if the top is pale and the bottom is black, suspect the pan, rack, or heat path before changing the recipe. If the entire cookie is dark, the oven temperature or baking time is more likely responsible.
How does pan heat differ from oven heat?
Pan heat acts directly on the dough’s contact surface, while oven air heats the exposed surfaces more gradually. A thin metal sheet responds quickly to the lower heating element and can create a dark base before the cookie center sets.
| Heat source | Transfer method | Typical effect on cookies | Warning sign |
|---|---|---|---|
| Baking sheet | Direct conduction | Dark underside and crisp base | Bottom burns while top stays pale |
| Oven air | Convection | Overall surface and center baking | Whole cookie remains underbaked |
| Lower element | Radiation and heated air | Stronger bottom browning | Lower-rack batches fail most often |
| Side and upper walls | Infrared radiation | Edge and top browning | Cookies near walls brown unevenly |
The 160°C / 320°F caramelization figure is a useful reference, not a guaranteed burn point for every cookie. Sugar type, water content, contact pressure, pan temperature, and baking time all change the result. Cookie bases can darken through combined browning reactions before the entire bottom reaches a uniform caramelization temperature.
Which Baking Sheet Causes the Darkest Cookie Bottoms?
Dark, nonstick, thin, and heavily aged baking sheets generally produce the darkest cookie bottoms. A light-colored, heavy-gauge aluminum sheet usually gives the most predictable browning because it absorbs less radiant energy than a black surface and spreads heat across a larger area.
| Baking sheet | Approximate material or finish | Bottom-browning tendency | Best adjustment |
|---|---|---|---|
| Dark nonstick steel | Black coating, thin to medium gauge | High | Reduce temperature 15-25°F |
| Thin steel sheet | 0.4-0.6 mm typical thickness | High and uneven | Use a second sheet underneath |
| Natural aluminum half-sheet | 1.0-1.5 mm typical thickness | Low to moderate | Keep the rack centered |
| Insulated cookie sheet | Double-wall construction | Low | Add 1-3 minutes if centers remain soft |
| Heavy stainless steel | Reflective but slower heating | Moderate | Allow full preheating |
| Warped old sheet | Uneven contact and hot spots | Variable, often high | Replace or reserve for roasting |
Natural aluminum is not automatically perfect. A very thin aluminum sheet can still heat rapidly, and a dark coating can dominate the material’s behavior. Pan thickness, surface color, oven position, and the liner must be evaluated together.
The common claim that all aluminum pans burn cookies is inaccurate. A light aluminum sheet usually reduces radiant absorption, while its thickness helps distribute heat. The relevant question is whether the pan is light, flat, and sufficiently heavy, not merely whether the label says aluminum.
Is parchment paper or a silicone mat better?
Parchment paper is the simplest first fix for burnt bottoms because it creates a thin barrier between dough and metal without changing cookie spread dramatically. A silicone baking mat provides more insulation and often produces a softer underside, but it can lengthen baking time and encourage additional spread in high-fat doughs.
| Liner | Typical thickness | Bottom protection | Texture effect | Typical price |
|---|---|---|---|---|
| Parchment paper | 0.05-0.08 mm | Moderate | Crisp to moderately soft base | $3-$8 per roll |
| Silicone mat | 0.7-1.0 mm | Moderate to high | Softer, less crisp base | $10-$25 |
| Aluminum foil | 0.01-0.02 mm | Low | Often darker, crisper base | $3-$8 per roll |
| Bare dark pan | 0 mm | None | Crispest, highest burn risk | Existing equipment |
Parchment does not “eliminate” burning. A pan exposed to excessive lower-element heat can still overheat the parchment and cookie. Silicone mats are also not suitable for every temperature or broiler setting, so follow the manufacturer’s maximum temperature, commonly around 425-480°F.
Avoid greasing a nonstick cookie sheet unless the recipe specifically requires it. Added butter or oil can pool beneath the dough, increasing frying-like contact and encouraging uneven browning. Parchment is usually more predictable than extra grease.
Should Cookies Bake on the Middle Rack?
Cookies should usually bake on the middle rack because that position balances the lower heating element, upper heat, and circulating air. Move the sheet one position higher when the bottom burns repeatedly, but avoid placing cookies directly against the oven ceiling, where tops can brown too quickly.
| Rack position | Distance from lower element | Likely result | Recommended use |
|---|---|---|---|
| Lowest rack | 2-5 inches typical | Strong bottom browning | Avoid for delicate cookies |
| Lower-middle | 5-8 inches typical | Moderate bottom heat | Dense bars or slow-baking dough |
| Middle | 8-14 inches typical | Most balanced baking | Default cookie position |
| Upper-middle | 12-18 inches typical | Lighter bottoms, darker tops | Bottom-burning correction |
| Highest rack | 2-5 inches below ceiling | Fast top browning | Use only for specific recipes |
Rack spacing varies by oven, so a universal 2-inch clearance rule is not sufficient. Airflow depends on the oven cavity, pan size, fan, heating-element location, and whether the sheet blocks circulation. Leave visible space around the pan rather than pressing it against a wall.
Bake one test cookie on the middle rack and another on the upper-middle rack. Compare the underside, edge color, and center texture after the same bake time. This controlled test identifies rack-related heat differences without altering the recipe.
How Can You Tell Whether the Oven Runs Hot?
An oven thermometer can reveal a hot oven in 20-30 minutes, making it the most useful diagnostic tool for repeated bottom burning. Place the thermometer near the center of the rack, preheat fully, and record several readings across a 20-minute cycle because thermostats switch the heating elements on and off.
Oven thermometer test
- Place an independent oven thermometer on the center rack.
- Set the oven to 350°F or 177°C.
- Wait at least 20 minutes after the preheat signal.
- Record the highest and lowest readings over 20 minutes.
- Repeat the test at least twice if the average differs from the setting.
- Compare the result with the recipe temperature, not only with the preheat light.
| Thermometer result at a 350°F setting | Interpretation | First correction |
|---|---|---|
| 345-355°F | Normal practical variation | Keep temperature unchanged |
| 356-365°F | Moderately hot | Reduce setting 10°F |
| 366-380°F | Significantly hot | Reduce 15-25°F and service oven |
| Above 380°F | Severe temperature error | Stop relying on the dial |
The American Society for Testing and Materials recognizes oven temperature measurement as a calibration issue rather than a simple visual judgment, and appliance manufacturers commonly advise checking temperature with an independent thermometer before requesting service. A home oven cycles rather than holding one exact temperature, so the average and swing matter more than one isolated reading.
A temperature reduction of 25°F is a reasonable trial for a verified hot oven or dark pan, but it is not a universal rule. Lowering the temperature too far can dry cookies before their structure sets, particularly for thin, low-moisture dough.
Why Do Warm Dough and High-Sugar Cookies Burn Faster?
Warm dough burns faster because melted fat allows the cookie to spread early, creating a thinner layer with more surface area against the hot pan. High-sugar doughs, especially those containing honey, corn syrup, or brown sugar, brown rapidly because dissolved sugars concentrate at the base as moisture evaporates.
| Dough condition | Typical dough temperature | Spread tendency | Bottom-burning risk |
|---|---|---|---|
| Firm chilled dough | 38-50°F | Low | Low |
| Cool room-temperature dough | 60-68°F | Moderate | Moderate |
| Warm butter-rich dough | 70-78°F | High | High |
| Honey or syrup-rich dough | Recipe-dependent | Moderate to high | High |
| Thin rolled dough | 1/8-1/4 inch | Very high exposure | High |
| Thick scoop dough | 3/4-1 inch | Lower exposure | Low to moderate |
Chilling is not a cure for every burnt cookie. If the recipe contains too little flour, too much sugar, or excessive baking soda, chilled dough may still spread and darken. Chill portioned dough for 15-30 minutes, then bake one test portion before committing the remaining dough.
Honey and other liquid sweeteners deserve special attention because fructose browns readily. Brown sugar also contributes more moisture and flavor compounds than granulated sugar, which can change spread and edge color. Do not automatically remove sugar from a tested recipe, because sugar controls tenderness, spread, moisture retention, and structure.
How Do You Fix the Next Batch?
The fastest reliable fix combines a cool pan, parchment, a center rack, and a controlled temperature test. Make one change at a time when possible, because changing the pan, oven setting, dough temperature, and bake time simultaneously prevents you from identifying the original cause.
Immediate recovery steps
- Cool the baking sheet completely.
Wait 10-15 minutes, or use a second room-temperature sheet. Do not place fresh dough on a warm pan. You will know this worked when the dough remains rounded for the first several minutes. - Line the pan with parchment.
Use a flat sheet of parchment that does not extend over the edges. Do not stack multiple loose layers, which can wrinkle and create uneven contact. - Move the rack to the middle position.
Use the upper-middle rack if the lower element is visibly close to the pan. Check the result by comparing the center and edge color. - Chill portioned dough for 15-30 minutes.
Chill scooped portions rather than one large mass if speed matters. The dough should feel firm but remain easy to portion. - Lower heat only when evidence supports it.
Try 15°F lower for a dark sheet or verified hot oven. Preserve the original bake time initially, then check the center two minutes early. - Use a double-pan setup when necessary.
Place the cookie sheet on top of a second empty sheet. The air gap slows conduction and protects the base, but it can require 1-3 additional minutes.
The success checkpoint is a fully set edge with a lighter underside and a center that reaches the recipe’s intended texture. Do not judge doneness by top color alone, because pale tops are common in cookies protected by parchment or baked on a higher rack.
What should you change first?
| Observed symptom | Most likely cause | First change | Expected test time |
|---|---|---|---|
| Bottom black, top pale | Excessive pan heat | Parchment and middle rack | Next batch |
| All surfaces too dark | Hot oven or long bake | Thermometer and 10-25°F reduction | 30 minutes |
| Only second batch burns | Warm sheet | Cool or swap pans | 10-15 minutes |
| Thin, wide, greasy cookies | Warm dough or excess fat | Chill 20 minutes | 20 minutes |
| Center raw, bottom dark | Excessive bottom heat | Double pan and lower rack exposure | Next batch |
| Random dark spots | Warped or thin sheet | Replace pan or stack sheets | Next batch |
Which Fix Costs the Least?
Cooling the pan, moving the rack, and chilling dough cost nothing, while parchment and an oven thermometer usually provide the best low-cost diagnostic value. A new heavy aluminum sheet costs more but offers the most consistent long-term improvement when the existing pan is dark, warped, or thin.
| Fix | Typical cost | Setup time | Best use | Limitation |
|---|---|---|---|---|
| Cool existing pan | $0 | 10-15 minutes | Repeated batches | Does not fix a hot oven |
| Move rack | $0 | 1 minute | Lower-element problems | May brown tops |
| Chill dough | $0 | 15-30 minutes | Excessive spread | Cannot correct pan hot spots |
| Parchment paper | $3-$8 | 2 minutes | First-line protection | Disposable |
| Oven thermometer | $5-$15 | 30 minutes | Temperature diagnosis | Does not insulate pan |
| Silicone mat | $10-$25 | 2 minutes | Softer bottoms | May increase spread |
| Heavy aluminum sheet | $15-$35 | 0 minutes | Permanent pan upgrade | Needs storage and care |
A thermometer usually deserves priority over an expensive pan if every recipe burns, including cookies baked on light-colored sheets. A new pan deserves priority if only one old sheet creates the problem and the oven tests within a normal range.
What Changes for Convection Ovens?
Convection ovens usually need a 25°F reduction from a conventional recipe, although the correct adjustment depends on the manufacturer and recipe. Moving the pan away from the lower element remains important because a fan improves air movement but does not remove excessive conductive heat from a dark sheet.
Use the manufacturer’s convection setting when available rather than manually turning on a fan. Start 20-25°F below the conventional temperature, check the cookies 2-3 minutes earlier, and rotate the sheet only if the oven manual permits it. A fan can dry exposed surfaces faster, making thin cookies look done before the center has the desired texture.
Frozen dough generally needs more baking time, not a higher temperature. Increasing heat to compensate can burn the base before the center thaws and sets. Bake one frozen portion as a test and extend time in 2-minute increments.
Shortbread, lace cookies, and thin sugar cookies require special care because their low thickness gives the pan more control over the final texture. A silicone mat can protect these cookies, but it may prevent the crisp base expected from shortbread. In that case, use a light aluminum sheet, parchment, and a slightly higher rack instead.
What Common Mistakes Make Bottom Burning Worse?
Several popular fixes create new problems because they change heat transfer without addressing the actual cause. Foil, excessive grease, a hot replacement sheet, and an extreme temperature reduction are the most common examples.
- Using aluminum foil as insulation: Foil is thin and remains closely coupled to the pan, so it provides little thermal buffering. It can also increase browning on some dark sheets.
- Greasing a nonstick pan: A layer of butter beneath the cookie can pool around the dough and intensify contact browning.
- Cooling a hot pan with cold water: Thermal shock can warp some sheets, particularly thin steel. Cool the pan gradually on a heat-safe surface.
- Lowering the oven by 50°F without testing: The outside may remain pale while the center dries during the extended bake.
- Opening the oven repeatedly: Heat loss extends baking time and can alter spread before the cookie structure sets.
- Using a damaged silicone mat: A curled or torn mat produces uneven thickness and localized dark spots.
A practitioner rule is to change the heat path before changing the formula. Pan, liner, rack, and dough temperature affect the underside directly; ingredient changes can alter the entire cookie and may hide rather than solve the defect.
Can You Save Cookies With Burnt Bottoms?
You can save cookies with lightly or moderately scorched bottoms by scraping away the dark layer, trimming the base, or pairing the cookies with a topping. Cookies with a black, bitter, or smoky interior are not worth serving because removing the visible crust does not remove burnt flavor throughout the crumb.
Let cookies cool fully before judging them. Warm cookies can taste more bitter at the edge and may crumble during trimming. Use a fine grater or Microplane with light pressure, moving over a plate until the black surface disappears, then stop before removing a large portion of the base.
| Damage level | Visual condition | Salvage method | Expected result |
|---|---|---|---|
| Mild | Deep brown edge, no bitter smell | Cool and scrape lightly | Usually acceptable |
| Moderate | Dark underside, normal center | Grate or trim base | Reduced height |
| Severe | Black patches and bitter crumb | Crush for crumbs only | Not suitable whole |
| Severe smoke damage | Acrid smell throughout | Discard | Unsafe or unpleasant |
Do not serve cookies that contain burned, acrid-smelling dough simply because the bottoms were trimmed. A thin layer of dark caramelization differs from carbonized material, and taste is the practical boundary.
Expert Rules for Reliable Cookie Batches
Rule one: reserve two identical sheets for alternating batches. A pan that rests for 10-15 minutes is often more consistent than a single sheet that receives dough immediately after leaving the oven.
Rule two: test one cookie before baking the full tray. One test portion reveals spread, underside color, and timing while limiting waste. This method is especially valuable when adapting a recipe to a dark pan or convection oven.
Rule three: diagnose by pattern, not by one cookie. A single cookie near the pan edge can encounter a local hot spot, while every cookie burning underneath points toward pan construction, rack position, or oven temperature.
The most counterintuitive finding is that a colder dough portion can still burn if it spreads over a dark, overheated sheet. Dough temperature changes the timing of spread, but it does not cancel a severe pan heat problem.
FAQ
Why are my cookies burnt underneath but raw inside?
Burnt bottoms with raw centers usually indicate excessive conductive heat from the pan rather than insufficient overall oven heat. Use a light-colored sheet, parchment, a middle rack, and a second pan underneath; then verify the oven with a thermometer before increasing bake time.
Does baking soda cause cookie bottoms to burn?
Baking soda can increase spread and browning, but it is rarely the sole cause of black bottoms. Excess soda raises pH and can accelerate browning, while too much spread creates a thinner base. Measure by weight when possible and compare the recipe’s stated amount with the flour quantity.
Why do only the second and third trays burn?
Later trays often burn because the baking sheet remains hot after the first batch. Use alternating sheets or cool the pan for 10-15 minutes, then place fresh dough on a room-temperature surface. A second tray may also expose the same pan to a longer period of lower-element radiation.
Can I bake cookies directly on a glass dish?
Glass is a poor first choice for cookies because it heats differently from thin metal and can produce uneven browning or altered spread. If glass is the only option, follow the recipe’s glassware temperature guidance, use parchment, and test one cookie before baking a full batch.
Should I reduce the temperature for a black cookie sheet?
Reduce the temperature by about 15°F as a controlled trial when using a black sheet, then check the center early. A light aluminum sheet is usually a better correction because it changes the pan’s heat absorption without extending the bake enough to dry the cookie.
How long should cookie dough chill before baking?
Chill cookie dough for 15-30 minutes when warm butter or excessive spread is causing thin, dark bases. Refrigerate longer, often 1-24 hours, only when the recipe is designed for extended chilling, because prolonged chilling changes hydration, flavor, and spread.
The Bottom Line
Why did my cookies burn on the bottom? The baking sheet transferred heat into the dough base too quickly, usually because the sheet was dark, thin, hot from a previous batch, or positioned too close to the lower element. Start with a cool lined pan on the middle rack, chill the dough for 15-30 minutes, and test the actual oven temperature before changing the recipe. A light heavy-gauge aluminum sheet or a double-pan setup provides the strongest hardware correction when the existing equipment remains the source.
