

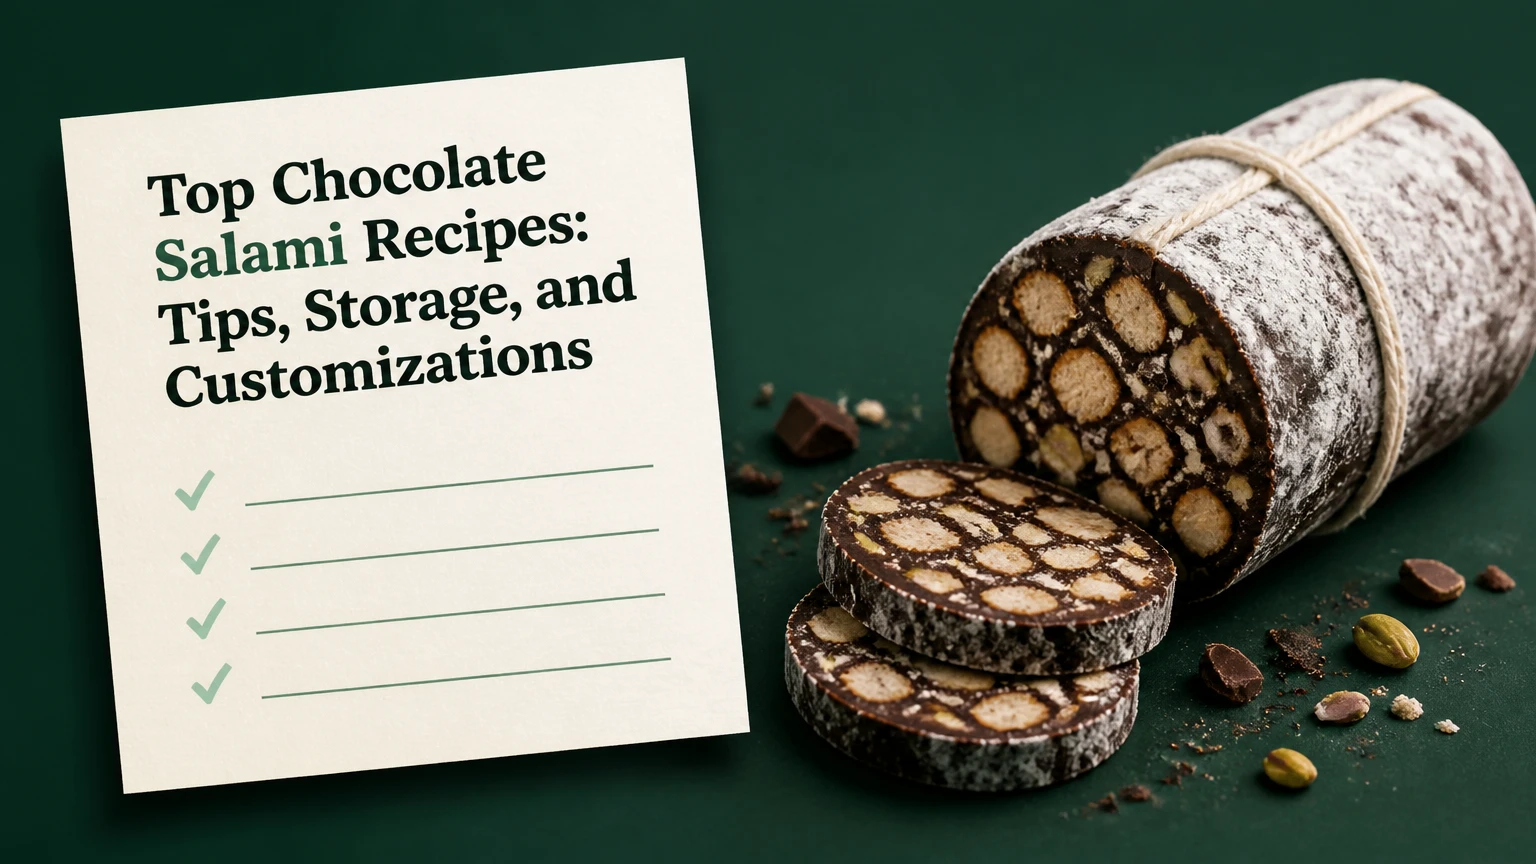
Chocolate salami might sound unusual, but it’s a delightful no-bake treat that’s sure to impress. Originating from Italy and Portugal, this dessert cleverly mimics the look of a traditional salami, but it’s made entirely of rich chocolate, crunchy biscuits, and a mix of nuts and dried fruits. It’s a perfect conversation starter at any gathering and a fun project for kids and adults alike.
I love making chocolate salami because it’s incredibly versatile. You can customize it with your favorite nuts, dried fruits, or even a splash of liqueur for an adult twist. Plus, it stores well in the fridge, making it a great make-ahead dessert. Whether you’re looking for a unique gift or a show-stopping dessert, chocolate salami is a deliciously unexpected choice.
What is Chocolate Salami?
Chocolate salami is a decadent and eye-catching dessert that has roots in both Italian and Portuguese cuisines. Despite its name and appearance, it contains no meat. Instead, it’s a cleverly constructed log made from rich chocolate, crunchy biscuits, and assorted nuts and dried fruits. The result is a cylindrical treat that, when sliced, resembles traditional salami with its speckled interior.
This dessert is as versatile as it is delicious. I love that chocolate salami can be customized with a variety of ingredients to suit different tastes. Whether adding smooth liqueurs, tangy dried cranberries, or earthy walnuts, the possibilities are endless. The magic of the chocolate salami lies in its ability to blend flavors and textures harmoniously while maintaining a striking visual appeal.
Chocolate salami makes an excellent choice for those who enjoy planning ahead. It’s a fantastic make-ahead dessert because it stores well in the refrigerator. I find it perfect for parties as it can be prepared days in advance. It’s also a delightful talking point for guests, making it an ideal addition to any dessert table. Moreover, it’s a charming gift for friends and family, adding a touch of homemade thoughtfulness to any occasion.
So, if you’re looking for a unique, delicious, and visually intriguing dessert, chocolate salami is a must-try. It’s a treat that never fails to impress with both its appearance and taste.
Ingredients
For making a decadent chocolate salami, gathering the right ingredients is crucial. Here’s what you’ll need:
- 7 oz (200 g) of Dark Chocolate: Preferably 70% cocoa for a rich, deep flavor.
- 1/2 cup (1 stick) of Unsalted Butter: Cut into small pieces, softened at room temperature.
- 3/4 cup (150 g) of Granulated Sugar: To add the perfect hint of sweetness.
- 2 Large Eggs: At room temperature for easier mixing.
- 8 oz (225 g) of Digestive Biscuits or Tea Biscuits: Roughly crushed into small pieces.
- 1/2 cup (50 g) of Chopped Nuts: Such as hazelnuts or almonds, toasted for added flavor.
- 1/2 cup (75 g) of Dried Fruit: Chopped dried figs, cranberries, or raisins for a chewy texture.
- 1 tsp of Vanilla Extract: For enhanced sweetness and aroma.
- 2 tbsp of Dark Rum or Brandy (optional): For a subtle hint of liqueur.
It’s important to have all ingredients prepped before starting. This ensures a smooth workflow and balanced flavor profile in the final chocolate salami.
Tools and Equipment
Creating the perfect chocolate salami requires some specific tools and equipment to ensure ease and efficiency in your preparation.
Mixing Bowls
You’ll need a set of mixing bowls. I recommend using different sizes, one larger for combining the main ingredients and a smaller one for melting the chocolate.
Double Boiler or Microwave-Safe Bowl
A double boiler is essential for melting the chocolate and butter without burning them. If you don’t have a double boiler, a microwave-safe bowl will suffice. Just be sure to melt the ingredients at short intervals and stir frequently.
Spatula and Whisk
A silicone spatula will help you mix the ingredients evenly and scrape down the sides of the bowls. A whisk will be useful for blending the eggs and sugar smoothly.
Chef’s Knife and Cutting Board
A sharp chef’s knife is needed to chop the nuts and dried fruits into bite-sized pieces. Use a sturdy cutting board to keep your workspace clean and safe.
Measuring Cups and Spoons
Accurate measurements are crucial for the right consistency and flavor balance. Have a set of measuring cups and spoons handy to measure out your ingredients precisely.
Parchment Paper
You’ll need parchment paper to shape and roll your chocolate salami. It prevents sticking and helps form a smooth, even log.
Serving Plate or Platter
Prepare a nice serving plate or platter for presenting your finished chocolate salami. This adds to the visual appeal when serving to guests or gifting.
Cling Film
Cling film will be used to wrap the chocolate salami log after shaping, ensuring it sets properly in the refrigerator.
Refrigerator
A refrigerator is essential for setting the chocolate salami. Make sure you have enough space to accommodate it until it firms up, typically a few hours or overnight.
Optional: Electric Mixer
While not necessary, an electric mixer can simplify and speed up the mixing process—especially when combining the sugar and eggs.
With these tools and equipment, you’ll be well-equipped to create a delicious and visually appealing chocolate salami.
Directions
Creating chocolate salami is straightforward and rewarding. Follow these steps to achieve perfect results.
Prep
- Gather Ingredients: Measure out all ingredients first to ensure smooth cooking.
- Crush Biscuits: Break the biscuits into small pieces about the size of peas. You can use a rolling pin or your hands.
- Chop Nuts and Dried Fruit: Using a chef’s knife, roughly chop the nuts and dried fruit. Keep the pieces bite-sized, but not too small.
- Melt Chocolate and Butter: Set up your double boiler or use a microwave-safe bowl to melt the dark chocolate and butter together until smooth.
- Whisk Eggs and Sugar: In a separate bowl, whisk the eggs and sugar until well combined and slightly frothy.
Cook
- Combine Chocolate Mixture: Once the chocolate and butter are melted and smooth, remove from heat. Let it cool slightly before adding the egg-sugar mixture to avoid cooking the eggs.
- Mix Thoroughly: Combine the chocolate mixture slowly with the egg-sugar mixture in a large mixing bowl. Use a spatula to ensure even blending.
- Fold In Dry Ingredients: Gradually add the crushed biscuits, chopped nuts, and dried fruit to the chocolate mixture. Gently fold them in with the spatula until everything is evenly distributed.
- Shape The Salami: Lay a large piece of parchment paper on your work surface. Spoon the mixture onto the center of the parchment paper. Shape it into a log about 2 inches in diameter.
- Wrap and Chill: Roll the log tightly in the parchment paper to form a salami shape. Twist the ends of the parchment paper to secure the log.
- Refrigerate: Place the wrapped chocolate salami in the refrigerator for at least 4 hours until it hardens.
- Slice and Serve: Once firm, unwrap the chocolate salami and place it on a serving plate. Use a sharp knife to slice it into rounds about 1/4 inch thick.
How to Store Chocolate Salami
Proper storage ensures that your chocolate salami stays fresh and maintains its delightful texture and taste. Here’s how to store chocolate salami effectively:
Refrigeration
- Wrap It Tightly: After making the chocolate salami, wrap it tightly in plastic wrap. Ensure that there is no air exposure, as this can lead to spoilage.
- Use an Airtight Container: Place the wrapped salami in an airtight container. This provides an extra layer of protection against moisture and odors from other foods.
- Refrigerate: Store the container in the refrigerator. Chocolate salami can be kept refrigerated for up to two weeks without losing its flavor and texture.
Freezing
- Initial Wrapping: Wrap the chocolate salami in plastic wrap as you would for refrigeration.
- Additional Wrapping: Next, wrap it in aluminum foil. This helps prevent freezer burn and further isolates it from other items in your freezer.
- Label and Date: Use a marker to label the salami with the date of freezing. This helps you keep track of its storage time.
- Freeze: Store the wrapped salami in the freezer. Chocolate salami can last up to two months in the freezer while maintaining optimal taste and texture.
- Thawing: When ready to serve, remove the chocolate salami from the freezer. Let it thaw in the refrigerator overnight. Slice once fully thawed for best results.
Room Temperature (For Short-Term)
- Keep It Cool and Dry: If planning to consume within a few days, keep the chocolate salami in a cool and dry place. Avoid direct sunlight or heat sources.
- Protective Wrapping: Wrap the chocolate salami in parchment paper or plastic wrap to maintain freshness and prevent it from drying out.
- Storage Duration: At room temperature, the chocolate salami should be consumed within three days for the best taste experience.
- Individual Wrapping: If gifting, cut individual slices and wrap each in parchment paper or plastic wrap.
- Presentation Containers: Place the wrapped slices in decorative tins or boxes, adding an extra touch of elegance.
- Storage Instruction Cards: Include a small card with storage instructions, ensuring the recipient enjoys the chocolate salami at its best.
By following these storage tips, you can enjoy your homemade chocolate salami, whether immediately or saved for a special occasion.
Can You Freeze Chocolate Salami?
Yes, you can freeze chocolate salami to extend its shelf life while retaining its delightful taste and texture. Freezing chocolate salami is quite simple. Here’s a step-by-step guide to ensure your dessert remains delicious and fresh:
Freezing Instructions
- Wrap the Salami: First, tightly wrap the chocolate salami in plastic wrap. This helps to prevent freezer burn and protects the chocolate from absorbing any other odors in the freezer.
- Use Aluminum Foil: For an added layer of protection, cover the plastic-wrapped salami with a layer of aluminum foil. This will further minimize exposure to air.
- Labeling: Clearly label the package with the date using a permanent marker. This will help you keep track of how long it has been stored.
Storage Duration
Chocolate salami can be frozen for up to three months without compromising its quality. Keeping track of the date when you froze it ensures you consume it within this time frame.
Thawing Tips
- Refrigerator Thawing: When you’re ready to enjoy the chocolate salami, move it from the freezer to the refrigerator. Allow it to thaw overnight for the best results. This slow thawing process helps maintain the chocolate salami’s texture and flavor.
- Room Temperature: If you need the salami sooner, you can let it sit at room temperature for a couple of hours. However, be cautious as leaving it out too long could make it too soft.
Freezing Leftovers
If you don’t plan to consume the entire chocolate salami at once, you can freeze individual slices. Follow the same wrapping and protecting steps for each slice and thaw them as needed.
By following these steps, you can enjoy your homemade chocolate salami anytime you wish, ensuring it tastes just as fresh and delicious as the day you made it.
Tips and Tricks
To make the best chocolate salami, it’s essential to incorporate a few tips and tricks that can elevate your dessert’s taste and texture.
Choose High-Quality Ingredients
Selecting high-quality ingredients makes a significant difference. I always recommend using premium chocolate with at least 70% cocoa content. Fresh, unsalted nuts and quality dried fruits enhance the overall flavor.
Crushing Biscuits
For the perfect texture, crush biscuits by placing them in a zip-lock bag and rolling over them with a rolling pin. This method ensures an even consistency without turning them into fine powder.
Mixing and Shaping
When combining ingredients, mix them thoroughly to ensure an even distribution of flavors. Shape the mixture into a tight, compact log using cling film. This not only helps in achieving the desired salami shape but also eliminates air pockets that can affect texture.
Refrigeration Time
Allow the chocolate salami to set in the refrigerator for at least 4 hours before serving. For an even better result, let it rest overnight. This time allows the flavors to meld and enhances the overall taste.
Easy Slicing
Before slicing, run a knife under hot water and wipe it dry. This trick ensures clean slices without crumbling the salami. Always slice using a gentle sawing motion.
Storage Tips
Store your chocolate salami in an airtight container to maintain its freshness. If not consuming immediately, it can be frozen for up to three months. Make sure to wrap it tightly in plastic wrap and aluminum foil to prevent freezer burn.
Customization
Personalize your chocolate salami by experimenting with different nuts, fruits, or even adding a splash of your favorite liqueur. Cranberries, almonds, or hazelnuts are excellent additions. A dash of rum or brandy can offer a delightful twist.
By following these tricks and tips, you can elevate your chocolate salami, ensuring it’s always a crowd-pleaser.
Conclusion
Crafting chocolate salami is a delightful and customizable experience. With the right ingredients and techniques, you can create a treat that’s both visually appealing and delicious. Proper storage ensures your creation stays fresh, whether you’re refrigerating, freezing, or keeping it at room temperature. By experimenting with different nuts, fruits, and liqueurs, you can make each batch unique. Remember to use high-quality ingredients and follow the shaping and slicing tips for the best results. Your chocolate salami will undoubtedly become a favorite at gatherings, impressing both friends and family. Happy baking!
