

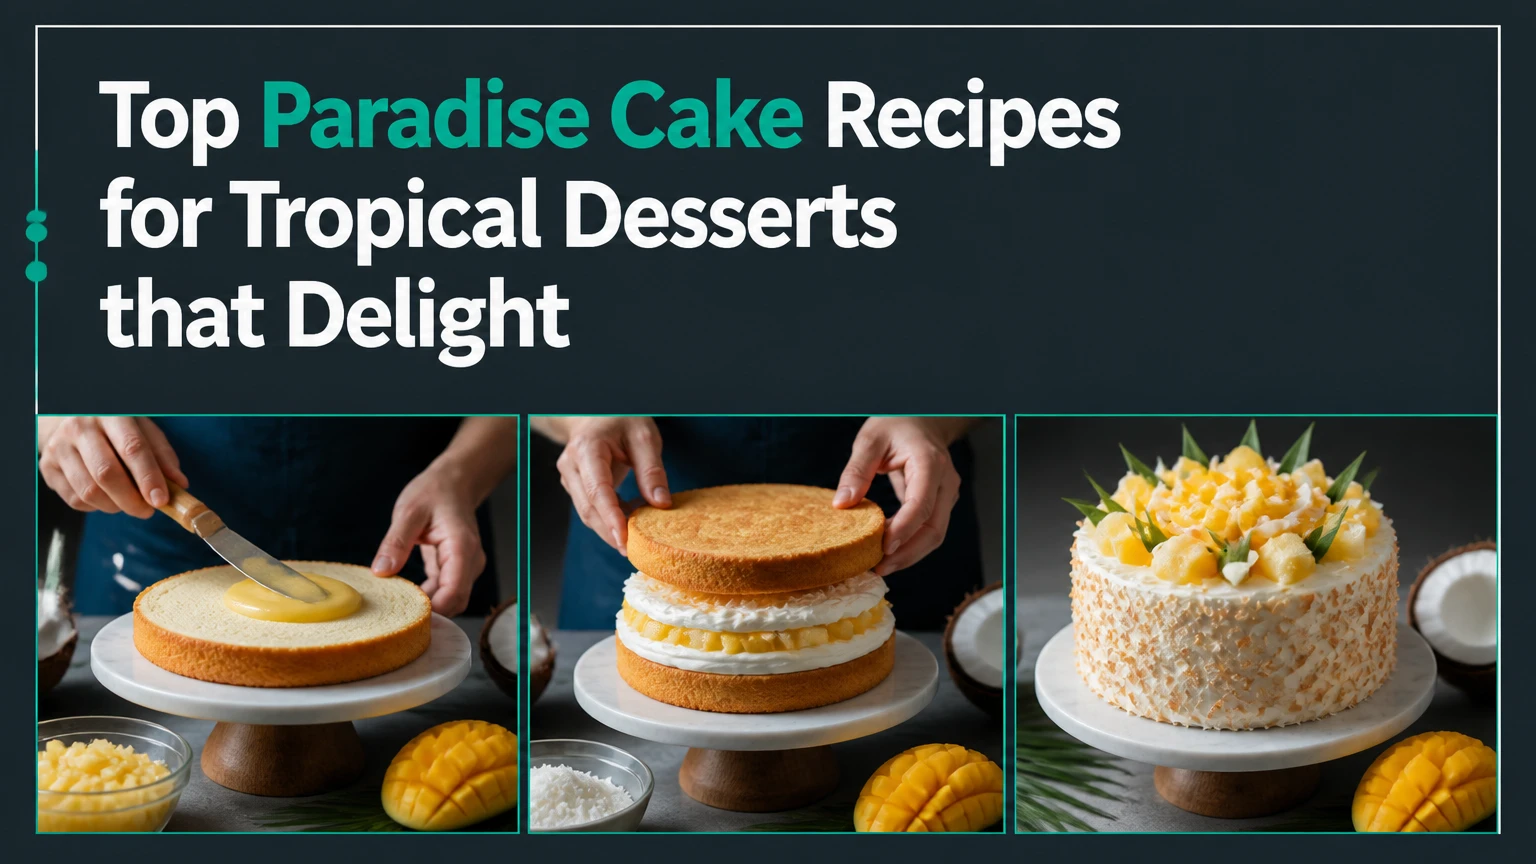
Imagine a dessert that transports you straight to a tropical paradise with just one bite. That’s exactly what paradise cake does. This delightful treat combines layers of vibrant flavors like coconut, pineapple, and passion fruit, making it a feast for both the eyes and the taste buds. Whether you’re hosting a summer party or simply craving a slice of something exotic, paradise cake never disappoints.
Ingredients
To create a Paradise Cake that captures the essence of a tropical getaway, gather the following ingredients meticulously.
For The Sponge Cake
- 1 cup all-purpose flour, sifted
- 1 cup granulated sugar
- 1/2 cup unsalted butter, softened
- 4 large eggs, room temperature
- 1/2 cup whole milk
- 1 teaspoon vanilla extract
- 1 teaspoon baking powder
- 1/4 teaspoon salt
- 1 cup crushed pineapple, drained
- 1 cup coconut cream
- 3/4 cup granulated sugar
- 1/2 cup passion fruit puree
- 1/4 cup cornstarch
- 2 tablespoons lime juice
- 1 cup shredded sweetened coconut, toasted
Equipment
Essential Tools
To ensure your Paradise Cake turns out perfect every time, gather these essential pieces of kitchen equipment:
- Mixing Bowls: You’ll need a set of mixing bowls in various sizes to combine your dry and wet ingredients separately.
- Electric Mixer: An electric mixer, either stand or hand-held, is crucial for beating the butter and sugar to the right consistency.
- Cake Pans: Two 9-inch round cake pans will give you the traditional layered look. Make sure to grease them well and line with parchment paper.
- Measuring Cups and Spoons: Accurate measurements are key, so have your measuring cups and spoons ready.
- Rubber Spatula: A rubber spatula is perfect for scraping down the sides of your mixing bowl, ensuring all ingredients are well incorporated.
Specialty Items
For the unique components of the Paradise Cake, the following specialty items are recommended:
- Citrus Juicer: Fresh passion fruit and lime juice add vibrant flavor. A citrus juicer will help you extract the maximum juice.
- Fine Mesh Sieve: You’ll need a fine mesh sieve to strain passion fruit puree, removing seeds and creating a smooth texture.
- Cooling Rack: Proper cooling is essential to avoid a soggy bottom. A wire cooling rack will help your cakes cool evenly.
- Offset Spatula: An offset spatula is invaluable for evenly spreading frosting over the cake layers.
- Cake Stand or Serving Plate: Present your masterpiece on a cake stand or a stylish serving plate for the best effect.
Optional Extras
While not necessary, these tools can make the baking process more enjoyable:
- Cake Leveler: A cake leveler ensures each cake layer is even and aesthetically pleasing.
- Piping Bags and Tips: For added decoration, piping bags and assorted tips can help you create beautiful designs with frosting.
- Microplane Grater: A microplane is handy for zesting citrus fruits, adding extra zing to your cake batter or frosting.
Gathering these items will set you up for success and keep your baking process smooth and enjoyable.
Directions
Follow these steps for a seamless paradise cake-making experience, ensuring each layer is perfect and full of tropical flavors.
Preparing The Sponge Cake
- Preheat the Oven: Start by preheating your oven to 350°F (175°C). Grease and flour three 9-inch round cake pans, and set aside.
- Mix Dry Ingredients: In a medium bowl, whisk together 3 cups of all-purpose flour, 2 1/2 teaspoons of baking powder, and 1/2 teaspoon of salt. This helps distribute the leavening agent evenly throughout the flour.
- Cream Butter and Sugar: In a large mixing bowl, use an electric mixer to cream together 1 cup of unsalted butter at room temperature and 2 cups of granulated sugar until light and fluffy. This process should take about 5 minutes.
- Incorporate Eggs: Add 4 large eggs one at a time, beating well after each addition. The mixture should be smooth and creamy.
- Add Wet Ingredients: Mix in 1 teaspoon of vanilla extract and 1 cup of coconut milk until well combined.
- Combine Wet and Dry Mixtures: Gradually add the flour mixture to the butter mixture, alternating with 1 cup of pineapple juice, beginning and ending with the flour mixture. Mix until just combined.
- Divide and Bake: Evenly divide the batter among the prepared cake pans. Bake for 25-30 minutes, or until a toothpick inserted into the center comes out clean. Allow cakes to cool in the pans for 10 minutes, then transfer to a wire rack to cool completely.
Creating The Filling
- Prepare Fruit Purees: In separate bowls, puree 1 cup of fresh pineapple chunks and 1 cup of passion fruit pulp. Strain the purees using a fine mesh sieve to remove any seeds or fibrous bits.
- Cook the Filling: In a medium saucepan, combine the pineapple puree, passion fruit puree, 1/2 cup of granulated sugar, and the juice of 1 lime. Cook over medium heat, stirring frequently, until the mixture thickens and reduces by half, about 15-20 minutes. Let the mixture cool completely.
- Whip the Cream: In a large mixing bowl, whip 2 cups of heavy cream with 1/4 cup of powdered sugar and 1 teaspoon of vanilla extract until stiff peaks form. Fold the cooled fruit mixture into the whipped cream until well combined.
- Level the Cakes: If needed, use a cake leveler or a serrated knife to level the tops of the cakes to ensure they are flat and even.
- Layer the Cake: Place one cake layer on your cake stand or serving plate. Spread a generous layer of the fruit and cream filling over the top. Repeat with the second and third layers, smoothing the filling to the edges.
- Frost the Cake: Using an offset spatula, apply a thin layer of the fruit filling mixture around the sides and top of the cake as a crumb coat. Chill the cake for 15 minutes to set the crumb coat.
- Final Frosting: Apply a thicker layer of the filling mixture over the entire cake, smoothing it out evenly. Optionally, use any leftover whipped cream to pipe decorative borders around the top and bottom edges.
- Garnish: Garnish the top of the cake with fresh pineapple slices, passion fruit seeds, and a sprinkle of shredded coconut for a stunning presentation.
- Chill and Serve: Refrigerate the cake for at least 1 hour before serving to allow the flavors to meld together. Slice, serve, and enjoy your tropical paradise cake!
Substitutions and Variations
For those looking to adapt the paradise cake recipe to meet specific dietary needs or simply to try new flavors, here are some substitutions and variations to consider.
Gluten-Free Version
To make a gluten-free paradise cake, I recommend using a high-quality gluten-free flour blend that contains xanthan gum. This helps the texture stay close to the original. Here are the substitutions:
- Flour: Replace the all-purpose flour with an equal amount of gluten-free flour blend.
- Baking Powder: Make sure your baking powder is gluten-free, as some brands may contain traces of gluten.
Butter-Free Version
If you need to avoid dairy or simply prefer not to use butter, here are some easy swaps:
- Butter: Replace the butter with an equal amount of coconut oil or a high-quality dairy-free margarine.
- Milk: Substitute regular milk with almond milk, coconut milk, or any other non-dairy milk of your choice.
- Chocolate Ganache: A rich layer of chocolate ganache can be added between the cake layers.
- Nutty Crunch: Sprinkle a mixture of chopped nuts, such as almonds or macadamia nuts, between the layers for a delightful crunch.
- Berry Compote: Swap out some of the tropical fruit puree with a homemade berry compote for a different fruity twist.
Storage
Proper storage ensures your paradise cake remains fresh and delicious for as long as possible. Here are my best tips for both short-term and long-term storage.
Short-Term Storage
To keep your paradise cake fresh for up to three days:
- After baking and cooling, cover the cake with plastic wrap or store it in an airtight container.
- Store the cake in the refrigerator. Cooling helps the cake stay moist and maintains the integrity of the whipped cream and fruit filling.
- If you haven’t frosted the cake yet, wrap each layer separately with plastic wrap to ensure no air gets in, preventing it from drying out.
Long-Term Storage
For those looking to keep their paradise cake for a longer period:
- After the cake has completely cooled, wrap each unfrosted layer tightly in plastic wrap, followed by a layer of aluminum foil.
- Place the wrapped layers in a freezer-safe bag or container to prevent freezer burn.
- Freeze the cake layers for up to three months.
- When ready to use, thaw the cake layers in the refrigerator overnight before assembling and frosting.
By following these storage steps, you can enjoy the tropical delight of paradise cake anytime you desire without compromising on taste and texture.
Make Ahead Instructions
Preparing a paradise cake ahead of time is a smart approach, especially for busy celebrations. Follow these steps to ensure your cake stays fresh and flavorful.
Step 1: Prepare the Cake Layers
- Bake the Cake Layers: Bake the sponge cake layers as specified in the recipe. Once baked, allow them to cool completely on wire racks.
- Wrap and Store: Wrap each cooled cake layer tightly in plastic wrap. This prevents them from drying out. If making the cake more than a day in advance, wrap the layers again in aluminum foil and store them in the freezer. They can stay fresh for up to one month this way.
Step 2: Prepare the Filling
- Make Fruit Purees: Prepare the fruit purees according to the recipe instructions. Store them separately in airtight containers in the refrigerator. These can be made up to three days ahead.
- Whip the Cream: Whip the cream and mix with the fruit purees when ready to assemble the cake. If you’re short on time, keep the whipped cream plain and mix it just before layering.
Step 3: Assemble the Cake
- Thaw Cake Layers: If the cake layers are frozen, remove them from the freezer and let them thaw in the refrigerator overnight.
- Layer the Cake: Once the layers are thawed, proceed to layer the cake with fruit purees and whipped cream. Follow the original layering instructions.
Step 4: Frost and Garnish
- Prepare Frosting: You can make the frosting up to two days in advance. Store it in an airtight container in the refrigerator.
- Frost the Cake: When ready to serve, frost the cake as directed. Avoid frosting too far in advance to maintain its texture.
- Add Garnishes: Just before serving, add fresh tropical fruits and shredded coconut as a garnish.
- Chill the Assembled Cake: After assembling, frosting, and garnishing, chill the cake in the refrigerator for at least 2 hours before serving. This ensures the layers set properly and flavors meld together perfectly.
By following these steps, you can efficiently prepare your paradise cake in advance, ensuring a stress-free serving experience at any gathering.
Conclusion
Paradise cake is a delightful tropical treat that’s perfect for any summer gathering. With its layers of sponge cake, fruit purees, and whipped cream, it’s sure to impress your guests. The recipe’s flexibility allows for various substitutions and flavor additions, making it easy to cater to different dietary preferences and tastes. By preparing the cake ahead of time, you can ensure a stress-free serving experience. Whether you’re a seasoned baker or a novice, this paradise cake recipe is a must-try for anyone looking to add a touch of tropical flair to their dessert repertoire.
