

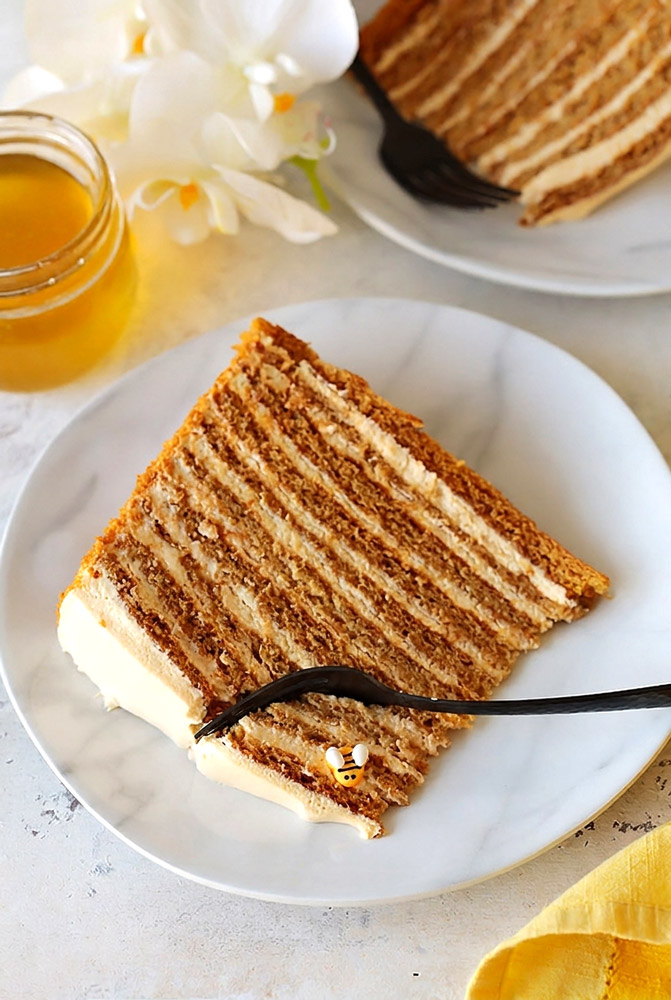
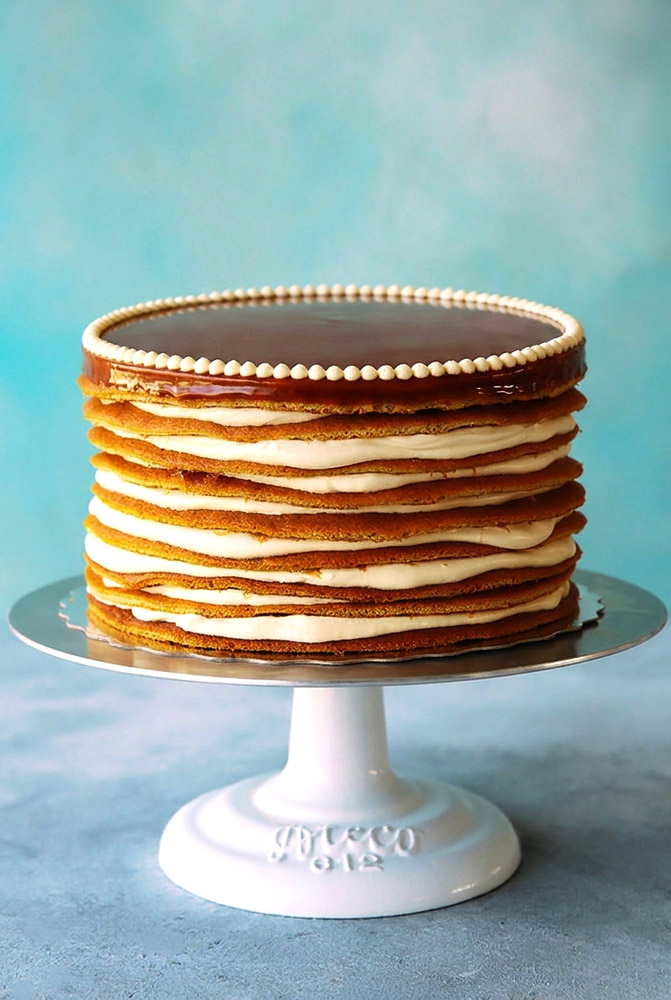
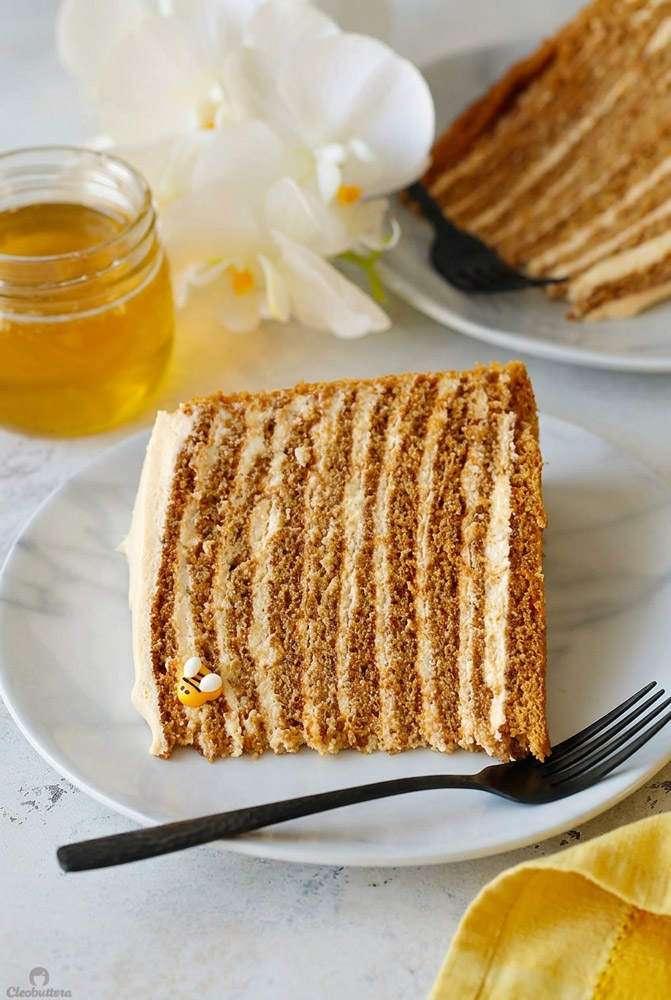
If you have ever wanted to bake a showstopper that halts conversation at the dinner table, this is the one. Medovik, the legendary multi-layered Russian Honey Cake, looks like an intricate architectural feat from an Old World patisserie. Ten to twelve paper-thin, deeply caramelized honey biscuit layers are stacked high with a cloud-like, burnt-honey and dulce de leche cream.
The origin of Medovik dates back to the 19th-century imperial Russian kitchens. Legend has it that a young royal chef created it for Empress Elizabeth Alexeievna, who famously despised honey. Unaware of the secret ingredient folded into the delicate, cream-softened layers, she fell in love with the dessert instantly.
My own obsession began years ago when I tasted a slice at a small Eastern European bakery. The texture wasn’t dense like a sponge cake or crunchy like a biscuit; it was completely unique—yielding, silky, and deeply aromatic with toasted sugar notes. This version takes the classic to another level by intentionally caramelizing (or “burning”) a portion of the honey. That single technique transforms standard sweetness into a complex, nutty, toffee-like profile that balances the whipped cream filling beautifully.
Recipe Overview & Baker’s Roadmap
- Prep Time: 45 minutes
- Cook Time: 45 minutes (baking layers in batches)
- Chilling / Resting Time: 8 to 12 hours (overnight)
- Total Active Time: 1 hour 30 minutes
- Yield: One 9-inch, 10-layer cake (12–14 generous slices)
- Difficulty: Intermediate (patience and organization over complex skill)
Baking a 10-layer cake sounds intimidating, but it is fundamentally a rhythm project. You are not rolling out stubborn, chilled dough disks with a rolling pin here; instead, you spread a warm, pliable honey batter directly onto parchment or silicone baking mats.
For equipment, gather two or three rimmed baking sheets, an offset spatula (essential for getting paper-thin, even rounds), a fine-mesh sieve, and either parchment paper or silicone mats. A stand mixer makes whipping the cream effortless, though a sturdy hand mixer will work just as well.
This is the ultimate make-ahead dessert. Medovik cannot—and should not—be served the day it is baked. It requires a long overnight slumber in the refrigerator so the whipped cream can soak into the biscuit layers, turning them into tender, cakey ribbons.
Ingredients & Sourcing Notes
- Honey: The star of the show. Choose a robust, pure floral honey such as clover, wildflower, or orange blossom. Avoid ultra-processed corn syrup blends, as they will not caramelize with the same depth.
- Unsalted Butter: High-fat European-style butter yields the best emulsion and richness in the cooked batter.
- Eggs: Six large, room-temperature eggs. Whisking them into the warm honey mixture creates the structure and rise of the thin biscuit layers.
- Baking Soda: This is your leavening agent and your browning engine. When it meets the hot honey and butter, it reacts aggressively, foaming up and producing those deep toffee aromas.
- Dulce de Leche: Adds body, stability, and a milky caramel backbone to the frosting. You can buy canned dulce de leche at Latin markets or well-stocked grocers, or simmer a can of sweetened condensed milk submerged in water for 3 hours ahead of time.
- Heavy Whipping Cream: Must be thoroughly chilled (minimum 36% milkfat) to ensure it whips to clean, stable medium-stiff peaks without breaking.
- All-Purpose Flour: Standard unbleached flour gives just enough gluten structure to allow the layers to be handled without tearing.
Step-by-Step Method
1. Caramelize the Honey (Burnt Honey Base) Set your saucepan over high heat with 3/4 cup of honey. As the heat builds, you will see tiny bubbles expand into a rolling, fragrant foam. Reduce the heat to medium and stir gently with a heatproof spatula. Watch the transformation: within about 3 minutes, the pale golden liquid will darken into a rich, reddish-amber hue with a toasted marshmallow aroma. Remove from the heat and immediately pour in 1/4 cup of water. It will sputter and steam aggressively—stand back slightly, let the bubbling subside, then whisk until smooth. Pour into a heatproof measuring cup.
2. Build the Warm Honey Batter Set up a double boiler by simmering 2 inches of water in a saucepan and placing a large heatproof bowl over top (ensure the water does not touch the bowl). Add 1/4 cup of your prepared burnt honey, 3/4 cup regular honey, the granulated sugar, and cubed butter. Stir lazily until the butter melts and the mixture turns glossy and uniform.
Test the mixture with a clean fingertip: it should feel warm to the touch, not scalding. Slowly whisk in the eggs until fully incorporated. Whisk in the baking soda, salt, and cinnamon. Within 30 seconds, a fascinating chemical reaction occurs: the batter will foam up vigorously, lighten in color, and release a distinct, toasted aroma. Remove the bowl from the heat. Sift the all-purpose flour over the batter in three equal batches, whisking after each addition until silky-smooth. Keep the bowl resting in a warm spot so the batter stays fluid and spreadable.
3. Spread and Bake the Layers Preheat your oven to 180°C (375°F). Prepare a template by tracing a 9-inch circle on paper and placing it beneath your silicone baking mat or parchment paper. Spoon a heaping 1/3 cup of warm batter into the center. Using your offset spatula, sweep the batter outward in smooth, concentric strokes until you hit the circle boundary. The layer should look translucent and thin—trust the process, as it puffs in the oven.
Slide as many baking sheets into the oven as will fit comfortably. Bake for 6 to 7 minutes until the layer turns a deep mahogany-caramel color and springs back when touched. Slide the mat or parchment off the hot pan immediately to halt cooking. While warm, trim any uneven edges with a paring knife, saving every single scrap. Repeat until you have 11 baked layers.
4. Toast the Crumb Topping Select your least uniform layer. Drop the oven temperature to 120°C (250°F) and return this layer along with all saved trimmings to a sheet pan. Toast for 15 minutes until dry, brittle, and deeply browned. Let cool completely, then blitz in a food processor until you have a fine, sand-like crumb.
5. Whip the Burnt-Honey Cream In a medium bowl, whisk together 1/2 cup of burnt honey, the dulce de leche, fine salt, and 3/4 cup of heavy cream until completely smooth. Chill in the refrigerator for 30 minutes. In your stand mixer fitted with the whisk attachment, whip the remaining 4 cups of heavy cream to soft peaks. Slowly stream in the chilled dulce de leche mixture, whipping continuously until you achieve medium-stiff, spreadable peaks.
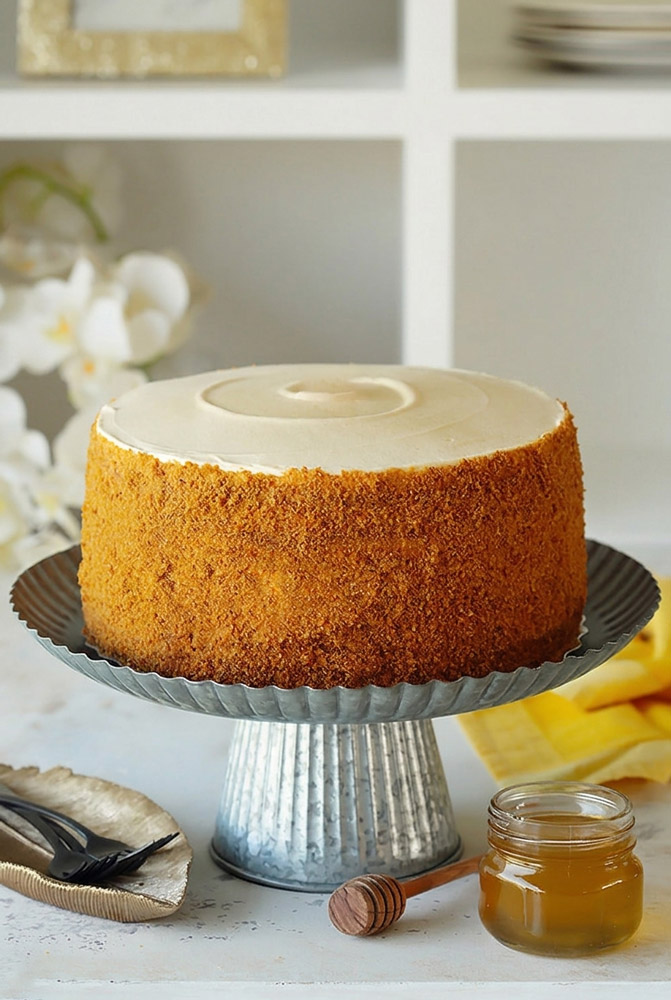
6. Assemble and Chill Place your first layer on a cake board or serving platter. Dollop a heaping cup of frosting into the center, spreading it evenly to within 1/4 inch of the edge. Stack the next layer on top, pressing gently to level. Repeat through all 10 layers, finishing with frosting on top. Use remaining frosting to coat the sides thinly.
Cup your hands to press the toasted cake crumbs generously all over the sides and top of the cake until completely enveloped in an amber velvet blanket. Transfer the cake to the refrigerator for at least 8 hours (preferably 24 hours) before slicing.
Variations & Customizations
- Traditional Tangy Smetana Cream: For a more classic Eastern European flavor profile, replace 1 cup of the heavy whipping cream with 1 cup of full-fat sour cream or crème fraîche folded into the whipped cream base. The lactic tang cuts through the rich caramel notes.
- Toasted Walnut Crunch: Add 1 cup of toasted walnuts to the food processor when grinding the cake scraps. The nutty, earthy bite complements the honey crumb coating.
- Warm Spiced Winter Edition: Add 1/4 teaspoon of ground cardamom, a pinch of ground ginger, and freshly grated nutmeg to the batter alongside the cinnamon for a holiday-ready profile.
Serving, Storage, and Freezing
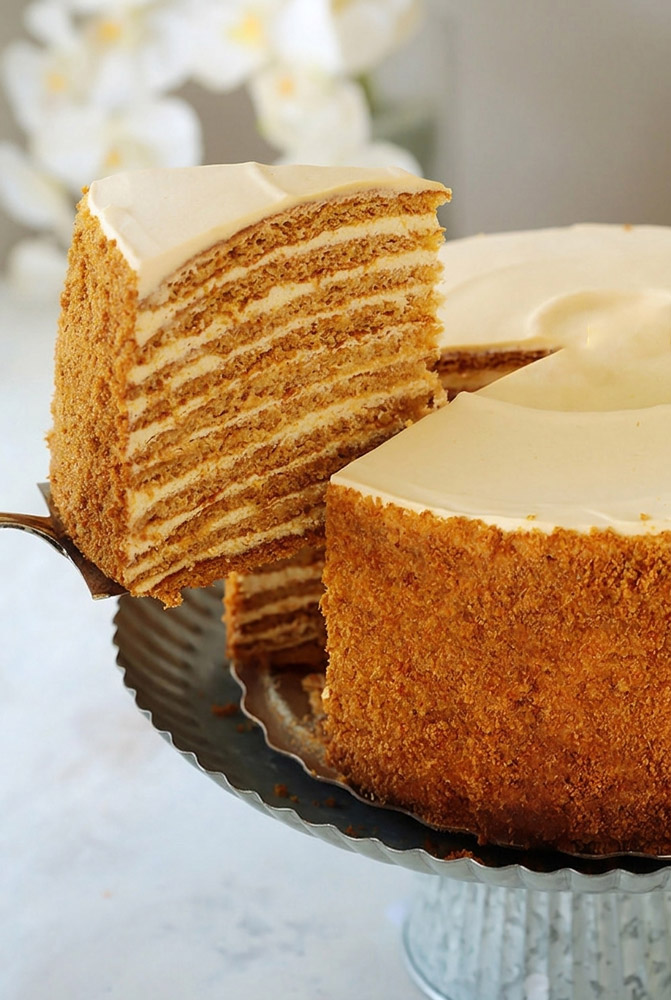
- Slicing & Presentation: Use a long, sharp chef’s knife warmed under hot water and wiped dry between cuts to get clean, picture-perfect cross sections showing off all ten layers.
- Pairings: Serve with unsweetened black tea, strong espresso, or a glass of dry sparkling wine (such as Prosecco or Cava) to cut through the honey richness.
- Refrigerator Storage: Keep covered in a cake dome or airtight container in the fridge for up to 5 days. The texture actually improves on days 2 and 3.
- Freezing: You can freeze the assembled cake (or individual slices) wrapped tightly in plastic wrap and aluminum foil for up to 2 months. Thaw overnight in the refrigerator before serving.
Russian Honey Cake (Medovik)
This showstopping 10-layer cake features delicate honey biscuit layers softened overnight by a luscious burnt honey and dulce de leche whipped cream. Coated in toasted honey crumbs, it is the ultimate make-ahead celebration dessert.
- Prep Time: 45 minutes
- Cook Time: 45 minutes
- Total Time: 9 hours 30 minutes (Resting Time)
- Yield: 12–14 servings 1x
- Category: Dessert / Cake
- Cuisine: Russian / Eastern European
Ingredients
Burnt Honey:
- 3/4 cup (255g) pure honey
- 1/4 cup (57g) water
Cake Layers:
- 1/4 cup prepared Burnt Honey
- 3/4 cup (255g) pure honey
- 1 cup + 2 tbsp (227g) granulated sugar
- 14 tbsp (199g) unsalted butter, cubed
- 6 large eggs (room temperature)
- 2 1/2 tsp baking soda
- 3/4 tsp fine salt
- 1 tsp ground cinnamon
- 3 3/4 cups (454g) all-purpose flour
Frosting & Assembly:
- 1/2 cup prepared Burnt Honey
- 1 1/4 cups (380g) dulce de leche
- 1/2 tsp fine salt
- 4 3/4 cups (1.12L) heavy whipping cream, cold, divided
Instructions
- Make Burnt Honey: Simmer 3/4 cup honey in a saucepan over medium heat for 3 minutes until dark amber. Turn off heat, carefully stir in 1/4 cup water, and set aside.
- Make Batter: In a bowl over simmering water, melt 1/4 cup burnt honey, 3/4 cup regular honey, sugar, and butter. Once warm, whisk in eggs, then baking soda, salt, and cinnamon until foaming. Remove from heat and sift in flour in 3 batches.
- Bake Layers: Preheat oven to 180°C (375°F). Spread 1/3 cup warm batter into 9-inch circles on silicone mats or parchment. Bake 6–7 minutes per layer until golden caramel (11 layers total).
- Make Crumb Coating: Lower oven to 120°C (250°F). Bake trimmings and the least uniform layer for 15 minutes until dry and dark; pulse into fine crumbs in a food processor.
- Make Frosting: Whisk 1/2 cup burnt honey, dulce de leche, salt, and 3/4 cup cream until smooth; chill 30 minutes. Whip remaining 4 cups cream to soft peaks, stream in honey mixture, and whip to medium-stiff peaks.
- Assemble & Chill: Layer 10 cake rounds with 1 cup frosting between each. Frost exterior, coat in reserved cake crumbs, and chill in the refrigerator for at least 8 to 12 hours before slicing.
Notes
- Spreading Tip: Keep the batter bowl warm over the water bath pan (off heat) so it spreads easily onto the mats.
- Make-Ahead Friendly: Assembled cake stays fresh and sliceable in the refrigerator for up to 5 days.
