
Indulge in the delightful fusion of minty freshness and rich chocolate decadence with this festive Chocolate Peppermint Poke Cake recipe. Perfect for the holiday season, this moist and flavorful cake is more than just a dessert—it’s a centerpiece for any Christmas celebration. The infusion of peppermint extract paired with sweetened condensed milk creates a luscious filling that seeps into every bite, ensuring each mouthful is bursting with flavor. Complementing this, a generous drizzle of hot fudge sauce adds an extra layer of chocolate goodness, making it irresistible to chocolate lovers and holiday enthusiasts alike.
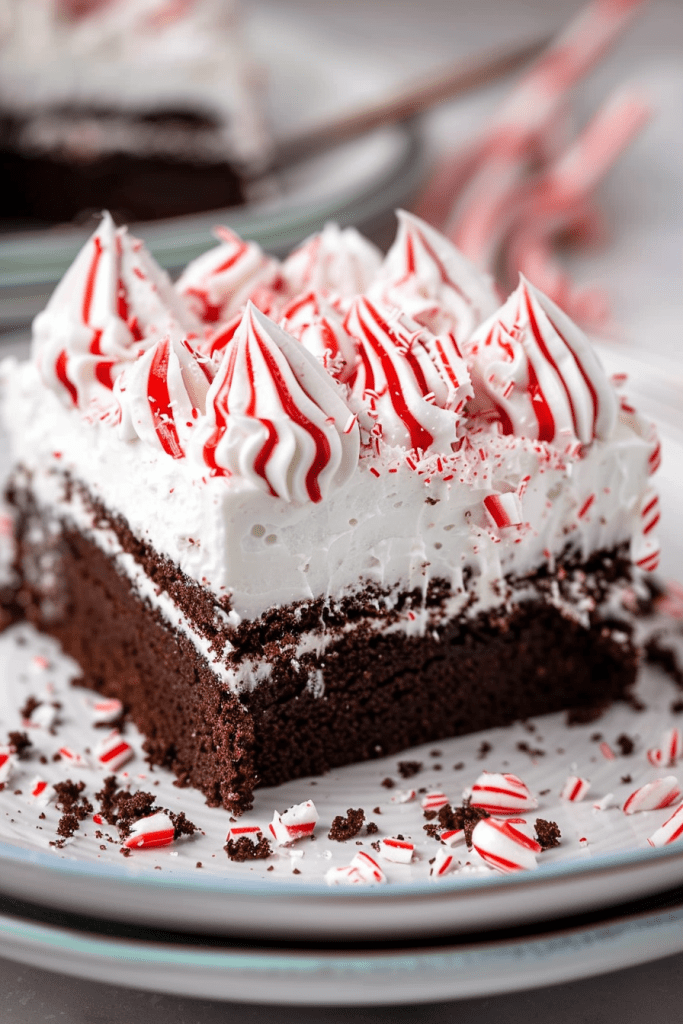
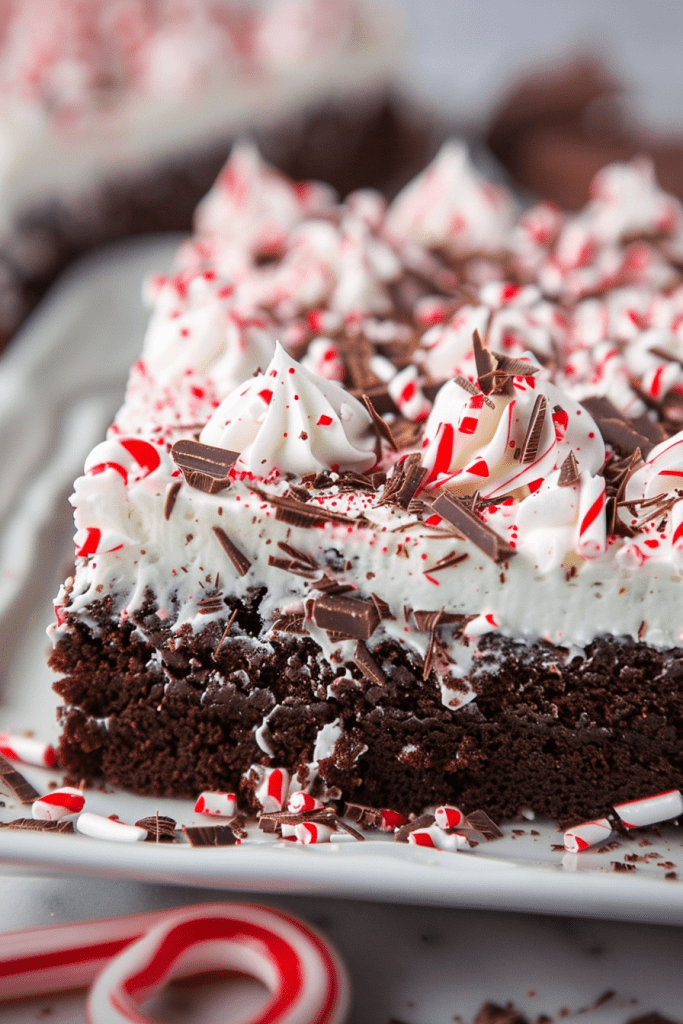
This Peppermint Poke Cake is a true holiday treat, showcasing a rich chocolate fudge base that serves as the perfect canvas for a peppermint-infused filling. The cake is topped with a fluffy layer of whipped cream, adding lightness and balance to its dense, chocolatey foundation. Peppermint crunch baking chips are sprinkled atop, providing a festive visual appeal and a delightful textural contrast. The subtle yet distinct peppermint flavor weaves seamlessly with the creamy filling and the airy whipped topping, ensuring each bite is a symphony of holiday flavors. By preparing this easy-to-make yet irresistibly delicious cake, you are guaranteed to elevate your Christmas dessert spread with minimal effort but maximum impact.
Ingredients List
For the Cake
- 1 box chocolate fudge cake mix (15.25 oz)
- Ingredients listed on the box to make the cake
For the Peppermint Filling
- 1 can sweetened condensed milk (14 oz)
- 1 teaspoon peppermint extract
- 1 jar hot fudge sauce (11-12 oz)
For the Topping
- 1 tub frozen whipped topping, thawed (8 oz)
- 1 bag Andes Peppermint Crunch Baking Chips (10 oz)
Required Tools and Equipment
To create this delightful Chocolate Peppermint Poke Cake recipe, you will need a few essential tools and equipment to ensure a smooth baking process:
- Offset Icing Spatula
- Maple Wooden Set Spoon, Multisize, Natural
- Pyrex Glass Mixing Bowl Set (3-Piece)
- Hand Mixer with Snap-On Case
- Lock N’ Lift Manual Handheld Can Opener with Locking Mechanism
- Non-Stick 13 x 9-Inch Covered Oblong Baking Pan with Lids, Pack of 2
- Stainless Steel Metal Measuring Spoons, Fits in Spice Jar, Set of 6 with bonus Leveler
Having these tools and equipment on hand will make preparing and serving this scrumptious cake a breeze. Now, let’s dive into the step-by-step process of assembling this decadent Chocolate Peppermint Poke Cake.
Preparation Steps
Preparing and Baking the Cake Batter
Begin by preparing the chocolate fudge cake batter according to the box instructions. This typically involves mixing the dry cake mix with water, eggs, and oil. Use a 9×13-inch baking pan to ensure the cake has room to rise and bake evenly. Preheat your oven to the recommended temperature, generally 350°F (175°C), to ensure that the cake bakes perfectly. Pour the batter into the prepared pan and bake as directed, usually for about 25-30 minutes. Keep an eye on the oven to avoid overbaking and a dry cake. The cake is ready when a toothpick inserted into the center comes out clean.
Creating the Poke Cake
Making the Peppermint Filling
As the cake nears completion, prepare the peppermint filling. In a small bowl, combine the sweetened condensed milk with the peppermint extract. Stir until thoroughly mixed, so the peppermint flavor is evenly distributed throughout the milk. This mixture serves as the flavorful infusion that will saturate your cake, providing the distinctive peppermint character that makes this dessert so festive.
Poking Holes and Filling
After removing the cake from the oven, allow it to cool slightly before proceeding with the next step. Use the round end of a wooden spoon to poke evenly spaced holes across the entire surface of the cake. This technique is crucial as it allows the peppermint filling to penetrate and flavor the cake thoroughly. Carefully pour the sweetened condensed milk mixture over the cake, spreading it with a spoon to ensure it seeps into each hole. This process enhances the cake’s moisture and enriches each bite with peppermint sweetness. Allow the cake to cool completely, which will give the flavors time to meld together and become more pronounced.
Frosting and Decorating
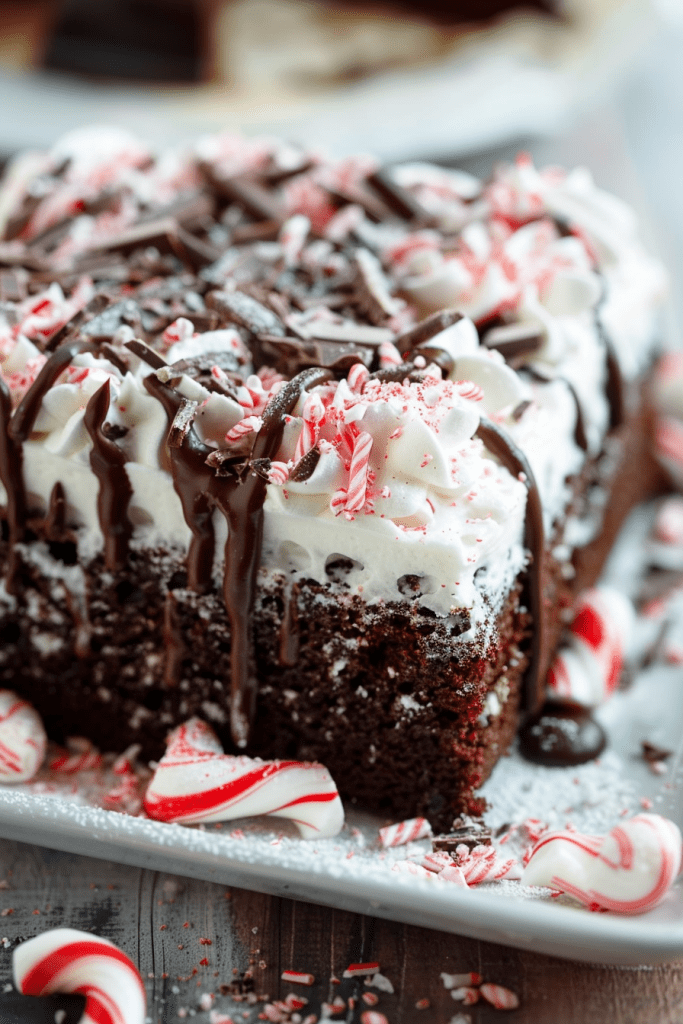
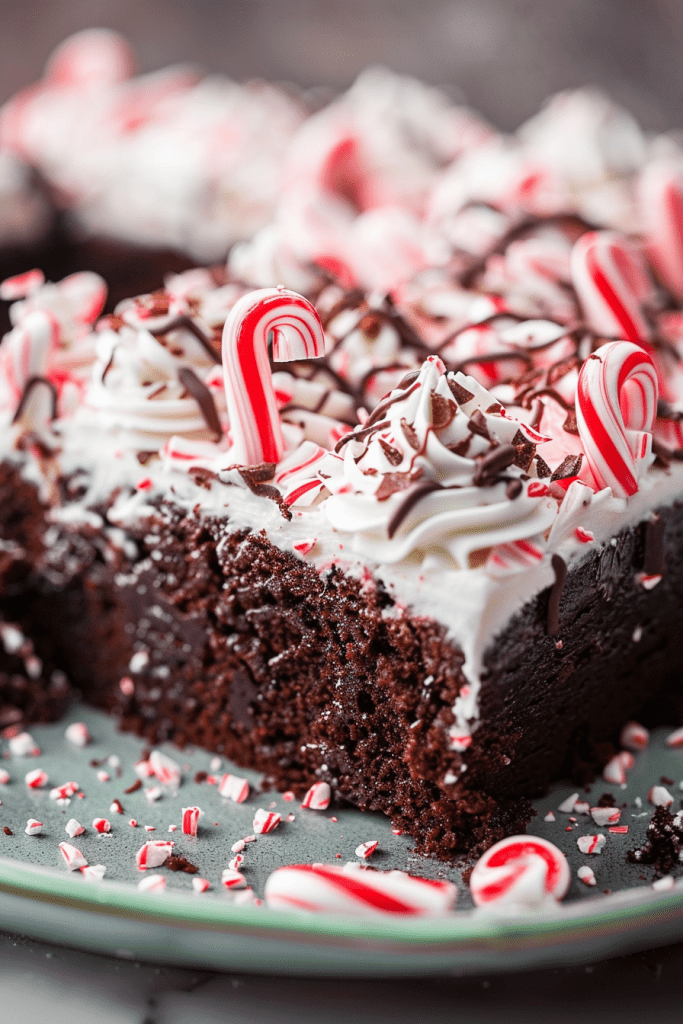
Once the cake has cooled, it’s time to apply the toppings. First, heat the hot fudge sauce in the microwave just until it becomes spreadable. Carefully pour it over the cake, using an offset spatula to spread it evenly over the surface. This step ensures a uniform layer of rich chocolate sauce that complements the underlying peppermint. Allow the chocolate to cool and set for about 15 minutes. Then, spread the thawed whipped topping evenly over the entire cake. The final touch involves sprinkling Andes Peppermint Crunch Baking Chips liberally over the whipped topping. This step not only enhances the cake’s festive appearance but also adds a delightful crunch and extra minty flavor. For an extra festive touch, consider adding colorful holiday sprinkles to enhance the cake’s visual appeal.
Make-Ahead Tips
To streamline your preparation, you can make parts of this recipe in advance. Baking the cake a day ahead allows it to settle and gives the flavors time to develop more fully. Once the cake has cooled, cover it securely with plastic wrap to maintain its moisture and store it at room temperature overnight. For the toppings, you can prepare your garnishes, such as crushed candy canes or other decorative elements, in advance and store them in an airtight container until you’re ready to assemble the cake. This preparation saves time on the day of serving and ensures a stress-free, enjoyable baking experience.
Serving and Storage
How to Serve
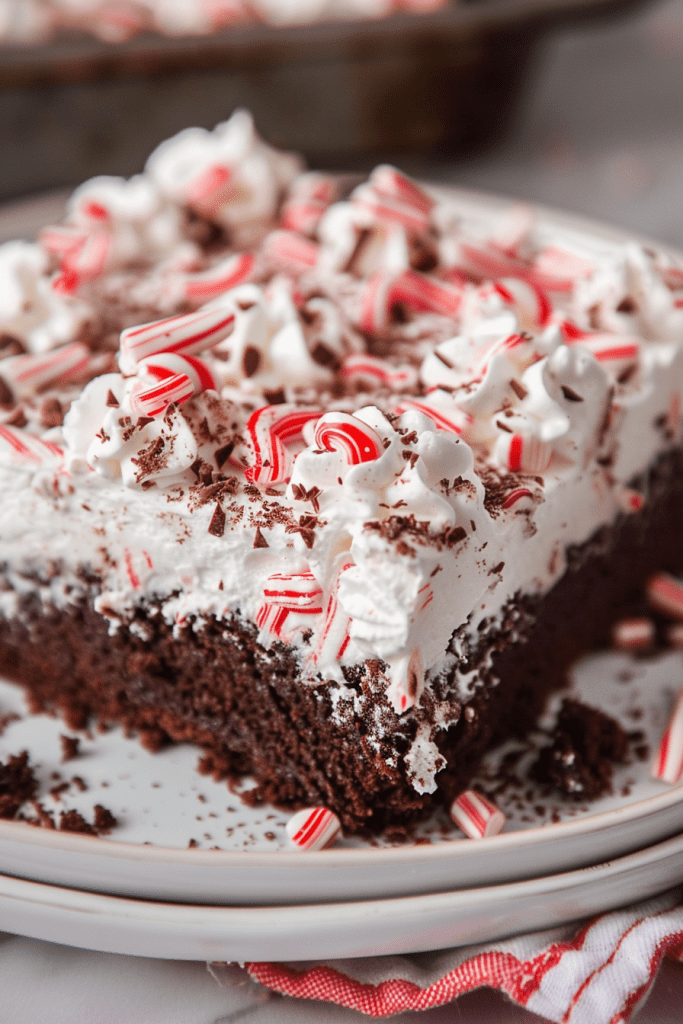
When you’re ready to serve this decadently layered cake, slice it into equal portions using a sharp knife. This precision maintains the cake’s structure and showcases its beautiful layers. Serve each slice on a plate and, for an extra touch, sprinkle additional peppermint crunch or crushed candy pieces on top for added texture and a burst of flavor. This cake is best enjoyed chilled, allowing the flavors to meld and the textures to set perfectly.
Storage Tips
To preserve any leftover cake, cover it securely with plastic wrap or place it in an airtight container. Store the cake in the refrigerator, where it will stay fresh and delicious for up to 3-4 days. This storage method is particularly important due to the dairy components in the cake, which need to be kept refrigerated. Before serving leftover cake, let it sit at room temperature for a few minutes to enhance its texture and flavors. Enjoy the cake fresh within a few days for the best taste and quality.

Conclusion
I hope this Chocolate Peppermint Poke Cake recipe inspires you to add a delightful twist to your holiday dessert table. With its decadent chocolate base, creamy peppermint filling, and a final flourish of festive toppings, this cake is bound to be a crowd-pleaser. By following the detailed steps outlined in this article, you can effortlessly create a stunning and delicious treat that will impress your family and friends. Embrace the holiday spirit with this indulgent dessert that perfectly captures the essence of the season. Happy baking!
PrintChocolate Peppermint Poke Cake

Experience the perfect blend of refreshing peppermint and rich chocolate in this festive Chocolate Peppermint Poke Cake. Ideal for the holiday season, it features a moist chocolate base soaked in a luscious peppermint filling and topped with whipped cream and peppermint crunch.
- Prep Time: 15 minutes
- Cook Time: 30 minutes
- Total Time: 45 minutes + chilling
- Yield: 12 1x
- Category: Dessert
- Cuisine: American
Ingredients
For the Cake
- 1 box chocolate fudge cake mix (15.25 oz)
- Ingredients listed on the cake box (usually eggs, oil, and water)
For the Filling
- 1 can sweetened condensed milk (14 oz)
- 1 teaspoon peppermint extract
- 1 jar hot fudge sauce (11–12 oz)
For the Topping
- 1 tub frozen whipped topping, thawed (8 oz)
- 1 bag Andes Peppermint Crunch Baking Chips (10 oz)
Optional Ingredients
- Crushed candy canes (for additional festive flair)
Instructions
Step 1: Prepare and Bake the Cake
- Preheat Oven: Preheat your oven to 350°F (175°C).
- Mix Batter: Prepare the chocolate fudge cake mix according to the package instructions, using the specified ingredients.
- Bake: Pour the batter into a greased 9×13-inch baking pan and bake for 25-30 minutes, or until a toothpick inserted in the center comes out clean.
Pro Tip: Avoid overmixing the batter to keep the cake light and fluffy.
Step 2: Create the Peppermint Filling
- Mix Filling: In a small bowl, combine the sweetened condensed milk with peppermint extract.
- Poke Holes: Once the cake is baked, remove it from the oven and poke holes all over using the round end of a wooden spoon.
Visual Cue: Ensure holes are evenly spaced to allow the filling to seep throughout the cake.
Step 3: Assemble the Cake
- Pour Filling: Carefully pour the peppermint mixture over the cake, focusing on filling each hole. Allow the cake to cool completely.
- Add Fudge: Heat the hot fudge sauce until spreadable. Pour and spread evenly over the cake using an offset spatula.
Common Mistake: Pouring filling too quickly may result in uneven absorption.
Step 4: Top and Decorate
- Whipped Topping: Spread the thawed whipped topping over the cooled cake.
- Finish with Chips: Sprinkle Andes Peppermint Crunch Baking Chips generously on top.
Optional: Add crushed candy canes for extra decoration and crunch.
Step 5: Chill and Serve
- Refrigerate: Chill the cake for at least 4 hours before serving. This allows the flavors to meld beautifully.
- Slice and Serve: Use a sharp knife to cut neatly into servings. Serve chilled.
Notes
Serving Suggestions
- For extra festivity, add colorful holiday sprinkles.
- Serve with a scoop of vanilla ice cream for a delightful contrast.
Tips & Tricks
- If you prefer, use a homemade cake recipe in place of the box mix, ensuring it fits a 9×13-inch pan.
- The longer the cake chills, the better the flavors meld.
Storage and Reheating
- Storage: Store leftover cake in an airtight container in the refrigerator for up to 3-4 days.
- Reheating: Enjoy cold for the best experience. If necessary, let it sit at room temperature for a few minutes before serving.