
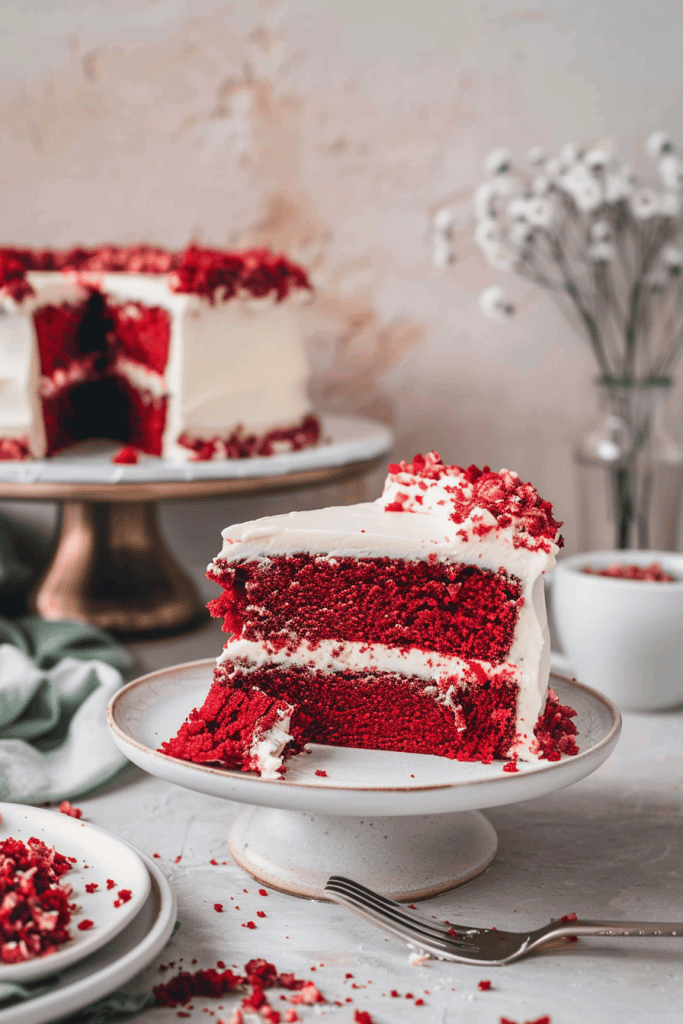
I’ve been on a quest for the perfect homemade red velvet cake recipe, searching for that ideal balance of moistness, richness, and that iconic buttermilk chocolate flavor. After experimenting with a blend of three recipes, I finally cracked the code and created what I proudly call THE MASTERPIECE in my kitchen. This easy, moist red velvet cake boasts a touch of Southern charm and a secret ingredient that elevates it to another level.
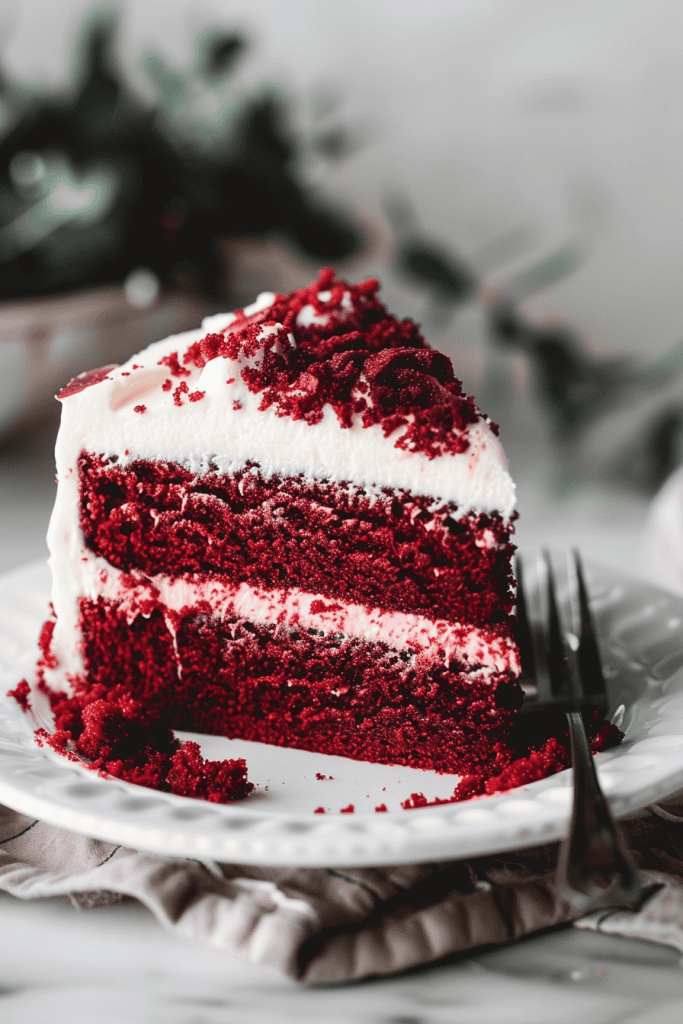
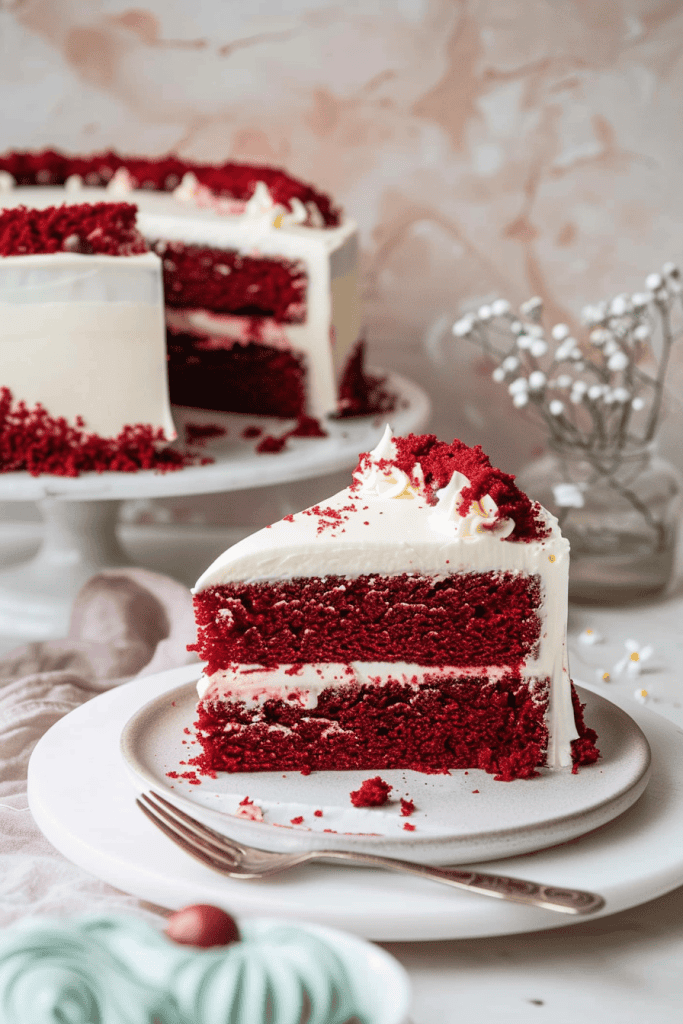
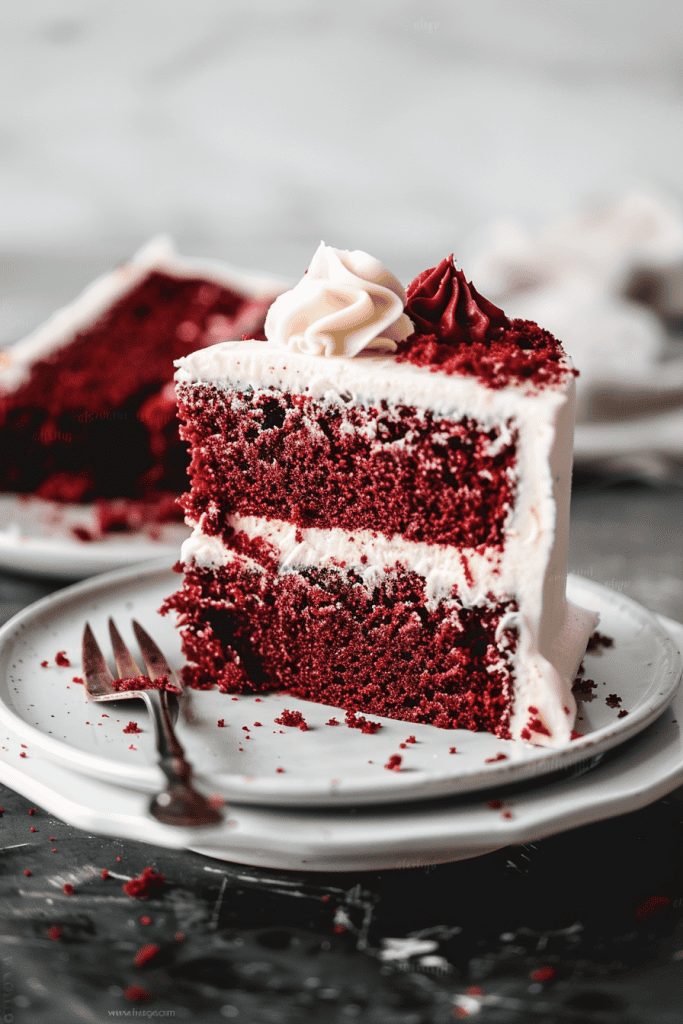
There’s something undeniably elegant about red velvet cake – from its vibrant crimson hue to its delicate crumb and subtle chocolate notes with a hint of tanginess from the buttermilk. Whether it’s for Valentine’s Day, Christmas, birthdays, or just because, this homemade red velvet cake is a versatile treat that’s sure to impress. Dive into the world of red velvet with this from-scratch recipe and discover why it’s not just the color that makes it velvet but also its lusciously smooth texture.
Ingredients
For the Red Velvet Cake
- ½ cup (1 stick or 113g) unsalted butter, at room temperature
- 1 ½ cups (315g) sugar
- 2 large eggs, at room temperature
- 1 teaspoon vanilla extract
- 1 Tablespoon (8g) cocoa powder
- 2 ¼ cups (190g) all-purpose flour
- 1 teaspoon baking soda
- 1 teaspoon salt
- 1 cup (242g) buttermilk, at room temperature
- 2 oz (56g) liquid red food color
- 1 teaspoon white vinegar
- 12 ounces brick-style cream cheese, softened (340 grams)
- ¾ cup unsalted butter, softened (175 grams)
- 3 cups powdered sugar (360 grams)
- 1 ½ teaspoons pure vanilla extract
Necessary Equipment
For baking a delightful homemade red velvet cake, you will need some essential equipment to ensure your cake turns out perfect. Let’s go over the recommended baking pans and mixing and baking tools you should have on hand.
Recommended Baking Pans
Invest in quality baking pans to create the perfect red velvet cake. I recommend using two 8-inch or 9-inch round cake pans for this recipe. The size of the pans you choose will affect the thickness of your cake layers, so choose accordingly. Additionally, consider using parchment paper for lining the pans to prevent sticking and ensure easy removal of the cakes.
Mixing and Baking Tools
Having the right tools can make a significant difference in your baking experience. Be sure to have a reliable electric mixer, either handheld or stand, for efficiently mixing the cake batter and frosting. A silicone spatula is handy for scraping down the sides of bowls and ensuring all ingredients are well incorporated. Invest in a cooling rack to cool your cakes evenly and avoid steam build-up. Additionally, an icing spatula and piping bag with a decorating tip can help you achieve a beautifully frosted red velvet cake.
Preparation
Prepping the Ingredients
To begin making the homemade red velvet cake, gather all the necessary ingredients as listed in the recipe. Measure and prepare each ingredient according to the specific amounts and requirements mentioned to ensure a successful baking experience.
Preparing the Baking Pans
Prepare the designated cake pans by greasing them with a non-stick cooking spray and lining the bottoms with parchment paper. Ensuring that the pans are properly prepped will help in easy removal of the cakes after baking.
Directions
I will now guide you through the step-by-step process of creating a delicious homemade red velvet cake. From mixing the batter to baking the cake layers and finally, cooling and removing them from the pans, follow these instructions for a perfect outcome.
Mixing the Batter
- In a large mixing bowl, combine the dry ingredients including cake flour, cocoa powder, baking soda, and salt. Sift the mixture to ensure a lump-free batter.
- Cream together butter and sugar until light and fluffy using a stand mixer or handheld mixer.
- Add eggs, oil, red food coloring, vanilla extract, and vinegar, mixing well after each addition.
- Alternate adding the dry ingredients and buttermilk in three additions, starting and ending with the dry ingredients.
Baking the Cake Layers
- Preheat the oven to 350F (177C) and prepare three 8-inch cake pans with parchment paper circles at the bottom.
- Divide the batter equally between the pans and bake for 20-25 minutes until a toothpick inserted comes out clean.
- Once baked, allow the cakes to cool in the pans for about 10 minutes before removing them onto a wire rack to cool completely.
- After cooling for 10 minutes in the pans, run a knife around the edges of the cakes to loosen them.
- Place a wire rack on top of each pan and invert them to release the cakes. Gently peel off the parchment paper and let the cakes cool completely before frosting.
Follow these directions carefully for a scrumptious homemade red velvet cake that is sure to impress your family and friends.
Frosting the Cake
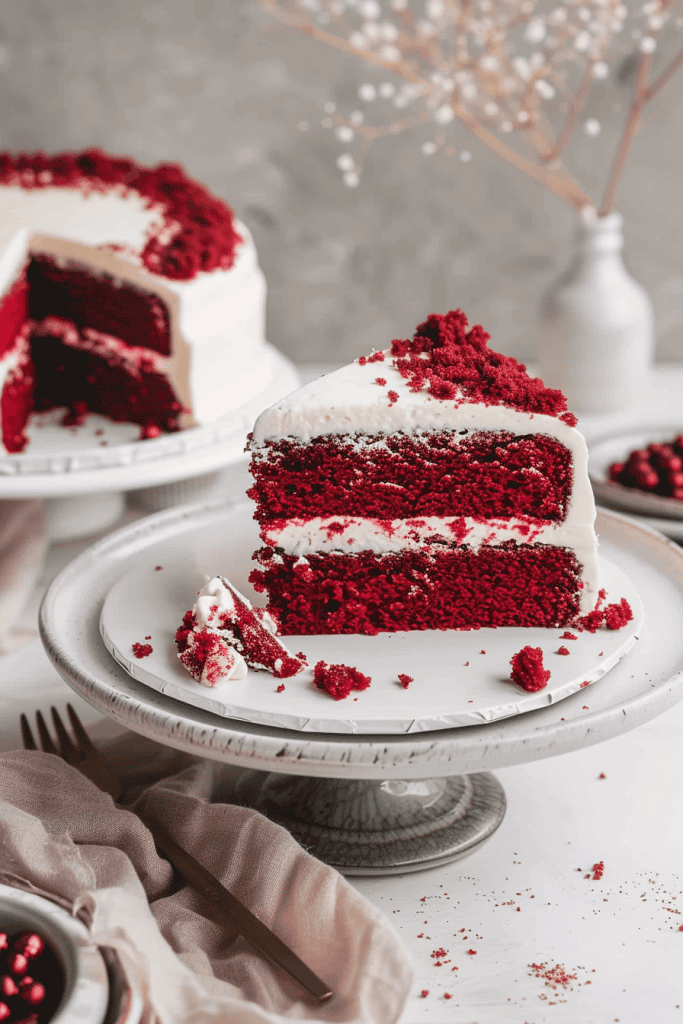
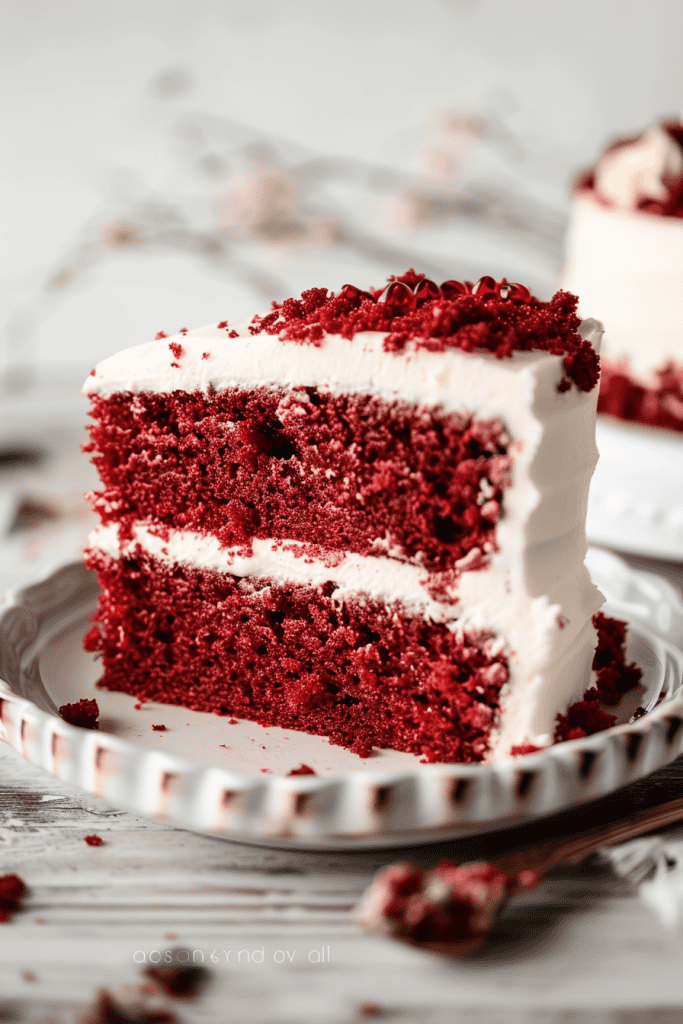
Frosting the cake is the crowning moment, adding the perfect finish to your homemade red velvet masterpiece. The cream cheese frosting adds a creamy and tangy layer that complements the rich, vibrant red cake layers beautifully.
Making the Cream Cheese Frosting
To create the luscious cream cheese frosting for your red velvet cake, start by combining cream cheese and butter in a large mixer bowl. Beat them until smooth and well combined. Gradually mix in powdered sugar, making sure to achieve a smooth and creamy consistency. Finish by adding the vanilla extract for that extra touch of flavor.
Applying Frosting to the Cake
When it’s time to frost the cake, begin by placing one cake layer on a serving plate. Spread a generous amount of frosting evenly on top. Continue layering the cakes with frosting in between, ensuring each layer is well coated. Once all layers are stacked, frost the entire cake, covering the top and sides generously. Use a bench scraper or offset spatula to smooth out the frosting for a flawless finish. Optionally, pipe a decorative border on top of the cake for added flair. Chill the cake until the frosting sets, and enjoy a slice of your decadent homemade red velvet creation.
Assembly and Decoration
Layering the Cake
To assemble the red velvet cake, start by placing the first cake layer cut side up on a cake board or stand. Spread about 1/2 cup of cream cheese frosting evenly on top, proceeding to place the next cake layer on top. Gently press down and repeat the frosting process for the remaining layers until the final layer is placed cut side down.
Decorative Tips
After crumb coating the cake with a thin layer of frosting, refrigerate it for 20-30 minutes. Apply a final, thicker layer of frosting all over the cake and smooth it using an offset spatula. Create a decorative pattern on the sides of the cake by lightly dragging a spatula. Add red velvet cake crumbs to the sides, and finish by piping rosettes on the top for a beautiful presentation.
Storage and Make-Ahead Tips
When it comes to storing your homemade red velvet cake, proper storage techniques can make a difference in maintaining its freshness and flavor for longer periods. Here are some useful tips on how to store and prepare your red velvet cake in advance.
Refrigerating
To ensure the longevity of your red velvet cake, it’s best to refrigerate it. After assembling and frosting the cake, cover it tightly and store it in the refrigerator. Refrigerating the cake helps it hold its shape when slicing and maintains its moistness. It is recommended to refrigerate the cake for at least 30-60 minutes before serving to allow the flavors to meld together.
Freezing and Thawing Instructions
If you want to prepare your red velvet cake ahead of time, freezing is a great option. Both frosted cake and unfrosted cake layers can be frozen for up to 2-3 months. To freeze the cake, ensure it is well wrapped to prevent freezer burn. When ready to enjoy, thaw the cake overnight in the refrigerator. Bring it to room temperature before decorating or serving to preserve its texture and taste.
Conclusion
Creating the perfect homemade red velvet cake is truly a labor of love. From the rich color to the velvety texture, every bite is a decadent delight. By following the detailed instructions provided, you can master this classic dessert with ease. Remember to store your masterpiece properly to savor its freshness for longer. Whether you’re baking for a special occasion or simply indulging your sweet tooth, this red velvet cake recipe is sure to impress. So roll up your sleeves, preheat your oven, and get ready to bake up a storm. Happy baking!