
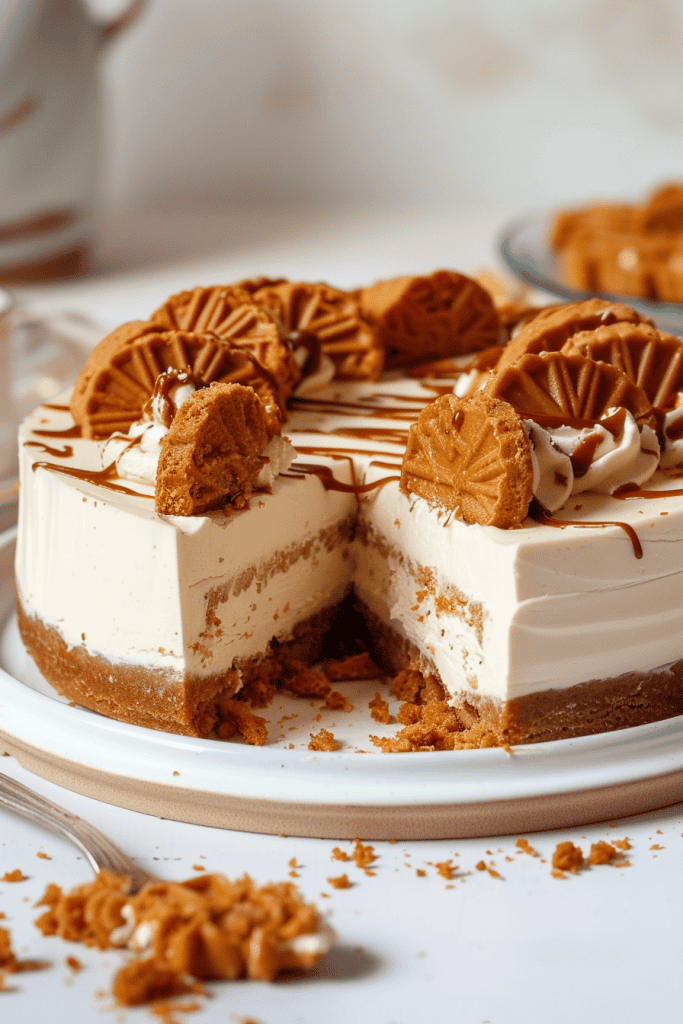
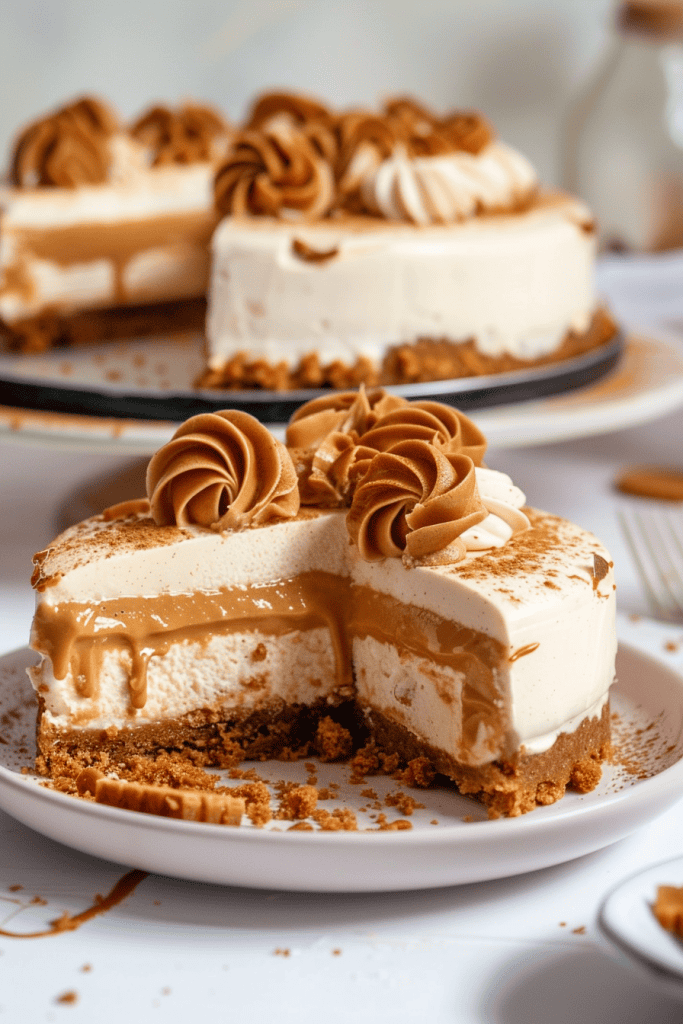
Craving a decadent dessert without the hassle of baking? Indulge in the irresistible allure of a No Bake Biscoff Cheesecake. This creamy delight features a luscious Lotus Biscoff cookie crust, a velvety Biscoff spread cheesecake filling, and a generous sprinkle of crushed Biscoff cookies—perfect for the cookie butter enthusiasts out there. Whether you’re a cheesecake aficionado looking for a quick fix or a dessert enthusiast seeking a show-stopping treat, this recipe is a must-try.
Say goodbye to oven-related stress and hello to a dessert that’s as easy to make as it is delicious. With layers of Biscoff cookies, creamy cheesecake, and a finishing touch of Biscoff spread, this no-bake cheesecake is a delightful addition to any occasion. Elevate your dessert game effortlessly with this crowd-pleasing, make-ahead treat that guarantees to impress your guests.
Ingredients
Creating a delicious No Bake Biscoff Cheesecake requires a few key ingredients to bring out its irresistible flavors.
For the Crust
- 1 8.8 oz (250g) package Biscoff cookies
- 1/2 cup unsalted butter, melted
For the Cheesecake Filling
- 1 cup heavy cream, cold
- 3 (8 oz) blocks full-fat cream cheese, softened to room temperature
- 1 cup powdered sugar
- 1 cup creamy Biscoff cookie butter
- 1/3 cup sour cream, room temperature
- 2 tsp pure vanilla extract
- Pinch of salt
- 1/2 cup heavy cream
These ingredients come together to create a velvety, creamy, and decadent No Bake Biscoff Cheesecake that is sure to wow your taste buds.
Equipment Needed
When preparing a delicious No Bake Biscoff Cheesecake, having the right equipment is crucial to ensure a smooth and successful dessert-making experience. Here’s what you’ll need:
1. Mixing Bowl:
A large mixing bowl to combine and whip the ingredients properly. Make sure it’s clean and dry before using it.
2. Hand Mixer or Stand Mixer:
To whip the cream cheese, Biscoff spread, powdered sugar, and other ingredients together until smooth and creamy.
3. Spatula:
A rubber spatula for folding the whipped cream into the cream cheese mixture gently, maintaining the airy texture of the cheesecake.
4. Measuring Cups and Spoons:
To accurately measure all the ingredients, ensuring the perfect balance of flavors in your cheesecake.
5. Springform Pan:
A springform pan to mold and set the cheesecake before serving. It allows for easy removal of the cake without damaging its structure.
6. Refrigerator:
A refrigerator to chill and set the cheesecake properly. Ensure you have enough space to store the dessert while it sets.
Having these essential tools on hand will make the process of creating a luscious No Bake Biscoff Cheesecake a breeze.
Directions
Creating a luscious No Bake Biscoff Cheesecake is a delightful journey filled with creamy indulgence and cookie goodness. Follow these simple steps to craft a dessert that will amaze your taste buds.
Preparing the Crust
- Combine 30 Lotus Biscoff cookies with 6 tablespoons of melted unsalted butter.
- Mix the ingredients in a medium-sized bowl until the texture resembles wet sand.
- Press the crust mixture into a parchment-lined 9-inch springform pan evenly using the bottom of a glass.
- Set the crust aside while moving on to prepare the filling.
Making the Cheesecake Filling
- In a standing mixer or by hand, beat 8 oz blocks of full-fat cream cheese with 1 cup of powdered sugar and 1 cup of creamy Biscoff cookie butter until smooth.
- Add 1/3 cup of room-temperature sour cream, 2 tsp pure vanilla extract, and a pinch of salt to the cream cheese mixture.
- Whip 1 cup of heavy cream until it holds its shape and gently fold it into the cream cheese mixture using a rubber spatula.
- Spoon the filling into a piping bag and pipe it onto the chilled crust, smoothing the tops evenly.
- Refrigerate the cheesecake for at least 6 hours or overnight to set.
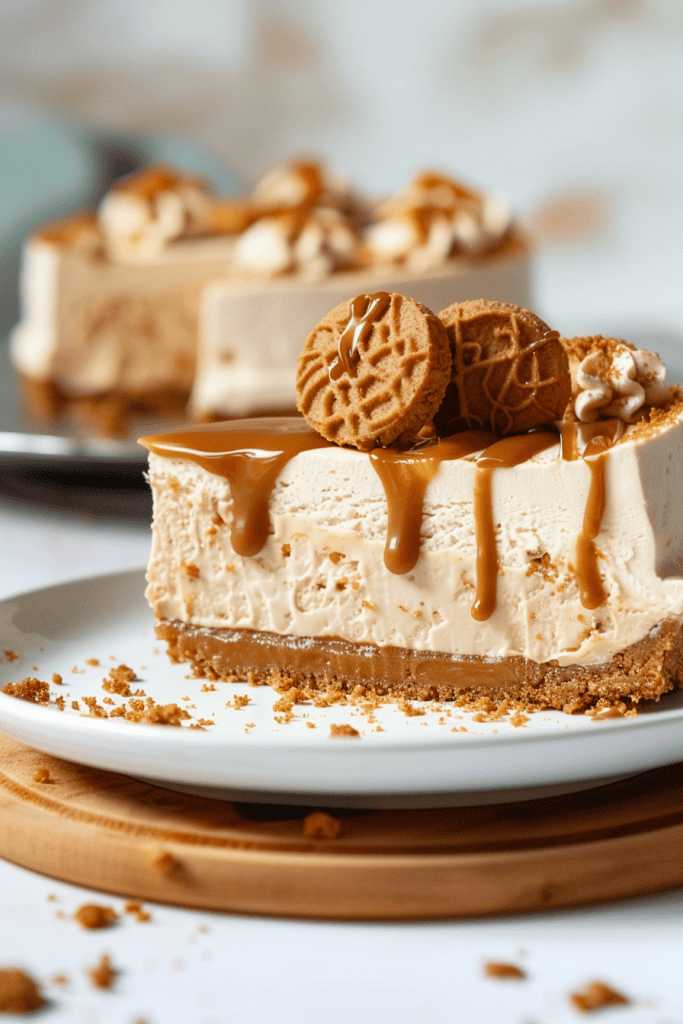
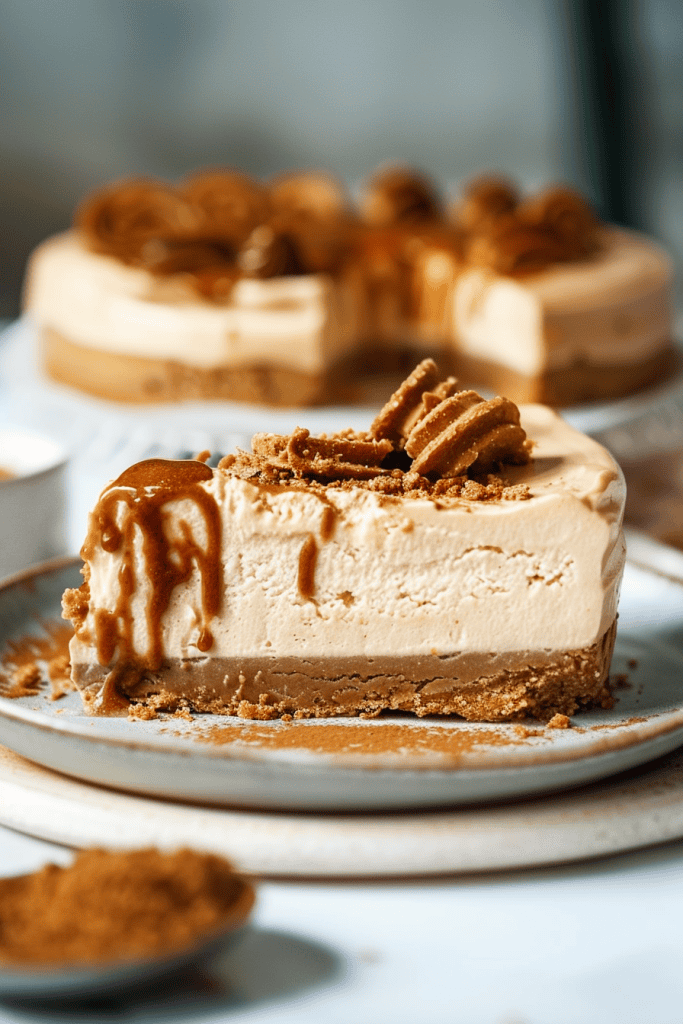
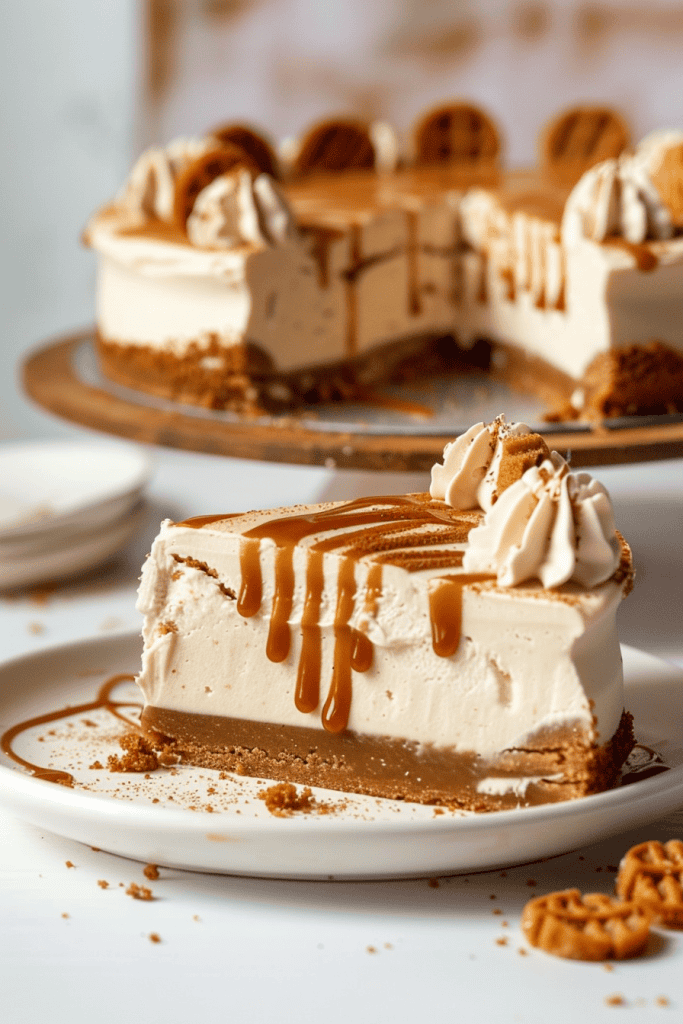
- Microwave about 20-30 seconds to melt the remaining Biscoff spread and spread it on top of the chilled cheesecake.
- Finish by sprinkling crushed Biscoff cookies over the spread, adding a delightful crunch and extra cookie flavor.
- Your No Bake Biscoff Cheesecake is ready to be served and enjoyed!
Setting and Serving
Creating a delectable No Bake Biscoff Cheesecake is just the beginning. The final steps of chilling, adding the perfect finishing touches, and serving elevate the dessert experience.
Chilling the Cheesecake
After assembling the cheesecake, it’s essential to allow it to set properly by chilling. Cover the pan with plastic wrap and place it in the refrigerator for a minimum of 4 hours or preferably overnight. This time is crucial for the cheesecake to firm up and achieve the perfect consistency.
Adding Final Touches
To enhance the cheesecake’s flavor and presentation, warm the Biscoff cookie spread in the microwave for 30-60 seconds until smooth. Pour the melted spread onto the center of the cheesecake and spread it gently to the edges, allowing some to drip over for a beautiful finish. For added crunch and visual appeal, sprinkle extra crushed Biscoff cookies on top before returning the cheesecake to the fridge for 15 minutes to set.
Serving Suggestions
Once the cheesecake is fully set, remove it from the springform pan by running a warm knife around the edges for easy release. Slice the cheesecake into portions and serve on chilled plates for the best taste experience. Optionally, accompany each slice with a dollop of whipped cream or additional crushed Biscoff cookies for an extra indulgent treat. Enjoy the creamy, flavorful No Bake Biscoff Cheesecake as a delightful dessert for any occasion.
Storage Instructions
After enjoying this delicious No Bake Biscoff Cheesecake, you may have leftovers that you want to preserve for later indulgence. Here are some simple storage instructions to ensure that your cheesecake stays fresh and tasty:
Refrigeration:
- Once the cheesecake has been prepared, cover the springform pan with plastic wrap or aluminum foil.
- Place the covered cheesecake in the refrigerator, making sure it is stored on a flat surface to prevent any toppings from getting smudged.
- Ideally, store the cheesecake in the refrigerator for up to 3-4 days to maintain its freshness and creamy texture.
- If you want to store your No Bake Biscoff Cheesecake for a longer period, freezing is an excellent option.
- Wrap the cheesecake (either whole or in slices) tightly in plastic wrap and then aluminum foil to prevent freezer burn.
- Label the cheesecake with the date before placing it in the freezer.
- When ready to enjoy, allow the cheesecake to thaw in the refrigerator overnight before serving.
- Frozen cheesecake can be stored for up to 1 month without compromising its taste.
By following these storage instructions, you can ensure that your No Bake Biscoff Cheesecake remains fresh and delicious for whenever you crave a sweet treat.
Conclusion
I’ve shared the secrets to creating a delectable No Bake Biscoff Cheesecake that’s sure to impress your taste buds. With its irresistible Lotus Biscoff cookie base, creamy Biscoff spread filling, and decadent cookie toppings, this dessert is a winner for any occasion. Remember, having the right tools and ingredients is key to achieving that perfect balance of flavors. By following the simple steps outlined in this article, you can easily whip up this crowd-pleasing treat. Don’t forget the storage tips to keep your cheesecake fresh and ready to enjoy whenever the craving strikes. Treat yourself and your loved ones to this heavenly dessert that’s bound to become a favorite in your recipe collection.