
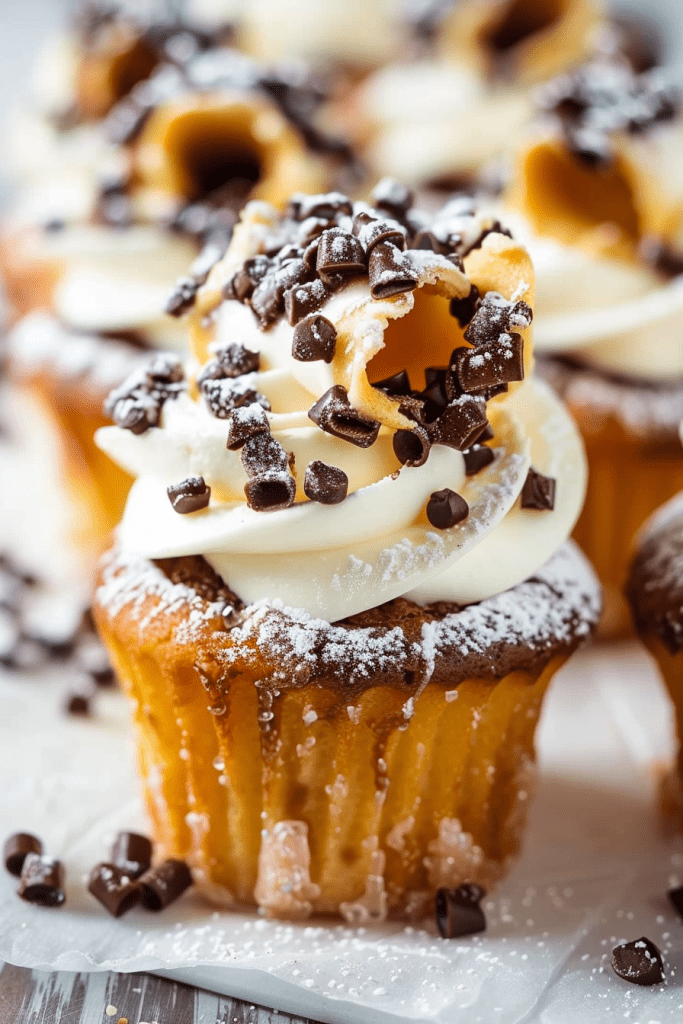
If you’re craving a delightful treat that combines the flavors of a classic Italian cannoli with the convenience of a cupcake, you’re in for a real treat with these Cannoli Cupcakes. This recipe takes the beloved elements of a cannoli – the creamy filling, the hint of chocolate, and the sweet pastry – and transforms them into a handheld delight perfect for any occasion.
I’ve taken the essence of a traditional cannoli and infused it into these easy-to-make cupcakes, creating a family-friendly dessert that’s sure to impress. Whether you’re a seasoned baker or trying your hand at homemade cupcakes for the first time, these Cannoli Cupcakes are a deliciously simple yet decadent option that will have everyone asking for more.
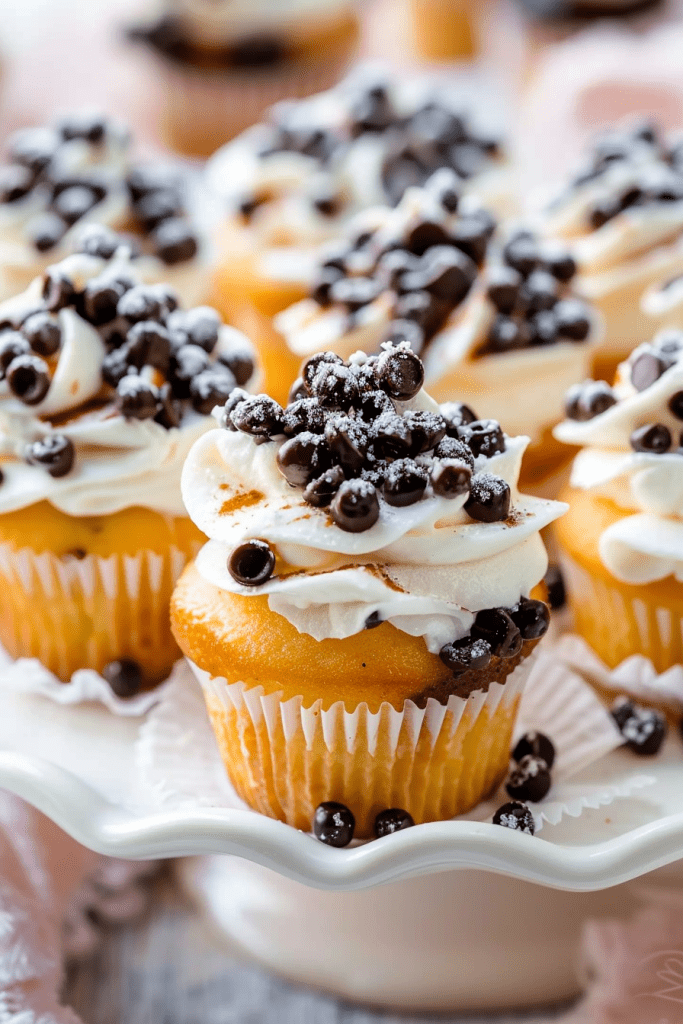
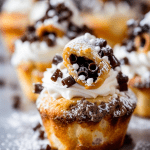
With a delicious ricotta buttercream frosting and a delightful cannoli filling, these cupcakes are a delightful twist on a beloved pastry. Get ready to indulge in the flavors of Italy with a fun and tasty treat that’s perfect for holidays, birthdays, or any special gathering.
Ingredients
Creating these scrumptious Cannoli Cupcakes is a breeze when you have the right ingredients on hand. Let’s break down what you’ll need for each component of this delightful dessert:
For the Vanilla Cupcakes
- 1 1/2 cups all-purpose flour
- 1 tsp baking powder
- 1/4 tsp baking soda
- 1/4 tsp fine sea salt
- 1/2 cup unsalted butter, at room temperature
- 1 cup granulated sugar (200 g)
- 3 large eggs, at room temperature
- 1 tsp vanilla extract
- 1/2 cup milk, at room temperature (120 ml)
For the Ricotta Buttercream Frosting
- 1/2 cup unsalted butter, at room temperature
- 2/3 cup whole milk ricotta
- 3 cups powdered sugar, sifted
- 1/2 tsp vanilla extract
For the Cannoli Filling
- 1 1/4 cups whole milk ricotta
- 1/3 cup powdered sugar, sifted
- 1/2 vanilla bean, split and seeds scraped
- 1/2 tsp vanilla extract
To decorate
- 1 cup mini semisweet chocolate chips
- 1 cup chopped pistachios
- (Optional: Mini cannoli shells for garnish)
Equipment Needed
When preparing Cannoli Cupcakes, having the right equipment can make the process efficient and enjoyable. Here’s a list of essential tools you’ll need to create these delightful treats:
- Cupcake Pan: An essential item for baking cupcakes, the cupcake pan ensures that your cupcakes bake evenly and maintain their shape.
- Cupcake Liners: These paper or foil liners not only prevent the cupcakes from sticking to the pan but also add a decorative touch to your finished treats.
- Mixing Bowls: You’ll need mixing bowls in various sizes to combine and mix the cupcake batter, ensuring all ingredients are well incorporated.
- Electric Mixer: An electric mixer can make the process of mixing the cupcake batter and frosting easier and faster than mixing by hand.
- Piping Bag and Tips: To achieve a professional-looking frosting on your cupcakes, a piping bag with tips allows you to create decorative swirls or designs on top.
- Cooling Rack: After baking, a cooling rack provides a suitable surface for your cupcakes to cool properly before adding the frosting.
- Offset Spatula: An offset spatula helps in evenly spreading the frosting on top of the cupcakes for a smooth and polished finish.
- Spatula/Spoon: For folding ingredients and scooping batter/filling.
- Strainer and Cheesecloth: For draining the ricotta.
- Measuring Cups and Spoons: For accurate ingredient measurement.
Gathering these essential tools before starting your Cannoli Cupcakes recipe will streamline your baking process and help you create beautifully delicious treats.
Making the Vanilla Cupcakes
Creating the perfect, tender vanilla cupcake is the delightful foundation for our cannoli creations. Follow these steps closely to ensure your cupcakes bake up beautifully moist and flavorful.
- Prepare for Baking: First things first, preheat your oven to a cozy 350ºF (177ºC). While it’s warming up, thoughtfully line 14 standard cupcake tins with your chosen paper liners, getting your baking station ready for action.
- Sift the Dry Ingredients: In a generously sized mixing bowl, sift together the all-purpose flour, baking powder, baking soda, and fine sea salt. This sifting step is key to aerating the ingredients and removing any lumps, which contributes to a lighter, more tender cupcake crumb. Once sifted, set this bowl aside for a moment.
- Cream Butter and Sugar: In the bowl of your electric mixer, take the room temperature unsalted butter and beat it on medium speed for about one minute, just until it’s smooth. Now, introduce the granulated sugar and continue to beat them together for another 1 to 2 minutes. You’re looking for the mixture to become wonderfully creamy, light in color, and noticeably fluffy. Don’t forget to pause and scrape down the sides of the bowl as necessary to ensure everything is evenly incorporated.
- Incorporate Eggs and Vanilla: Add the room temperature large eggs one at a time, ensuring you mix each egg until it’s just combined into the batter before adding the next. This gradual addition helps create a stable emulsion. After the eggs are in, pour in the pure vanilla extract and give it a final mix to distribute that lovely aroma.
- Begin Alternating Dry and Wet: Now, gently add about one-third of your previously sifted dry ingredient mixture to the wet ingredients. Mix on a low speed, just until the flour is barely incorporated. Overmixing at this stage can lead to tough cupcakes, so less is more.
- Add First Half of Milk: Pour in half of the room temperature milk. Mix again on low speed, just until the milk is combined into the batter.
- Continue with Dry Ingredients: Add another third of the dry ingredients to the bowl. Continue to mix on low speed, stopping as soon as the flour streaks disappear.
- Add Remaining Milk: Follow with the remaining half of the milk, mixing gently until it’s just combined with the batter.
- Finish with Dry Ingredients: Lastly, add the final third of the dry ingredients. For this last addition, you can either fold it in gently using a rubber spatula to ensure you don’t overwork the gluten, or stir it in on the lowest possible speed with your mixer until just incorporated and the batter is smooth.
- Fill Cupcake Liners: Carefully divide the prepared batter evenly among the 14 cupcake liners. Aim to fill each liner about two-thirds of the way full; this will give the cupcakes enough room to rise without spilling over.
- Bake to Perfection: Place the cupcake pan into your preheated oven and bake for approximately 18 minutes. It’s a good idea to start checking for doneness around the 15-minute mark, as oven temperatures can vary. To check if they’re ready, gently press your finger on the top of a cupcake; if it springs right back, they are perfectly baked.
- Cool Completely: Once baked, carefully remove the cupcakes from the oven and transfer them to a wire cooling rack. It’s crucial to let the cupcakes cool completely before you even think about filling and frosting them, as warm cupcakes can melt your delicious toppings.

Making the Cannoli Filling
This luscious, creamy cannoli filling is the heart of our cupcakes. Properly preparing the ricotta is the secret to achieving that authentic, rich texture.
- Mix the Filling Ingredients: In a clean medium-sized bowl, combine the now beautifully strained ricotta, the sifted powdered sugar (sifting prevents lumps!), the fragrant seeds scraped from the split vanilla bean, and the pure vanilla extract. Gently mix these ingredients together with a spatula or spoon until they are just combined and wonderfully smooth. Avoid overmixing. Once mixed, cover the bowl and chill the filling in the refrigerator until you’re ready to assemble your cupcakes.
- Drain the Ricotta: Begin by lining a fine-mesh strainer with a double layer of cheesecloth. Gently spoon the whole milk ricotta into the cheesecloth-lined strainer. Allow it to drain, and you can even give it a light squeeze to help remove any excess watery whey. This step is vital for a thick, not runny, filling.
- Strain Adequately: Let the ricotta continue to strain for about 30 minutes or so. The exact time can vary depending on the initial moisture content of the ricotta brand you’re using. Your goal is to have ricotta that is noticeably firmer and less watery before you use it to make the delectable filling.
Preparing the Ricotta Buttercream Frosting
This frosting is a delightful marriage of creamy butter and rich ricotta, creating a uniquely textured and flavored topping for your cannoli cupcakes.
- Whip the Butter: In a medium to large mixing bowl, place the room temperature unsalted butter. Using an electric mixer on medium-high speed, beat the butter for a full 3 minutes. This extended beating time aerates the butter, making it exceptionally light, fluffy, and creamy – the perfect base for your frosting.
- Incorporate the Ricotta: Add the whole milk ricotta to the whipped butter. Reduce the mixer speed to medium and beat for another minute, just until the ricotta is smoothly combined with the butter, creating a homogenous mixture.
- Add Powdered Sugar Gradually: Turn the mixer off before adding the sifted powdered sugar. This prevents a sugar cloud in your kitchen! Add all the sifted powdered sugar at once, then begin mixing on the lowest speed until the sugar is gently incorporated into the butter and ricotta mixture.
- Beat Until Smooth: Once the sugar is mostly mixed in, increase the mixer speed to medium-high and beat for another full minute. This final whip will ensure the frosting is perfectly smooth, light, and airy.
- Flavor and Adjust: Finally, add the pure vanilla extract and mix briefly to combine. Assess the frosting’s consistency; if it feels a bit too soft for piping, especially in warmer kitchens, don’t hesitate to pop the bowl into the refrigerator for a short period (15-20 minutes) to allow it to firm up slightly before you begin frosting your cupcakes.
Assembling the Cannoli Cupcakes
This is where all your delicious components come together to create the final, irresistible treat. Take your time and enjoy the process of transforming your baked goods into stunning cannoli cupcakes.
- Storage: Your beautifully assembled Cannoli Cupcakes can be stored in an airtight container in the refrigerator. They will keep well and remain delicious for up to 4 days, though they are always best enjoyed fresh!
- Core the Cupcakes: Once your vanilla cupcakes are completely cool to the touch, use a small spoon, the end of a piping tip, or a dedicated cupcake corer to carefully remove a small section from the center of each cupcake. You’re creating a little well for that delightful cannoli filling, so don’t go all the way through to the bottom.
- Fill with Cannoli Cream: Transfer your chilled Cannoli Filling into a piping bag. You can snip about a 1/2-inch opening at the end of the bag or use a small round piping tip. Gently pipe a generous amount of the cannoli filling into the hollowed-out center of each cupcake until it’s nicely filled.
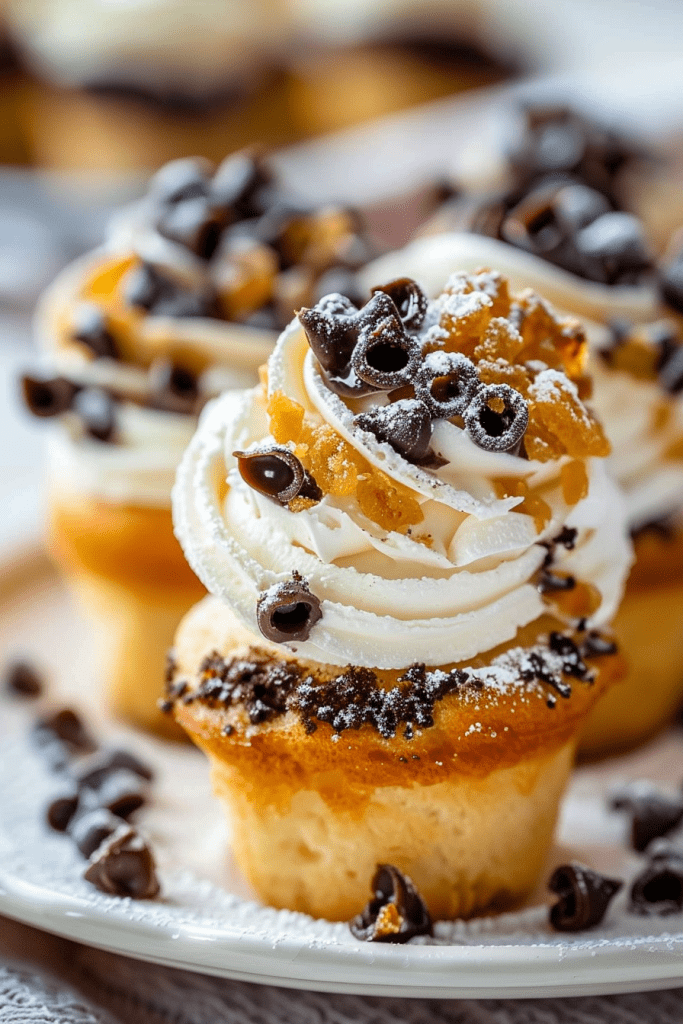
- Frost the Cupcakes: Place your prepared Ricotta Buttercream Frosting into a separate piping bag fitted with the piping tip of your choice (a large star tip like a Wilton 1M works beautifully for classic swirls). Artfully pipe the frosting over the top of each filled cupcake, covering the opening and creating an attractive mound or swirl.
- Add Decorative Touches (Optional): For an extra layer of flavor and visual appeal, you can gently roll the freshly frosted sides of the cupcakes in mini semisweet chocolate chips or finely chopped pistachios. This adds a lovely crunch and a pop of color.
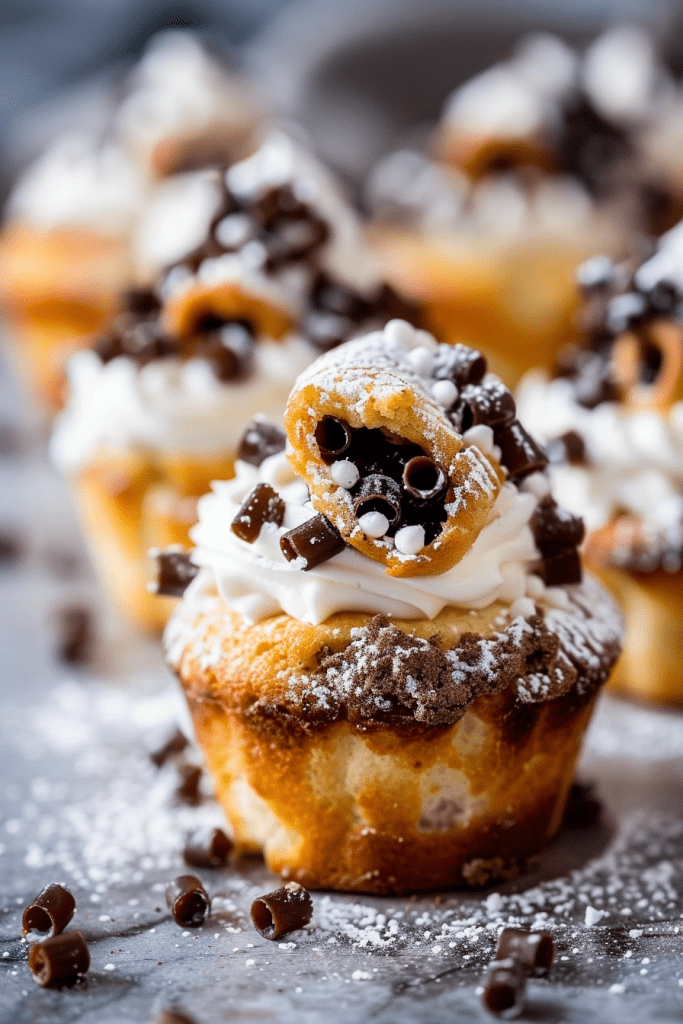
- Garnish with Mini Cannoli (Optional): If you’re using mini cannoli shells for an show-stopping garnish, it’s best to pipe the remaining Cannoli Filling into these delicate shells right before you intend to serve the cupcakes, or at most, up to 3 hours beforehand. This is because the crisp shells can become soggy if they sit with the moist filling for too long. Once filled, place a mini cannoli artfully on top of each frosted cupcake.
- Final Dusting (Optional): For an elegant finishing touch, consider a light dusting of powdered sugar over the tops of the frosted cupcakes just before serving. This adds a touch of bakery-style finesse.
Decorating Tips
Onto the fun part – decorating these delectable cannoli cupcakes! To achieve that classic cannoli look, I recommend using a piping tip like the Wilton 1M tip, or your tip of choice. This tip creates those beautiful swirls of frosting that resemble the traditional cannoli filling.
Once you have frosted the cupcakes with the Ricotta Buttercream Frosting, you can choose to garnish them with mini homemade cannolis (filled just before serving) for an extra special touch. The combination of the creamy frosting and the crunchy cannoli shell is truly a match made in dessert heaven.
For a finishing touch, consider rolling the frosted cupcakes in mini chocolate chips or chopped pistachios. This not only adds a delightful texture but also enhances the flavor profile, giving your cannoli cupcakes a perfect balance of sweetness and crunch.
Conclusion
I’ve shared a delectable Cannoli Cupcakes recipe that combines the best of both worlds – cupcakes and cannolis. With a creamy filling, delicious frosting, and tender cupcake, these treats are perfect for any occasion. By following the detailed steps provided, you can easily recreate these delightful treats in your own kitchen. From preparing the vanilla cupcakes to assembling the final product with Cannoli Filling and Ricotta Buttercream Frosting, each step is crucial to achieving the perfect balance of flavors and textures.
Don’t forget to use your favorite decorating tip for those beautiful swirls of frosting. With the option to garnish with mini cannolis, chocolate chips, or pistachios, you can add your own creative touch to these delicious Cannoli Cupcakes. Enjoy baking and indulging in these delightful treats!
PrintCannoli Cupcakes
Imagine the creamy, sweet delight of a classic Italian cannoli, all wrapped up in a tender vanilla cupcake! This recipe brings you the best of both worlds – a rich cannoli cream filling, fluffy ricotta buttercream, and a moist cupcake base. Perfect for celebrations or a special homemade treat!
- Prep Time: 1 hour
- Cook Time: 18 minutes
- Total Time: 1 hour 18 minutes
- Yield: 14 cupcakes 1x
- Category: Dessert, Cupcakes
- Cuisine: Italian-Inspired, American
Ingredients
For the Vanilla Cupcakes:
- 1 1/2 cups all-purpose flour (191g)
- 1 tsp baking powder
- 1/4 tsp baking soda
- 1/4 tsp fine sea salt
- 1/2 cup unsalted butter, room temperature (113g)
- 1 cup granulated sugar (200g)
- 3 large eggs, room temperature
- 1 tsp vanilla extract
- 1/2 cup milk, room temperature (120ml)
For the Cannoli Filling:
- 1 1/4 cups whole milk ricotta (306g)
- 1/3 cup powdered sugar, sifted (41g)
- 1/2 vanilla bean, split, seeds scraped
- 1/2 tsp vanilla extract
For the Ricotta Buttercream Frosting:
- 1/2 cup unsalted butter, room temperature (113g)
- 2/3 cup whole milk ricotta (162g)
- 3 cups powdered sugar, sifted (375g)
- 1/2 tsp vanilla extract
To Decorate (Optional):
- 1 cup mini semisweet chocolate chips
- 1 cup chopped pistachios
- Mini cannoli shells
Instructions
Step 1: Make the Vanilla Cupcakes
- Prep Oven & Pans: Preheat oven to 350°F (177°C). Line 14 cupcake tins with liners.
- Dry Ingredients: Whisk together flour, baking powder, baking soda, and salt in a bowl.
- Cream Butter & Sugar: In a separate large bowl, beat butter with an electric mixer until smooth. Add sugar; beat until light and fluffy (1-2 mins).
- Add Eggs & Vanilla: Beat in eggs one at a time, then stir in vanilla.
- Combine Wet & Dry: Alternately add dry ingredients (in three parts) and milk (in two parts) to the wet mixture, starting and ending with dry. Mix on low speed until just combined – don’t overmix!
- Fill & Bake: Divide batter evenly into liners (about 2/3 full). Bake for 18 minutes, or until a toothpick inserted comes out clean or cupcakes spring back when lightly pressed.
- Cool Down: Let cupcakes cool in the pan for a few minutes before transferring to a wire rack to cool completely.
Step 2: Prepare the Cannoli Filling
- Drain Ricotta: Line a strainer with a double layer of cheesecloth. Place ricotta in it and let drain for at least 30 minutes, gently squeezing to remove excess liquid. The ricotta should be fairly firm.
- Mix Filling: In a bowl, gently mix the drained ricotta, sifted powdered sugar, vanilla bean seeds, and vanilla extract until smooth. Chill until ready to use.
Step 3: Whip Up the Ricotta Buttercream Frosting
- Beat Butter: In a bowl, beat room temperature butter with an electric mixer on medium-high for 3 minutes until fluffy.
- Add Ricotta: Add ricotta and beat on medium for 1 minute until combined.
- Sweeten: Turn mixer off, add sifted powdered sugar. Mix on low until incorporated, then beat on medium-high for 1 minute until smooth and creamy.
- Vanilla Touch: Stir in vanilla extract. If frosting is too soft, chill for 15-20 minutes.
Step 4: Assemble Your Cannoli Cupcakes
- Core Cupcakes: Once cool, use a small spoon or cupcake corer to remove the center from each cupcake.
- Fill ‘Em Up: Pipe or spoon the Cannoli Filling into the hollowed centers.
- Frost Away: Pipe or spread the Ricotta Buttercream Frosting onto each cupcake.
- Decorate (Optional): Roll frosted edges in mini chocolate chips or chopped pistachios. If using, fill mini cannoli shells with leftover filling just before serving and place one on each cupcake. A light dusting of powdered sugar also looks lovely!
Notes
- Serving Suggestions: These cupcakes are a showstopper on their own! For an extra treat, serve alongside a cup of espresso or coffee.
- Tips & Tricks:
- Room Temp is Key: Using room temperature butter, eggs, and milk for the cupcakes ensures a smoother batter and better rise.
- Don’t Overmix: Mix cupcake batter just until ingredients are combined for the tenderest crumb.
- Drain Ricotta Well: This is crucial for a thick, luscious cannoli filling that isn’t watery.
- Chill if Needed: If your frosting or filling becomes too soft, a short stint in the fridge will help it firm up for easier piping.
- Fresh Cannoli Shells: If garnishing with mini cannolis, fill them right before serving to keep the shells crisp.
- Storage: Store your Cannoli Cupcakes in an airtight container in the refrigerator for up to 4 days. Let them sit at room temperature for about 15-20 minutes before serving for the best flavor and texture.