
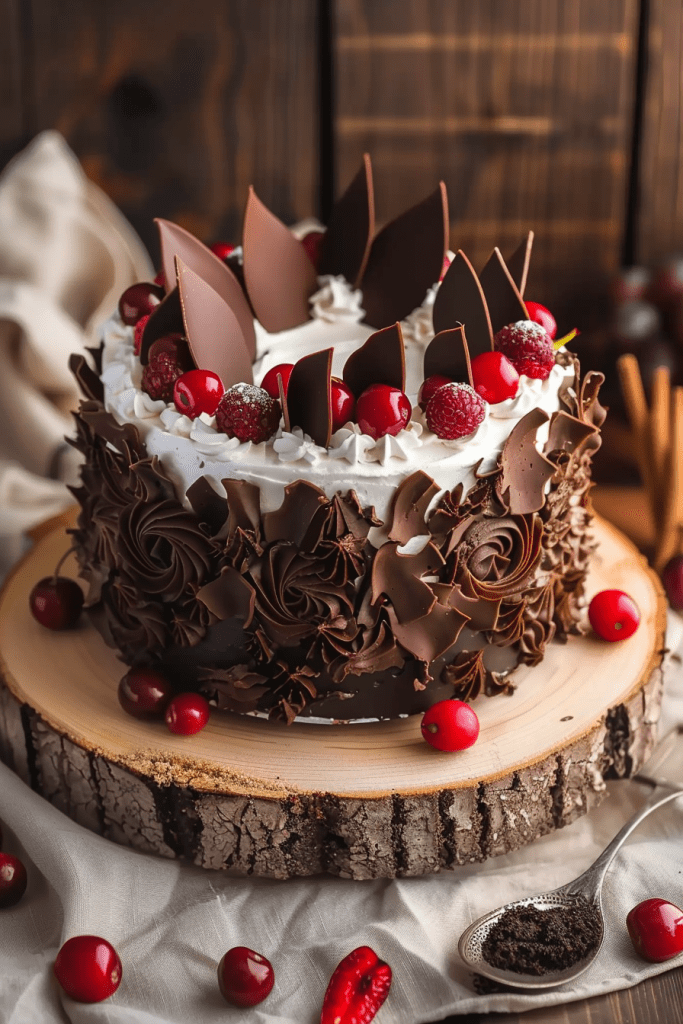
Indulge in the decadent charm of a classic dessert with my take on the iconic Black Forest cake recipe. Originating from the lush Black Forest region in Germany, this cake is a symphony of rich chocolate sponge layers, whipped cream frosting, and luscious cherry fillings. While its precise beginnings may be debated, the essence of this dessert remains a beloved favorite worldwide.
My version of the Black Forest cake pays homage to tradition while adding a personal twist. With layers of moist chocolate sponge cake soaked in cherry syrup, crowned with a delightful cherry filling, and adorned with a velvety chocolate ganache, this recipe promises a burst of flavors in every bite. Whether you savor it for a special occasion or a sweet indulgence, this Black Forest cake is sure to captivate your taste buds with its harmonious blend of textures and tastes.
Ingredients
Creating a delicious Black Forest cake requires a selection of key ingredients. Let’s gather everything we need to make this delightful dessert!
Chocolate Cake
- 2 cups all-purpose flour
- 2 cups granulated sugar
- 3/4 cup unsweetened cocoa powder
- 2 teaspoons baking powder
- 1 1/2 teaspoons baking soda
- 1 teaspoon salt
- 3 large eggs
- 1 cup whole milk
- 1/2 cup vegetable oil
- 2 teaspoons vanilla extract
- 1 cup hot coffee (or hot water)
Cherry Filling and Syrup
- 1 can (15 oz) pitted sour cherries, drained with juice reserved
- 1/2 cup granulated sugar
- 1/4 cup cornstarch
- 1/4 cup Kirsch (cherry brandy) (optional for the syrup)
Whipped Cream Frosting
- 4 cups heavy whipping cream
- 1 cup powdered sugar
- 2 teaspoons vanilla extract
- Dark chocolate shavings or curls
- Fresh cherries for decoration
Required Tools and Equipment
Tools:
- Mixing Bowls: You will need various sizes of mixing bowls to combine and whip ingredients efficiently.
- Electric Mixer: A stand mixer or hand-held electric mixer will make whipping cream and beating cake batter much easier.
- Rubber Spatula: Use a rubber spatula to fold in ingredients gently and scrape down the sides of the bowl.
- Measuring Cups and Spoons: Accurate measurements are crucial in baking, so ensure you have measuring cups and spoons for both dry and liquid ingredients.
- Cake Pans: You will need round cake pans to bake the chocolate sponge layers. Ensure they are properly greased and lined with parchment paper for easy cake removal.
- Sieve or Strainer: A sieve or strainer will come in handy when draining cherries or sifting dry ingredients like flour and cocoa powder.
- Saucepan: Have a medium-sized saucepan ready for preparing the cherry filling and syrup on the stovetop.
- Whisk Attachment: If using a stand mixer, keep the whisk attachment ready to whip the cream to stiff peaks.
- Piping Bag with Tip (Optional): For decorative frosting, a piping bag with a star tip can be used to pipe swirls of whipped cream on the cake.
- Oven: Preheat your oven to the specified temperature before baking the chocolate sponge layers.
- Refrigerator: Some components of the Black Forest cake, like whipped cream frosting and cherry filling, may need to be chilled before assembling the cake.
- Cherry Pitter (Optional): If using fresh cherries, a cherry pitter can be handy for removing pits quickly.
- Cooling Rack: After baking the cake layers, allow them to cool on a wire rack to prevent sogginess.
- Palette Knife or Offset Spatula: A palette knife or offset spatula is useful for spreading frosting and assembling the cake neatly.
- Cake Stand or Serving Platter: To present your Black Forest cake in style, have a cake stand or a decorative serving platter ready.
Preparation Steps
Preparing the Cake Pans
To ensure the cakes come out easily, I always spray two 8-inch round cake pans with cooking spray and line the bottoms with parchment paper. This simple step guarantees a smooth release and helps in the assembly process later on.
Making the Chocolate Cake
Creating the chocolate cake base is the heart of the Black Forest Cake. I preheat the oven to 350 degrees Fahrenheit, grease the baking pans, and line them with parchment. Then, I mix the dry ingredients with the wet ones gently to get a smooth, thin batter. The cakes bake for about 30-35 minutes until a toothpick inserted comes out clean.
Preparing the Cherry Filling and Syrup
The cherry filling and syrup add a burst of fruity flavor to the cake. To start, I drain the cherries, reserving the liquid. Next, I create a cornflour slurry and make a thick syrup to coat the drained cherries. Once cooled, the cherries are ready to be added to the cake layers.
Making the Whipped Cream Frosting
Whipped cream frosting gives the Black Forest Cake its signature light and creamy texture. I beat heavy whipping cream with sugar and kirsch until stiff peaks form, creating a luscious topping for the cake. Refrigerating the frosting before assembly ensures it holds its shape perfectly.
Assembling the Black Forest Cake
Now that we have our chocolate cake layers, cherry filling, and whipped cream frosting ready, it’s time to bring them all together to assemble the decadent Black Forest Cake. Follow these steps to create a stunning and delicious dessert that will impress everyone at the table.
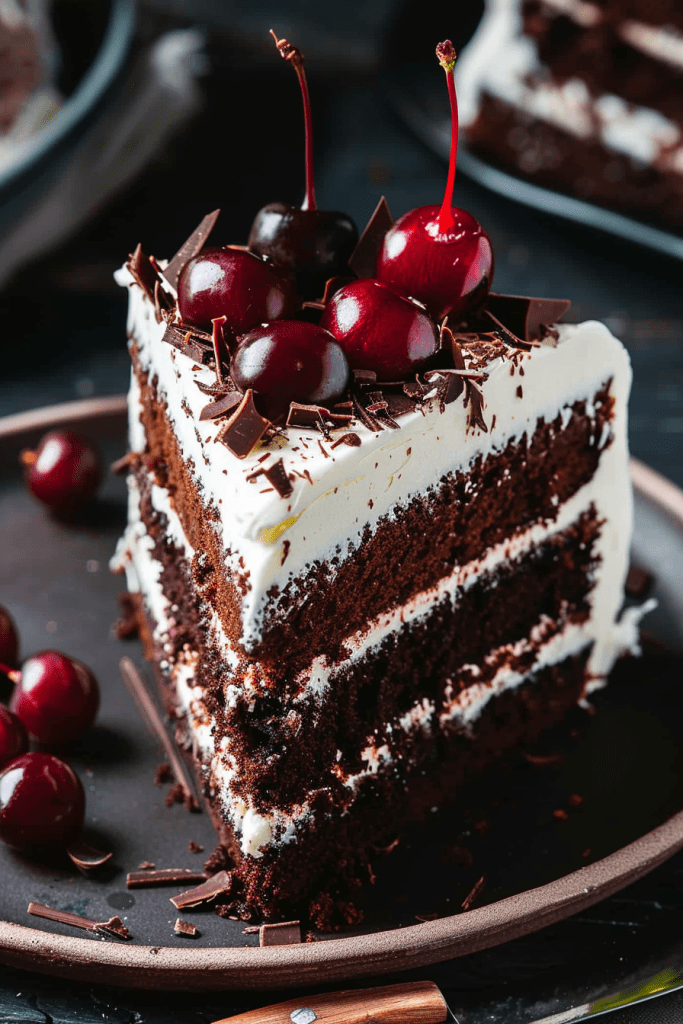
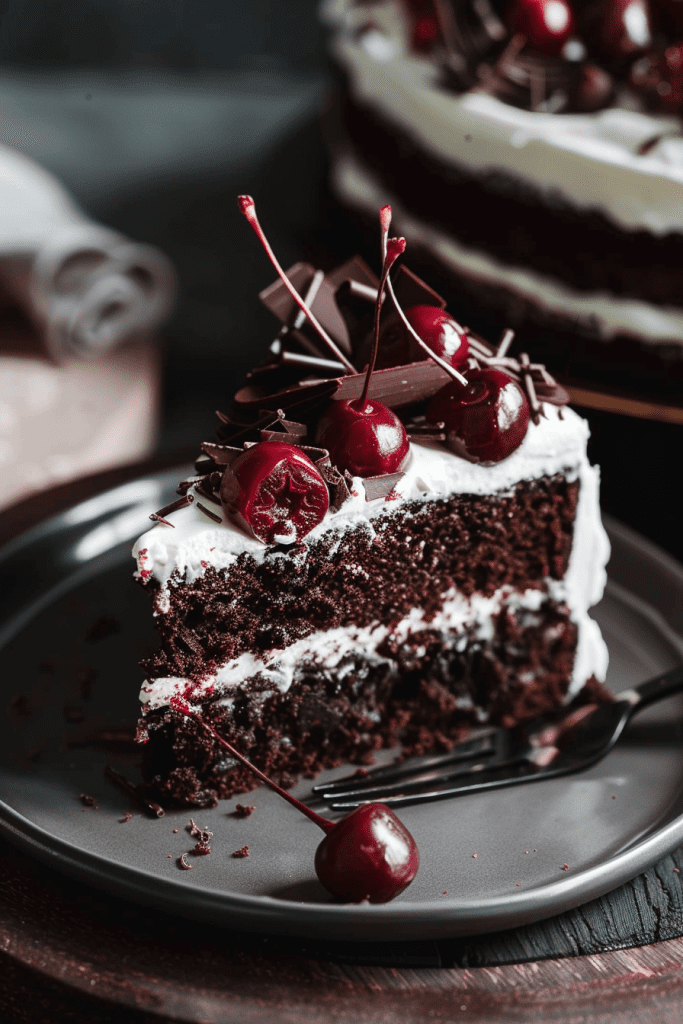
Layering the Cakes and Filling
- Slice each cake horizontally into two even layers, creating four cake rounds.
- Place the first cake layer on a serving plate and generously spread 1/3 of the cherry pie filling over it.
- Gently lay the next cake round on top of the cherries and spread about half of the ermine buttercream over it.
- Add the third layer of cake and top it with 1/3 of the remaining cherries. Place the final cake layer on top.
- Cover the top cake layer with the remaining frosting, making sure not to frost the sides.
- Finish by adding the remaining cherry pie filling in the center of the cake without spreading it to the edges. This will create a beautiful presentation.
- Let the assembled cake rest for 8-12 hours or more to allow the flavors to meld, enhancing the taste of the cake.
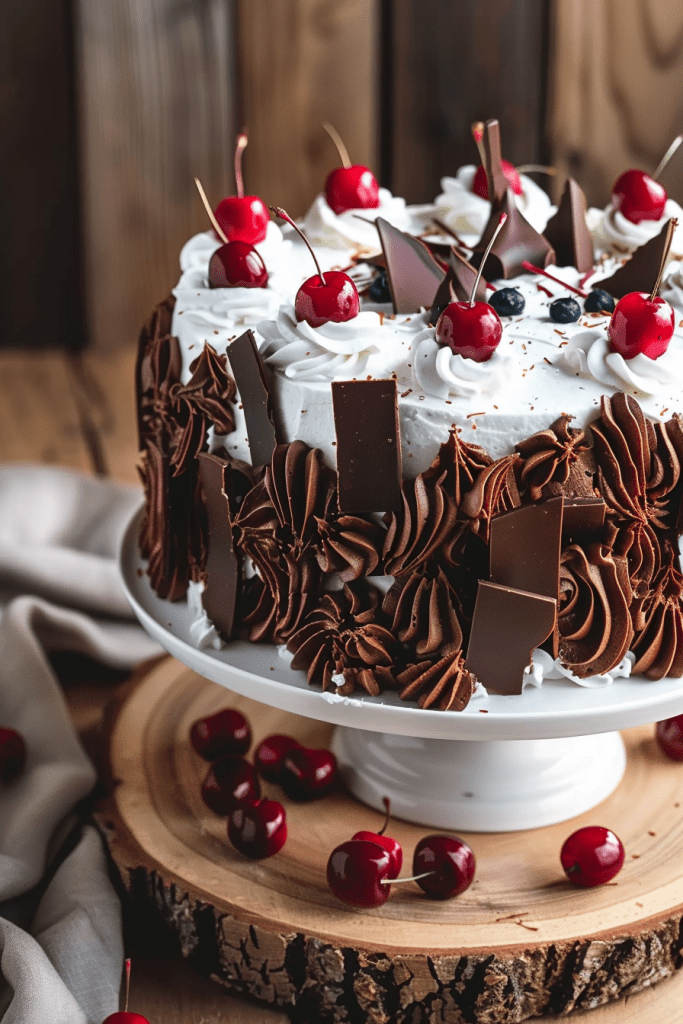
Applying the Frosting
- Using a long serrated knife, carefully slice each cake in half horizontally to create a total of seven layers.
- Roughly chop the pitted cherries and mix them with kirsch in a bowl before draining them, reserving the syrup.
- Whip the heavy cream with powdered sugar and kirsch until stiff peaks form, ensuring a stable and fluffy frosting.
- Drizzle each cake layer with chocolate syrup and spread a generous amount of whipped cream between the layers.
- Spread the remaining whipped cream over the entire cake, ensuring a thick and luscious frosting layer.
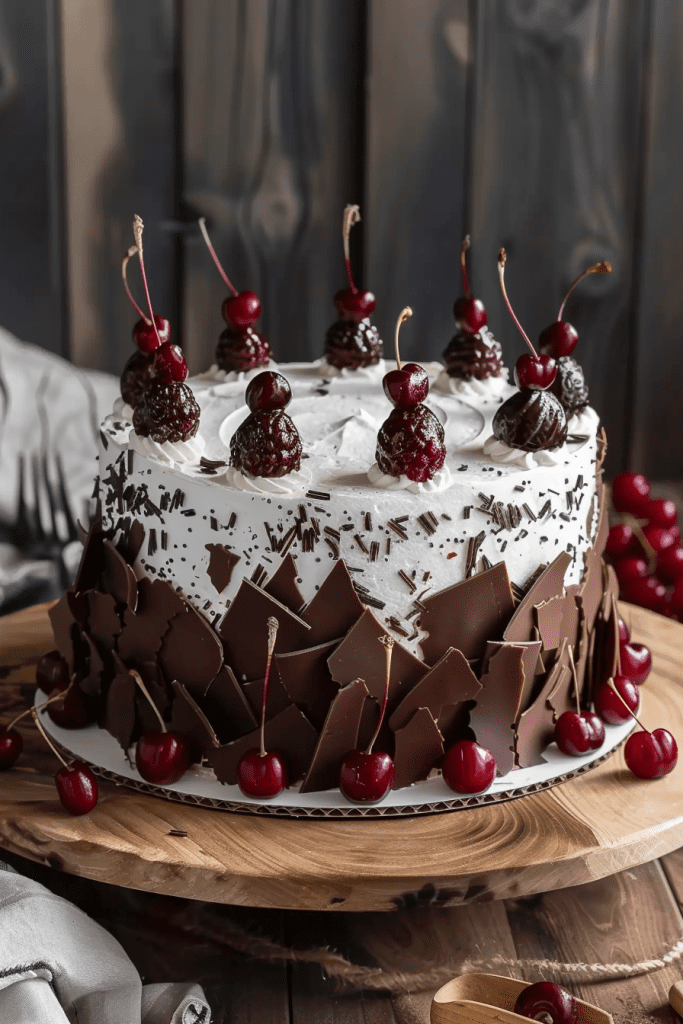
- Decorate the top of the cake with stemmed cherries for an elegant look.
- For a finishing touch, sprinkle chocolate shavings along the sides of the cake to add a contrasting texture and flavor.
- Refrigerate the assembled cake for 3-4 hours before slicing and serving, allowing it to set and develop its flavors.
By following these steps, you’ll create a stunning Black Forest Cake that not only looks impressive but also tantalizes the taste buds with its rich chocolate, cherry, and cream layers. Enjoy this classic dessert with your loved ones and savor every bite of this indulgent treat.
Additional Tips
Planning ahead is key when it comes to making a Black Forest cake. Here are some additional tips to enhance your baking experience.
Making Ahead of Time
If you want to prepare your Black Forest cake ahead of time, consider making the cake layers and filling in advance. You can assemble the cake and apply the frosting on the day you plan to serve it to keep the whipped cream fresh and the flavors intact.
Storage Recommendations
To keep your Black Forest cake fresh, store any leftovers in the refrigerator for up to 2 days. Due to the whipped cream frosting, it’s essential to refrigerate the cake. Freezing the whole cake is not recommended, so plan to assemble and frost the cake on the day of serving to maintain its delicious taste and texture.
Conclusion
So, there you have it – a tantalizing Black Forest cake recipe that promises to impress your taste buds with its rich chocolate layers, luscious cherry filling, and fluffy whipped cream frosting. Remember, patience is key when it comes to letting the flavors meld together for that perfect bite. Planning ahead by preparing the cake layers and filling in advance will make the assembly process a breeze. And don’t forget, freshness is paramount, so assemble and frost the cake on the day of serving. By following these tips and storing any leftovers in the refrigerator, you can ensure that your Black Forest cake remains a delectable delight for up to 2 days. Enjoy every slice of this decadent dessert!