
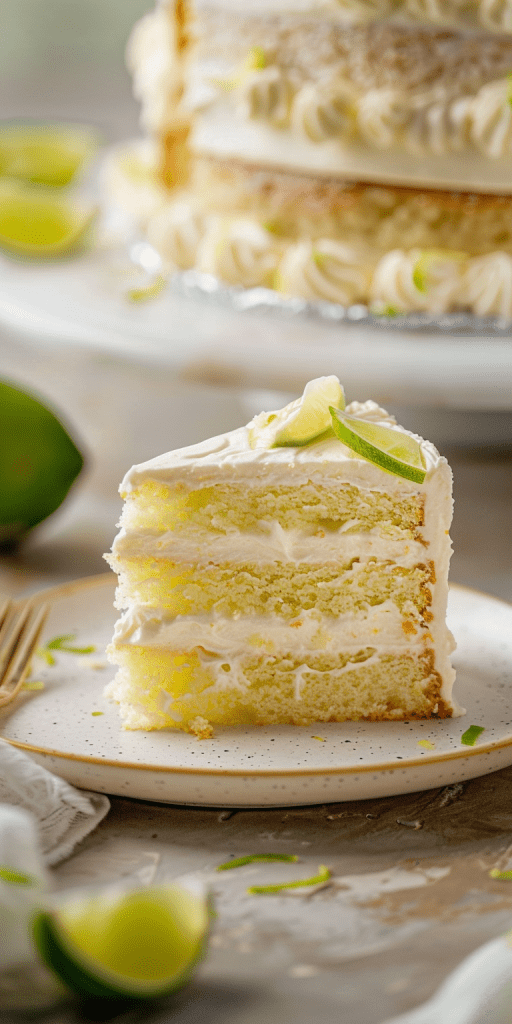
Craving a burst of tangy sweetness in every bite? Look no further than a delightful Key Lime Cake! This three-layered marvel is a citrus lover’s dream, with its tender, fluffy texture and zesty lime flavor that dances on your taste buds. Infused with the essence of key limes, both the cake and the cream cheese frosting deliver the perfect balance of tanginess and sweetness, making it an ideal treat for any occasion.
If you’re a fan of the classic key lime pie, this Key Lime Cake will surely steal your heart. With key lime juice incorporated into both the cake layers and frosting, every slice offers a refreshing and tart experience reminiscent of the beloved pie. Whether you’re celebrating a special event or simply craving a summery dessert, this cake is a must-try for those who appreciate the delightful combination of sweet and tangy flavors.
Ingredients for Key Lime Cake
To create a delicious Key Lime Cake, we need a few key ingredients for both the cake layers and the luscious cream cheese frosting. Let’s dive into what you’ll need to bring this zesty and moist dessert to life.
Cake Ingredients
- 2 cups all-purpose flour
- 1 teaspoon baking powder
- 1/2 teaspoon baking soda
- 1/2 teaspoon salt
- 1/2 cup unsalted butter, softened
- 1/2 cup vegetable oil
- 1 and 1/2 cups granulated sugar
- 3 large eggs
- 1/2 cup whole milk
- 1/2 cup key lime juice
- Zest of 2 key limes
- 1 teaspoon vanilla extract
- 3/4 cup unsalted butter, softened
- 6 oz cream cheese, softened
- 4 cups powdered sugar
- 2 tablespoons key lime juice
- Zest of 1 key lime
Required Tools and Equipment
When preparing this Key Lime Cake recipe, having the right tools and equipment on hand can make the baking process smoother and more efficient. Here are the essential items you’ll need for creating this delightful dessert:
Mixing Equipment
For mixing the cake batter and frosting, you will require:
- Medium mixing bowl or a stand mixer
- Whisk attachment for the mixer
- Rubber spatula for scraping down the bowl
Baking Gear
To bake the Key Lime Cake to perfection, make sure you have:
- 6-inch, 8-inch, or 9-inch round cake pans (depending on your desired cake size)
- Parchment paper for lining the cake pans
- Cooling rack for cooling the baked cakes
- Oven for baking the cake layers at the specified temperature
- Cake stand or serving platter for assembling and presenting the cake
Having these tools and equipment ready will make the process of creating your Key Lime Cake a breeze.
Preparation Steps
Prepping the Ingredients
- In a large bowl, whisk together 3 cups of all-purpose flour, 1/4 teaspoon of baking soda, and 1 teaspoon of kosher salt.
- In a separate mixing bowl, combine 3/4 cup of unsalted butter (softened), 2/3 cup of cream cheese (softened), 2.5 cups of granulated sugar, 2 tablespoons of key lime zest, 6 eggs, 1 teaspoon of vanilla extract, 2 teaspoons of optional Midori, 1 cup of whole milk, and 1/4 cup of freshly squeezed key lime juice.
- Preheat the oven to 350 degrees Fahrenheit (175 degrees Celsius).
- Grease three 8-inch round cake pans to prepare them for the cake batter.
Directions for Key Lime Cake
Making the Cake Batter
To start, ensure the butter and eggs reach room temperature for optimal softness. Preheat the oven to 350F and prepare three 8-inch round cake pans. In a bowl, combine cake flour, baking powder, baking soda, and salt.
Baking the Cake
Pour the prepared batter into the cake pans and bake in the preheated oven. Check for doneness by inserting a toothpick into the center which should come out clean or with a few moist crumbs. Let the cakes cool in the pans for ten minutes before transferring them to a cooling rack.
Cooling the Cake
After removing the cakes from the pans, let them cool completely on the rack. If making a three-layer cake, ensure each layer cools evenly. Once cooled, the cake is ready for frosting and serving.
Frosting Preparation
Creating the Frosting
To create the tangy and creamy key lime cream cheese frosting, start by ensuring the cream cheese is cold and comes straight from the fridge. Use a full-fat brick cream cheese for the fluffiest and stiffest frosting. Then, follow my unique method for making cream cheese frosting that results in icing perfect for piping decorations.
Applying the Frosting
When it’s time to frost the cake, ensure that the layers are even by measuring the frosting precisely for each layer. Spread the frosting evenly, pushing any excess towards the edges. Stack the layers evenly, adding a crumb coat to seal in any loose crumbs. Chill the cake before applying the final coat of frosting for a smooth and flawless finish.
Assembling the Cake
Now that we have our beautifully baked key lime cake layers and the tangy key lime cream cheese frosting ready, it’s time to assemble our delicious creation.
- Prepare the Workspace: Clear a large, flat surface to assemble the cake. Have the chilled cake layers, frosting, a turntable (if available), offset spatula, and a cake stand or serving plate handy.
- Level the Cake Layers: If needed, use a serrated knife to level off the tops of the cake layers to create an even surface for stacking.
- Apply the First Layer of Frosting: Start by placing one cake layer on the cake stand or serving plate. Add a dollop of frosting on top and spread it evenly over the layer using an offset spatula.
- Stack the Cake Layers: Carefully place the next cake layer on top of the frosted one. Repeat the process of adding frosting and stacking until all layers are in place.
- Crumb Coat the Cake: Apply a thin layer of frosting around the entire cake to seal in any loose crumbs. This will help create a smooth surface for the final coat of frosting.
- Chill the Cake: Place the assembled cake in the refrigerator for about 15-30 minutes to allow the crumb coat to set.
- Final Frosting Coat: Remove the cake from the refrigerator and apply the final coat of frosting. Spread the frosting evenly over the cake, covering the top and sides completely.
- Decorate (Optional): Get creative with decorations like lime zest, slices, or edible flowers on top of the cake for a visually appealing finish.
- Chill Before Serving: For the best results, chill the assembled cake in the refrigerator for at least an hour before serving. This helps the flavors meld together and sets the frosting.
- Serve and Enjoy: Slice the cake using a sharp knife that has been warmed under hot water for clean cuts. Plate the slices, serve, and savor the delightful flavors of this refreshing key lime cake!
Assembling the cake is the final step in creating this delightful dessert that perfectly balances tanginess and sweetness for a truly delightful treat.
Tips for Perfect Key Lime Cake
Achieving a flawless Key Lime Cake requires attention to detail and a few expert tips. Below are specific suggestions for baking and frosting that will help you create a stunning and delicious dessert.
Baking Tips
When preparing the cake layers, ensure you evenly divide the batter among the pans for consistent baking. To prevent uneven baking, rotate the pans halfway through the baking time. Allow the cakes to cool in the pans for the specified time before transferring them to a wire rack for complete cooling.
Frosting Tips
For a perfectly frosted Key Lime Cake, start by evenly spreading frosting between each layer before stacking them. Apply a crumb coat to lock in moisture and then chill the cake to set the coat. Finish with a smooth, thick layer of frosting, ensuring the sides and top are well-covered. Use a cake knife for precise smoothing to create the ideal canvas for decorating.
How to Serve Key Lime Cake
After creating this delightful Key Lime Cake, serving it in the best way possible is essential to ensure your guests fully enjoy the flavors and textures you’ve worked so hard to achieve. Here are my recommended steps for serving your Key Lime Cake:
1. Chilling and Settling:
- Once the Key Lime Cake is fully assembled with the cream cheese frosting, it’s best to chill it for at least a few hours or overnight. This will allow the flavors to meld together and the frosting to set properly.
2. Slicing:
- Use a sharp knife to slice the Key Lime Cake into neat portions. A hot knife can make clean cuts through the cake without dragging the frosting.
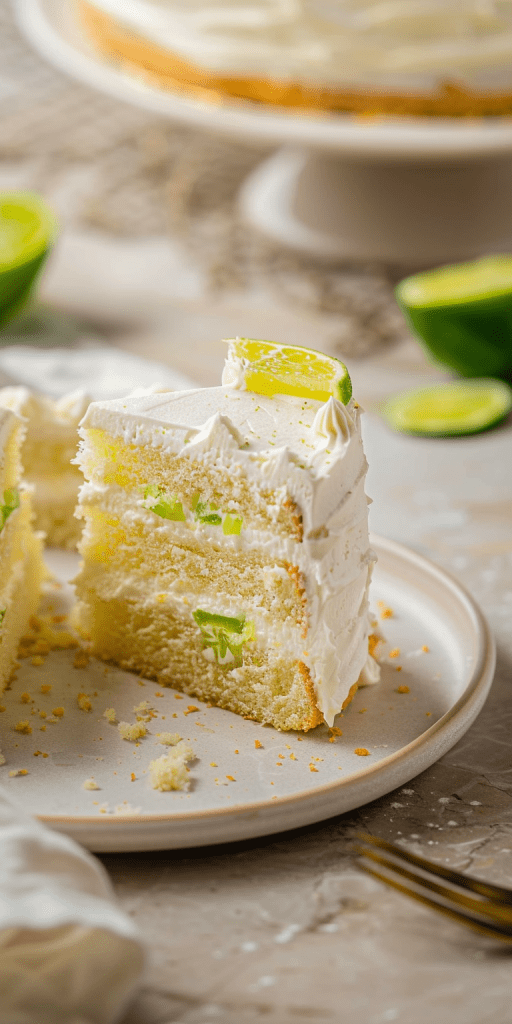
3. Garnishing:
- Before serving, consider garnishing each slice with a fresh slice of lime or a sprinkle of lime zest. This not only adds a touch of elegance but also enhances the citrus aroma.
4. Serving Suggestions:
- Key Lime Cake pairs beautifully with a dollop of whipped cream or a scoop of vanilla ice cream. The combination of the creamy cake with a light topping creates a perfect balance of flavors.
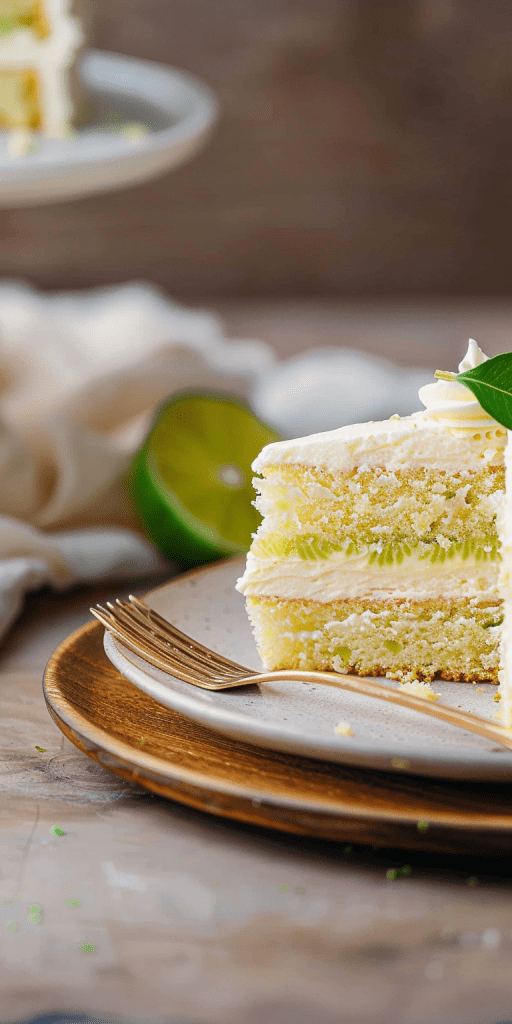
5. Presentation:
- Serve each slice of Key Lime Cake on a decorative dessert plate to elevate the visual appeal. A pop of color, like a mint leaf or a raspberry, can also make the presentation more inviting.
- Encourage your guests to savor the Key Lime Cake slowly to appreciate the layers of flavors from the zesty lime essence to the creamy cream cheese frosting. Let them indulge in the tangy and sweet symphony that defines this delicious dessert.
By following these simple steps, you can serve your Key Lime Cake with elegance and ensure that every bite is a delightful experience for all who taste it.

Storing Key Lime Cake
After enjoying this delightful Key Lime Cake, you may have some leftover slices or perhaps want to prepare it in advance for a future occasion. Proper storage is key to maintaining the cake’s flavor and freshness. Here are the steps to store your Key Lime Cake effectively:
Freezing Cake Layers:
- If you have extra cake layers or an entire cake to store, wrap the individual layers tightly in plastic wrap.
- Place the wrapped cake layers in a freezer-safe bag or container to prevent freezer burn.
- Label the bag with the date to help monitor freshness.
- Store the cake layers in the freezer for up to three months.
Thawing Frozen Cake:
- When ready to enjoy the frozen cake layers, remove them from the freezer.
- Let the cake layers thaw at room temperature for a few hours.
- Ensure the cake layers are completely thawed before frosting or serving.
- If you have leftover frosted cake, wrap it tightly in plastic wrap to protect the frosting.
- Store the wrapped cake in a freezer-safe bag or container.
- Label the container with the date for reference.
- Freeze the frosted cake for up to three months.
Follow these simple steps to preserve your Key Lime Cake and enjoy its fresh and tangy flavors even weeks after baking.
Conclusion
Key Lime Cake is a delightful treat that never fails to impress with its tangy flavors and creamy texture. By mastering the art of baking, frosting, and storing this delectable dessert, you can enjoy its freshness for weeks to come. Whether you’re a seasoned baker or a novice in the kitchen, these tips ensure a perfect Key Lime Cake every time. Don’t hesitate to experiment with different variations and decorations to make this cake your own signature creation. With the right techniques and a dash of creativity, you’ll have a show-stopping Key Lime Cake that will leave your guests craving for more. Treat yourself to a slice of this citrusy delight and indulge in a culinary experience that is both refreshing and satisfying.