
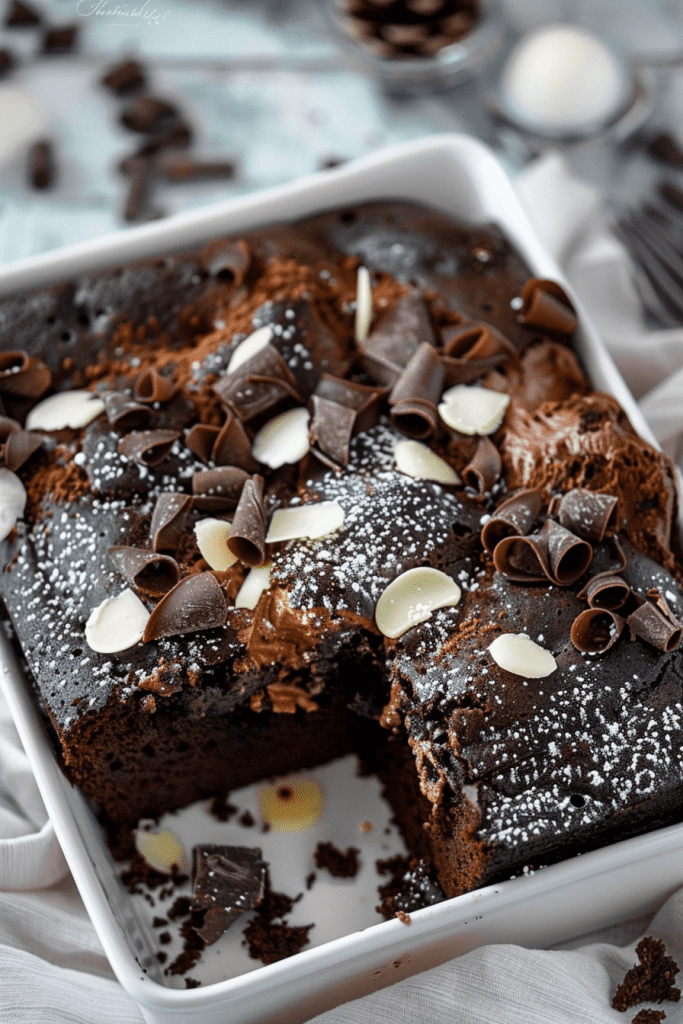
Craving a decadent dessert that’s as easy to make as it is delicious? Look no further than the Chocolate Earthquake Cake recipe. This twist on the classic German chocolate cake is a true indulgence, loaded with rich, gooey goodness that sets it apart. The secret to its simplicity lies in using a boxed cake mix, making it a go-to option for those seeking a quick yet impressive treat.
With a medley of chocolate, coconut, and pecans, this dessert is a delightful fusion of flavors and textures. Whether you’re a fan of nuts or prefer to skip them, this recipe caters to all tastes. If you’re in the mood for a scrumptious delight that’s guaranteed to be a crowd-pleaser, the Chocolate Earthquake Cake is your go-to option. Let’s dive into this easy and irresistible recipe that’s bound to become a household favorite.
Ingredients
Indulge in the decadent flavors of this Chocolate Earthquake Cake. Below are the essential ingredients you’ll need to create this heavenly dessert.
Cake Ingredients
- 1 cup sweetened shredded coconut
- 1 cup chopped pecans
- 1 (15.25 ounce) box German chocolate cake mix, plus additional ingredients called for on the package
- 1/2 cup salted butter, softened at room temperature
- 3 large eggs
- 1/3 cup vegetable oil
- 1 1/4 cups water
- 8-ounce block of cream cheese, softened at room temperature
- 1 teaspoon vanilla extract
- 1 cup confectioners’ sugar
- 3 tablespoons salted butter, melted
- 3/4 cup chocolate chips
Equipment Needed
When preparing a delicious Chocolate Earthquake Cake, having the right equipment is crucial to ensure a smooth and successful baking experience. Here are the essential tools and kitchen items you will need to create this decadent dessert:
- 9×13-inch Baking Pan with at least 2-inch depth
- Electric Mixer
- Mixing Bowls
- Measuring Cups and Spoons
- Spatula or Mixing Spoon
- Oven for Preheating
- Toothpick for Testing Cake Doneness
Preparation Steps
Let’s dive into the exciting process of making this delightful Chocolate Earthquake Cake! Follow these simple steps to create a decadent treat that will wow your taste buds.
Preparing the Cake Batter
- Preheat your oven to 350°F (175°C) and lightly grease a 9×13-inch baking pan.
- Layer the shredded coconut and chopped pecans at the bottom of the prepared pan.
- In a large bowl, mix the chocolate cake mix with water, oil, and eggs using an electric mixer until well combined.
- Pour the cake batter over the coconut and pecan layer in the pan.
- In a clean bowl, beat the cream cheese, butter, and vanilla extract until well combined.
- Gradually mix in the confectioners’ sugar until smooth.
- Pour the cream cheese mixture over the cake batter in the pan.
- Use a toothpick to create a swirling pattern between the cream cheese and cake batter.
By following these preparation steps meticulously, you’ll be on your way to baking a mouthwatering Chocolate Earthquake Cake that is both visually appealing and irresistibly delicious.
Assembly Instructions
Layering the Ingredients
To begin assembling the Chocolate Earthquake Cake, spread an even layer of sweetened shredded coconut and chopped pecans at the bottom of a greased 9×13-inch baking pan. This forms a crunchy and flavorful base for the cake.
Tips for Even Baking
For consistent baking results, ensure the cake batter is spread evenly over the coconut and pecan layer. Additionally, dot the cream cheese mixture throughout the batter and sprinkle chocolate chips evenly for a well-balanced distribution of flavors. This will help achieve a uniform and delicious outcome.
Baking Instructions
Preheating the Oven:
I preheat the oven to 350 degrees Fahrenheit. It’s essential to have the oven ready before starting the baking process to ensure consistent heat distribution for an evenly baked cake.
Baking Time and Temperature:
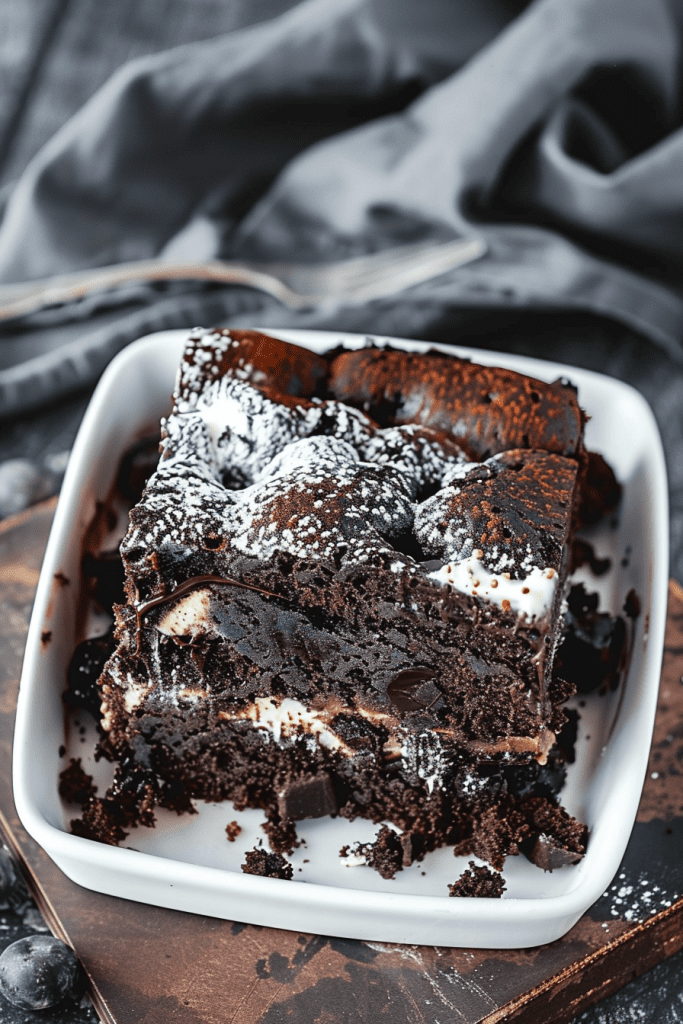
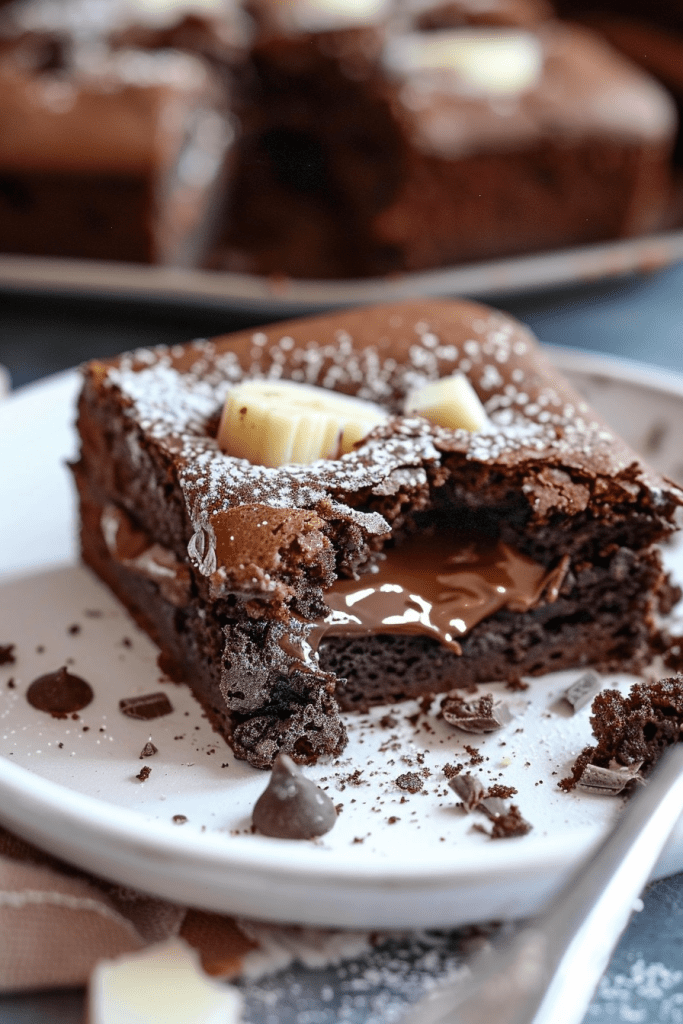
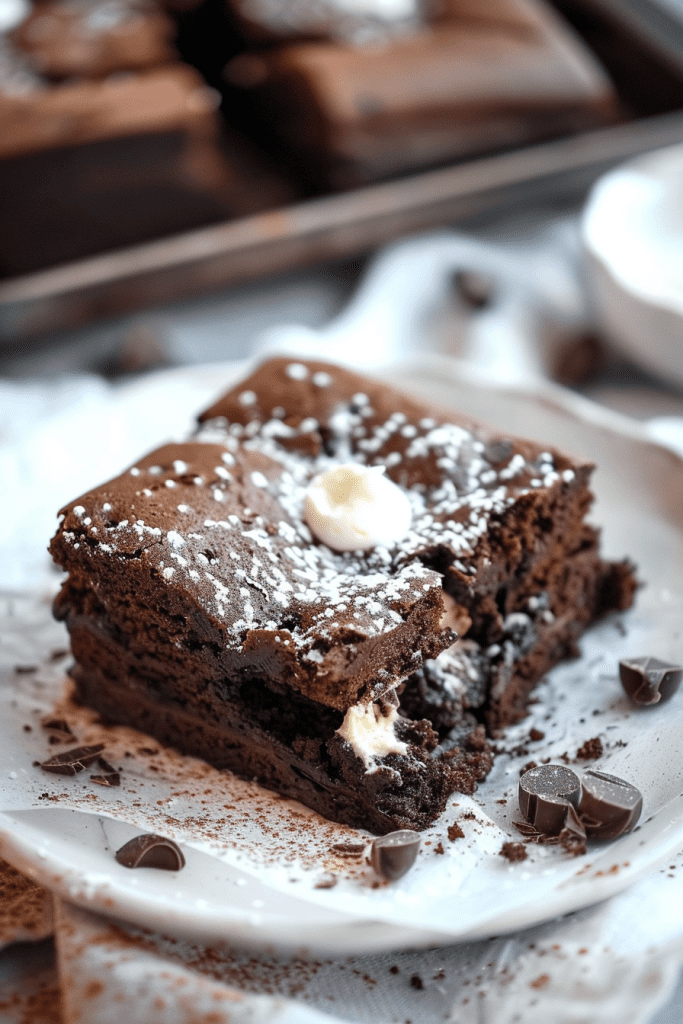
The cake goes into the preheated oven for about 30 minutes until the top is set. Since this cake has a gooey center due to the cream cheese mixture, a toothpick won’t come out completely clean. It’s crucial to bake until the center is just slightly springy to the touch for a perfect Chocolate Earthquake Cake.
Serving
How to Serve Chocolate Earthquake Cake
To serve your Chocolate Earthquake Cake, you can explore various delightful options. Here are a few simple yet fantastic serving ideas to complement this rich and decadent dessert:
- Ice Cream: Indulge in a warm slice of Chocolate Earthquake Cake with a scoop of velvety vanilla ice cream. The contrast of warm cake and cold ice cream is a match made in dessert heaven.
- Sweet Sauces & Syrups: Elevate the gooey goodness of the cake by drizzling it with your favorite sweet sauces like hot fudge, strawberry syrup, or caramel sauce. These sauces can take the flavor profile of the cake to the next level.
- Whipped Cream: Top your slices of Chocolate Earthquake Cake with a dollop of fresh whipped cream for an extra touch of lightness and creaminess. It adds a beautiful contrast to the rich flavors of the cake.
- Coconut Flakes: Sprinkle toasted or untoasted coconut flakes over the cake for a delightful crunch and a hint of tropical flavor. It not only enhances the texture but also adds a visual appeal to the presentation.
By dressing up your Chocolate Earthquake Cake with these serving suggestions, you can create an unforgettable dessert experience that will leave your taste buds dancing. Make sure to store any leftovers in an airtight container in the fridge for up to 3 days. To enjoy the cake again, simply warm it in the microwave for a few seconds before serving – though that step is optional but highly recommended for a gooey, comforting treat. If you choose to freeze the cake, tightly wrap it in plastic and thaw it in the fridge before reheating and serving.

Storage Instructions
After indulging in this luxurious Chocolate Earthquake Cake, you may want to save some for later. Here’s how you can store it for freshness.
Refrigeration
To preserve the Chocolate Earthquake Cake, simply cover the baking dish with plastic wrap or aluminum foil and store it in the refrigerator. It can be kept fresh for up to 3 days. When ready to enjoy, you can heat individual slices in the microwave for a warm and gooey treat.
Freezing and Reheating Tips
For longer storage, you can freeze the Chocolate Earthquake Cake. Wrap the entire baking dish or individual slices tightly in plastic wrap and aluminum foil before placing them in the freezer. The cake can be frozen for up to 2-3 months. When craving a decadent dessert, thaw the cake overnight in the refrigerator or at room temperature. Reheat in the microwave or oven for a delightful chocolatey indulgence.
Conclusion
So there you have it – the Chocolate Earthquake Cake recipe is a delightful twist on the classic German chocolate cake, perfect for any occasion. With its fusion of chocolate, coconut, and pecans, this dessert is a crowd-pleaser that will surely become a household favorite. Remember to follow the simple steps outlined in this article, from layering the ingredients to serving with your favorite toppings. Whether enjoyed fresh or reheated, this cake is a gooey indulgence that can be stored for later enjoyment. Get ready to impress your guests with this decadent treat that’s as easy to make as it is delicious.