
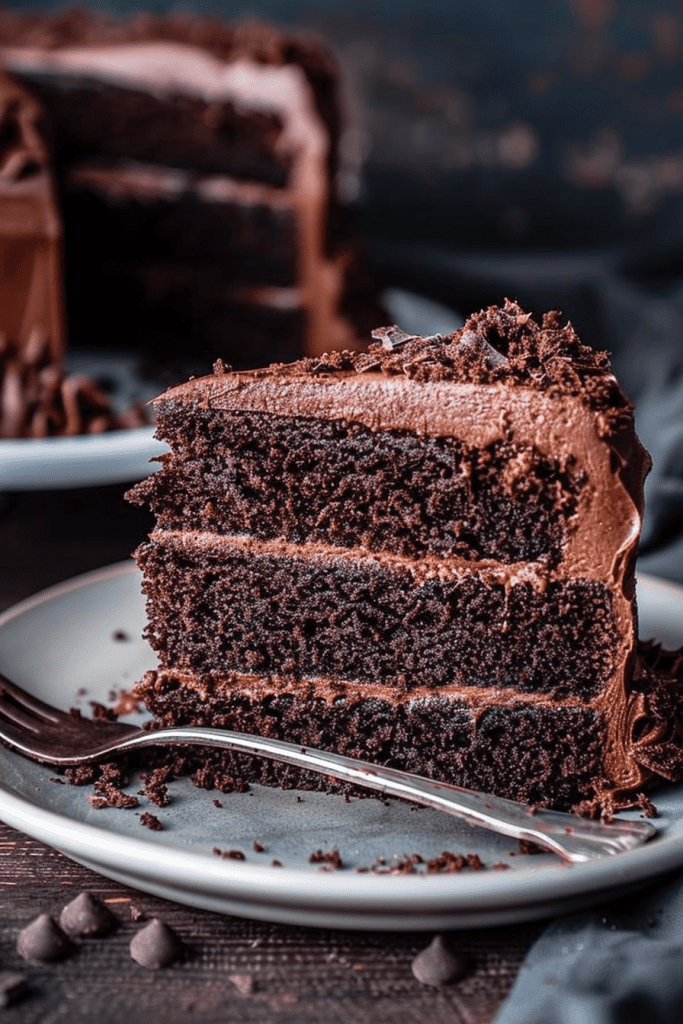
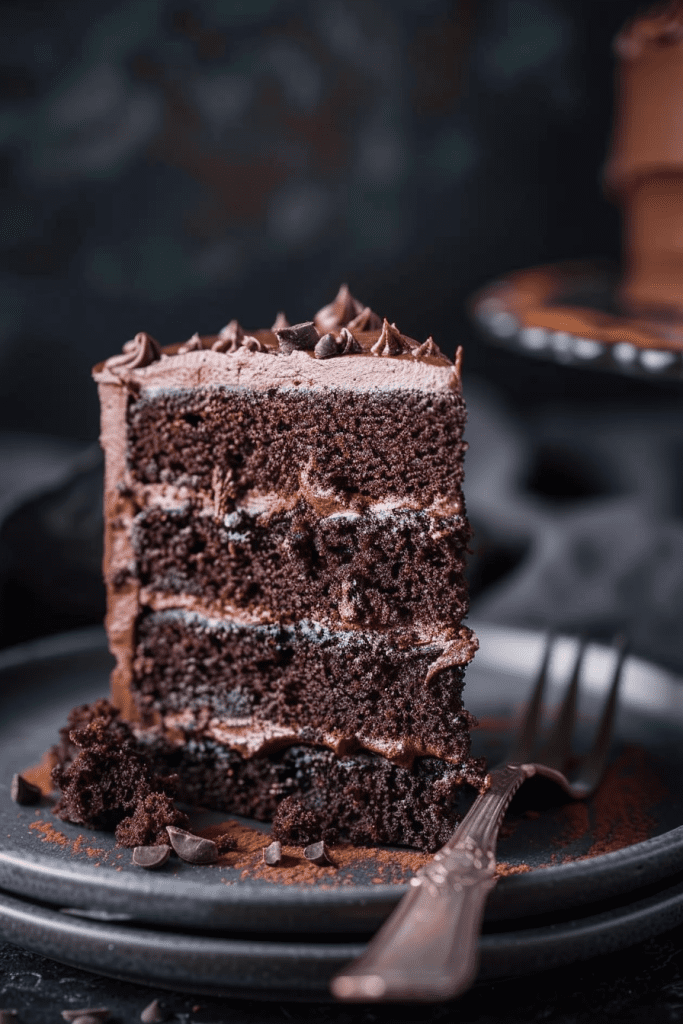
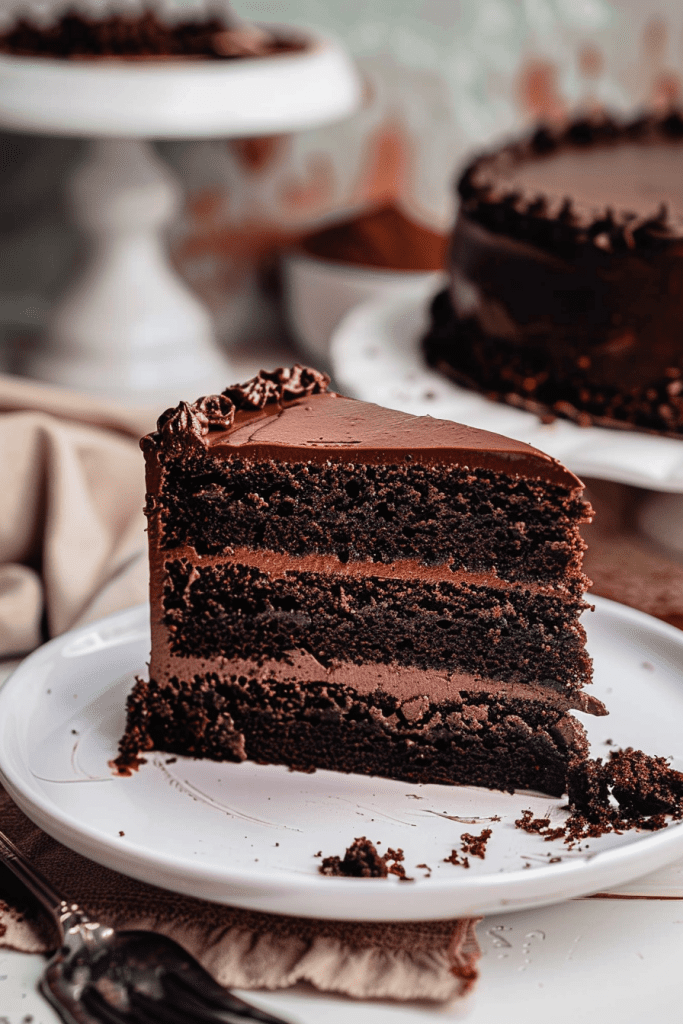
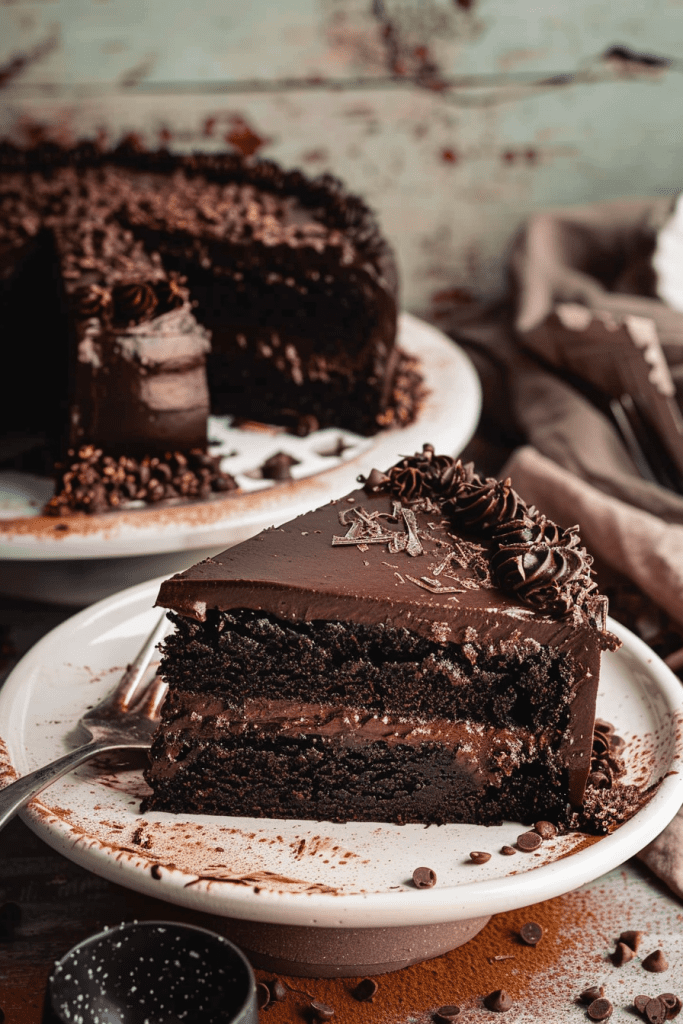
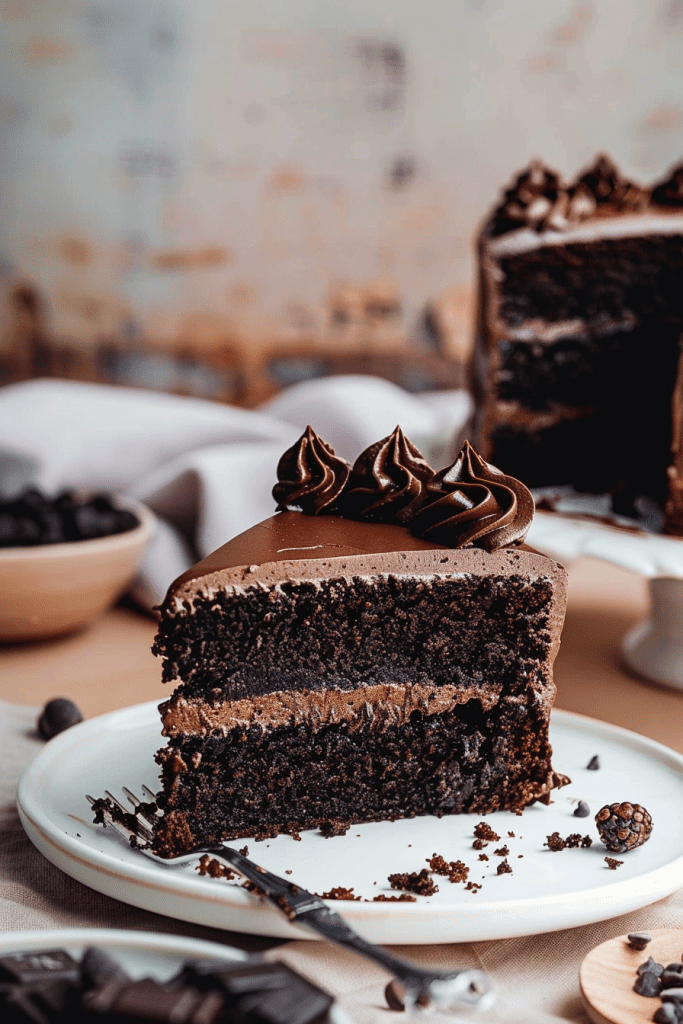
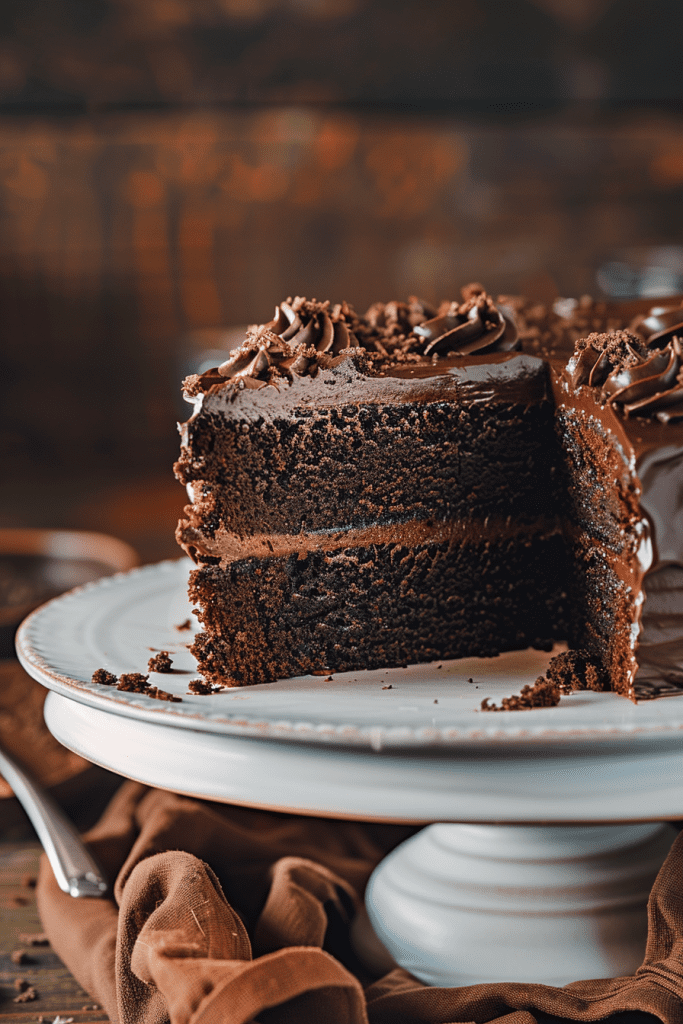
Indulge in the decadent world of chocolate with the irresistible chocolate blackout cake recipes. This rich dessert is a true delight for chocolate enthusiasts, featuring moist layers filled with luxurious chocolate pudding and generously frosted with a velvety chocolate frosting. But there’s more to this sweet treat than just its sumptuous flavors.
The history behind the chocolate blackout cake is as intriguing as its taste. Originating from the blackout drills of World War II in Brooklyn, where lights were dimmed to ward off potential bombings, this dessert became a symbol of comfort and indulgence during dark times. Today, the Brooklyn blackout cake remains a beloved classic, cherished by chocolate lovers worldwide for its rich heritage and unforgettable taste.
Ingredients
Indulge in the decadent flavors of a chocolate blackout cake with layers of rich chocolate pudding and velvety frosting. Let’s dive into the essential ingredients that make this cake a luscious treat.
Cake Ingredients
- Dark Cocoa Powder: 12 ounces
- Boiling Water: ½ cup
- Semisweet Chocolate, chopped: 12 ounces
- Unsalted Butter: 12 tablespoons (1 ½ sticks)
- Light Corn Syrup: 1 tablespoon
- Vanilla Extract: 1 tablespoon
- Eggs: 4, yolks separated
- All-Purpose Flour: 2 cups
- Baking Powder: 1 ½ teaspoons
- Baking Soda: 1 ½ teaspoons
- Salt: ½ teaspoon
- Buttermilk: 1 cup
Pudding Ingredients
- Granulated Sugar: 2 cups
- Cornstarch: ⅓ cup
- Salt: ¼ teaspoon
- Whole Milk: 1 ½ cups
- Semisweet Chocolate Chips: 6 ounces
- Unsweetened Chocolate, chopped: 1 ½ ounces
- Vanilla Extract: 1 tablespoon
- Semisweet Chocolate, chopped: 16 ounces
- Unsalted Butter: 2 cups (4 sticks)
- Powdered Sugar: 6 cups
- Whole Milk: 1 cup
- Vanilla Extract: 1 tablespoon
- Salt: ½ teaspoon
Essential Tools and Equipment
When preparing to bake this decadent chocolate blackout cake, having the right tools and equipment can make the process smoother and more enjoyable. Here are the essential items you will need to create this indulgent dessert:
Tools:
- Mixing Bowls: Have a variety of mixing bowls in different sizes for mixing batter and preparing frosting.
- Electric Mixer: A handheld electric mixer or stand mixer will help you achieve smooth and creamy consistencies for the cake batter and frosting.
- Spatula: Use a spatula to scrape down the sides of the mixing bowl and ensure all ingredients are properly incorporated.
- Cake Pans: You’ll need three round cake pans to bake the cake layers simultaneously.
- Parchment Paper: Line your cake pans with parchment paper for easy release of the cake layers.
- Cooling Rack: A cooling rack is essential for cooling the cake layers evenly once they come out of the oven.
- Offset Spatula: This tool is perfect for spreading frosting evenly between cake layers and on the sides of the cake.
- Sharp Knife: Use a sharp knife to level off the cake layers for a neat and even presentation.
- Cake Stand or Serving Plate: Choose a beautiful cake stand or serving plate to showcase your finished chocolate blackout cake.
- Oven: Preheat your oven to the specified temperature before baking the cake layers.
- Measuring Cups and Spoons: Accurate measurements are crucial, so make sure you have measuring cups and spoons for both dry and liquid ingredients.
- Whisk: Use a whisk for combining dry ingredients and beating eggs for the cake batter.
- Saucepan: You’ll need a saucepan to prepare the dark chocolate pudding for filling the cake layers.
- Refrigerator: Chilling the cake layers and pudding is essential for assembly, so ensure you have enough space in your refrigerator.
- Candy Thermometer: If your frosting recipe requires precise temperature adjustments, a candy thermometer will be useful.
- Cake Lifter: For carefully transferring cake layers, a cake lifter can be very handy to maintain their shape.
- Cake Decorating Tools (optional): If you plan to decorate your cake, consider having piping bags, decorating tips, and other tools for creating stunning designs.
Prep Work
Before diving into baking this decadent chocolate blackout cake, it’s essential to have all your ingredients prepped and ready. Let’s start by preparing the cake batter and the luscious chocolate pudding that will elevate this dessert to a whole new level.
Preparing Cake Batter
- Preheat the oven to 350°F and line two 8×2-inch round cake pans with parchment paper, greasing them with unsalted butter and dusting with cocoa powder.
- Sift together ¾ cup of Dutch-process cocoa powder, 1 ½ cups of all-purpose flour, 1 ½ teaspoons of baking soda, and ¾ teaspoon of baking powder into a bowl. Whisk to combine.
- In a separate large bowl, whisk together 1 large egg, 1 large egg yolk, 1 ½ cups of dark brown sugar, ¾ cup of sour cream, 5 tablespoons of vegetable oil, 2 teaspoons of vanilla extract, salt, and ¾ cup of hot water until smooth.
- Gradually whisk the dry ingredients into the wet mixture until just combined.
- Divide the batter evenly between the prepared pans and bake for 25-35 minutes until a toothpick inserted into the center comes out clean.
- Allow the cakes to cool completely in the pans on a wire rack before inverting them onto plates.
- Start by preheating the oven to 350°F and greasing two 8-inch round cake pans.
- Whisk together the dry ingredients for the cake batter and set aside.
- In a mixing bowl, beat together eggs, oil, and vanilla until smooth. Add the water gradually and mix until the batter is thin.
- Pour the batter into the greased pans and bake for 35-45 minutes until a toothpick comes out clean.
- Allow the cakes to cool for 15 minutes in the pans before turning them out onto a cooling rack.
- Prepare the chocolate pudding by combining cream and chocolate in a microwave-safe bowl. Heat until steaming, stirring until smooth. refrigerate the mixture until it thickens to a spreadable consistency.
Baking the Cake
To bake the delicious Chocolate Blackout Cake, it’s essential to follow precise steps and techniques to achieve a moist and flavorful outcome. Here’s how I go about the baking process:
Preparing the Cake Batter
- Room Temperature Ingredients: Ensure all your ingredients, such as eggs and butter, are at room temperature for a homogenous mixture.
- Measure Flour Correctly: Avoid packing flour into your measuring cup. Instead, create air pockets by stirring and spooning the flour, then level it off.
- Mixing the Batter: Do not overmix the batter to prevent developing gluten, leading to a moist cake texture.
- Line the Baking Pans: Prepare your cake pans by lining them with parchment paper for even baking and easy release.
- Divide the Batter: Once the batter is ready, divide it evenly between the prepared pans.
- Baking Process: Preheat the oven to the specified temperature and bake the cake layers until a toothpick inserted comes out clean.
- Cooling the Cakes: Let the cakes cool in the pans for a few minutes before transferring them to a wire rack to cool completely.
By following these detailed steps, you’ll be on your way to creating a delectable Chocolate Blackout Cake that will surely impress your family and friends.
Assembling the Cake
It’s time to bring all the components together and assemble the decadent Brooklyn blackout cake. Let’s layer the rich chocolate cake, creamy pudding filling, and luscious frosting to create a show-stopping dessert that will impress any chocolate lover.
Layering and Filling
- Using a sharp serrated knife, slice each cake layer horizontally in half to form four layers.
- Place one layer on a cake round or plate and generously spread half of the filling over it.
- Add the second layer on top and repeat the filling process.
- Place the third layer on top of the second layer.
- Apply a thin layer of frosting to the top and sides of the cake.
- Refrigerate for 10 minutes to set the layers.
Applying Frosting
- While the cake chills, crumble the remaining cake layer.
- Apply the remaining frosting generously on the cake, ensuring even coverage.
- Sprinkle the cake crumbs liberally on top, pressing gently to adhere.
- Refrigerate the cake for at least 1 hour before serving to allow the flavors to meld.
- Once the cake has set, remove it from the refrigerator.
- Serve the Brooklyn blackout cake within 24 hours for the best taste and texture.
- Store any leftovers in a cool place to maintain freshness and quality.
- Enjoy the indulgent flavors and rich texture of this iconic dessert inspired by the historic blackout era of Brooklyn.
Serving Suggestions
As you prepare to indulge in the decadent delight of the chocolate blackout cake, consider enhancing the experience with these serving suggestions.
Serving:
- Carefully slice the chilled cake using a sharp knife to reveal the beautiful layers of chocolate cake, creamy pudding filling, and rich frosting.
- Serve each slice on elegant dessert plates to elevate the presentation and create a sense of indulgence.
Accompaniments:
- Pair each slice of chocolate blackout cake with a dollop of freshly whipped cream or a scoop of vanilla ice cream for contrasting flavors and textures.
- Garnish the plate with a dusting of cocoa powder or chocolate shavings to add a touch of sophistication to the dessert presentation.
Beverage Pairing:
- Complement the intense chocolate flavors of the cake by serving it with a piping hot cup of espresso or a smooth glass of red wine for a luxurious dining experience.
- Alternatively, pair the cake with a refreshing glass of milk to balance the richness of the chocolate and enhance the overall tasting experience.
Decorative Touches:
- Add a final flourish to each slice by drizzling a velvety chocolate sauce on top or sprinkling with edible gold or silver dust for a touch of glamour.
- Consider decorating the serving platter with fresh berries, mint leaves, or edible flowers to create a visually appealing presentation that delights both the eyes and the palate.
Storage Tips:
- To maintain the cake’s freshness and flavor, store any leftover slices in an airtight container in the refrigerator for up to 3-4 days.
- Before serving leftover slices, allow them to come to room temperature for about 15-20 minutes to enhance the flavors and textures of the cake.
Elevate your dining experience with these serving suggestions to make each bite of the chocolate blackout cake a moment of pure indulgence and culinary delight. Enjoy the rich flavors and nostalgic charm of this iconic Brooklyn dessert.
Storage Tips
After indulging in the decadent slices of the black-out chocolate cake, it’s essential to know how to store the remaining cake properly to enjoy its rich flavors for days to come. Here are some handy storage tips to keep your blackout cake fresh:
1. Room Temperature Storage:
- If you plan to consume the cake within a day or two, store it at room temperature in an airtight container or cover it tightly with plastic wrap.
- Make sure to place the cake in a cool, dry place away from direct sunlight or heat sources.
2. Refrigeration:
- For longer storage periods, refrigerate the blackout cake. Place it in an airtight container or wrap it well with plastic wrap to prevent it from drying out.
- Before serving refrigerated cake, allow it to sit at room temperature for about 30 minutes to bring it back to its ideal texture.
- To freeze blackout cake for extended storage, wrap individual slices or the whole cake tightly in plastic wrap followed by aluminum foil.
- Label the wrapped cake with the date to keep track of storage time. Frozen blackout cake can last up to 2-3 months.
- Thaw frozen cake overnight in the refrigerator before serving. Allow it to come to room temperature before enjoying.
By following these storage tips, you can ensure that your blackout chocolate cake stays fresh and delicious, allowing you to enjoy its indulgent taste even days after baking.
Conclusion
Mastering the art of baking a delectable chocolate blackout cake is not just about following a recipe; it’s about understanding the history and significance behind this iconic dessert. By incorporating key ingredients, utilizing the right baking tools, and exploring various serving suggestions, you can elevate your culinary skills and create a truly indulgent dining experience. With proper storage techniques such as room temperature storage, refrigeration, and freezing, you can prolong the freshness and flavor of your blackout cake, ensuring that every slice remains as delightful as the first bite. Embrace the tradition, savor the richness, and enjoy the decadence of a homemade chocolate blackout cake that is sure to impress your taste buds and leave a lasting impression on your guests.