
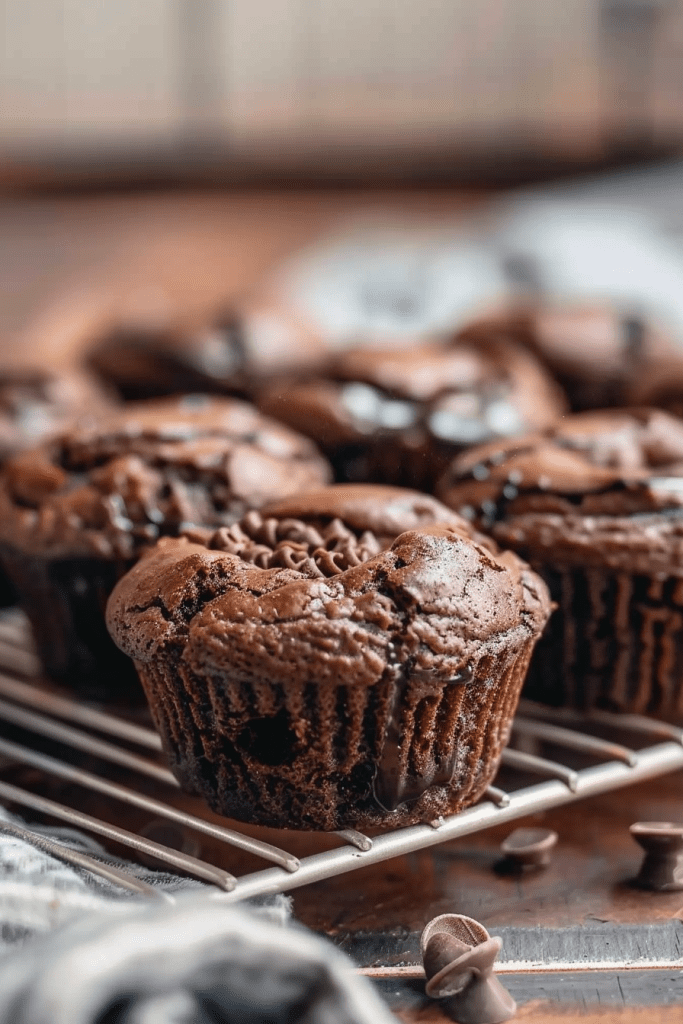
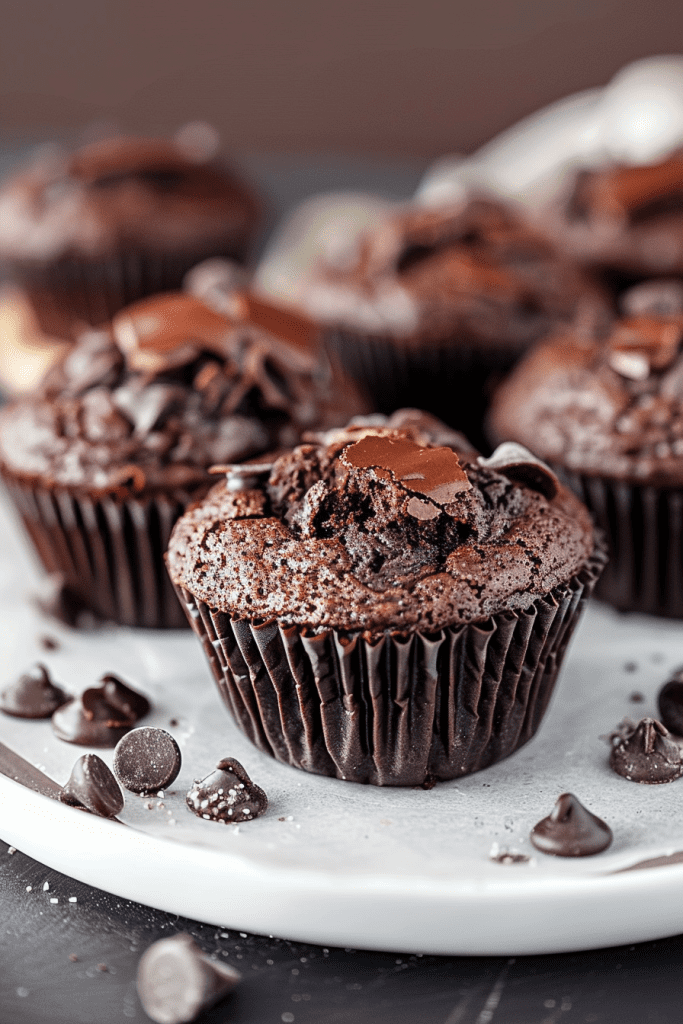
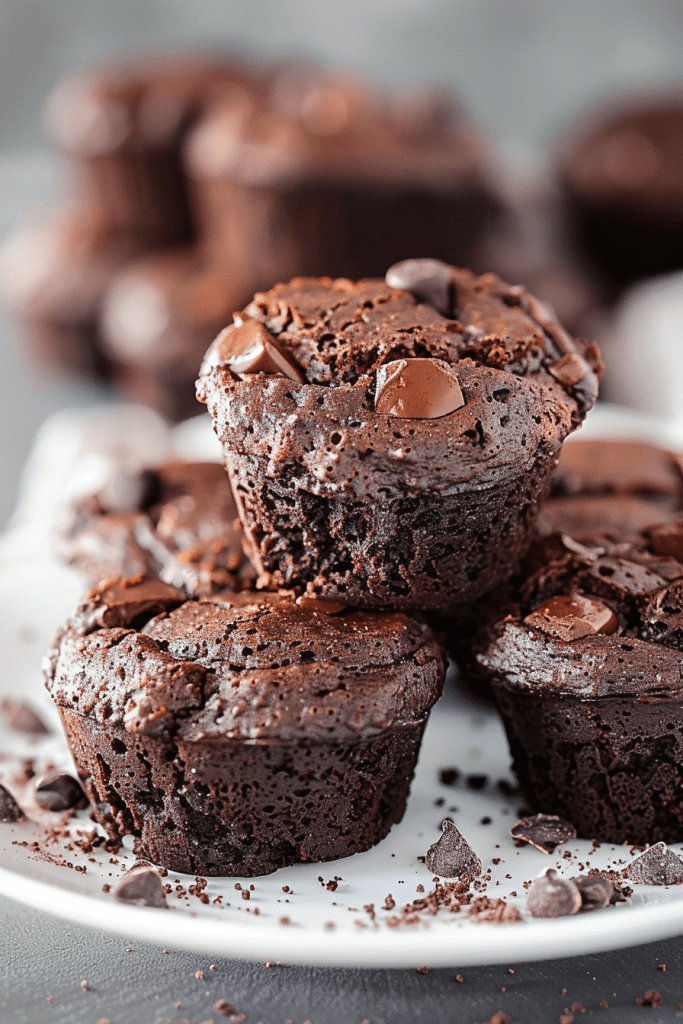
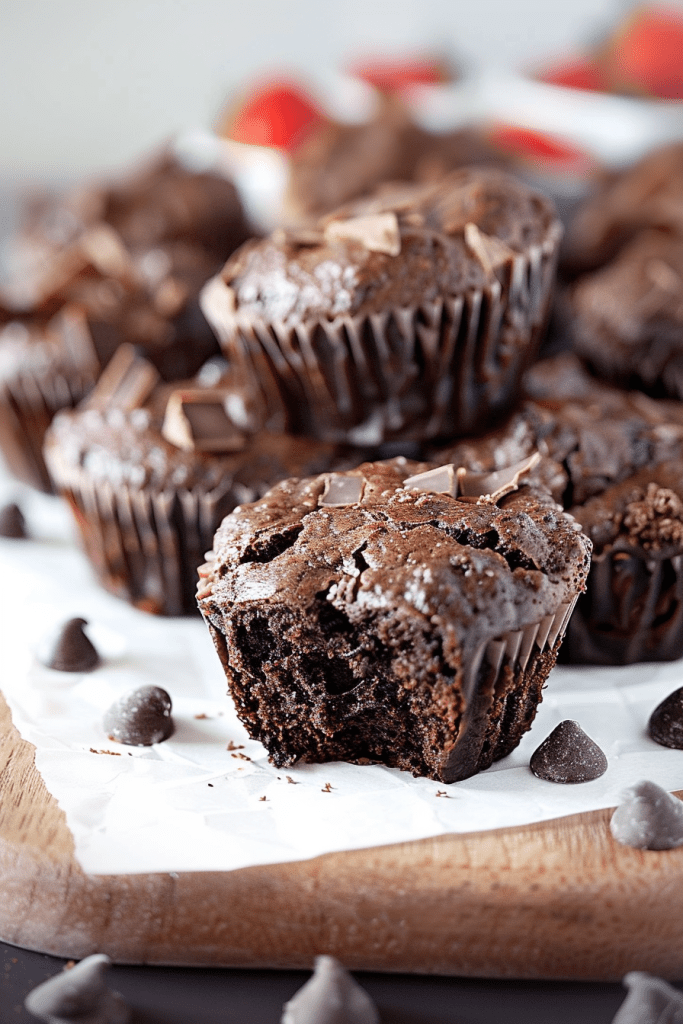
Craving the perfect blend of chewy edges and fudgy centers? Brownie muffins are the ultimate indulgence for chocolate enthusiasts like me. These decadent treats, baked in a muffin pan, offer a delightful twist on traditional brownies. With a carefully selected list of ingredients, they pack a powerful punch of rich chocolate flavor, complemented by a hint of salt for that perfect balance.
The beauty of brownie muffins lies in their convenience and irresistible taste. They retain the essence of classic brownies while being conveniently portioned into muffin form, making them ideal for on-the-go snacking or a quick dessert fix. Whether you’re a die-hard chocolate lover or simply seeking a satisfying treat, these brownie muffins are sure to impress with their dense, fudgy texture and intense chocolatey goodness. Get ready to elevate your baking game with this easy-to-make recipe that promises to satisfy even the most discerning sweet tooth.
Ingredients
- Prep Time: 15 minutes
- Cook Time: Varies (11-25 minutes depending on size)
- Total Time: Approximately 40 minutes
- Servings: 48 mini brownie bites (or adjust for larger muffins)
- 12 ounces bittersweet chocolate chips (60-70% cacao)
- 1/2 cup butter
- 3 large eggs
- 1 cup granulated sugar
- 1/4 cup brown sugar, packed
- 1 teaspoon vanilla extract
- 1/2 teaspoon salt
- 3/4 cup all-purpose flour
- 1/4 cup unsweetened cocoa powder (not Dutch-processed)
- 1/2 cup mini semisweet chocolate chips
Equipment Needed
To make these irresistible brownie muffins, you’ll need to gather some essential equipment that will make your baking process a breeze. Here’s a list of the things you’ll need:
- Muffin Tin or Mini Muffin Tin: Standard 12-cup or 2-24 cup mini muffin tins.
- Heavy Saucepan: For melting chocolate and butter.
- Stand Mixer (or Hand Mixer): For beating eggs and sugars thoroughly.
- Mixing Bowls: Helpful for prepping ingredients, though much can be done in the stand mixer bowl.
- Measuring Cups and Spoons: Accurate measurements are crucial in baking.
- Rubber Spatula: Handy for scraping every bit of the delicious batter from the bowl and into the muffin cups.
- Oven: A preheated oven is a must.
- Cooling Rack: For cooling the brownie muffins evenly.
Okay, here is the expanded step-by-step instructions section with more descriptive wording:
Instructions
- Prepare Your Muffin Tins for Baking Success:
- For crafting delightful mini brownie bites: Begin by preheating your oven to a steady 350°F (177°C). Next, take your 2-24 cup mini muffin tins and meticulously grease each individual cup with butter or non-stick spray, followed by a light dusting of flour. Alternatively, you can opt for the convenience of paper mini muffin liners, placing one in each cup. Once prepared, set these tins aside, ready for the batter. Remember, it’s crucial to really grease the muffin tin thoroughly to ensure your precious brownies don’t stick and can be removed effortlessly.
- For baking satisfyingly large brownie bites: Adjust your oven temperature by preheating it to 375°F (190°C). Similarly, prepare a standard 12-cup muffin tin by generously greasing and flouring each cup, or by lining them with paper muffin tin liners if you prefer. Set this prepared tin aside. Diligent greasing is key here as well, as it guarantees your brownie muffins will release cleanly from the pan.
- Gently Melt the Chocolate and Butter Foundation: In a sturdy, heavy-bottomed saucepan, combine the 12 ounces of bittersweet chocolate chips (those with 60-70% cacao will yield the best rich flavor) and the 1/2 cup of butter. Place the saucepan over a low heat, encouraging the ingredients to melt slowly and evenly. Stir constantly and patiently with a spatula or wooden spoon, watching as the chocolate and butter transform into a smooth, glossy, and well-combined liquid. Once fully melted and beautifully homogenous, remove the saucepan from the heat and set it aside for a few moments to cool slightly.
- Whip Up a Light and Airy Egg and Sugar Base: Transfer your attention to the bowl of your stand mixer (or use a large mixing bowl and a hand mixer). Into this bowl, crack the three large eggs. Add the granulated sugar, the packed brown sugar (which adds a lovely depth of molasses flavor), the teaspoon of pure vanilla extract, and the half teaspoon of salt. Beat these ingredients together on a high speed setting for a full 5 minutes. You’ll know it’s ready when the mixture has visibly thickened, turned a paler color, and achieved a wonderfully light, creamy, and voluminous consistency. This aeration step is vital for the texture of your brownies.
- Gracefully Combine the Chocolate with the Aerated Base: Reduce the speed of your stand mixer to its lowest setting. Carefully and gradually pour the slightly cooled, melted chocolate and butter mixture into the bowl containing the whipped egg and sugar base. Allow the mixer to gently incorporate the chocolate, mixing just until everything is well-combined and the batter is a uniform, luscious chocolate color. Avoid overmixing at this stage.
- Carefully Incorporate the Dry Ingredients: Now it’s time to introduce the dry components. Add the 3/4 cup of all-purpose flour and the 1/4 cup of unsweetened cocoa powder directly into the wet batter. With the mixer still on low, or by hand using a rubber spatula, stir these dry ingredients in just until they are combined and no streaks of flour or cocoa remain. It’s very important not to overmix here, as overmixing can lead to tougher brownies. A few gentle stirs are all that’s needed.
- Fold in the Final Chocolatey Flourish: To elevate the chocolate experience even further, gently add the 1/2 cup of mini semisweet chocolate chips to the batter. Using your rubber spatula, carefully stir or fold them in to distribute them evenly throughout the mixture. At this point, the batter should be wonderfully thick and rich, resembling the classic consistency of a decadent brownie batter.
- Evenly Distribute the Batter into Muffin Cups: With your luscious brownie batter ready, carefully divide it among the prepared muffin cups you set aside earlier. Aim to fill each cup about 3/4 full. This will give the brownie muffins enough space to rise and puff up during baking without overflowing. A cookie scoop can be very helpful for portioning the batter neatly and evenly.
- Bake to Perfection, Achieving Puffed and Shiny Tops:
- For your adorable mini muffin bites: Carefully place the filled mini muffin tins into the preheated 350°F (177°C) oven. Bake for approximately 11-15 minutes. You’ll know they’re nearing readiness when the brownies have visibly puffed up and their tops have developed a characteristic shiny, slightly cracked surface. If you prefer exceptionally fudgy middles, aim for the lower end of this baking time. For a slightly cakier, more well-done brownie, extend the baking time towards the 15-minute mark.
- For your more substantial large muffin bites: Transfer the filled standard muffin tin into the preheated 375°F (190°C) oven. These larger bites will require a bit longer, baking for about 15-25 minutes. Similar to the minis, look for them to be nicely puffed with that desirable shiny, cracked top. For intensely fudgy centers, opt for a shorter baking time within this range, and for a more cake-like texture, allow them to bake a little longer.
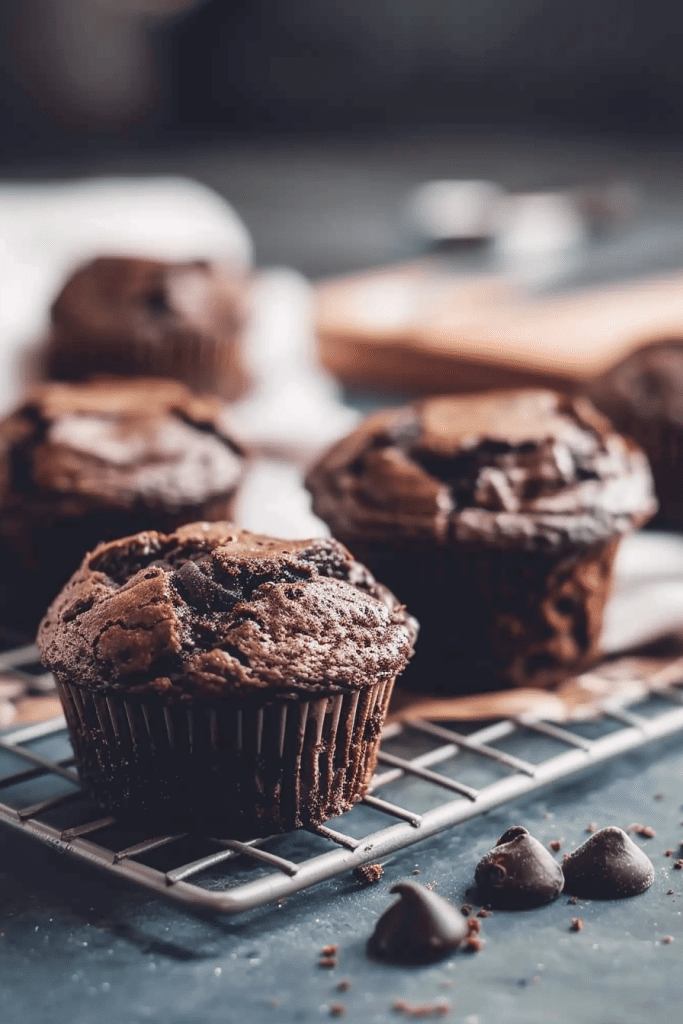
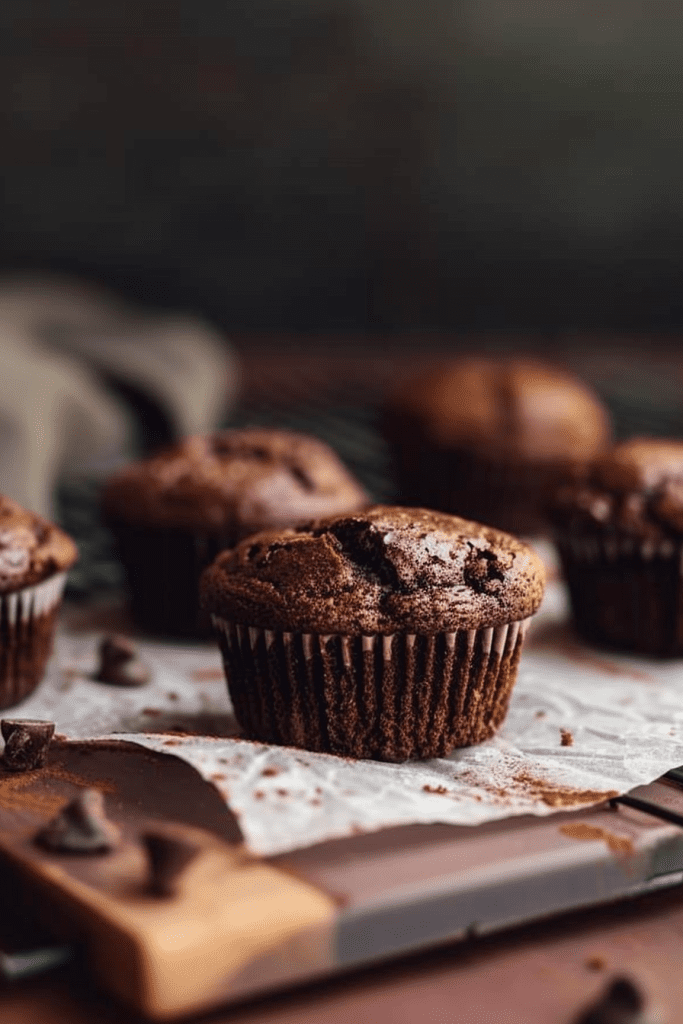
- Cool and Patiently Await Indulgence: Once baked to your desired doneness, carefully remove the muffin tin(s) from the oven. Allow the brownie muffins to cool directly in the muffin tin for a crucial 10 minutes. This initial cooling period helps them to set up properly and makes them easier to remove without breaking. After the 10 minutes have passed, gently transfer the brownie muffins from the tin to a wire rack to finish cooling completely. This allows air to circulate around them, preventing any sogginess and ensuring the perfect texture.
Dietary Substitutions
When it comes to dietary preferences or restrictions, there are several easy swaps you can make in this brownie muffin recipe to accommodate various needs. Here are some dietary substitutions you can consider:
Gluten-Free Option:
For a gluten-free version of these delicious brownie muffins, simply replace the all-purpose flour with a gluten-free flour blend. Make sure to check that all your ingredients, including the chocolate chips, are gluten-free as well.
Dairy-Free Option:
To make these brownie muffins dairy-free, substitute the butter with a dairy-free alternative like melted vegan butter or coconut oil. You can also use dairy-free chocolate chips in place of regular chocolate chips.
Egg-Free Option:
For an egg-free version of these muffins, you can use a flaxseed or chia seed egg as a substitute. To make a flaxseed egg, mix 1 tablespoon of ground flaxseed with 3 tablespoons of water and let it sit for a few minutes to thicken before adding it to the recipe in place of eggs.
Vegan Option:
To make these brownie muffins completely vegan, combine the above substitutions by using a gluten-free flour blend, dairy-free butter, dairy-free chocolate chips, and a flaxseed or chia seed egg. This way, you can enjoy a delicious vegan treat without compromising on flavor or texture.
By making these simple dietary substitutions, you can still enjoy the delightful taste and texture of brownie muffins while catering to your dietary preferences or restrictions. Feel free to experiment with these options to find the perfect version that suits your needs.
Tips for Perfect Brownie Muffins
When making brownie muffins, there are a few key tips to ensure they turn out perfectly every time. Here are some essential pointers to help you achieve the best results:
- Use High-Quality Ingredients
For rich and decadent brownie muffins, opt for high-quality ingredients like premium cocoa powder and good quality chocolate chips (the recipe specifies 60-70% cacao bittersweet chocolate for a reason!). The quality of your ingredients will significantly impact the flavor and texture of the final product. - Proper Mixing Technique
To achieve a moist and tender crumb in your brownie muffins, remember not to overmix the batter, especially when adding the flour. Mix the wet and dry ingredients until just combined to prevent the muffins from becoming tough. The specific instruction to beat eggs and sugar for 5 minutes until thick and creamy is key to the texture. - Don’t Overbake
Brownie muffins are best when they are slightly underbaked for fudgier middles. The instructions provide a time range and visual cues (puffed, shiny, cracked top). Baking toward the lower end of the suggested time will give you that desirable gooey center. - Let Them Cool
Allow your brownie muffins to cool in the pan for about 10 minutes as instructed before transferring them to a wire rack to cool completely. Cooling them in the pan helps them set and ensures they maintain their shape. - Storage Tips
If you’re planning to store your brownie muffins, make sure they are completely cooled before placing them in an airtight container. Room temperature is ideal for storing brownie muffins, or you can freeze them for future enjoyment.
By following these helpful tips, you’ll be able to consistently bake perfect brownie muffins that are sure to be a hit with family and friends.
Storage
Allow the brownie muffins to cool completely before storing to prevent sogginess. Follow these storage instructions to maintain their texture and flavor.
Room Temperature
Once cooled, store the brownie muffins at room temperature for up to 3 days to retain their perfect brownie texture. Enjoy the moist and slightly gooey centers by keeping them at room temperature.
Freezing Instructions
For longer storage, freeze the brownie muffins in an airtight container. Ensure they are completely cooled before freezing. Thaw them at room temperature when ready to enjoy, preserving their delicious fudgy texture.
Conclusion
In wrapping up, brownie muffins offer a delightful twist on classic brownies, combining chewy edges with fudgy centers in a portable treat. With various dietary substitutions available, there’s a version for everyone to enjoy. Remember, using top-notch ingredients, mastering the mixing technique, and proper baking and storage methods are key to achieving perfect brownie muffins every time.
Experiment with different options and savor the moist, gooey centers for up to 3 days at room temperature. For longer freshness, freeze them in an airtight container, ensuring they maintain their irresistible texture when thawed. Enjoy the rich chocolate flavor and share these delectable treats with loved ones.
PrintBrownie Muffins
Whip up these irresistible brownie muffins! Imagine perfectly fudgy centers, delightful chewy edges, and a double dose of chocolatey goodness. This easy recipe creates the ultimate portable treat for satisfying any chocolate craving. They’re a little bit brownie, a little bit muffin, and all-around delicious!
- Prep Time: 15 minutes
- Cook Time: 11-25 minutes (varies by size)
- Total Time: Approx. 40 minutes
- Yield: 48 mini bites or 12 large muffins 1x
- Category: Dessert, Snack
- Cuisine: American
Ingredients
- 12 ounces bittersweet chocolate chips (60-70% cacao)
- 1/2 cup butter
- 3 large eggs
- 1 cup granulated sugar
- 1/4 cup brown sugar, packed
- 1 teaspoon vanilla extract
- 1/2 teaspoon salt
- 3/4 cup all-purpose flour
- 1/4 cup unsweetened cocoa powder (not Dutch-processed)
- 1/2 cup mini semisweet chocolate chips
Instructions
- Get Ready:
- Minis: Preheat oven to 350°F (177°C). Grease & flour two 24-cup mini muffin tins (or use liners).
- Large: Preheat oven to 375°F (190°C). Grease & flour a 12-cup standard muffin tin (or use liners).
- Pro-tip: Grease well so your brownies pop out easily!
- Melt & Mingle: Gently melt the 12 oz bittersweet chocolate chips with butter in a saucepan over low heat, stirring until smooth. Set aside to cool slightly.
- Whip It Good: In a stand mixer (or with a hand mixer), beat eggs, both sugars, vanilla, and salt on high for 5 minutes until thick and creamy. This step is key for texture!
- Chocolate In: Reduce mixer speed to low and blend in the melted chocolate mixture until just combined.
- Dry Goods: Gently stir in the flour and cocoa powder until just incorporated. Don’t overmix!
- Extra Chocolate Hit: Fold in the 1/2 cup mini chocolate chips. The batter will be thick and luscious.
- Fill ‘Em Up: Divide batter evenly among your prepared muffin cups, filling about 3/4 full.
- Bake Time!
- Minis: Bake for 11-15 minutes.
- Large: Bake for 15-25 minutes.
- Look for: Puffed tops that are shiny and slightly cracked. For fudgier centers, bake for less time; for cakier, bake a bit longer.
- Cool Down: Let muffins cool in the tin for 10 minutes before transferring to a wire rack to cool completely. Patience is a virtue here!
Notes
- Serving Suggestions: Amazing on their own, with a glass of cold milk, a scoop of vanilla ice cream, or a dusting of powdered sugar!
- Tips & Tricks for Perfection:
- Quality Chocolate: Using good 60-70% cacao chocolate makes a world of difference.
- Don’t Overmix: Especially when adding flour! This keeps them tender.
- Fudgy vs. Cakey: Adjust baking time by a few minutes to achieve your perfect texture.
- Cooling is Crucial: The 10-minute cool in the pan helps them set.
- Storage & Reheating:
- Store completely cooled brownie muffins in an airtight container at room temperature for up to 3 days.
- For longer storage, freeze in an airtight container for up to 3 months. Thaw at room temperature.
- Want a warm, gooey treat? Briefly microwave a single muffin for 10-15 seconds (from room temp).
1 Comment
how long do you put them on the oven