
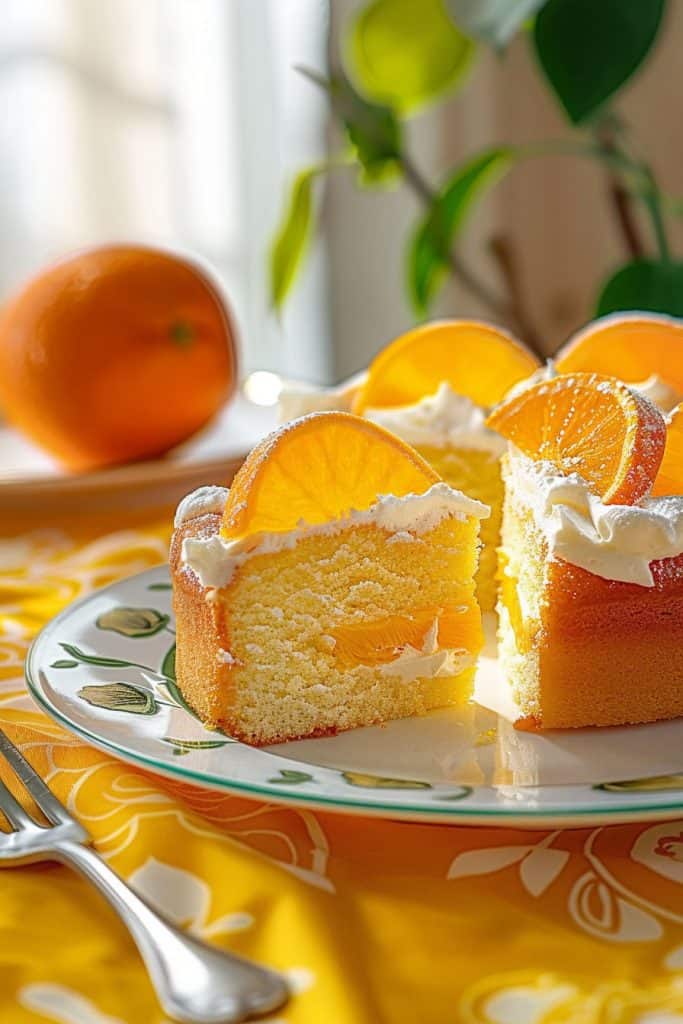
There’s something truly magical about the combination of citrus and cream in a cake. The bright, zesty flavor of oranges paired with the rich, smooth texture of a creamy cake creates a dessert that’s both refreshing and indulgent. Whether you’re a fan of classic cakes or looking to try something new, a creamy orange cake is sure to delight your taste buds and impress your guests.
Originating from sunny regions where citrus fruits thrive, this cake brings a burst of sunshine to any occasion. The natural sweetness of oranges perfectly balances the creamy elements, making each bite a harmonious blend of flavors. Plus, the vibrant color adds a festive touch to any table. Ready to dive into a slice of heaven? Let’s explore how to make this delightful treat that’s perfect for any season.

Ingredients
Here’s a list of what you’ll need to create a delectable creamy orange cake that bursts with citrusy freshness and creamy indulgence.
For the Cake
- 2 1/2 cups cake flour – sifted
- 2 1/2 teaspoons baking powder
- 1/2 teaspoon salt
- 1 cup unsalted butter – softened
- 2 cups granulated sugar
- 4 large eggs – room temperature
- 2 teaspoons vanilla extract
- 1 tablespoon grated orange zest
- 1/2 cup freshly squeezed orange juice
- 1/2 cup whole milk – room temperature
- 1 cup cream cheese – softened
- 1/2 cup unsalted butter – softened
- 4 cups powdered sugar – sifted
- 1 tablespoon grated orange zest
- 2 tablespoons freshly squeezed orange juice
- 1 teaspoon vanilla extract
- 1-2 tablespoons heavy cream – as needed for consistency
Be sure to have all your ingredients measured and ready to go before you begin. This preparation will make the process seamless and enjoyable.
Tools and Equipment
Creating a creamy orange cake requires careful preparation, and using the right tools and equipment will ensure a smooth baking process. Here’s a list of what you’ll need:
Baking Tools
- Mixing Bowls: You’ll need several sizes to mix different components of the cake batter and frosting.
- Measuring Cups and Spoons: Precision is vital in baking, so ensure you have a full set of both dry and liquid measuring cups and spoons.
- Electric Mixer: A stand mixer or hand mixer will help you achieve the perfect creamy texture for both the batter and the frosting.
- Whisk: Useful for combining dry ingredients and for whipping cream if you prefer not to use an electric mixer.
- Spatula: A silicone spatula helps in folding ingredients gently without deflating the batter.
Baking Equipment
- Cake Pans: Two 9-inch round cake pans are recommended for this recipe. Ensure they are greased and lined with parchment paper for easy release.
- Cooling Racks: Essential for allowing the cakes to cool evenly once they’re out of the oven.
- Zester: Fresh orange zest is a key flavor component. A zester or microplane will make this task easy and efficient.
- Offset Spatula: Ideal for spreading frosting smoothly across the cake layers.
- Piping Bag and Tips: If you want to add a decorative touch with piped frosting, a piping bag fitted with your preferred tips will be useful.
- Cake Turntable: While not essential, a turntable makes frosting the cake much easier, allowing for smooth, even layers.
By assembling these tools and equipment, you’ll ensure a seamless baking experience, and your creamy orange cake will make a stunning and delicious impression.
Directions
Follow these step-by-step directions to create your creamy orange cake from scratch. Each step ensures you achieve the perfect balance of flavors and textures.
Prep
- Preheat Your Oven: Set the oven to 350°F (175°C) to ensure it’s at the right temperature when your cake batter is ready.
- Prepare the Pans: Grease and flour two 9-inch round cake pans. This prevents the cake from sticking and makes for easy removal.
- Zest and Juice Oranges: Zest two large oranges to obtain about 2 tablespoons of zest. Juice the zested oranges to get 1 cup of fresh orange juice.
- Mix Dry Ingredients: In a medium bowl, whisk together 2 1/2 cups of all-purpose flour, 2 1/2 teaspoons of baking powder, and 1/2 teaspoon of salt. Set aside.
Bake
- Cream Butter and Sugar: In a large mixing bowl, use an electric mixer to cream 1 cup of unsalted butter (room temperature) and 2 cups of granulated sugar until the mixture becomes light and fluffy.
- Add Eggs and Vanilla: Add four large eggs, one at a time, beating well after each addition. Mix in 1 tablespoon of pure vanilla extract until combined.
- Incorporate Wet and Dry Ingredients: Gradually add the dry ingredient mixture to the bowl, alternating with 1 cup of fresh orange juice. Begin and end with the dry ingredients.
- Add Zest: Fold in the 2 tablespoons of orange zest.
- Bake: Divide the batter evenly between the prepared pans. Bake for 25-30 minutes, or until a toothpick inserted into the center comes out clean. Allow cakes to cool in the pans for 10 minutes, then transfer to a wire rack to cool completely.
Make the Frosting
- Beat Cream and Butter: In a large bowl, beat 1 cup of unsalted butter (room temperature) until creamy using an electric mixer.
- Add Cream Cheese: Add 8 ounces of cream cheese, beating until the mixture is smooth and combined.
- Incorporate Powdered Sugar and Vanilla: Gradually add 4 cups of powdered sugar, mixing on low speed until incorporated. Add 2 teaspoons of vanilla extract, then increase the speed and beat until fluffy.
- Add Orange Zest and Juice: Mix in 1 tablespoon of orange zest and 2 tablespoons of fresh orange juice for a citrusy flair.
- Level the Cakes: Once the cakes have completely cooled, level the tops using a sharp knife to ensure they stack evenly.
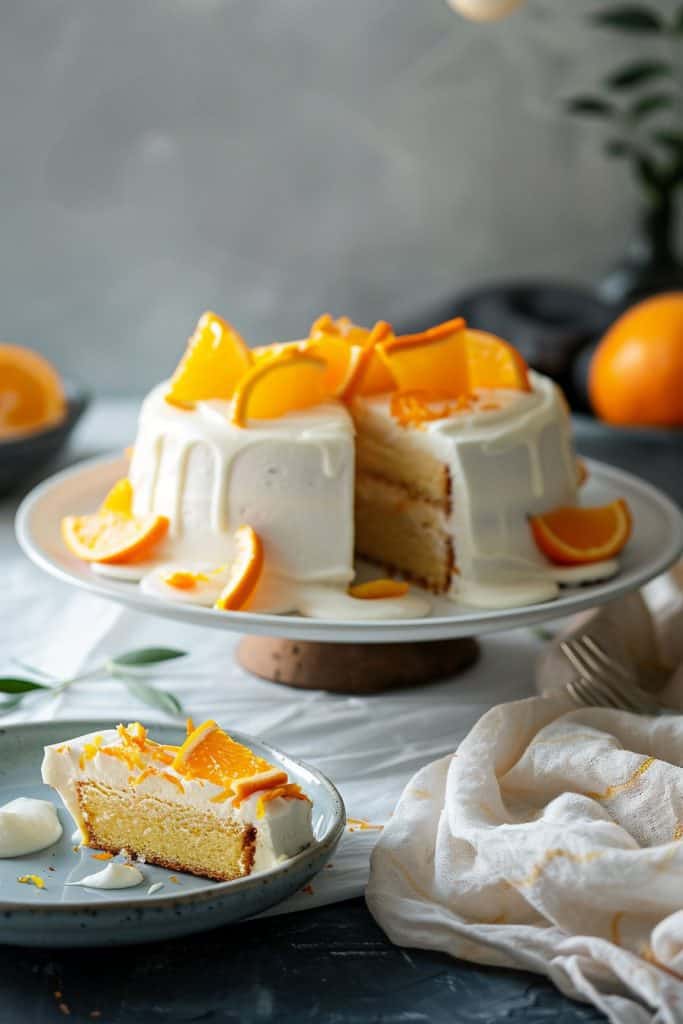
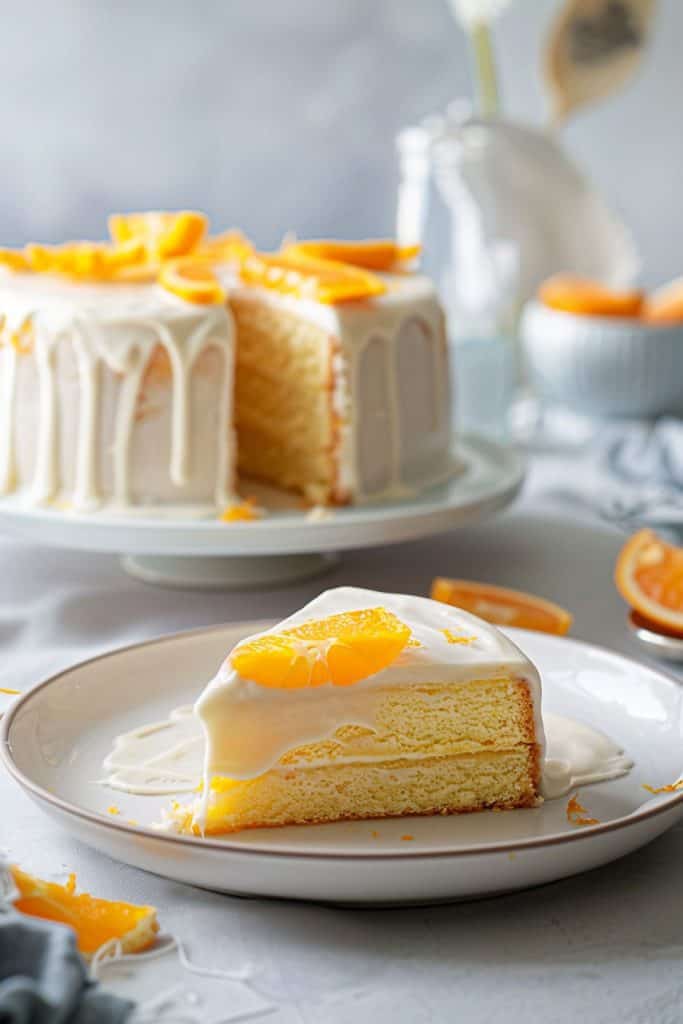
- Frost the First Layer: Place one cake layer on a serving plate or cake stand. Spread a generous amount of frosting evenly over the top using an offset spatula.
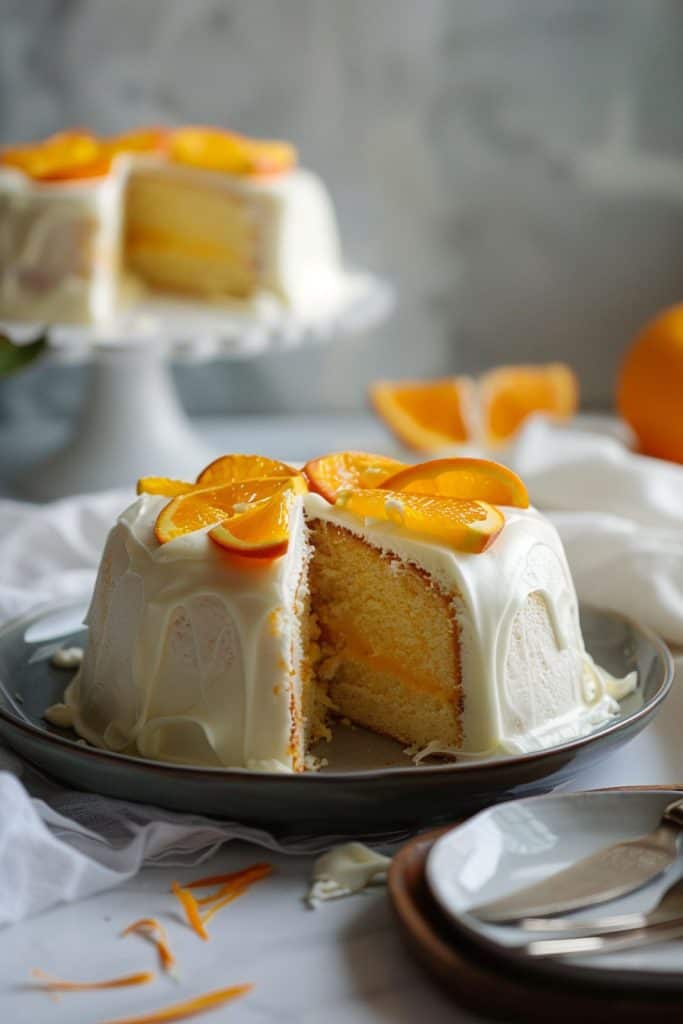
- Add the Second Layer: Place the second cake layer on top, ensuring the layers align. Frost the top and sides of the cake with the remaining frosting.
- Decorate: For an extra touch, garnish with thinly sliced orange wedges or additional zest on top. Refrigerate the cake for at least 30 minutes before serving to set the frosting.
Tips for the Best Creamy Orange Cake
Use Fresh, High-Quality Ingredients
I always start with the freshest ingredients to ensure the best flavor. Freshly squeezed orange juice and zest give the cake a vibrant citrusy aroma and taste. Organic oranges can offer a bolder flavor, free of any chemical residues.
Room Temperature Ingredients
Make sure all your ingredients are at room temperature, including eggs, butter, and cream cheese. This helps them blend more smoothly, creating a better texture for the cake and frosting. I take my refrigerated items out about an hour before starting.
Don’t Overmix the Batter
When combining the wet and dry ingredients, mix just until combined. Overmixing can lead to a dense cake. I fold my batter gently using a spatula to ensure everything is well incorporated without overworking it.
Proper Zesting Techniques
Use a microplane or fine grater for zesting the oranges, making sure to only get the orange part and avoid the bitter white pith. I find that zesting twice the amount I think I need ensures I have enough to sprinkle a little zest into the frosting as well.
Accurate Measurements
Baking is a science, and accurate measurements are crucial. Use a kitchen scale to measure ingredients like flour and sugar. Level off dry ingredients with the back of a knife for precision. I measure my liquids at eye level to ensure accuracy.
Use the Right Cake Pans
I use light-colored, non-stick cake pans to avoid over-baking the edges. Grease the pans thoroughly and line them with parchment paper to ensure easy release. This step prevents the cake from sticking and breaking apart when you remove it from the pan.
Rotate Pans During Baking
For even baking, I always rotate my cake pans halfway through the baking time. This prevents any hot spots in the oven from causing uneven cooking.
Thoroughly Cooling the Cake Before Frosting
Make sure the cake layers are completely cool before frosting. I cool mine on wire racks. If the cake is even slightly warm, the frosting will melt and slide off.
Creating a Crumb Coat
Apply a thin layer of frosting to seal in crumbs before adding the final layer of frosting. This crumb coat ensures a smooth and professional-looking finish. I refrigerate the cake for about 20 minutes after the crumb coat to set it properly.
Refrigerate the Cake Before Serving
After frosting and decorating, refrigerate the cake for at least an hour before serving. This helps set the frosting, making it easier to slice and serve. I find this also enhances the flavors, making every bite more delightful.
By following these tips, I guarantee your creamy orange cake will be a delectable and visually stunning treat that delights all.
Pro Tips for Making This Recipe
1. Use Fresh Ingredients
When making a creamy orange cake, the freshness of your ingredients matters. Freshly squeezed orange juice and zest will provide a more vibrant flavor compared to store-bought varieties. The creams and butter should be as fresh as possible to achieve a rich and creamy texture.
2. Room Temperature Ingredients
Ensure all of your ingredients are at room temperature before you start mixing. Eggs, butter, and dairy need to be at room temperature to create a smooth batter and to help them blend better. Cold ingredients can cause the batter to curdle, which will affect the cake’s final texture.
3. Proper Zesting Technique
Use a microplane or fine grater to zest your oranges. Avoid the white pith as it can be bitter. Only zest the outermost layer, collecting the brightly-colored rind, to impart the best citrus flavor.
4. Accurate Measurements
Baking is a science, and accurate measurements are crucial for success. Use a kitchen scale for the most precise measurements of ingredients. Measuring cups and spoons should be leveled off to ensure you are not using too much or too little of an ingredient.
5. Right Cake Pans
Choose the right cake pans to ensure even baking. If the recipe calls for 9-inch round cake pans, avoid substituting with different sizes. This helps ensure your cake layers are consistent in size and bake evenly. Grease and line your pans with parchment paper to prevent sticking.
6. Avoid Overmixing
Overmixing the batter can lead to a dense and tough cake. Mix until the ingredients are just combined. This helps maintain the cake’s light and airy texture.
7. Rotate Pans During Baking
If your oven has hot spots, rotating your cake pans halfway through the baking time helps ensure even baking. This prevents one side from becoming over-baked while the other side remains undercooked.
8. Thorough Cooling
Allow your cake to cool completely before applying any frosting. A warm cake will cause the frosting to melt and slide off. It can also result in a cake that is too moist and difficult to decorate.
9. Crumb Coat
Apply a thin layer of frosting to create a crumb coat. This layer traps any loose crumbs and creates a smooth base for the final layer of frosting. Let the crumb coat chill in the refrigerator for about 30 minutes before applying the final coat.
10. Refrigerate Before Serving
After frosting, refrigerate the cake for at least an hour before serving. This helps the layers and frosting to set, making the cake easier to slice and present. The slightly chilled cake also brings out the rich creamy textures and enhances the orange flavor.
How to Serve
When your creamy orange cake is ready and beautifully frosted, serving it in the best possible way enhances the experience for your guests. Here are my tried-and-true steps to present and serve this delightful dessert.
Step 1: Choosing the Right Plate
Select a clean, flat cake plate or stand that complements the cake’s vibrant orange color. A white or light-colored ceramic plate often works best to make the cake stand out.
Step 2: Slicing the Cake
Using a sharp, serrated knife, slice the cake in smooth, even motions. Clean the knife with a warm, damp cloth between cuts to ensure each slice remains neat and tidy.
Step 3: Serving Each Piece
Carefully transfer each slice to individual dessert plates using a cake server. Ensure each piece is intact with the creamy frosting layers visible.
Step 4: Adding Garnishes
For an extra touch, garnish each slice with a twist of orange peel, a sprinkle of fresh orange zest, or a few delicate mint leaves. A dollop of whipped cream on the side adds an elegant finish.
Step 5: Pairing with Beverages
Serve the cake with a beverage that complements its citrusy notes. A cup of hot tea, a glass of champagne, or even a refreshing orange-infused sparkling water pairs wonderfully with this creamy orange cake.
By following these steps, you’ll present your creamy orange cake in a way that looks as good as it tastes, ensuring an unforgettable dessert experience for everyone.

How to Store Orange Cake
Storing your creamy orange cake properly is crucial for maintaining its delightful texture and flavor. Follow these steps to ensure your cake stays fresh and delicious:
Cooling the Cake
Before storing your orange cake, allow it to cool completely. Placing a warm cake in a container can cause condensation, leading to a soggy texture. I typically let my cake rest on a wire rack for at least an hour.
Wrapping the Cake
Once the cake has cooled, wrap it tightly in plastic wrap. This prevents air from reaching the cake, which can cause it to dry out. Ensure there are no gaps, and the entire cake is covered.
Using an Airtight Container
For added protection, place the wrapped cake in an airtight container. This further safeguards it from drying out and keeps it free from any external odors. I prefer to use a container that fits the cake snugly to avoid unnecessary movement inside.
Refrigeration
If you plan to enjoy your cake within a week, store it in the refrigerator. The cold temperature helps maintain the cake’s creamy texture and fresh citrus flavor. Make sure it’s in the coldest part of the fridge away from any sources of moisture.
Freezing the Cake
For longer storage, freezing the cake is an excellent option. To freeze, place the wrapped cake in a freezer bag or wrap it in aluminum foil again. Label the package with the date and store it in the freezer for up to three months. When you’re ready to indulge, thaw the cake in the refrigerator for 24 hours before serving.
Storing Slices
If you have leftover slices, follow the same wrapping method. Place each slice on a piece of plastic wrap and cover it thoroughly. Store the slices in an airtight container and refrigerate or freeze, depending on when you plan to eat them.
By following these detailed steps, you can savor your creamy orange cake just as if it were freshly baked.
Conclusion
Creating a creamy orange cake is truly a rewarding experience. The blend of citrus and cream offers a unique and delightful flavor profile that’s sure to impress. By using fresh ingredients and following proper techniques, you can achieve a cake that’s both moist and flavorful.
Don’t forget the importance of proper storage to maintain the cake’s texture and taste. Whether you refrigerate it for short-term enjoyment or freeze it for later, these tips ensure your cake remains as delicious as when it was first baked.
So go ahead and enjoy every bite of your creamy orange cake, knowing you’ve mastered the art of baking and preserving this delightful dessert.