
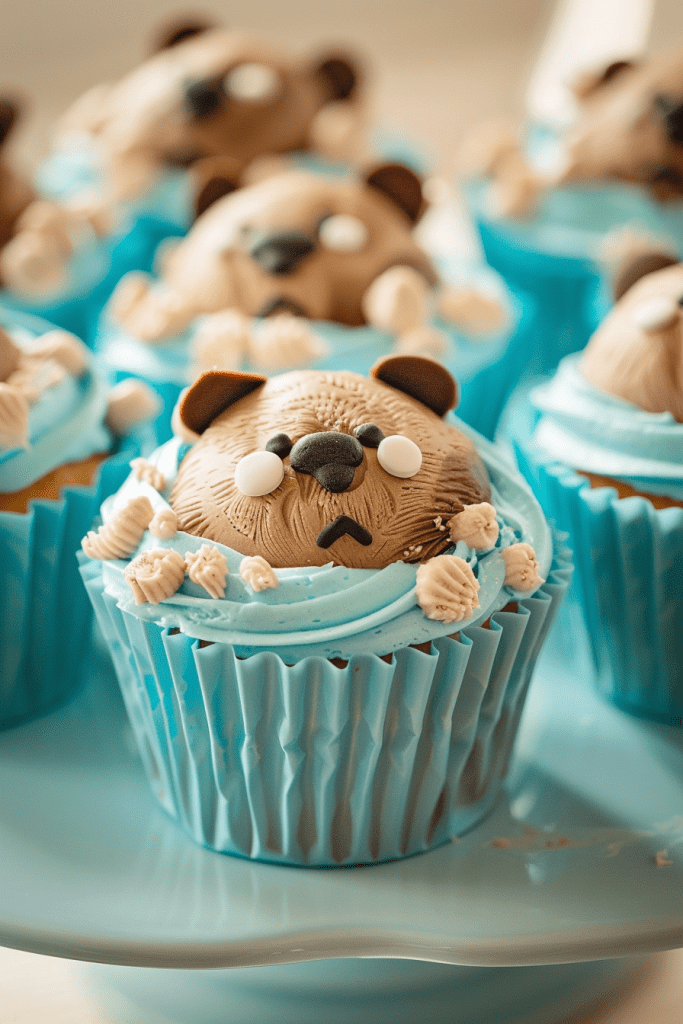
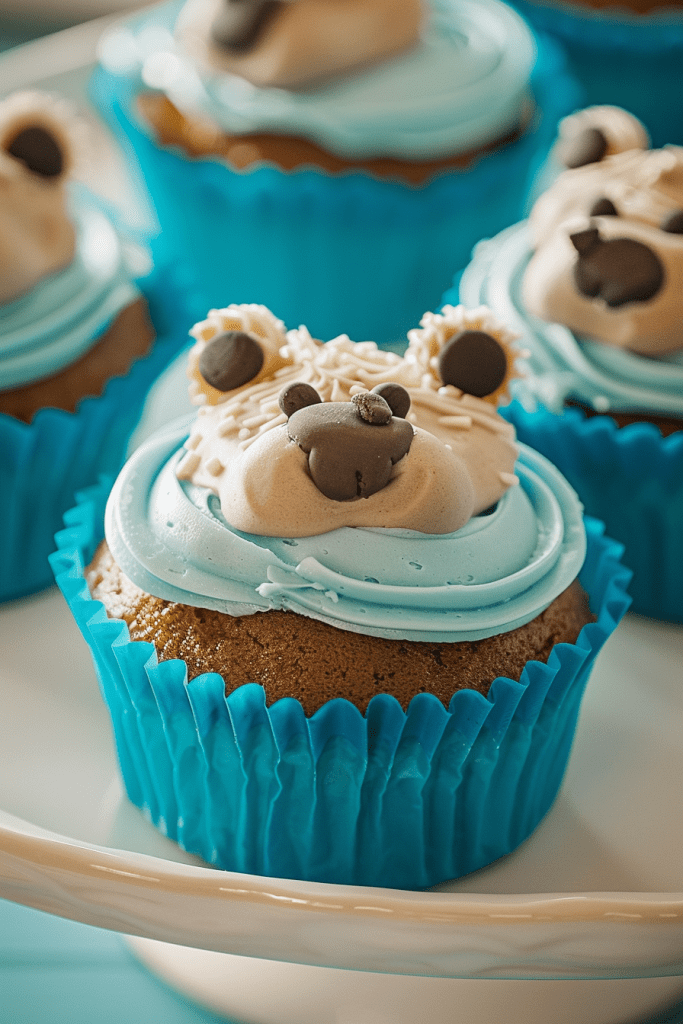
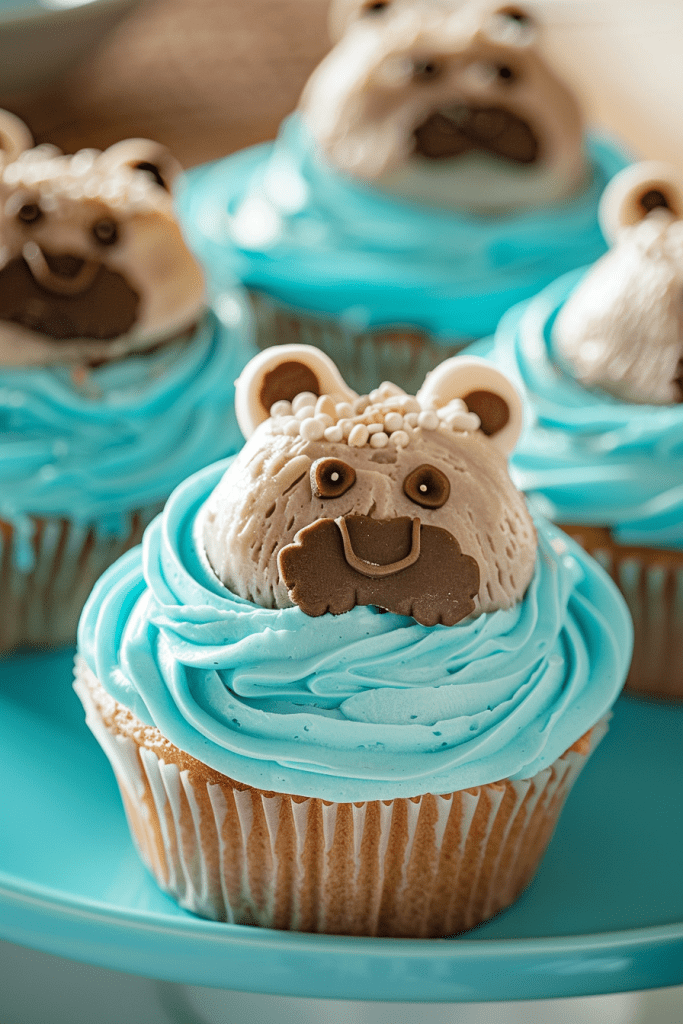
Who can resist the charm of adorable Sea Otter Cupcakes? These sweet treats, originally shared in 2016, are a delightful addition to any dessert table. Perfect for kids’ birthday parties or themed events like Finding Dory parties, these cupcakes are sure to make a splash.
To bring these cute otters to life, you’ll need black, brown, and white modeling chocolate. Don’t worry if you’ve never worked with modeling chocolate before – it’s easier than you think. By using your favorite chocolate and a bit of corn syrup or honey, you can create a delicious and versatile medium for crafting edible decorations.
If you’re eager to try your hand at working with modeling chocolate, these Sea Otter Cupcakes are a fantastic place to start. Dive into the world of candy clay creations and bring a touch of whimsy to your baking endeavors.
Ingredients
Cupcake Base
- 12 chocolate cupcakes
- 12 Reese’s Cups
Modeling Chocolate for Decorations
- Black modeling chocolate
- Brown modeling chocolate
- White modeling chocolate
- Assorted candies for eyes and nose
- Edible markers for detailing
Equipment Needed
To create these adorable Sea Otter Cupcakes, you will need a few essential kitchen tools and equipment. Make sure you have the following items ready before you start:
- Cupcake Pan: For baking the chocolate cupcakes to perfection.
- Mixing Bowls: To prepare the cupcake batter and any frosting you may want to use.
- Whisk or Electric Mixer: For mixing the cupcake batter until smooth and fluffy.
- Piping Bag with Round Tip: Essential for frosting the cupcakes and creating the otter-like swirls.
- Offset Spatula: To spread frosting evenly on the cupcakes.
- Modeling Chocolate in Black, Brown, and White: Use these to craft the charming otter faces and features.
- Assorted Candies: Get candies for the otters’ eyes and nose to add a touch of sweetness and cuteness.
- Edible Markers: These will help you add detailed features and expressions to the otter faces.
Instructions
Preparing the Cupcake Batter
Once you have gathered all the necessary ingredients and equipment, it’s time to start creating the delicious chocolate cupcakes. Begin by preheating your oven to the specified temperature and lining your cupcake pan with paper liners. In a mixing bowl, combine the dry ingredients and mix well. In a separate bowl, whisk together the wet ingredients until smooth. Gradually incorporate the dry ingredients into the wet ingredients, mixing until just combined. Fill each cupcake liner with batter and bake in the preheated oven until the cupcakes are fully baked and a toothpick inserted comes out clean.
Making the Modeling Chocolate
Modeling chocolate is a versatile and fun medium to work with when creating edible decorations. To make the modeling chocolate, you will need your favorite chocolate and some corn syrup or honey. Simply melt the chocolate, allow it to cool slightly, and then gradually mix in the corn syrup until it forms a pliable dough. Divide the modeling chocolate into portions and color them as needed using food-safe gel or powdered colors. With the colored modeling chocolate ready, you can move on to crafting the adorable otter features.
Crafting the Otter Features
With the colored modeling chocolate prepared, it’s time to bring your sea otter cupcakes to life. Roll out the brown and black modeling chocolate and use small round cutters to create the otter’s face and ears. Shape the white modeling chocolate into small balls for the otter’s eyes. Attach the features together using a dab of water or edible glue. Use edible markers to add details like whiskers and a cute smile to complete the adorable otter faces. Once the features are set, gently place them on top of the frosted cupcakes for a charming finishing touch.
Assembly
It’s time to bring our sea otter cupcakes to life by assembling all the adorable features we’ve prepared. Let’s construct the sea otter faces and complete the final assembly for these delightful treats.
Constructing the Sea Otter Faces
- Take the shaped otter heads and bodies made from the colored modeling chocolate.
- Attach the otter heads on top of the bodies gently using a bit of melted chocolate as glue.
- Use edible markers to draw eyes, noses, smiles, and whiskers on the otter faces, adding personality to each one.
- Allow the details to set and dry before moving on to the final step.
- Frost each chocolate cupcake generously with your favorite frosting, creating a smooth surface for the otter faces.
- Carefully lift the completed otter faces and gently press them onto the frosted cupcakes.
- Position the faces slightly off-center to give them a playful and engaging look on each cupcake.
- Repeat the process for all cupcakes, ensuring each one gets its charming sea otter decoration.
- Your sea otter cupcakes are now ready to delight both children and adults alike with their whimsical charm and delicious taste. Enjoy!
Decoration Tips
When it comes to decorating sea otter cupcakes, attention to detail is key to creating adorable and irresistible treats. Here are some expert tips to take your cupcake decorations to the next level:
- Facial Expressions: Use edible markers to draw expressive eyes, cute button noses, cheerful smiles, and whiskers on the otter faces. Play around with different facial expressions to give each otter its own personality.
- Modeling Chocolate Colors: Experiment with a variety of colors for the modeling chocolate to create visually appealing otter features. Consider using shades of brown, white, and black to mimic the fur and facial markings of real sea otters.
- Texture and Dimension: Pay attention to adding texture and dimension to the otter faces. Use small edible tools to create fur-like textures or small patterns on the otters’ bodies to make them more realistic and engaging.
- Playful Poses: To enhance the whimsical charm of the sea otter cupcakes, position the otter faces slightly off-center on the frosted cupcakes. This playful tilt adds a fun and dynamic element to the overall presentation.
- Accessorize: Get creative with accessories by adding edible props such as tiny fondant seashells, edible sand made from crushed graham crackers, or sugar pearls to enhance the sea-themed decorations and make your cupcakes even more captivating.

Storage and Serving Suggestions
When you’ve put your heart and creativity into crafting these adorable sea otter cupcakes, you’ll want to ensure they stay fresh and are served in a way that enhances their charm. Here are some expert suggestions for storing and presenting your sea otter cupcakes:
Storage Tips:
- Room Temperature: Sea otter cupcakes can be stored at room temperature in an airtight container for up to 2 days. Make sure the container is sealed properly to maintain freshness and prevent the cupcakes from drying out.
- Refrigeration: If you need to store the cupcakes for a longer period or in warmer weather, refrigeration is recommended. Place the cupcakes in an airtight container and store them in the refrigerator for up to 5 days. Before serving, allow them to come to room temperature for about 30 minutes to enhance the flavors.
- Freezing: To enjoy your sea otter cupcakes later, you can freeze them. Place the decorated cupcakes in a single layer on a baking sheet and freeze until solid. Once frozen, transfer them to a freezer-safe container or bag. They can be stored in the freezer for up to 1 month. Thaw the cupcakes in the refrigerator overnight and bring them to room temperature before serving.
- Presentation: To showcase your sea otter cupcakes beautifully, consider arranging them on a decorative platter or tiered stand. Adding sea-themed decor or blue frosting waves can enhance the aquatic feel.
- Personalization: Get creative by personalizing each sea otter cupcake with different expressions or accessories. This adds a fun and unique touch, making each cupcake special.
- Pairing: Serve the sea otter cupcakes alongside a refreshing beverage like lemonade or iced tea to complement the sweetness of the treats and create a delightful dessert experience.
By following these storage and serving suggestions, you can ensure that your sea otter cupcakes not only taste delicious but also look stunning and make a lasting impression on your guests.
Conclusion
Creating sea otter cupcakes is a fun and creative way to impress your guests at any event. By following the detailed instructions provided and adding your personal touch to the decorations, you can ensure that these cupcakes not only taste delicious but also look absolutely adorable. Remember to store them properly to maintain their freshness and presentation. Whether served at room temperature, chilled, or even frozen for later enjoyment, these cupcakes are sure to be a hit. With the right pairing of beverages and attention to detail in presentation, you can elevate your sea otter cupcakes to a delightful dessert experience that will leave a lasting impression on everyone who tries them. Enjoy the process of baking and decorating these cute treats, and watch as they become the highlight of your next celebration.