

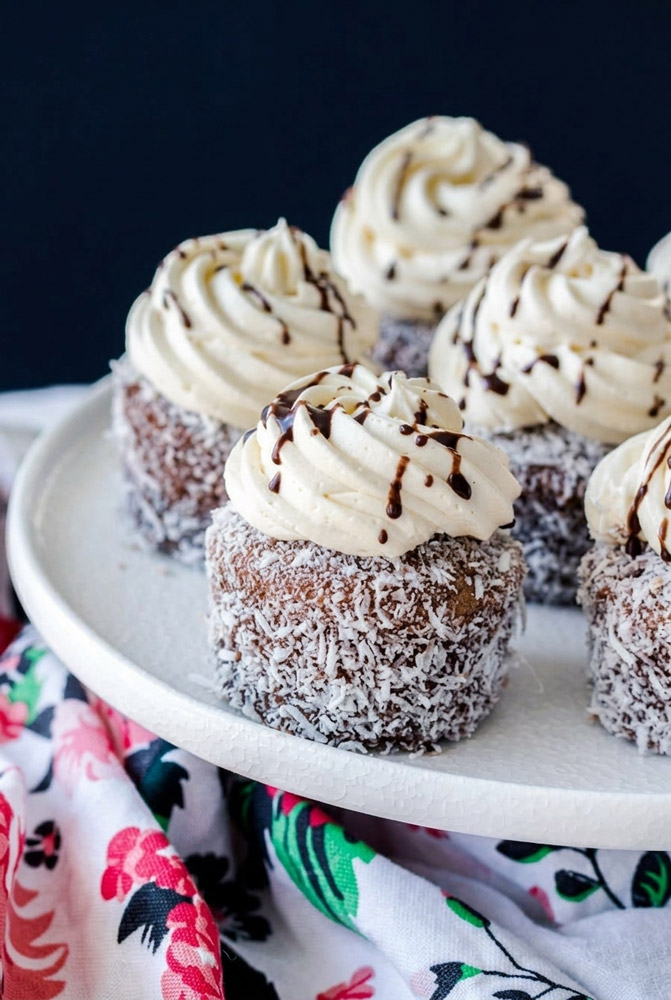
If you have ever traveled down under or walked into an Aussie bakery, you have probably seen a Lamington. It is a classic Australian treat: a simple square of vanilla sponge cake dipped in chocolate glaze and rolled in coconut.
Legend says these were invented by accident. Lord Lamington’s chef in Queensland needed a quick dessert for unexpected guests and threw together some leftover sponge cake, chocolate, and coconut. Just like that, an icon was born.
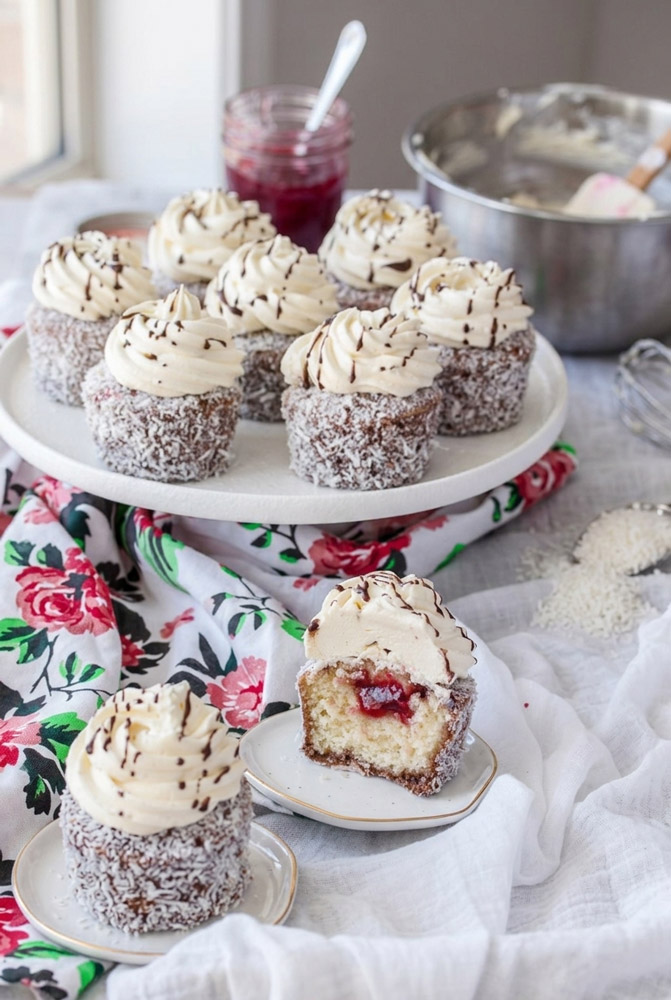
Traditional lamingtons can sometimes get dry because the cake sits bare under the glaze. These cupcakes fix that completely. By using a super moist buttermilk batter, adding a tart raspberry jam center, and topping it with fluffy vanilla buttercream, you get all the nostalgic flavors without the dryness.
The Prep Work
- Prep time: 50 minutes
- Cook time: 22 to 24 minutes
- Total time: 1 hour and 14 minutes (plus 30 minutes to chill)
- Yield: 12 cupcakes
- Skill level: Intermediate (there are a few steps, but they are easy)
The Gear You Need
Silicone muffin trays are perfect for this recipe. Since we are peeling the wrappers off to glaze the whole cake, silicone gives you clean, straight edges. If you only have a metal tin, just grease it well and dust it with flour, or use paper liners and peel them off gently once the cakes are cold.
A spring-triggered ice cream scoop helps keep your portions even. To hollow out the cakes for the jam, a cupcake corer is great, but a small paring knife or the back of a metal piping tip works too.
Can You Make These Ahead?
Yes. You can bake and glaze the cake bases up to 24 hours in advance. Just keep them in an airtight container at room temperature. The chocolate flavor actually gets better overnight.
You can also make the buttercream a day ahead and keep it in the fridge. When you are ready to use it, let it come to room temperature for an hour, then beat it for two minutes to make it fluffy again.
What You Need
For the Cupcakes
- All-purpose flour (215g / 1 ⅔ cups): The base of the cake.
- Cornstarch (30g / ¼ cup): Our secret weapon. Mixing this with regular flour creates a homemade cake flour for a super tender crumb.
- Sugar (267g / 1 ⅓ cups): For sweetness and moisture.
- Baking powder (1 ¾ tsps) & Salt (¼ tsp): For rise and balance.
- Unsalted butter (135g / 5oz): Melted and cooled slightly.
- 3 Large eggs: Make sure they are at room temperature so they don’t clump the butter.
- Buttermilk (¾ cup): Makes the cake melt-in-your-mouth soft. No buttermilk? Mix ¾ cup of milk with a tablespoon of lemon juice or vinegar and let it sit for five minutes.
- Vanilla extract (2 tsps): Use the good stuff here since it is the main flavor.
For the Coating
- Desiccated coconut (¾ cup) & Shredded coconut (¾ cup): A mix of both gives the best look and texture.
- Powdered sugar (195g / 1 ½ cups): The base of the glaze.
- Cocoa powder (1 ½ tbsps): Use Dutch-processed cocoa if you can find it for a richer color.
- Milk (⅓ cup) & Unsalted butter (1 tbsp): Melted together for the glaze.
- Raspberry jam (¼ cup): A tart, seedless jam works best.
For the Buttercream
- Unsalted butter (226g / 1 cup): Softened to room temperature.
- Powdered sugar (260g / 2 cups): Sifted so it isn’t lumpy.
- Vanilla extract (1 tsp) & Salt (¼ tsp): The salt is key to cutting the intense sweetness.
- Heavy cream (2 tbsps): Makes the frosting silky smooth.
Step-by-Step Guide
Step 1: Make the Batter
Preheat your oven to 180°C (350°F). Lightly grease your muffin tray.
Sift your flour and cornstarch together into a large bowl. Do it twice. This adds air and mixes them perfectly. Whisk in the sugar, baking powder, and salt.
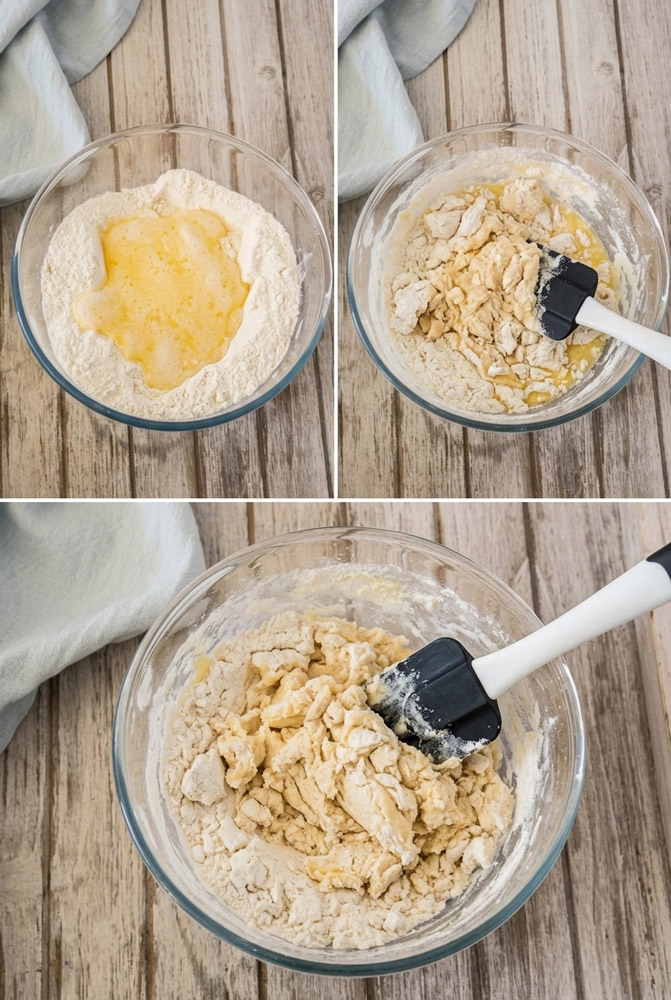
In a separate bowl, beat the eggs until they are pale and frothy. Make a well in the center of your dry ingredients. Pour in the melted butter, frothy eggs, buttermilk, and vanilla.
Gently fold everything together with a spatula. Stop mixing the moment the flour disappears. A few small lumps are fine. Overmixing makes the cupcakes tough.
Step 2: Bake and Cool
Scoop the batter into the tray, filling each cup about three-quarters full. Bake for 11 minutes, then rotate the tray for an even bake. Bake for another 11 to 13 minutes.
Test them by pressing the center with a finger—it should spring back. Let them cool in the tin for 10 minutes, then move them to a wire rack to cool completely. They must be cold before glazing.
Step 3: The Chocolate and Coconut Coat
Mix your two types of coconut together.
Quick tip: Divide the coconut into two bowls. Use one bowl for the first six cupcakes and the second bowl for the rest. This keeps the coconut from getting messy and brown from the chocolate drips.
Whisk the powdered sugar and cocoa powder in a bowl. Heat the milk and tablespoon of butter in a saucepan until melted and hot. Pour it into the cocoa mix and whisk until smooth.
Drop a cooled, wrapper-free cupcake into the warm glaze. Roll it with two forks to coat it completely. Lift it up, let the extra glaze drip off, and roll it in the coconut. Press gently so it sticks. Repeat with all cupcakes, then chill them in the fridge for 30 minutes.
Step 4: Add the Jam
Once the chocolate is set, cut a small cylinder out of the top center of each cupcake, going about halfway down. Pull the cake piece out.
Spoon a teaspoon of raspberry jam into the hole. Cut the cake piece in half to make a flat lid, and press it back over the jam. This seals the surprise inside.
Step 5: Whip the Buttercream
Put your softened butter in a mixer. Beat it on medium speed for 6 to 7 minutes. It feels like a long time, but this turns the yellow butter into a pale, fluffy base.
Turn the mixer to low. Add the powdered sugar slowly, one spoonful at a time, so it doesn’t fly everywhere. Add the salt, vanilla, and heavy cream.
Turn the speed up to medium and beat for 5 more minutes. It will turn into a light, glossy frosting that looks like marshmallow fluff. Pipe big swirls right over your jam-sealed cupcakes.
Serving and Storage
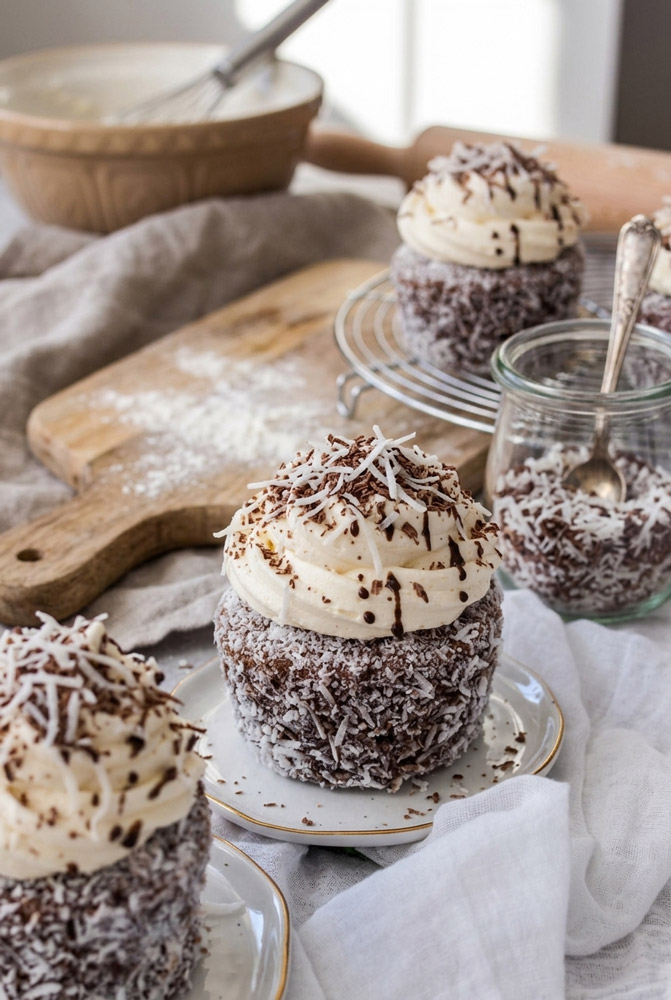
These look beautiful on a tiered cake stand. Because they are sweet and rich, they pair perfectly with a hot cup of black tea, a strong coffee, or a flat white.
Keep them in an airtight container in the fridge for up to 4 days. Because cold temperature firms up butter, take them out 15 minutes before eating so they soften up.
You can also freeze the glazed, un-frosted bases for up to 3 months. Just wrap them tightly. When you want a treat, thaw them on the counter, add the jam, and whip up a fresh batch of frosting.
PrintLamington Cupcakes with Whipped Vanilla Buttercream
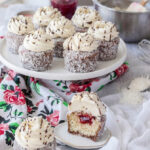
This recipe turns the classic Australian bakery treat into a spectacular, ultra-moist cupcake. A tender vanilla buttermilk sponge is soaked in a rich chocolate mirror glaze, rolled in sweet coconut, filled with tart raspberry jam, and topped with a mountain of cloud-like whipped buttercream.
- Prep Time: 50 minutes
- Cook Time: 22–24 minutes
- Total Time: 1 hour 14 minutes (plus 30 mins chilling)
- Yield: 12 cupcakes 1x
- Category: Dessert / Cupcakes
- Cuisine: Australian
Ingredients
For the Cupcakes
- 215g (1 ⅔ cups) All-purpose flour
- 30g (¼ cup) Cornstarch
- 267g (1 ⅓ cups) Granulated sugar
- 1 ¾ tsps Baking powder
- ¼ tsp Salt
- 135g (5 oz) Unsalted butter, melted and cooled slightly
- 3 Large eggs, room temperature
- ¾ cup Buttermilk
- 2 tsps Pure vanilla extract
For the Chocolate Coating
- ¾ cup Desiccated coconut
- ¾ cup Shredded coconut
- 195g (1 ½ cups) Powdered sugar
- 1 ½ tbsps Unsweetened cocoa powder
- ⅓ cup Light milk
- 15g (1 tbsp) Unsalted butter
- ¼ cup Raspberry jam
For the Whipped Buttercream
- 226g (1 cup) Unsalted butter, perfectly softened
- 260g (2 cups) Powdered sugar, sifted
- 1 tsp Pure vanilla extract
- ¼ tsp Salt
- 2 tbsps Heavy cream
Instructions
Bake the Cupcakes
- Preheat your oven to 180°C (350°F) and grease a 12-cup silicone or metal muffin tray.
- Double-sift the flour and cornstarch into a large bowl, then whisk in the sugar, baking powder, and salt.
- In a separate bowl, whisk the eggs until light and frothy.
- Make a well in the center of the dry ingredients. Pour in the melted butter, frothy eggs, buttermilk, and vanilla. Gently fold with a spatula just until the flour disappears—do not overmix.
- Fill the muffin cups three-quarters full. Bake for 11 minutes, rotate the pan, and bake for another 11 to 13 minutes until the tops spring back when touched.
- Cool in the tin for 10 minutes, then move to a wire rack to cool completely. They must be cold before the next step.
Glaze and Coat
- Whisk the shredded and desiccated coconuts together in a shallow dish.
- In a separate bowl, sift the powdered sugar and cocoa powder together.
- Heat the milk and 15g of butter in a small saucepan until melted and steaming. Pour into the cocoa mixture and whisk into a smooth, glossy glaze.
- Peel the wrappers off your cold cupcakes. Using two forks, submerge each cake entirely into the warm chocolate glaze.
- Let the excess drip off, then roll the cake firmly in the coconut mixture. Place back on the rack and chill in the fridge for 30 minutes to set.
Fill and Frost
- Use a cupcake corer or knife to cut a cylinder out of the center of each chilled cupcake, going halfway down.
- Drop 1 teaspoon of raspberry jam into the well. Slice the removed cake plug in half horizontally to make a flat lid, and press it back over the jam.
- Beat the 226g of softened butter on medium speed for a full 6 to 7 minutes until pale and incredibly fluffy.
- Lower the mixer speed and slowly add the powdered sugar one spoonful at a time. Add the vanilla, salt, and heavy cream, then whip on medium-high for another 5 minutes until it looks like marshmallow fluff.
- Pipe large, beautiful swirls over the jam-sealed cupcakes.
Notes
- Pro-Tip for Coconut: Divide your coconut mixture into two bowls before coating. Use the first bowl for the first 6 cupcakes, and the second bowl for the rest. This keeps the coconut looking bright white and pristine rather than clumpy from chocolate drips.
- Serving Suggestions: Pair these rich, decadent cupcakes with a hot, unsweetened beverage. They strike a perfect flavor balance when served alongside a strong black pour-over coffee, a hot Earl Grey tea, or a classic Australian flat white.
- Storage & Reheating: Store assembled cupcakes in an airtight container in the fridge for up to 4 days. Because cold temperatures firm up the butter, always let them sit on the counter for 15 to 20 minutes before serving so the cake and frosting can soften back up to maximum fluffiness. Do not microwave or heat them, or the glaze and buttercream will melt.
- Freezing Strategy: You can freeze the un-cored, chocolate-coconut glazed bases for up to 3 months. Wrap each base tightly in plastic wrap before freezing. Thaw on the counter for an hour, core, fill with fresh jam, and top with freshly whipped buttercream.
