Wellesley Fudge Cake is more than a dessert—it’s a slice of history. Back in the late 1800s, at Wellesley College, students secretly experimented with making fudge. Why? Because the college’s founder wasn’t a fan of rich desserts like pies and doughnuts. So, the students got creative. Over time, their creation evolved into a decadent chocolate cake topped with rich fudge frosting.
By the 1940s, this cake was famous, even appearing in Baker’s Chocolate ads. Today, it’s a treat that transports you to a simpler time. Layers of moist chocolate cake paired with luscious fudge frosting? It’s as delicious now as it was then.
This updated recipe keeps the magic alive while making the process simpler. Whether it’s for a celebration or just a cozy afternoon project, this cake is sure to impress.
What to Expect
How Long Does It Take?
Set aside about 3 hours to make this cake. That includes cooling and frosting time. The hands-on part takes about 1 hour, so it’s perfect for a leisurely baking day.
How Many Does It Serve?
This recipe makes a hearty cake that serves 8–10 people. Hosting a bigger group? Double the recipe, use larger pans, and adjust the bake time slightly. Just remember to check with a toothpick in the center—it’s ready when it comes out with a few moist crumbs.
Is It Hard to Make?
It’s an intermediate-level recipe. But don’t be intimidated. If you follow the steps carefully, even beginners can pull this off. The frosting requires a little attention, but that’s where the magic happens.
What Tools Do You Need?
Here’s what to grab before you start:
- Two 8-inch square pans (parchment paper recommended!)
- A stand or hand mixer for creaming the butter and sugar
- A saucepan for the frosting
- A wire rack for cooling
- An offset spatula (optional but super handy)
If you only have round pans, no worries—they’ll work just fine!
Can You Make It in Advance?
Absolutely. You can bake the cake layers up to two days ahead. Wrap them tightly and store at room temperature. The fudge frosting? It can chill in the fridge for a day. Just bring it to room temperature before spreading it on the cake.
Ingredients You’ll Need
Making a Wellesley Fudge Cake requires straightforward ingredients that deliver big flavor:
For the Cake:
- All-purpose flour
- Baking soda & baking powder
- Salt
- Unsweetened cocoa powder (Dutch-process preferred for deeper flavor)
- Butter
- Granulated sugar
- Eggs
- Buttermilk (makes the cake moist and tangy)
- Vanilla extract
Pro Tip: Bloom the cocoa powder in hot water—it wakes up the chocolate flavor.
For the Fudge Frosting:
- Light brown sugar
- Evaporated milk (or half-and-half)
- Butter
- Bittersweet chocolate (use good-quality stuff—it’s worth it!)
- Vanilla extract
- Powdered sugar (sifted for a silky finish)
Don’t have buttermilk? No problem. Mix 1 cup of milk with 1 tablespoon of vinegar or lemon juice, let it sit for five minutes, and voilà!
Let’s Bake This Cake
Step 1: Bake the Cake Layers
- Prep everything: Preheat your oven to 350°F and grease two 8-inch square pans. Line them with parchment paper for easy removal.
- Mix dry ingredients: In one bowl, whisk together flour, baking soda, baking powder, and salt.
- Bloom the cocoa: Stir the cocoa powder into hot water until smooth. Let it cool slightly.
- Cream butter and sugar: Beat butter and sugar with a mixer on medium-high for about 3 minutes—this makes the cake light and fluffy. Add the eggs one at a time, mixing after each.
- Combine wet and dry: Add the dry ingredients in three parts, alternating with the buttermilk. Start and end with the dry mix. Finally, stir in the cocoa mixture and vanilla.
- Bake: Divide the batter between the pans, smooth the tops, and bake for 25–30 minutes. The toothpick test will let you know when it’s done.
- Cool: Let the cakes cool in the pans for 30 minutes, then transfer them to a wire rack to cool completely.
Step 2: Make the Fudge Frosting
- In a saucepan, combine brown sugar, half the evaporated milk, half the butter, and salt. Cook over medium heat until bubbles appear, about 4–6 minutes. Lower the heat and simmer until it thickens, around 6 more minutes.
- Pour the mixture into a bowl. Stir in the remaining butter and evaporated milk. Add the chopped chocolate and vanilla. Stir until smooth.
- Gradually whisk in sifted powdered sugar until glossy and thick. Let it cool for about an hour, stirring occasionally as it thickens.
Step 3: Put It All Together
- Place one cake layer on a platter. Spread about 1 cup of frosting on top.
- Add the second layer and frost the top and sides generously.
- Refrigerate for at least an hour to let everything set.
Customization Ideas
Want to try something fun? Here are a few twists:
- Add a layer of raspberry jam between the cakes for a fruity surprise.
- Decorate with fresh berries for a springtime touch.
- For gluten-free friends, swap in a 1:1 gluten-free flour blend—it works beautifully!
Serving & Storing Tips
This cake pairs beautifully with whipped cream or a scoop of vanilla ice cream. Got leftovers? Store them covered in the fridge for up to three days—it tastes even better the next day!
For long-term storage, freeze the unfrosted cake layers. Wrap them tightly, and they’ll stay fresh for up to a month.
The best part? This cake isn’t just a dessert; it’s a piece of tradition. Share it, enjoy it, and make it your own. Happy baking!
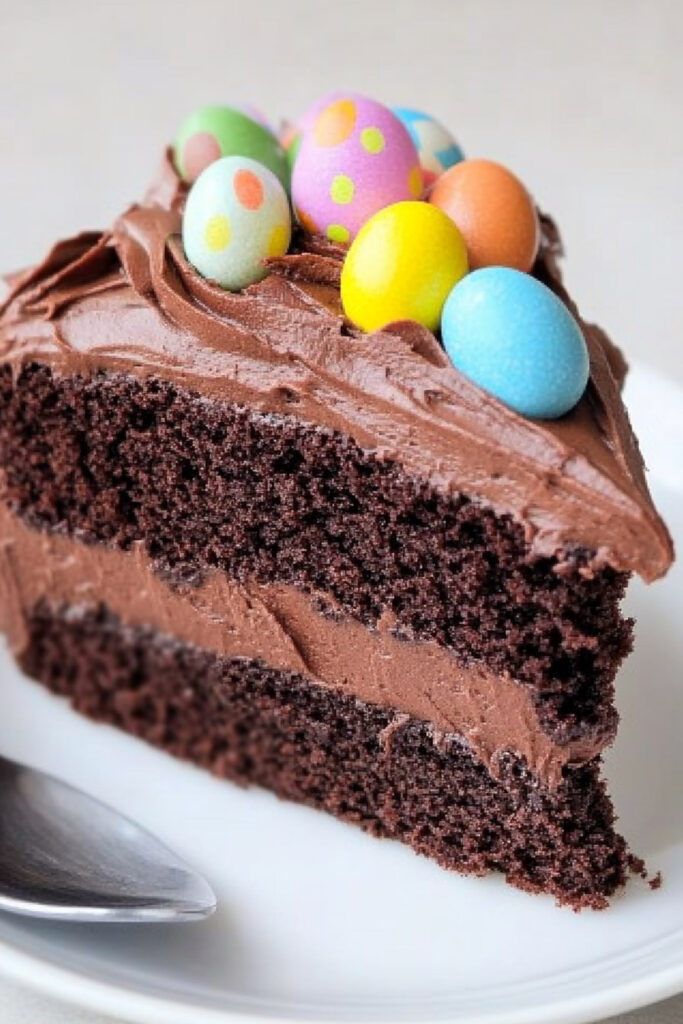
Wellesley Fudge Cake
Wellesley Fudge Cake is the ultimate chocolate dessert—moist layers of cake topped with luscious, fudgy frosting. This indulgent treat has its roots in Wellesley College back in the 1800s, where students secretly whipped up rich sweets against the founder’s wishes. Fast forward to today, and it’s a dessert that feels just as special. Whether you’re celebrating a big event or just need some chocolate therapy, this cake is worth every bite.
- Prep Time: 30 minutes
- Cook Time: 30 minutes
- Total Time: 3 hours (Cooling & Frosting 2 hours)
- Yield: 8–10 1x
- Category: Dessert
Ingredients
For the Cake:
- 2 ½ cups all-purpose flour
- 2 tsp baking soda
- 1 tsp baking powder
- ½ tsp salt
- ¾ cup hot water
- ½ cup unsweetened cocoa powder (Dutch-process preferred for richer flavor)
- 16 tbsp (2 sticks) butter, softened
- 2 cups granulated sugar
- 2 large eggs, room temperature
- 1 cup buttermilk (see note for substitute)
- 2 tsp vanilla extract
For the Fudge Frosting:
- 1 ½ cups light brown sugar
- 1 cup evaporated milk (or half-and-half)
- 8 tbsp butter, softened (divided into 4 tbsp each)
- ¼ tsp salt
- 8 oz bittersweet chocolate, chopped (or semisweet if you prefer it less intense)
- 1 tsp vanilla extract
- 3 cups powdered sugar, sifted
Instructions
Step 1: Bake the Cake Layers
- Prep Your Pans: Preheat your oven to 350°F and grease two 8-inch square pans. Line them with parchment paper, grease the paper, and lightly flour the pans.
- Mix Dry Ingredients: In a medium bowl, whisk the flour, baking soda, baking powder, and salt. Set aside.
- Boost the Cocoa: Stir the cocoa powder into ¾ cup of hot water until smooth. Let it cool. (This extra step really deepens the chocolate flavor.)
- Cream Butter and Sugar: Beat the butter and sugar with a mixer on medium-high speed until pale and fluffy—around 3 minutes. Add the eggs one at a time, mixing after each.
- Combine Everything: Reduce the mixer to low. Add dry ingredients in 3 parts, alternating with buttermilk in 2 parts (start and finish with the dry mix). Stir in the cooled cocoa mixture and vanilla by hand to make sure everything is well blended without overmixing.
- Bake: Divide the batter evenly between the two pans. Smooth the tops and bake for 25–30 minutes, rotating the pans halfway through. The cakes are done when a toothpick in the center comes out with just a few crumbs.
- Cool: Let the cakes cool in the pans for 30 minutes, then transfer them to a wire rack to cool completely.
Step 2: Make the Fudge Frosting
- Start the Base: In a large saucepan over medium heat, combine brown sugar, ½ cup evaporated milk, 4 tbsp butter, and salt. Cook, stirring occasionally, until small bubbles form at the edges (around 5 minutes). Lower the heat and simmer for another 5–6 minutes until it thickens and turns a golden-brown hue.
- Add the Good Stuff: Pour the mixture into a large bowl. Stir in the remaining evaporated milk and butter until it cools slightly. Add the chopped chocolate and vanilla, stirring until smooth.
- Finish with Sugar: Gradually whisk in the sifted powdered sugar. Keep stirring until the frosting is creamy and glossy. Let it sit at room temperature for about an hour—it will thicken as it cools.
Step 3: Assemble the Cake
- Layer Up: Place one cooled cake layer on a serving plate. Spread about 1 cup of frosting over the top.
- Frost the Whole Cake: Place the second layer on top. Spread the rest of the frosting evenly over the top and sides. Use an offset spatula or a knife for a smooth finish.
- Chill: Refrigerate for about an hour to let the frosting set before slicing.
Notes
Tips and Tricks
- Dutch-Process Cocoa: If you can find it, use Dutch-process cocoa for a deeper, richer chocolate flavor.
- DIY Buttermilk: No buttermilk? Just mix 1 cup of milk with 1 tbsp vinegar or lemon juice. Let it sit for 5 minutes before using.
- Frosting Consistency: If the frosting firms up too much, let it warm slightly at room temperature or stir in a tablespoon of evaporated milk.
Serve It Right
For an extra treat, serve slices of this cake with:
- A dollop of freshly whipped cream
- A scoop of vanilla ice cream
Leftovers and Storage
- Leftover cake can be stored in the fridge for up to 3 days. Just bring it to room temperature before serving so the frosting softens up.
- Want to plan ahead? Wrap unfrosted cake layers tightly in plastic wrap and freeze for up to a month. Frost them after thawing for freshly baked flavor.

