
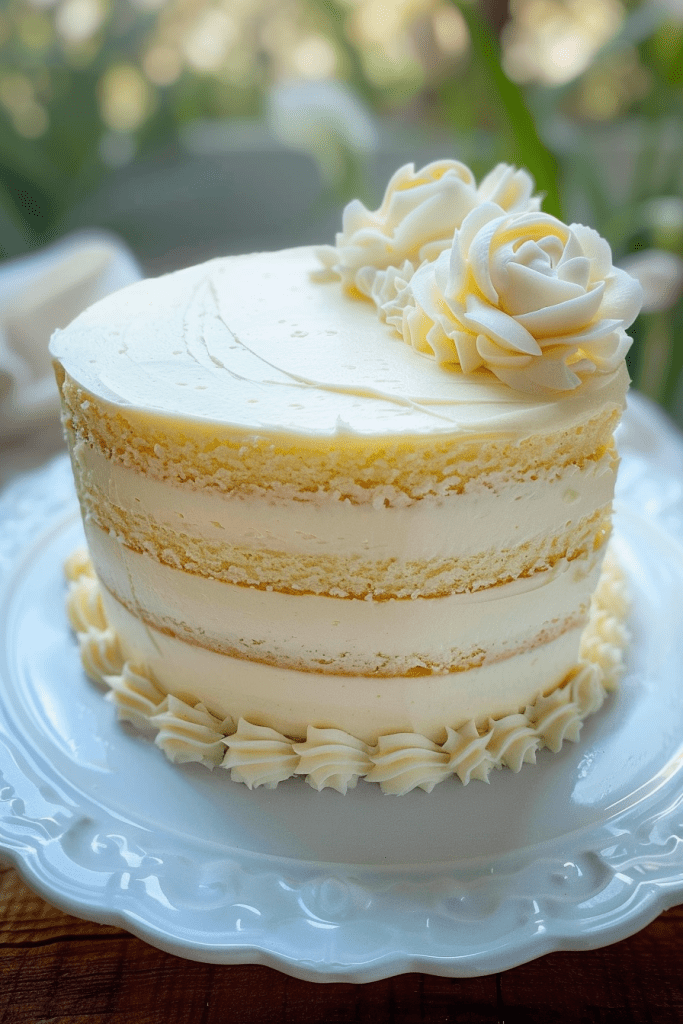
I’m thrilled to introduce my delectable vanilla velvet cake recipe! This cake is a delightful blend of moistness, softness, and a melt-in-your-mouth texture, all infused with a rich vanilla flavor. A vanilla velvet cake is a true crowd-pleaser, perfect for any occasion.
The secret to the distinct taste and texture of this cake lies in the careful combination of ingredients. Each bite offers a velvety smoothness that will leave you craving more. If you’ve been on the hunt for a go-to vanilla cake recipe that never fails to impress, look no further.
Ingredients
Creating the perfect vanilla velvet cake requires a careful selection of ingredients that blend harmoniously to deliver a moist, soft, and flavorful experience. Let’s dive into the components that make this cake a crowd-favorite.
Cake Components
Prepare to elevate your baking game with the following cake components:
- 1 cup (240g) heavy cream
- 1/4 cup (29g) powdered sugar
- 1 teaspoon vanilla extract
- 12 ounces brick-style cream cheese, softened (340 grams)
- 3/4 cup unsalted butter, softened (175 grams)
- 3 cups powdered sugar (360 grams)
- 1 1/2 teaspoons pure vanilla extract
Equipment Required
When preparing a delicious vanilla velvet cake, having the right equipment is essential to ensure a smooth baking process and perfect results. Here are the tools and equipment you will need:
- Two 9-inch round cake pans
- Parchment paper
- Stand mixer with paddle attachment or handheld mixer
- Mixing bowls (various sizes)
- Whisk
- Measuring cups and spoons
- Spatula
- Cooling rack
- Oven set to 350°F (177°C)
- Non-stick cooking spray
- Sifter (for dry ingredients)
- Piping bag and tips (optional for decorating)
- Cake stand or serving plate
Make sure to gather and prepare all the necessary equipment before starting the baking process. Having everything ready will make the baking experience more enjoyable and help you achieve a perfect vanilla velvet cake.
Preparation Steps
Now that we have all our ingredients ready, it’s time to start preparing the delicious vanilla velvet cake. Let’s get started with the preparation steps.
Prep the Ingredients
- Heavy Cream: Measure out the heavy cream needed for the recipe.
- Powdered Sugar: Prepare the powdered sugar as required for the cake batter.
- Cream Cheese: Ensure the cream cheese is softened and ready to incorporate into the mixture.
- Vanilla Extract: Have the vanilla extract measured and set aside for use.
- Oven Settings: Preheat the oven to 350°F (177°C) to ensure it’s ready for baking.
- Pan Preparation: Take the time to prepare the cake pans by greasing and lining them for easy cake removal.
- Timer Check: Make sure to set a timer so that the oven is at the correct temperature when it’s time to bake the cake.
Directions
Let’s dive into the steps to create this delightful vanilla velvet cake recipe!
Mix the Dry Ingredients
In a large mixing bowl, sift together 2 cups of all-purpose flour, 1 teaspoon of baking soda, 1 teaspoon of baking powder, and 1 teaspoon of salt. Whisk the dry ingredients until well combined and set the bowl aside.
Combine the Wet Ingredients
In a separate bowl, cream together 1 cup of softened unsalted butter, 1 ½ cups of granulated sugar, and 2 large eggs using a hand mixer or stand mixer. Add 1 cup of buttermilk and 1 tablespoon of white vinegar, mixing until smooth. Finally, stir in 1 tablespoon of vanilla extract.
Combine Wet and Dry Mixes
Gradually add the dry ingredients to the wet mixture, gently folding the flour into the batter until just combined. Be careful not to overmix to maintain the cake’s light texture and rise.
Bake the Cake
Preheat your oven to 350°F (177°C) and prepare two 9-inch cake pans by greasing them with butter and lining the bottoms with parchment paper. Divide the batter evenly between the pans and smooth the tops. Bake for 25-30 minutes or until a toothpick inserted into the center comes out clean. Allow the cakes to cool in the pans for 10 minutes before transferring them to a wire rack to cool completely.
Frosting Recipe
Creating a delicious frosting is key to complementing the flavors of a vanilla velvet cake. Here’s how you can make a scrumptious vanilla buttercream frosting to top off your cake:
Making Vanilla Buttercream Frosting
To prepare the vanilla buttercream frosting, follow these simple steps:
Ingredients:
- 1 cup unsalted butter, softened
- 4 cups powdered sugar
- 1 tablespoon vanilla extract
- 2-4 tablespoons heavy cream or milk
- In a mixing bowl, beat the softened butter until creamy.
- Gradually add the powdered sugar, one cup at a time, and continue mixing until well combined and smooth.
- Add the vanilla extract to the mixture and beat until incorporated.
- Incorporate the heavy cream or milk, one tablespoon at a time, until you reach your desired consistency.
- Beat the frosting on high speed for a few minutes until light and fluffy.
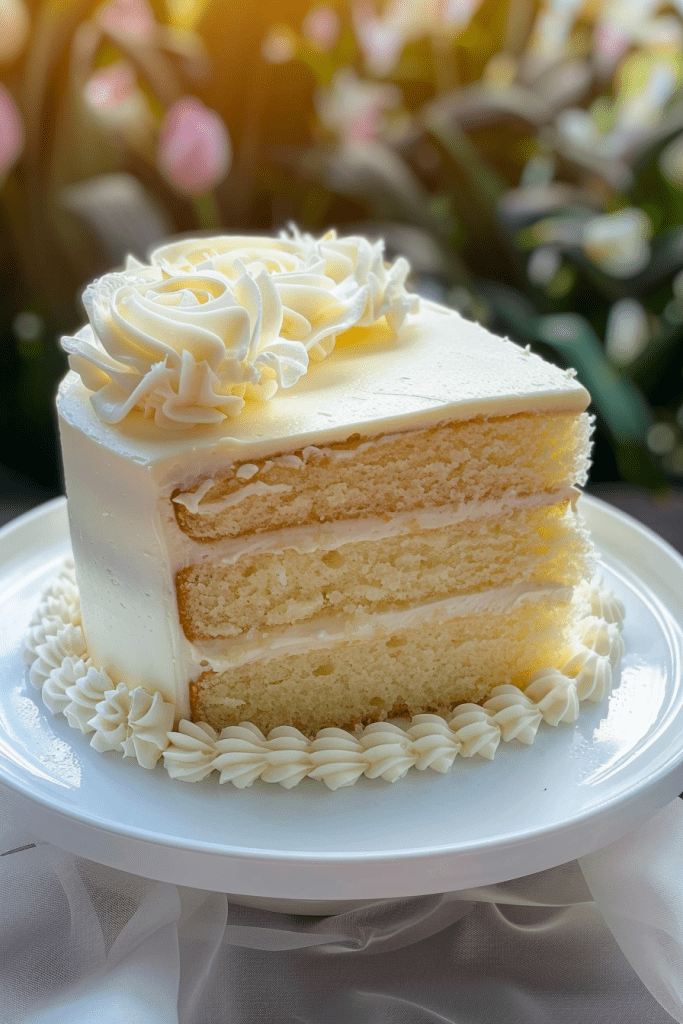
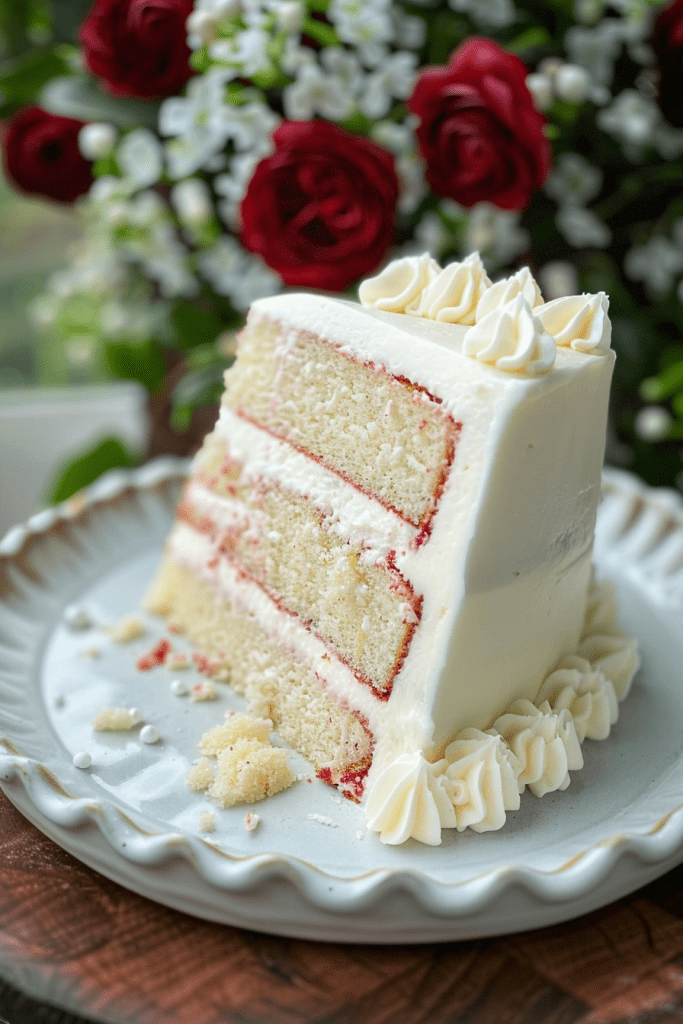
Assembling the Cake
After baking the delightful vanilla velvet cake layers and preparing the luscious buttercream frosting, it’s time to assemble this indulgent treat. Now, let’s walk through the process of layering the cakes and frosting them to create a masterpiece.
Layering the Cakes
- Ensure your vanilla velvet cake layers have thoroughly cooled before starting the assembly process.
- Place the first cake layer on a cake plate or pedestal.
- Use a disposable piping bag or ziplock bag with the tip snipped away to pipe a buttercream dam about ¼ to ½ inch from the edge of the cake.
- Spread the whipped cream filling within the dam, ensuring it stays within the boundaries.
- Repeat the process with the second cake layer and top it with the third layer.
- Fill in any gaps between the cake layers with additional buttercream for a seamless finish.
- Apply a crumb coat by spreading a thin layer of frosting on the assembled cake.
- Chill the cake in the freezer for 15-20 minutes or longer in the refrigerator to allow the frosting to set.
- Once the crumb coat is set, proceed to apply the final coat of frosting for a flawless look.
- Smooth out the frosting for a clean finish on the outside of the cake.
With the cakes layered and frosted, your vanilla velvet cake is now ready to be enjoyed.
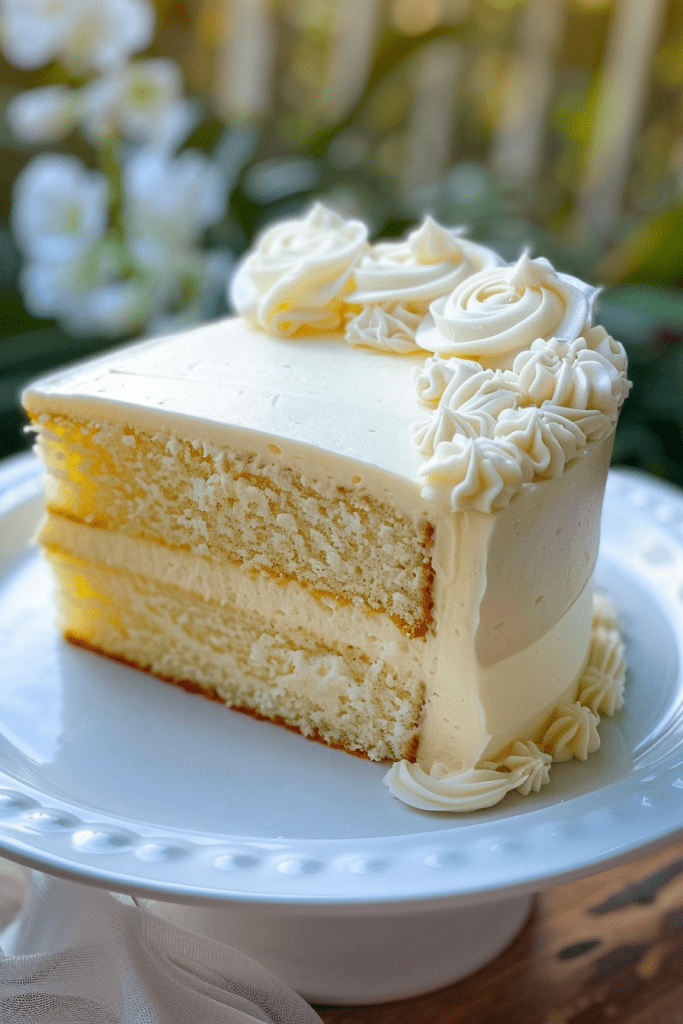
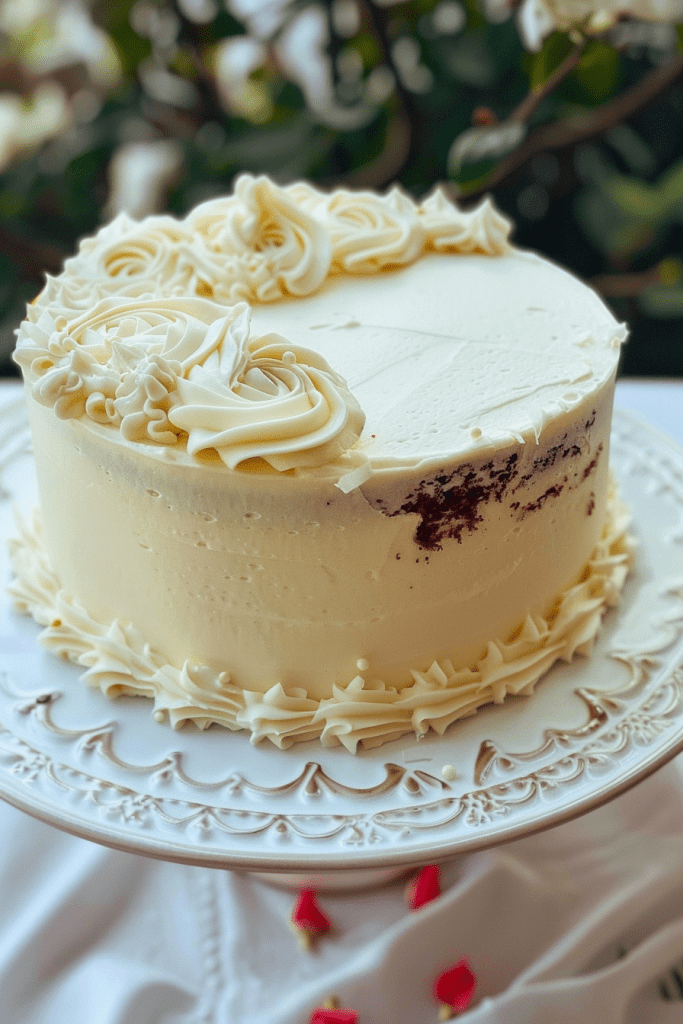
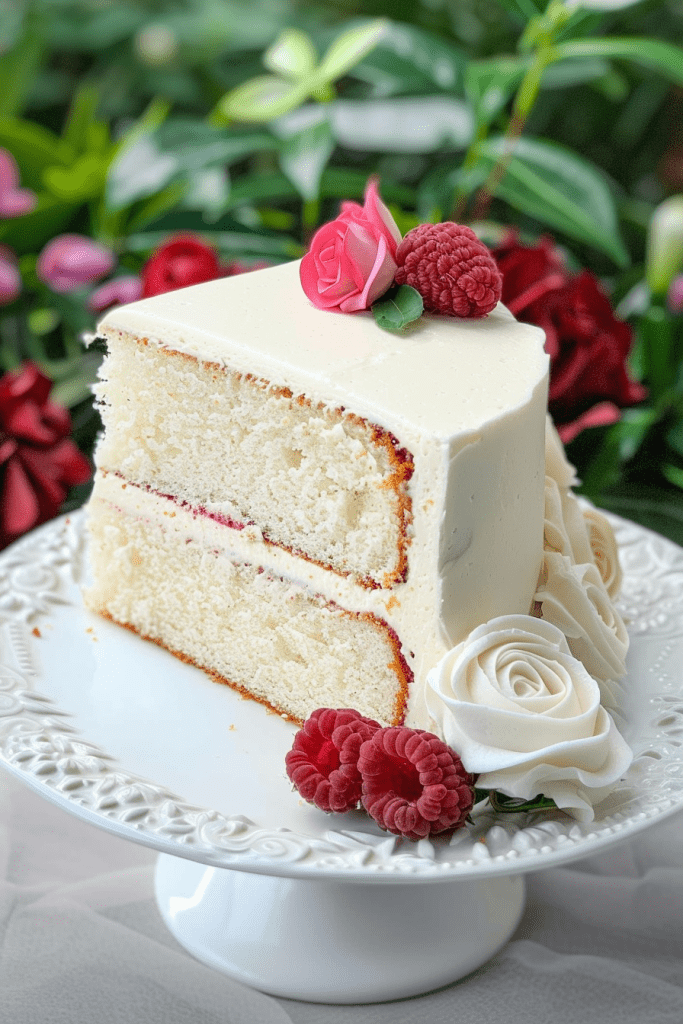
Decoration Ideas
Decorating a vanilla velvet cake can elevate its presentation and make it even more appealing. Here are some simple garnishing techniques and advanced decorating tips to help you create a stunning vanilla velvet cake that not only tastes delicious but looks impressive as well.
Simple Garnishing Techniques
- Powdered Sugar Dusting: A classic and easy way to decorate a vanilla velvet cake is by dusting the top with a sprinkle of powdered sugar. This adds a touch of elegance and contrast to the rich red color of the cake.
- Fresh Berries: Arrange a handful of fresh berries such as strawberries, raspberries, or blueberries on top of the cake for a pop of color and a fruity contrast to the vanilla flavor.
- Chocolate Shavings: Create delicate chocolate shavings using a vegetable peeler or grater and sprinkle them over the frosted cake. The chocolate adds a decadent touch to the vanilla velvet cake.
- Piped Buttercream Flowers: Use a piping bag and a small star tip to create beautiful buttercream flowers on top of the cake. Roses, daisies, or any floral design can add a whimsical and artistic element to the cake.
- Fondant Accents: If you’re looking to take your decorating skills up a notch, consider using fondant to create intricate designs or shapes to adorn the cake. From delicate bows to intricate patterns, fondant allows for endless creativity.
- Edible Gold Leaf: For a touch of luxury and glamour, adorn the cake with edible gold leaf. Whether applied in small accents or covering an entire tier, gold leaf adds a sophisticated and opulent touch to the vanilla velvet cake.
With these decoration ideas, you can turn your vanilla velvet cake into a masterpiece that not only tastes heavenly but also captivates with its visual appeal. Let your creativity shine and customize your cake to suit any occasion or celebration.
Storage and Serving
How to Store
After enjoying a delightful slice of vanilla velvet cake, it’s essential to store any leftovers properly to maintain freshness. Place the cake in an airtight container or cover it tightly with plastic wrap. Store the cake in the refrigerator for up to 4 days to ensure it stays moist and delicious.
Best Serving Practices
To serve the vanilla velvet cake at its best, allow it to come to room temperature for about 30 minutes before slicing. This will enhance the flavors and textures of the cake, giving you a more enjoyable eating experience. Serve the cake on a decorative platter or cake stand to showcase its beauty, and consider adding a dollop of whipped cream or a scoop of vanilla ice cream for an extra indulgent touch. Enjoy this luscious dessert with your loved ones for a truly memorable treat.
Conclusion
Creating a show-stopping vanilla velvet cake is not just about taste but also about visual appeal. By following the steps outlined in this article, you can craft a decadent dessert that will leave a lasting impression. From the moist layers to the creamy frosting and decorative touches, every aspect contributes to a delightful experience. Remember, presentation is key, so don’t shy away from experimenting with different decorations to make your cake truly unique. With proper storage and serving techniques, you can ensure that every slice is as fresh and delicious as the first. So go ahead, unleash your creativity, and treat yourself and your loved ones to a slice of vanilla velvet perfection.