
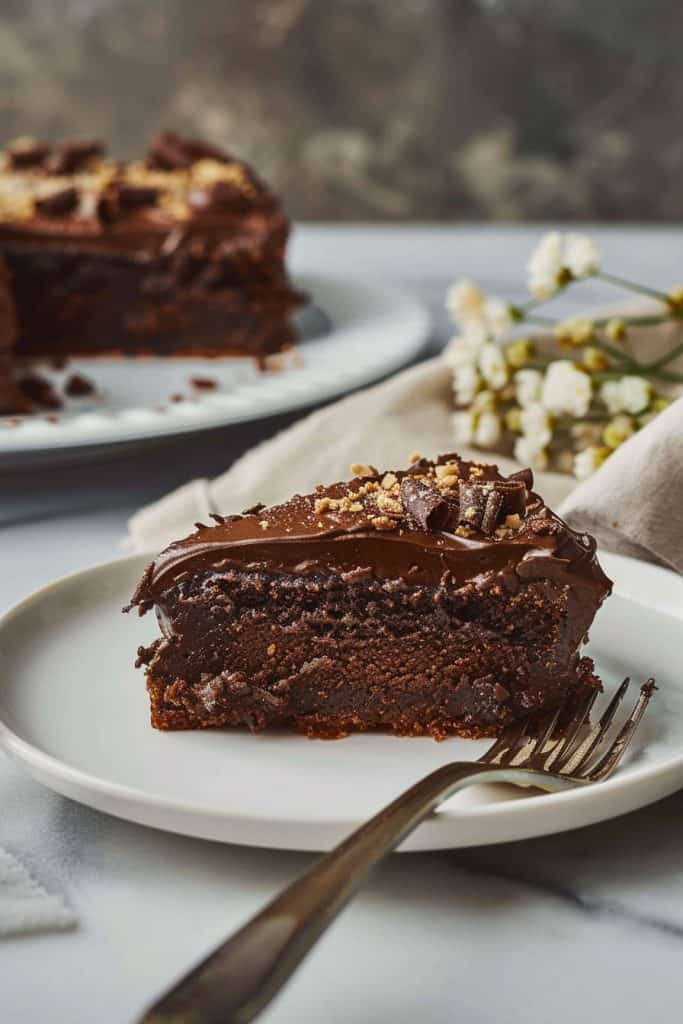
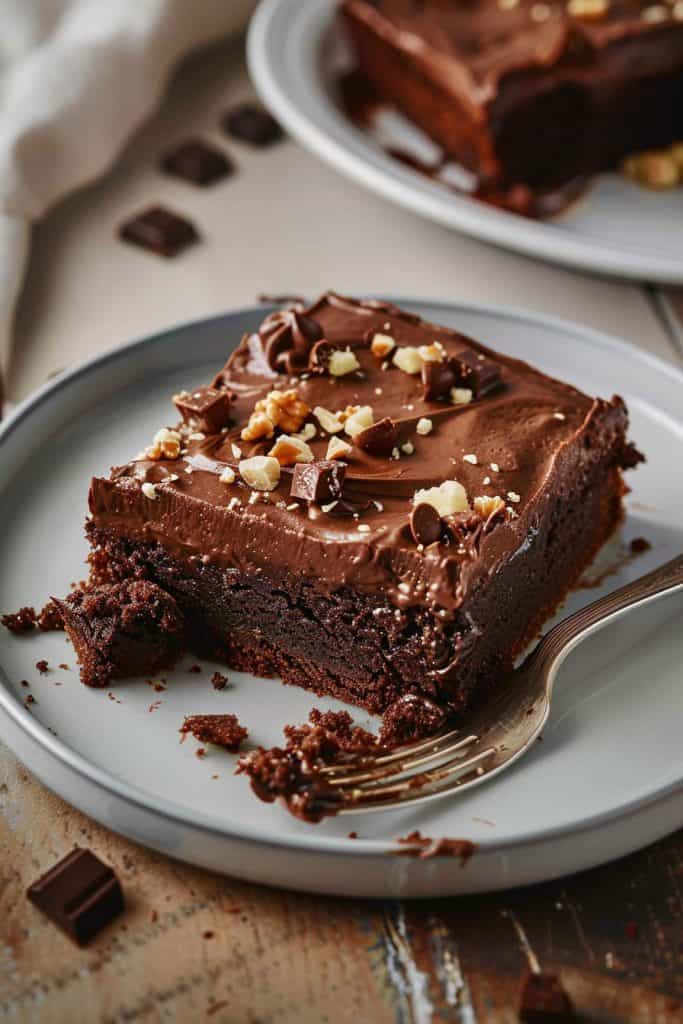
There’s something undeniably comforting about a Texas Chocolate Sheet Cake. This Southern classic, known for its rich, moist texture and decadent chocolate frosting, has a way of bringing people together. Whether it’s a family gathering, a potluck, or just a regular Tuesday, this cake always steals the show.
The origins of this delightful dessert trace back to the heart of Texas, where everything is bigger, including the flavors. The beauty of this cake lies in its simplicity and the fact that it can be whipped up with pantry staples. You’ll love how the buttermilk in the batter adds a tangy depth, perfectly balancing the sweetness of the chocolate.
Ready to dive into a slice of Texas tradition? Let’s get started on creating this crowd-pleaser that’s sure to become a favorite in your home.
Texas Chocolate Sheet Cake Ingredients
Let me guide you through the list of ingredients you’ll need to bake a sumptuous and crowd-pleasing Texas Chocolate Sheet Cake. The recipe comprises two parts: the cake and the frosting.
For the Cake
- 2 cups all-purpose flour
- 2 cups granulated sugar
- 1 teaspoon baking soda
- 1/2 teaspoon salt
- 1 cup unsalted butter
- 1/4 cup unsweetened cocoa powder
- 1 cup water
- 1/2 cup buttermilk, at room temperature
- 2 large eggs, at room temperature
- 1 teaspoon vanilla extract
- 1/2 cup unsalted butter
- 1/4 cup unsweetened cocoa powder
- 1/4 cup buttermilk
- 3 1/2 cups powdered sugar
- 1 teaspoon vanilla extract
- 1 cup chopped pecans (optional)
With these ingredients, you are ready to dive into making the iconic Texas Chocolate Sheet Cake. Let’s get started on creating a delightful dessert.
Tools and Equipment Needed
Before diving into the recipe for a Texas Chocolate Sheet Cake, it’s essential to gather the right tools and equipment. Having everything ready will make the entire baking process smoother and more enjoyable.
- Baking Sheet (18×13 inches): This size is perfect for a classic sheet cake, ensuring even baking and the right cake thickness.
- Mixing Bowls: You’ll need a few mixing bowls—one large for the cake batter and one medium for the frosting.
- Whisk: Useful for combining dry ingredients and achieving a smooth batter.
- Hand Mixer or Stand Mixer: A hand mixer or stand mixer helps mix the cake batter and frosting thoroughly to achieve a smooth, creamy texture.
- Measuring Cups and Spoons: Accurate measurements are key to baking success. Ensure you have both liquid and dry measuring cups, along with measuring spoons.
- Spatula: A silicone spatula is necessary for scraping down the sides of your mixing bowls and spreading the batter evenly in the baking sheet.
- Saucepan: A medium-sized saucepan is required to prepare the chocolate frosting.
- Cooling Rack: Integral for allowing the cake to cool properly and for even frosting application.
- Offset Spatula: This help spread the frosting evenly on the cake once it has cooled.
- Parchment Paper: Lining your baking sheet with parchment paper ensures the cake doesn’t stick and makes for easier cleanup.
- Toothpicks: Useful for testing the doneness of your cake by ensuring it comes out clean.
With these tools and equipment on hand, you’ll be well-prepared to create a delectable Texas Chocolate Sheet Cake that’s sure to impress.
How to Make Texas Chocolate Sheet Cake
Making a Texas Chocolate Sheet Cake is an exciting endeavor that yields a rich, chocolaty delight. Follow these steps for a seamless baking experience.
Prep
First, preheat your oven to 350°F (175°C). Prepare a 13×18-inch baking sheet by greasing it lightly and lining it with parchment paper. This ensures easy removal of the cake once baked.
In a large bowl, sift together 2 cups of all-purpose flour and 2 cups of granulated sugar. Set aside.
In a separate, smaller bowl, mix 1 teaspoon of baking soda, 1/2 teaspoon of salt, and 1/2 cup of buttermilk. Set this mixture aside as well.
Cook
In a medium saucepan, melt 1 cup (2 sticks) of unsalted butter over medium heat. Once melted, add 1 cup of water and 1/4 cup of unsweetened cocoa powder. Bring this to a boil, stirring continuously until the mixture is smooth. Remove from heat and allow it to cool slightly.
Slowly pour the warm chocolate mixture into the large bowl with the dry ingredients, whisking continuously. Add the buttermilk mixture, followed by 2 large eggs and 1 teaspoon of vanilla extract, whisking to combine completely.
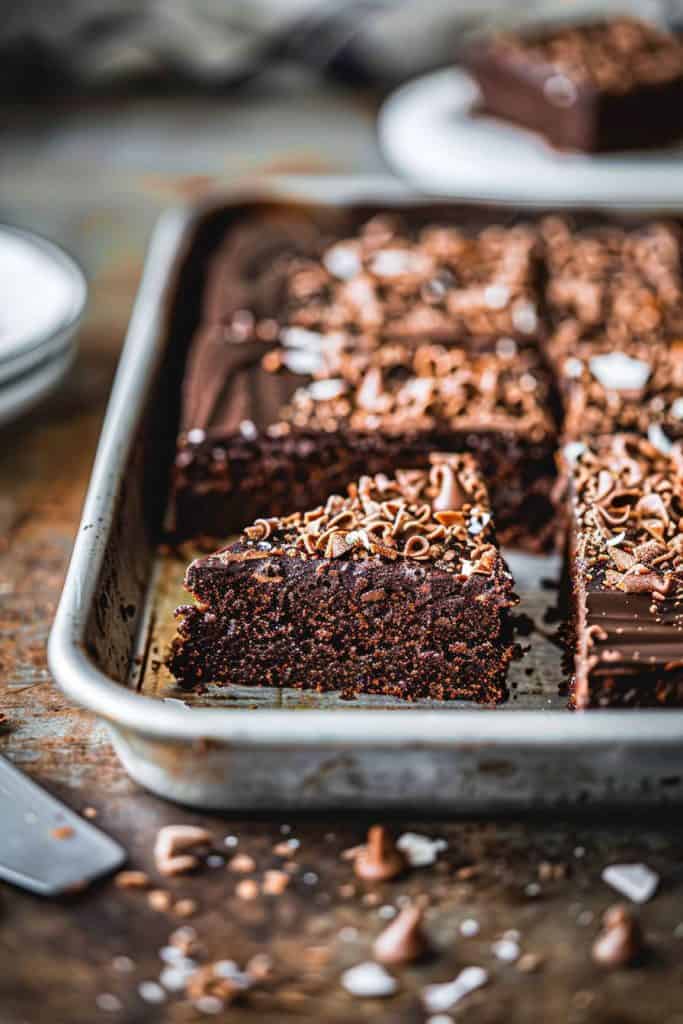
Pour the batter into the prepared baking sheet, spreading it evenly with a spatula. Bake for 20 minutes, or until a toothpick inserted into the center comes out clean.
Make the Frosting
While the cake bakes, make the frosting. In a medium saucepan, melt 1/2 cup (1 stick) of unsalted butter over medium heat. Add 1/4 cup of unsweetened cocoa powder and 6 tablespoons of milk, stirring constantly.
Bring the mixture to a boil, then remove from heat. Gradually whisk in 4 cups of powdered sugar until the frosting is smooth and lump-free. Finally, stir in 1 teaspoon of vanilla extract and 1 cup of chopped pecans (optional) for added texture and flavor.
Assemble and Serve
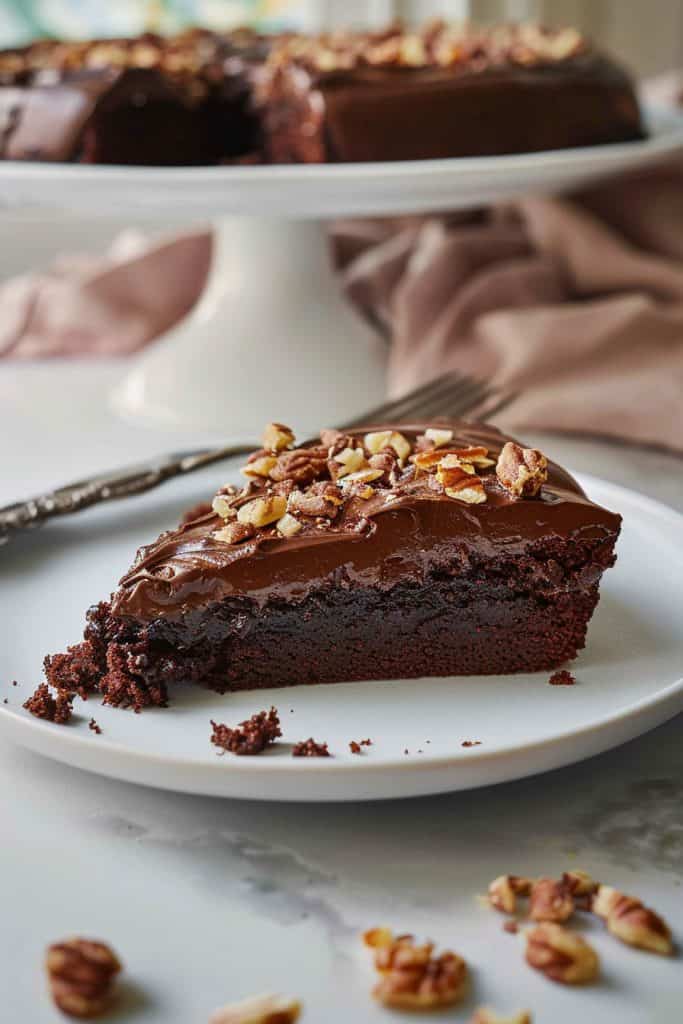
Once the cake is out of the oven, let it cool slightly on a cooling rack for about 10 minutes. While still warm, pour the frosting over the top, spreading it with an offset spatula to cover the entire cake evenly. Allow the frosting to set before slicing the cake into squares.
Serve the Texas Chocolate Sheet Cake warm or at room temperature, and enjoy the rich, delectable flavors that make it a beloved Southern treat.
Tips for the Best Texas Chocolate Sheet Cake
Creating the perfect Texas Chocolate Sheet Cake is about mastering a few key details. Here are my essential tips to ensure your cake is the best it can be.
Use Fresh Ingredients
Always opt for fresh ingredients, especially when it comes to baking powder, baking soda, and cocoa powder. Fresh ingredients make a significant difference in flavor and texture.
Measure Accurately
Baking is a science, so precise measurements are crucial. Use a kitchen scale for dry ingredients and ensure your measuring cups are leveled off for accuracy.
Don’t Overmix
When combining the wet and dry ingredients, mix just until they are incorporated. Overmixing the batter can lead to a dense, tough cake instead of a light and tender one.
Preheat Your Oven
Ensure your oven is fully preheated before you place the cake inside. This ensures even baking and helps the cake rise properly. Use an oven thermometer to check that your oven is at the correct temperature.
Prepare Your Pan Properly
Grease your baking sheet well and line it with parchment paper for easy removal. This prevents the cake from sticking and makes cleanup a breeze.
Monitor Baking Time
Keep an eye on the cake as it bakes. Ovens can vary, so check for doneness a few minutes before the suggested baking time. Use a toothpick to test the center; it should come out clean or with a few crumbs.
Perfect the Frosting
For the frosting, use high-quality cocoa powder and never rush the melting process. Combine and melt the butter and cocoa on medium heat to prevent burning. Pour the hot frosting over the warm cake to allow it to seep in, creating a luscious and moist texture.
Let It Cool
Allow the cake to cool completely on a wire rack before cutting. This helps set the frosting and makes slicing easier. Plus, it ensures that the flavors develop fully for the best taste.
Serve Fresh
While the Texas Chocolate Sheet Cake can be stored for several days, it’s best enjoyed fresh. The texture and flavor are at their peak when freshly made.
How to Store Texas Chocolate Sheet Cake
Room Temperature Storage
- Cool the Cake Completely: Allow the cake to cool entirely at room temperature before storing. This prevents condensation from forming, which can make the cake soggy.
- Cover the Cake: Use plastic wrap or foil to cover the cake directly on the baking sheet. Ensure it is completely covered to keep out air and to retain moisture.
- Storage Duration: At room temperature, the cake will stay fresh for up to 3 days. Keep it in a cool, dry place away from direct sunlight.
Refrigerator Storage
- Initial Cooling: Like with room temperature storage, let the cake cool completely to avoid condensation.
- Wrap Tightly: Wrap the cake or slices in plastic wrap or place them in airtight containers. This prevents the cake from drying out.
- Refrigerate: Store the wrapped cake in the refrigerator. It can stay fresh for up to 1 week. Bring it to room temperature before serving for the best flavor.
- Prepare the Cake: After the cake has cooled, cut it into portions if desired for easier thawing later.
- Wrap for Freezing: Wrap each portion or the whole cake tightly in plastic wrap, then cover with a layer of aluminum foil or place in a freezer-safe bag. This double-layer protects against freezer burn.
- Label and Freeze: Label with the date and type of cake. The Texas Chocolate Sheet Cake can be frozen for up to 3 months.
- Thawing: To thaw, place the cake in the refrigerator overnight or let it sit at room temperature until fully thawed. For best results, allow it to come to room temperature before serving to enjoy its full flavor and texture.
Can You Freeze Texas Chocolate Sheet Cake?
Yes, you can freeze Texas Chocolate Sheet Cake to extend its shelf life and enjoy it later. Freezing is a great option if you have leftovers or want to prepare the cake in advance. Here are the steps to properly freeze your Texas Chocolate Sheet Cake and ensure it maintains its delightful taste and texture:
Freezing the Cake
- Cool the Cake Completely: Allow the Texas Chocolate Sheet Cake to cool entirely on a wire rack. This step is crucial to avoid condensation, which can cause freezer burn.
- Cut Into Portions: Slice the cake into individual portions. This makes it easier to thaw and reduces waste since you can take out only what you need.
- Wrap Tightly: Use plastic wrap to tightly cover each piece of cake. Double wrapping ensures maximum protection. After wrapping with plastic, cover the pieces with aluminum foil for an extra layer of defense against freezer burn.
- Label and Date: Use a permanent marker to label and date each wrapped piece. This will help you keep track of how long the cake has been frozen.
- Store in Freezer: Place the wrapped cake portions in a single layer in the freezer, ensuring they do not touch each other until fully frozen. Once frozen solid, you can store them in a freezer-safe airtight container or a heavy-duty freezer bag to save space.
Thawing the Cake
- Remove Wrapping: Take out the desired number of cake pieces from the freezer and remove the aluminum foil and plastic wrap.
- Thaw at Room Temperature: Place the cake on a plate and let it thaw at room temperature. This usually takes about 2-3 hours, depending on the size of the pieces.
- Serve and Enjoy: Once thawed, the cake is ready to be enjoyed! If the frosting appears slightly wet or sticky, allow it to air dry for a few minutes before serving.
- Avoid Frosted Freezing: If possible, freeze the cake without frosting and add it fresh when ready to serve. This keeps the frosting’s texture optimal.
- Consume Within Three Months: For the best quality, consume the frozen Texas Chocolate Sheet Cake within three months. Beyond this time, the texture may deteriorate.
By following these steps, you can freeze your Texas Chocolate Sheet Cake effectively, preserving its deliciousness for future indulgence.
Conclusion
Mastering the Texas Chocolate Sheet Cake is a rewarding experience that brings a touch of Southern charm to any occasion. By following the simple recipe and expert tips, you’ll create a delicious treat that’s sure to impress. Proper storage, whether at room temperature or in the freezer, ensures your cake remains fresh and delectable. Remember to label and thaw correctly to enjoy every bite. With these guidelines, you can savor the rich flavors of this classic dessert anytime you desire. Happy baking!