
If you’re looking for a cheesecake that’s light, airy, and packed with flavor, then my Ricotta Cheesecake recipe is exactly what you need. It’s an Italian-inspired twist on the classic cheesecake, made with ricotta cheese for a slightly sweet and creamy texture that’s lighter than the traditional cream-cheese-based versions. The tangy zest of lemon balances the sweetness perfectly, and a buttery graham cracker crust provides that crunchy base we all love.
In this step-by-step recipe, I’ll guide you through how to prepare a ricotta cheesecake that’s topped with fresh, juicy berries and a delicious apricot jelly glaze. Trust me, this dessert will quickly become a staple in your kitchen, ready to impress at any occasion! Let’s dive into it.

Ingredients: Your Ricotta Cheesecake Essentials
Before we get started, let’s make sure we have everything at hand. Here’s a list of what you’ll need to create this scrumptious Ricotta Cheesecake, from the buttery crust to the fruity topping:
For the Crust:
- 1 cup graham cracker crumbs
- ¼ cup granulated sugar
- ¼ cup butter, melted
For the Cheesecake Filling:
- 1 cup granulated sugar
- 1 tablespoon lemon zest (the secret to a lovely citrus undertone!)
- 32 ounces ricotta cheese (room temperature)
- 1 teaspoon pure vanilla extract
- ¼ teaspoon salt
- 4 eggs (room temperature)
Topping (use your favorite fruits!):
- 1-1/2 cups fresh strawberry slices and/or fresh whole raspberries
- 2 cups fresh blueberries
- ¼ cup apricot jelly, heated slightly for a gloss finish
Kitchen Tools Required:
Make sure you have the following tools handy:
- 9-inch springform pan
- Stand mixer or hand mixer
- Parchment paper
- Nonstick spray
- Baking sheets and cooling racks
With the ingredients and tools at your fingertips, we’re ready to start creating!
Preparing the Perfect Crust for Ricotta Cheesecake
A cheesecake is only as good as its foundation, and this graham cracker crust is the ideal base for the light and creamy ricotta filling. It adds both texture and a delicious buttery flavor to complement the smooth cheesecake. We want to create a sturdy yet tender crust that holds its shape and pairs well with the ricotta filling without overpowering it.
Step-by-Step Guide to Making the Crust:
- Preheat Your Oven:
Before anything else, preheat your oven to 350°F (175°C). While it heats up, let’s prepare the springform pan. - Prepare Your Springform Pan:
Spray the bottom and sides of a 9-inch springform pan with nonstick cooking spray. I always recommend also lining the bottom with a piece of parchment paper. This step ensures that your cheesecake will easily come out of the pan without sticking. - Mix the Crust Ingredients:
In a medium-sized bowl, combine 1 cup of graham cracker crumbs with ¼ cup of granulated sugar. Pour in ¼ cup of melted butter and stir until the mixture reaches a “wet sand” consistency, where the crumbs are evenly coated in butter and lightly sticky. - Press and Bake:
Transfer the crumb mixture into the prepared springform pan. Use your fingers or the bottom of a flat glass to firmly and evenly press the crumbs into the base of the pan, and gently up the sides by about an inch. Once everything is pressed evenly, pop the pan into the preheated oven and bake for 7 minutes . - Cool the Crust:
After baking, remove the crust from the oven and place it on a wire rack to cool while we move on to making the luscious ricotta filling.
Making the Luscious Ricotta Filling and Baking the Cheesecake
Now that your crust has cooled, it’s time to focus on the star of the show— the ricotta filling. This filling is delightfully smooth and slightly tangy, with a light, fluffy texture that will make every bite melt in your mouth. The combination of ricotta cheese with fresh lemon zest creates a refreshing yet creamy sensation that’s different from traditional cheesecakes.
Step-by-Step Guide to Preparing the Filling:
- Prep Your Ingredients:
Make sure your ricotta cheese and eggs are at room temperature. This ensures a creamier and more even filling. If you’re in a hurry, you can let them sit at room temperature for about 30 minutes before starting. - Infuse Sugar with Lemon Zest:
In a large mixing bowl or the bowl of your stand mixer, combine 1 cup granulated sugar with 1 tablespoon lemon zest . Use your fingertips to rub the zest into the sugar until it’s fragrant and slightly moist. This step really enhances the lemony flavor, making your cheesecake even more aromatic! - Mix the Ricotta, Vanilla, and Salt:
Add 32 ounces of ricotta cheese , 1 teaspoon pure vanilla extract , and ¼ teaspoon salt to the bowl with your lemon-sugar mixture. Using the paddle attachment of a stand mixer—or an electric hand mixer on medium speed—beat the mixture until it becomes smooth and well-combined. - Add the Eggs One at a Time:
Next, add the 4 eggs one at a time, continuing to mix on medium speed after each egg is added. This ensures the filling remains smooth and each egg gets incorporated seamlessly into the batter. - Pour the Filling into the Prepared Crust:
Once the batter is smooth, pour it straight into your cooled graham cracker crust. Use a spatula to spread the filling evenly for a smooth surface.
Baking the Ricotta Cheesecake:
- Set Your Oven Temp:
With the filling in place, lower the temperature of your preheated oven to 325°F (160°C) . A slower bake helps ensure the cheesecake sets perfectly without cracking or over-baking. - Bake Time:
Place the cheesecake in the middle of your preheated oven and bake for 1 hour 15 minutes to 1 hour 20 minutes (75 to 80 minutes). You’ll know it’s done when the center is just set, meaning it still has a slight jiggle to it but is mostly firm. Don’t worry if it looks a little wobbly in the middle—that’s perfectly normal! The cheesecake will firm up as it cools. - Cool the Cheesecake:
Once baked, remove the cheesecake from the oven. Set the pan on a cooling rack and let it cool completely at room temperature. - Chill in the Refrigerator:
Transfer the cooled cheesecake to the refrigerator to chill for at least 6 hours , but preferably overnight. This chilling step helps the flavors meld together and allows the texture to set into that creamy, dreamy consistency we’re aiming for.

Adding the Fresh Fruit and Glaze: The Final Touch
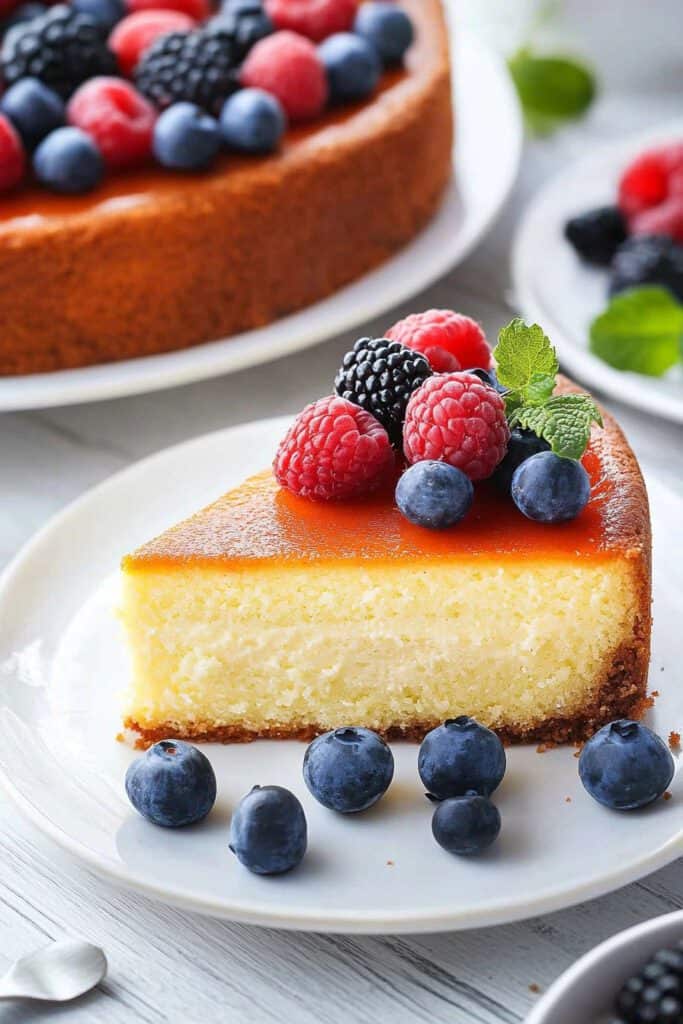
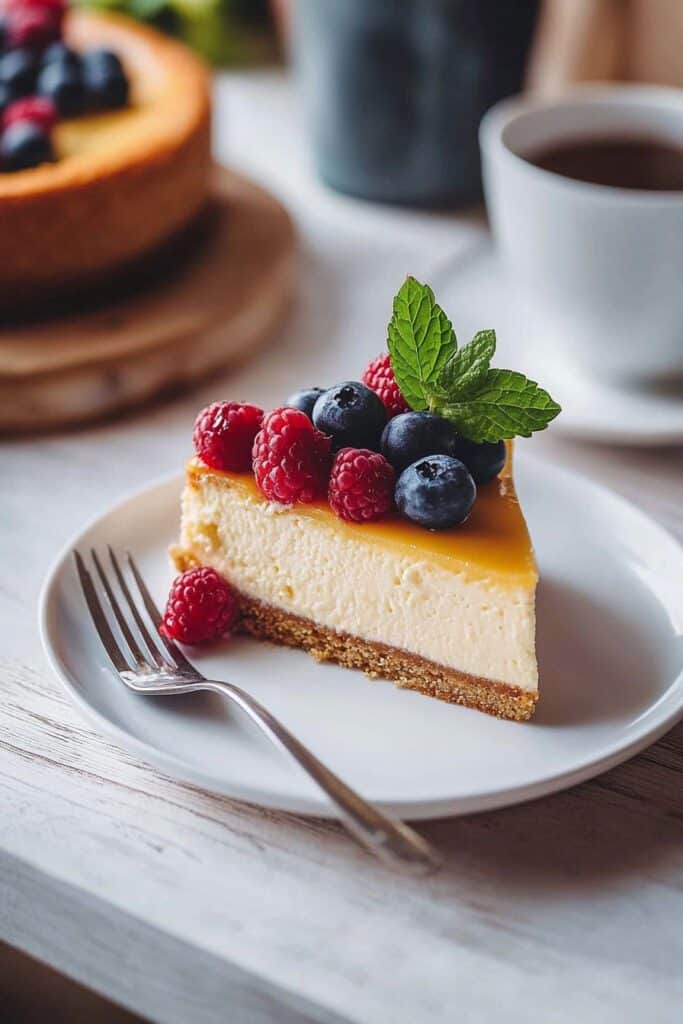
After your cheesecake has chilled for at least 6 hours (or overnight), it’s time for the grand finale: the toppings. We’re going to decorate the cheesecake with a selection of fresh berries and a shiny apricot jelly glaze for a sweet and glossy top. The combination of vibrant berries and jammy glaze adds a fresh, fruity flavor that perfectly complements the creamy ricotta filling.
Step-by-Step Guide to Topping Your Cheesecake:
- Prepare the Fruits:
For this recipe, I chose a mix of fresh strawberries (sliced or whole) , raspberries , and blueberries —but feel free to get creative with whatever fresh fruits you love! Wash your berries and allow them to drain so there’s no excess water. - Arrange the Berries:
Start by arranging 1½ cups of fresh strawberry slices and raspberries evenly over the top of the chilled cheesecake. You can create a circular pattern for a beautiful, symmetrical presentation or scatter them casually for a more rustic look. Follow by sprinkling 2 cups of fresh blueberries in the gaps, filling up any spots for a colorful, vibrant tapestry of fruit. - Heat the Apricot Jelly:
In a small saucepan or microwave-safe bowl, gently heat ¼ cup apricot jelly until it becomes slightly thinned out and easier to spread. This glaze will give the cheesecake that gorgeous, glossy finish you see in bakery windows. - Brush the Glaze Over the Fruits:
Using a pastry brush, gently brush the warm apricot jelly over the arranged fruits. The glaze will give the berries a beautiful shine and enhance their sweetness, while also helping them stick to the surface of the cheesecake. - Chill the Cheesecake to Set the Glaze:
After glazing, place the cheesecake back in the fridge for about 30 minutes to allow the glaze to set fully. During this time, everything comes together beautifully!
Serving Your Ricotta Cheesecake
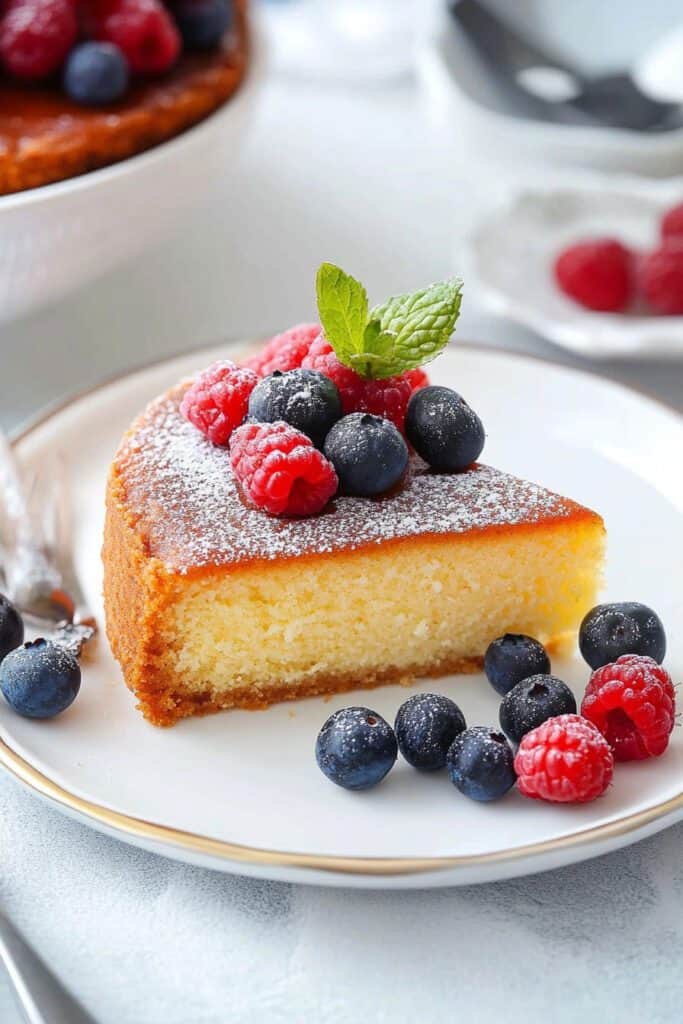
Now that your stunning Ricotta Cheesecake is topped with fresh, juicy berries and shimmering apricot glaze, it’s ready to be served! Carefully release the springform pan and slice your cheesecake into generous wedges. Each bite is a delightful experience—crunch from the graham cracker crust, silky ricotta filling with hints of lemon, and the bright, fruity burst from the berries.
Pro Tips for Serving:
- Use a long, sharp knife to slice the cheesecake, and wipe the knife clean between each cut to get clean, smooth slices.
- Serve chilled for best texture, but let it sit out for about 10 minutes before slicing to make it easier.
Storing Your Ricotta Cheesecake
If you have any leftovers (though that’s unlikely!), store your cheesecake in an airtight container in the fridge for up to 3 days . The fruit-topped cheesecake is best served fresh, but you can also freeze plain slices (without fruit) tightly wrapped in plastic wrap for up to 1 month for a sweet treat later on!
Conclusion: Celebrate with Each Bite
This Ricotta Cheesecake is more than just a dessert—it’s a showstopping centerpiece for any occasion. Whether it’s a weekend family gathering, a special dinner, or a holiday feast, this cheesecake adds that extra touch of sweetness and elegance to your table. By pairing the light, fluffy texture of ricotta with zesty lemon and fresh berries, you’ve just created a dessert that’s both refreshing and indulgent!
Now it’s your turn to dig in and enjoy. Feel free to experiment with different toppings or fruits to make it your own. Happy baking and, most importantly, happy eating! ???