
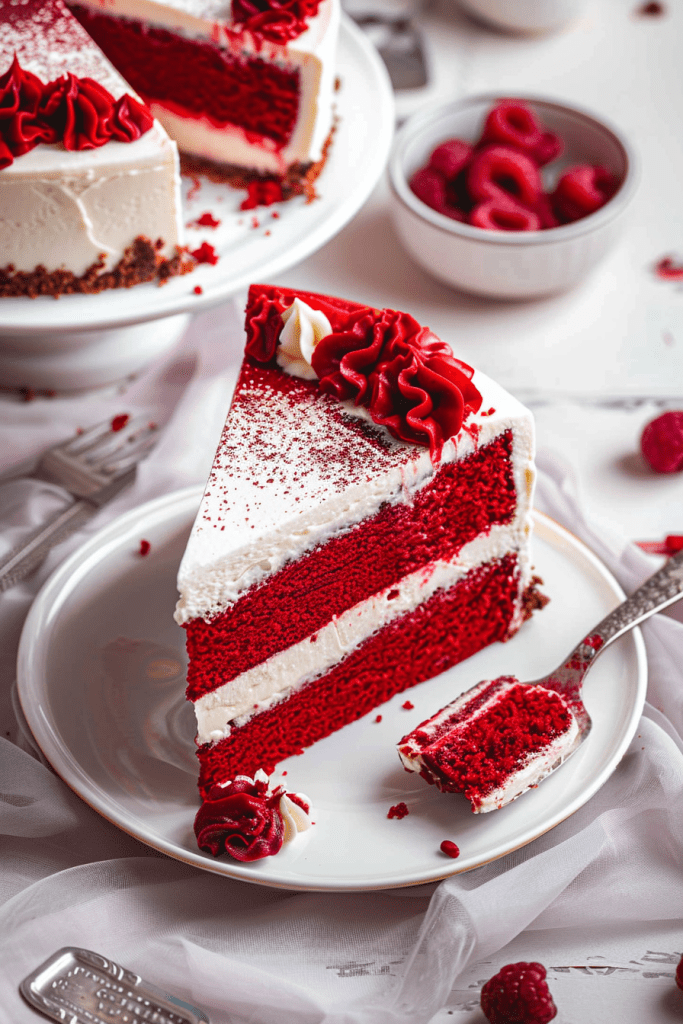
Craving the best of both worlds with a decadent twist? Indulge in the ultimate fusion of red velvet cake and creamy cheesecake with this irresistible Red Velvet Cheesecake recipe. Combining the rich flavors of red velvet with the velvety smoothness of cheesecake, this dessert is a true showstopper for any occasion.
Crafted with a rich, homemade red velvet cake base layer, this recipe elevates the classic cheesecake experience with a luscious baked cheesecake layer that’s rich, smooth, and oh-so-satisfying. Perfectly assembled and chilled, this dessert is a delightful creation that promises to impress even the most discerning taste buds.
Whether you’re a fan of the tangy goodness of red velvet desserts or the creamy indulgence of cheesecake, this Red Velvet Cheesecake offers the best of both worlds in every heavenly bite. Get ready to treat yourself to a slice of pure bliss with this delightful and creamy creation.

Ingredients
Creating a Red Velvet Cheesecake masterpiece requires the perfect blend of ingredients. Let’s start by gathering what we need for the Red Velvet Cake, Cheesecake, and Cream Cheese Frosting.
For the Cheesecake:
- 16 ounces cream cheese, at room temperature
- ½ cup (99 g) granulated sugar
- 1 tablespoon all-purpose flour
- Pinch salt
- ¼ cup (60 ml) heavy cream
- ½ teaspoon vanilla extract
- 2 eggs, at room temperature
For the Red Velvet Cake:
- ½ cup (113 g) unsalted butter, at room temperature
- 1½ cups (298 g) granulated sugar
- 2 eggs
- ¼ cup (26 g) + 1 tablespoon unsweetened cocoa powder
- 6 tablespoons red food coloring, liquid
- 1 teaspoon vanilla extract
- 1 cup (240 ml) buttermilk
- 2¼ cups (270 g) all-purpose flour
- 1 teaspoon baking soda
- 1 teaspoon salt
- 1 tablespoon distilled white vinegar
For the Cream Cheese Frosting:
- 1 cup (227 g) unsalted butter, at room temperature
- 4 cups (454 g) powdered sugar
- 2 teaspoons vanilla extract
- Pinch salt
- 16 ounces cream cheese, chilled and cut into 16 pieces
Equipment Needed
To prepare this delectable red velvet cheesecake recipe, you’ll need to ensure you have the following essential kitchen tools and equipment ready:
- 9-inch Springform Pan
- Electric Mixer
- Rubber Spatula
- Mixing Bowls
- Measuring Cups and Spoons
- Oven
- Wire Rack
- Cake Pans (two 9-inch round metal baking pans)
- Nonstick Baking Spray
- Parchment Paper
- Flour (for dusting pans)
- Cooling Rack
Having these tools on hand will help you create a perfect red velvet cheesecake with ease.
Prep Work
Before diving into the decadent creation of red velvet cheesecake, some essential prep work is needed to set the stage for this delightful dessert.
Preparing the Cake Pans
To ensure your red velvet cake layers come out perfectly, prepare the cake pans. Grease two 9-inch cake pans. Line the bottoms of the pans with a parchment round, butter the parchment paper, and then flour the pans. This step is crucial to prevent the cake from sticking and ensure a smooth removal process once baked. For the cheesecake, spray a 9-inch springform pan with non-stick cooking spray and line the bottom with a round of parchment paper.
Preparing the Cream Cheese
For a velvety smooth cheesecake filling, it’s crucial to use cream cheese that is at room temperature. Set out the required amount of cream cheese ahead of time. Softened cream cheese blends effortlessly with the other ingredients, resulting in a silky texture and consistent flavor throughout the cheesecake layer. Note that for the frosting, the cream cheese should be chilled.
Directions
Make the Cheesecake:
- Preheat oven to 350°F (175°C). Prepare the 9-inch springform pan as described in Prep Work.
- Using an electric mixer on medium-low speed, beat the cream cheese, sugar, flour, and salt until the mixture is creamy and no lumps of cream cheese remain, about 3 minutes.
- Scrape down the sides of the bowl, add the heavy cream and vanilla, and beat to combine.
- Beat in the eggs one at a time, beating for about 15 seconds before adding the next.
- Using a rubber spatula, mix a few times by hand to ensure that all of the ingredients are evenly incorporated.
- Pour the filling into the prepared springform pan and spread into an even layer.
- Bake until the cheesecake is set and does not jiggle, about 40 to 55 minutes.
- Remove from the oven and cool on a wire rack for at least 1 hour.
- Once the cheesecake has cooled to room temperature, place it in the freezer for at least 3 hours or overnight.
Make the Red Velvet Cake:
- Preheat oven to 350°F (175°C). Prepare the two 9-inch cake pans as described in Prep Work.
- On medium-high speed, cream the butter and sugar until light and fluffy, about 3 minutes.
- Turn the mixer to high and add the eggs one at a time, mixing for about a minute after each addition. Scrape down the bowl and beat until well incorporated.
- In a separate small bowl, mix together the cocoa powder, vanilla extract and red food coloring to make a thick paste. Add to the batter and mix on medium speed until completely combined. You may need to stop the mixer to scrape the bottom of the bowl, making sure that all the batter gets color.
- Reduce the mixer speed to low and slowly add half of the buttermilk. Add half of the flour and mix until combined. Scrape the bowl and repeat the process with the remaining buttermilk and flour. Beat on high until smooth.
- Again, reduce the mixer speed to low and add the salt, baking soda and vinegar. Turn to high and beat for another couple of minutes until completely combined and smooth.
- Divide the batter evenly between the two prepared cake pans and bake for about 30 minutes, or until a thin knife or skewer inserted into the center comes out clean.
- Cool for 10 minutes and then remove cakes from the pans and place them on a cooling rack to cool completely.
Make the Frosting:
- Using an electric mixer, beat the butter, powdered sugar, vanilla, and salt on low speed until smooth, then mix for an additional 2 minutes, scraping down the bowl as needed.
- Increase the speed to medium-low and add the chilled cream cheese one piece at a time and mix until smooth, then mix for an additional 2 minutes.
Assembly
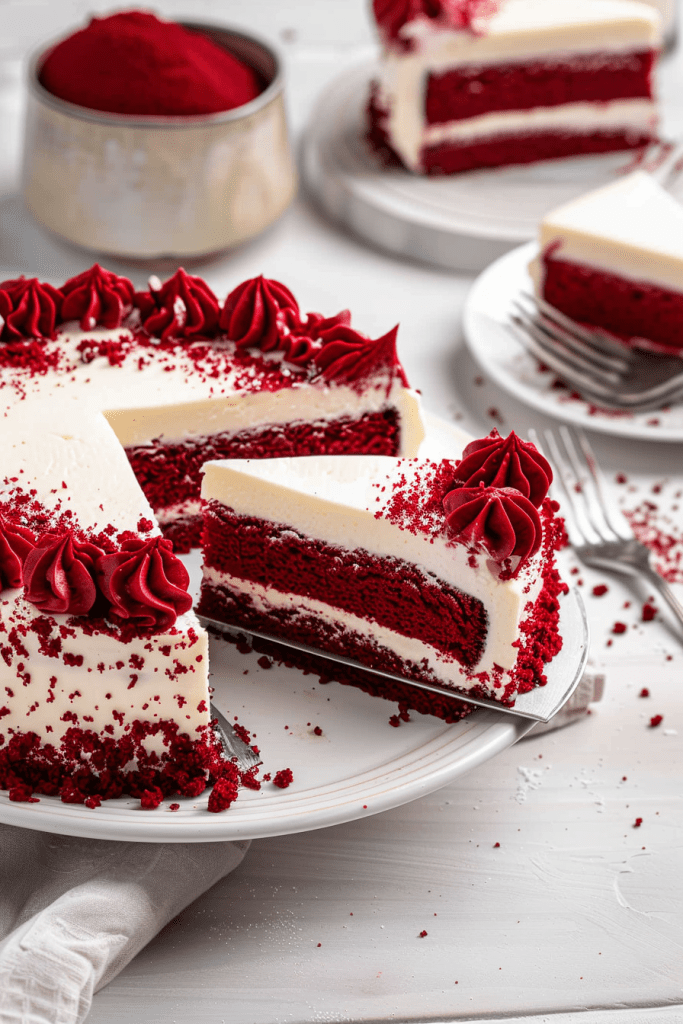
Assembling the red velvet cheesecake is where the magic happens. Layering the Cake and Cheesecake and Applying the Frosting require care to create a stunning dessert that tastes as good as it looks. Let’s dive into the final steps of creating this decadent Red Velvet Cheesecake masterpiece.
Assemble the Red Velvet Cheesecake:
- Level the tops of the cakes if necessary, then place one cake layer on a serving platter.
- Remove the cheesecake from the freezer and remove the sides of the springform pan. Slide a knife between the bottom of the cheesecake and the parchment paper to remove the cheesecake from the pan bottom and parchment round.
- If the cheesecake is wider than the cake layers, use a sharp knife to gently shave off some of the sides of the cheesecake so it is the same width as the cake layers.
- Place the cheesecake layer on top of the first cake layer, then place the second cake layer on top of the cheesecake layer, upside-down.
- Spread a very thin layer of cream cheese frosting (the “crumb coat”) over the top and sides of the cake, then refrigerate for 30 minutes to set the frosting.
- Then apply another liberal coat of frosting and decorate as desired.
- Keep refrigerated, then let sit at room temperature for 20 minutes before serving. Cover leftovers and store in the refrigerator for up to 5 days.

Decorating Tips
For a stunning finish to your red velvet cheesecake, consider the following topping ideas and piping techniques to elevate the visual appeal and taste of your dessert.
Topping Ideas
- White Chocolate Shavings: Sprinkle delicate white chocolate shavings over the frosting for an elegant touch.
- Red Velvet Cake Crumbs: Save some red velvet cake crumbs (from leveling the cakes) to garnish the cheesecake, adding a pop of color and extra texture.
- Fresh Berries: Top the cheesecake with a mix of fresh berries like raspberries and blueberries for a fruity contrast.
- Crushed Pecans: Add a crunchy element with finely crushed pecans scattered over the top of the cheesecake.
- Cocoa Dusting: Lightly dust the cheesecake with cocoa powder for a hint of rich chocolate flavor.
Piping Techniques
- Whipped Dollops: Use a decorator’s pastry tip to create frosting dollops around the edge of the cheesecake for a decorative finish.
- Swirls and Spirals: Practice piping swirls and spirals of frosting on top of the cheesecake for an intricate pattern.
- Floral Designs: Explore creating floral designs with frosting using different piping tips to add an artistic touch.
- Custom Messages: Write personalized messages or greetings on the cheesecake using piped frosting for a customized presentation.
- Layered Filling: Experiment with piping different layers of the filling to create a visually appealing and indulgent dessert. (Note: This applies more if you were doing a filling between layers, less so for the exterior frosting, but simple border piping is effective).
How to Store
After creating this indulgent Red Velvet Cheesecake, you’ll want to ensure it stays fresh and delicious for as long as possible. Here are the steps to follow for storing your masterpiece:
Refrigeration:
- Once the cheesecake is assembled and frosted, keep it refrigerated.
- Cover the cheesecake well (using a cake container or loosely tented foil) to prevent drying out and preserve its flavor.
- Let the cake sit at room temperature for about 20 minutes before serving for the best texture.
- Leftovers should be covered and stored in the refrigerator for up to 5 days.
If you wish to store the cheesecake for a longer period, freezing is an option.
Freezing Instructions
To freeze your delectable Red Velvet Cheesecake for later enjoyment, follow these simple steps:
- Chilling: Ensure the fully assembled and frosted cake is well-chilled, ideally refrigerated for several hours until the frosting is firm.
- Individual Slices: If you prefer portioning the cheesecake for easy serving later, slice it into individual portions before freezing. This makes thawing quicker and easier.
- Wrapping: Wrap the whole cheesecake or individual slices tightly in plastic wrap. Ensure that the wrap is snug to prevent freezer burn and maintain freshness. Apply a second layer of aluminum foil for extra protection.
- Freezer Bag/Container: Place the wrapped cheesecake (whole or slices) in a freezer-safe bag or airtight container for added protection against freezer odors.
- Labeling: Don’t forget to label the storage container with the date of freezing to keep track of freshness.
- Freezing: Place the wrapped cheesecake in the freezer, making sure it is stored flat to maintain its shape. It can be stored in the freezer for up to one month for best quality.
When you’re ready to enjoy your frozen Red Velvet Cheesecake, follow these steps:
- Thawing: To defrost the whole cheesecake, transfer it (still wrapped) to the refrigerator and let it thaw overnight. For individual slices, unwrap and thaw in the refrigerator for a few hours.
- Serving: Once thawed, serve the Red Velvet Cheesecake chilled or allow it to sit at room temperature briefly (as recommended for refrigerated cake) for the best taste and texture. Add fresh toppings if desired.
By storing your Red Velvet Cheesecake properly, you can savor the blend of rich flavors and creamy goodness, ensuring a delightful treat for yourself and your loved ones.
Conclusion
Creating a Red Velvet Cheesecake is a delightful experience that combines the best of red velvet cake and creamy cheesecake. With the right ingredients and proper preparation, this dessert is sure to impress on any occasion. From assembling the layers to adding the finishing touches, each step contributes to a stunning and delicious final product. By following the storage tips provided, you can enjoy the rich flavors and creamy texture of this Red Velvet Cheesecake even days after making it. Whether for a special celebration or a simple indulgence, this dessert is a perfect choice for anyone looking to treat themselves and their loved ones.
PrintRed Velvet Cheesecake Recipe
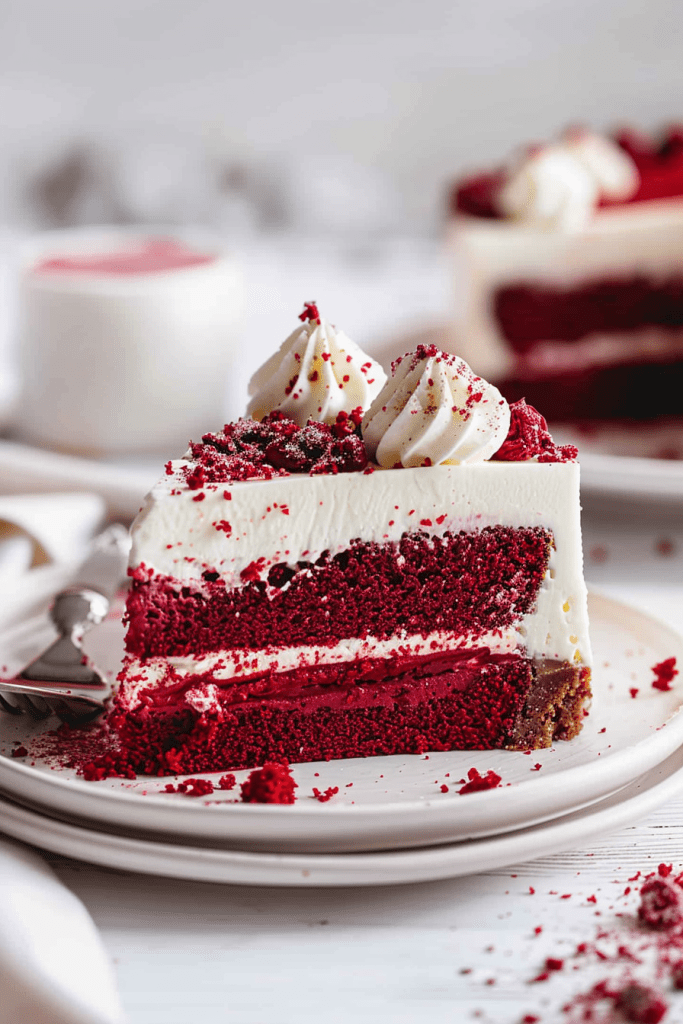
Get ready for pure indulgence! This showstopper features layers of moist, homemade red velvet cake snuggling a rich, creamy baked cheesecake center. It’s all wrapped up in a tangy, smooth cream cheese frosting – truly the best of both dessert worlds!
- Prep Time: 1 hr
- Cook Time: 1 hr 50 mins
- Total Time: Approx. 7 hours (includes essential chilling/freezing time)
- Yield: 16 servings 1x
- Category: Dessert
- Cuisine: American
Ingredients
For the Cheesecake:
- 16 oz cream cheese, room temperature
- ½ cup (99 g) granulated sugar
- 1 tbsp all-purpose flour
- Pinch salt
- ¼ cup (60 ml) heavy cream
- ½ tsp vanilla extract
- 2 large eggs, room temperature
For the Red Velvet Cake:
- ½ cup (113 g) unsalted butter, room temperature
- 1½ cups (298 g) granulated sugar
- 2 large eggs
- ¼ cup (26 g) + 1 tbsp unsweetened cocoa powder
- 6 tbsp red food coloring, liquid
- 1 tsp vanilla extract
- 1 cup (240 ml) buttermilk
- 2¼ cups (270 g) all-purpose flour
- 1 tsp baking soda
- 1 tsp salt
- 1 tbsp distilled white vinegar
For the Cream Cheese Frosting:
- 1 cup (227 g) unsalted butter, room temperature
- 4 cups (454 g) powdered sugar
- 2 tsp vanilla extract
- Pinch salt
- 16 oz cream cheese, chilled and cut into 16 pieces
Instructions
Make the Cheesecake:
* Preheat oven to 350°F (175°C). Spray a 9-inch springform pan, line bottom with parchment.
* Beat cream cheese, sugar, flour, and salt on medium-low until creamy (about 3 mins).
* Mix in heavy cream and vanilla. Beat in eggs one at a time, just until combined.
* Pour into prepared pan, spread evenly.
* Bake 40-55 mins until set. Cool on wire rack (1 hr), then freeze until solid (at least 3 hrs or overnight).
2. Make the Red Velvet Cake:
* Preheat oven to 350°F (175°C). Grease, parchment-line, butter, and flour two 9-inch cake pans.
* Cream butter and sugar until light and fluffy (3 mins). Beat in eggs one at a time.
* In a small bowl, mix cocoa, vanilla, and red food coloring into a paste. Add to batter, mix until combined.
* Alternately add buttermilk and flour (starting and ending with flour) on low speed.
* Mix in salt, baking soda, and vinegar. Beat on high until smooth.
* Divide batter between pans. Bake 30 mins, or until toothpick comes out clean. Cool 10 mins in pans, then fully on wire rack.
3. Make the Frosting:
* Beat butter, powdered sugar, vanilla, and salt on low until smooth (about 2 mins).
* Increase speed to medium-low. Add chilled cream cheese pieces one by one, beating until smooth (about 2 more mins).
4. Assemble the Cake:
* Level cooled cake layers if needed. Place one layer on serving platter.
* Remove cheesecake from freezer/pan. Trim edges gently if needed to match cake size.
* Place cheesecake layer onto first cake layer. Top with second cake layer (upside-down).
* Apply a thin “crumb coat” of frosting. Chill 30 mins.
* Frost entire cake generously. Decorate as desired.
Notes
- Serving: For best texture, let the cake sit at room temperature for 20 minutes before slicing and serving. Garnish with leftover cake crumbs or fresh berries!
- Tips & Tricks: Use room temperature ingredients (except for the frosting’s cream cheese!) for smooth mixing. Don’t overbeat cheesecake eggs. The freezing step for the cheesecake is crucial for clean assembly. A crumb coat prevents crumbs in your final frosting layer.
- Storage: Keep the cake refrigerated, covered tightly. It’s best enjoyed within 5 days. You can also freeze individual slices (wrap well in plastic wrap and foil) for up to 1 month; thaw overnight in the refrigerator.