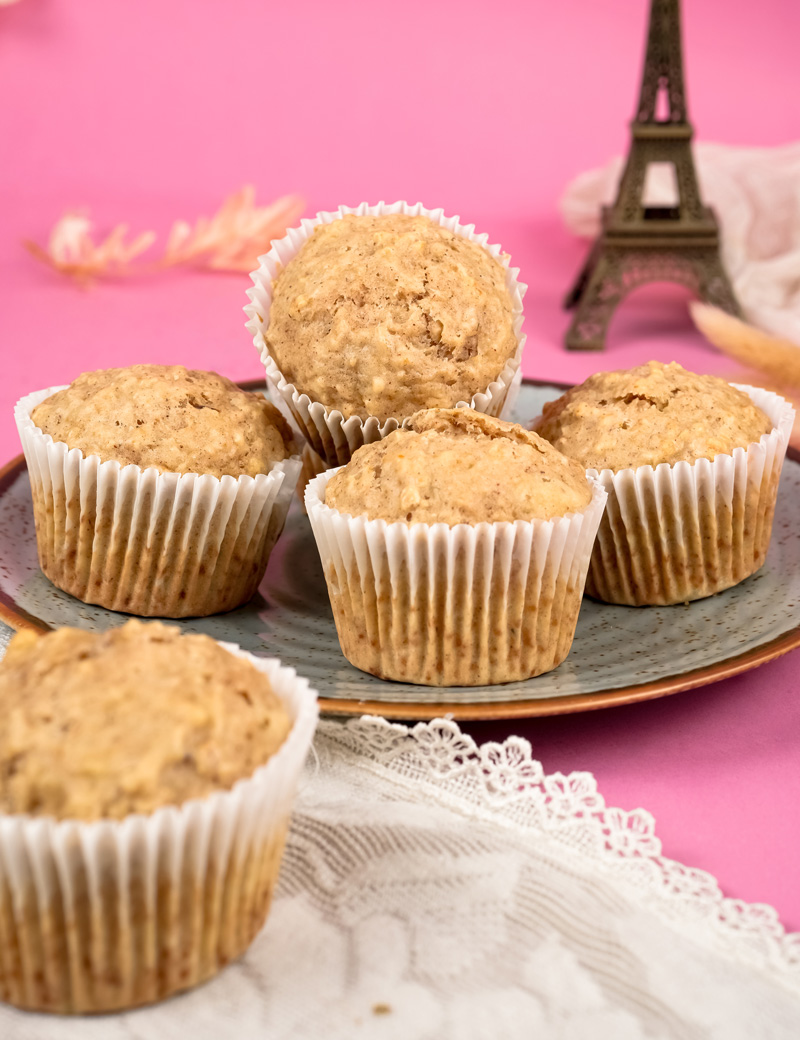
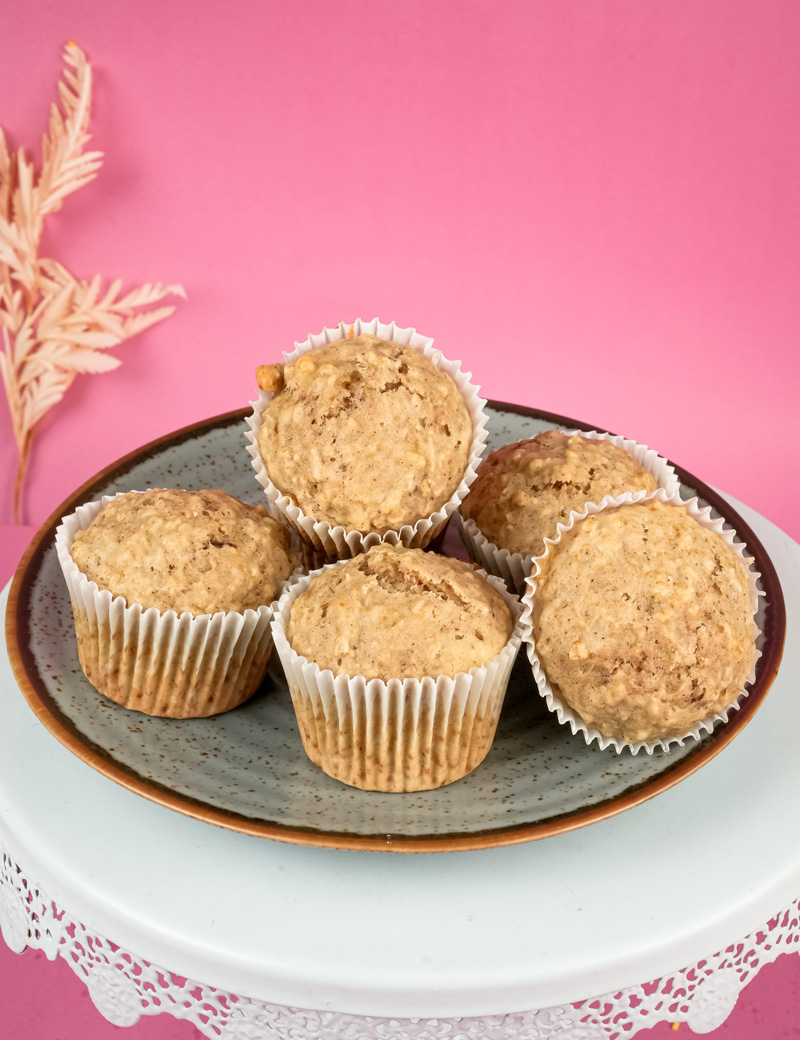
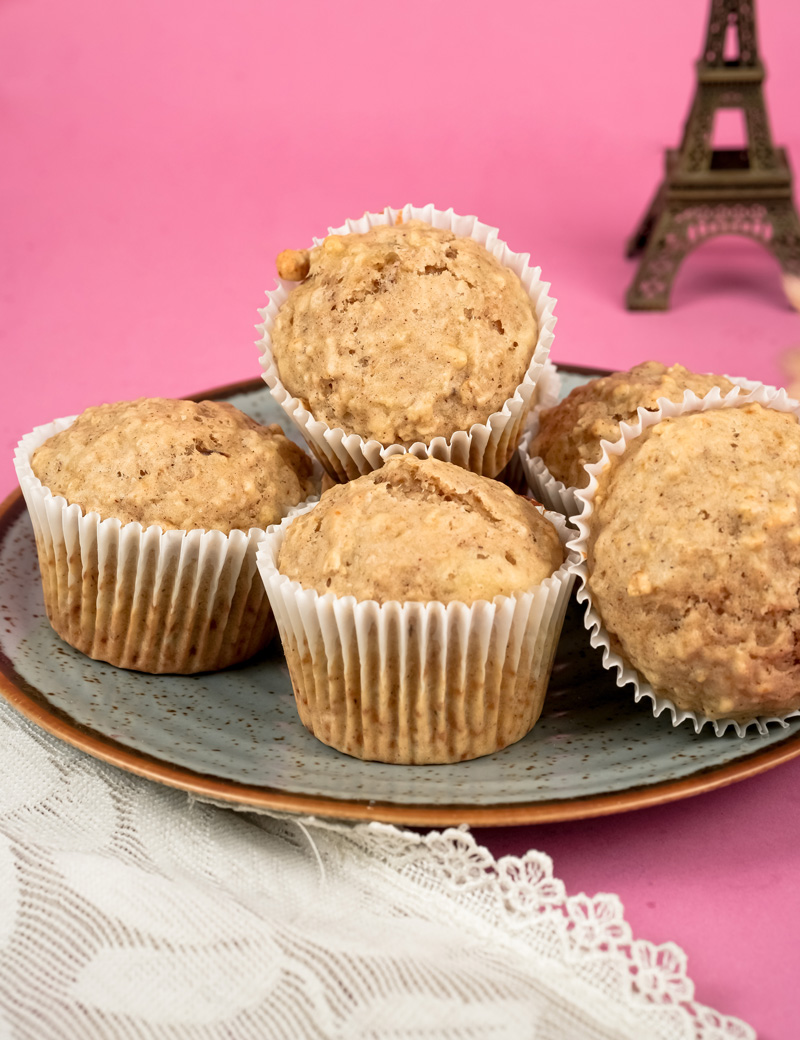
Okay, seriously, let’s chat about something amazing: Oat Muffins. If you’re anything like me, you know there’s a special kind of comfort that comes from a warm, soft muffin. It’s like getting a little hug, but you can eat it! And these aren’t just any old muffins. Nope. We’re talking about a recipe for Healthy Oatmeal Muffins that are so moist, so full of flavor, you’ll find yourself making them all the time. I promise!
Think about oatmeal. It’s been around forever, right? The go-to for a good, stick-to-your-ribs breakfast. Well, imagine taking all that wholesome goodness and packing it into a handy, easy-to-grab muffin. That’s what we’re doing! This recipe I’m sharing today? It’s one I’ve tweaked and perfected. It uses applesauce – that’s one of my little secrets for amazing texture and a hint of natural sweetness. Plus, whole wheat flour gives them this lovely, almost nutty taste.
And cinnamon? Oh, the cinnamon! It makes these cinnamon oatmeal muffins totally irresistible. I got obsessed with creating this Easy Oatmeal Muffins Recipe because, honestly, I think everyone should have a fantastic muffin recipe that’s both yummy and makes you feel good about eating it. So, ready to find out How to Make Oatmeal Muffins that will seriously impress you (and anyone you share them with)? Let’s do this!
Recipe Lowdown: What We’re Making
Before we jump into the mixing and baking, let’s get a quick peek at what this muffin adventure looks like. It always helps me to see the big picture first!
- Time Commitment:
- Getting Ready: You’ll only need about 10 quick minutes to get everything mixed. Super fast, right?
- Baking Time: These little guys bake up in about 14-16 minutes.
- Total Time: From start to finish, you’re looking at around 26 minutes. So, if you suddenly need muffins (it happens to the best of us!), this recipe has your back.
- How Many Muffins & Making More (or Less!):
- This recipe makes a nice batch of 12 regular-sized muffins. Now, the original notes also mentioned using a mini muffin pan. Great idea! If you go mini, you’ll get about 24 tiny treats.
- Can you change the batch size? Oh yeah! Easily. Cut everything in half for 6 standard muffins. Or, if you’re feeding a crowd (or just really love muffins like I do), double it for 24. Just make sure your mixing bowl is big enough if you’re doubling – learned that the hard way once!
- Skill Level:
- I’d say this recipe is Easy / Great for Beginners. It’s pretty much a “mix the wet stuff, mix the dry stuff, then put ’em together” kind of recipe. No fancy tricks. Just simple, happy baking.
- Tools of the Trade:
- Standard 12-cup Muffin Pan: The main recipe is geared for this. If you do decide to make mini muffins (about 24 of them!), remember they might bake a little quicker. I’d start checking them around the 10-12 minute mark.
- Mixing Bowls: You’ll need at least one medium bowl. But let’s be real, having a couple around is always handy when you’re baking, isn’t it?
- Whisk & Spatula: A whisk is great for getting those wet and dry ingredients mixed up separately. Then, a spatula is perfect for gently folding it all together.
- Measuring Cups and Spoons: Baking is a bit of a science, so good measuring is key!
- Something to Store Them In: For keeping your amazing muffins fresh… if they last that long. (Spoiler: they usually don’t in my house!)
- No Whisk? No Problem! If you don’t have a whisk, a good old fork will work for most of the mixing. We’re resourceful!
- Making Ahead / Meal Prep Champion:
- These muffins are perfect for meal prep. Bake a batch on Sunday, and boom! Breakfast or snacks are ready for a few days. They stay really nice and tasty.
Here’s that handy table again for changing the recipe size, just in case you need it:
| Ingredient | Full Batch (12) | Half Batch (6) | Double Batch (24) |
|---|---|---|---|
| Applesauce | ½ cup | ¼ cup | 1 cup |
| Milk | ½ cup | ¼ cup | 1 cup |
| Butter (melted) | ¼ cup | 2 tbsp | ½ cup |
| Egg | 1 large | ½ (or 1 small) | 2 large |
| Vanilla Extract | 1 tsp | ½ tsp | 2 tsp |
| Whole Wheat Flour | 1¼ cups | ⅝ cup (10 tbsp) | 2½ cups |
| Rolled Oats | ½ cup | ¼ cup | 1 cup |
| Sugar | ⅓ cup | 2 tbsp + 2 tsp | ⅔ cup |
| Cinnamon | 1 tsp | ½ tsp | 2 tsp |
| Baking Powder | 1 tsp | ½ tsp | 2 tsp |
| Baking Soda | ½ tsp | ¼ tsp | 1 tsp |
| Salt | ¼ tsp | ⅛ tsp | ½ tsp |
The Good Stuff: What Goes In These Muffins
Alright, let’s talk ingredients. Knowing what you need and getting it all out before you start – chefs call it “mise en place,” fancy, huh? – just makes baking so much more chill and fun.
Here’s your shopping list:
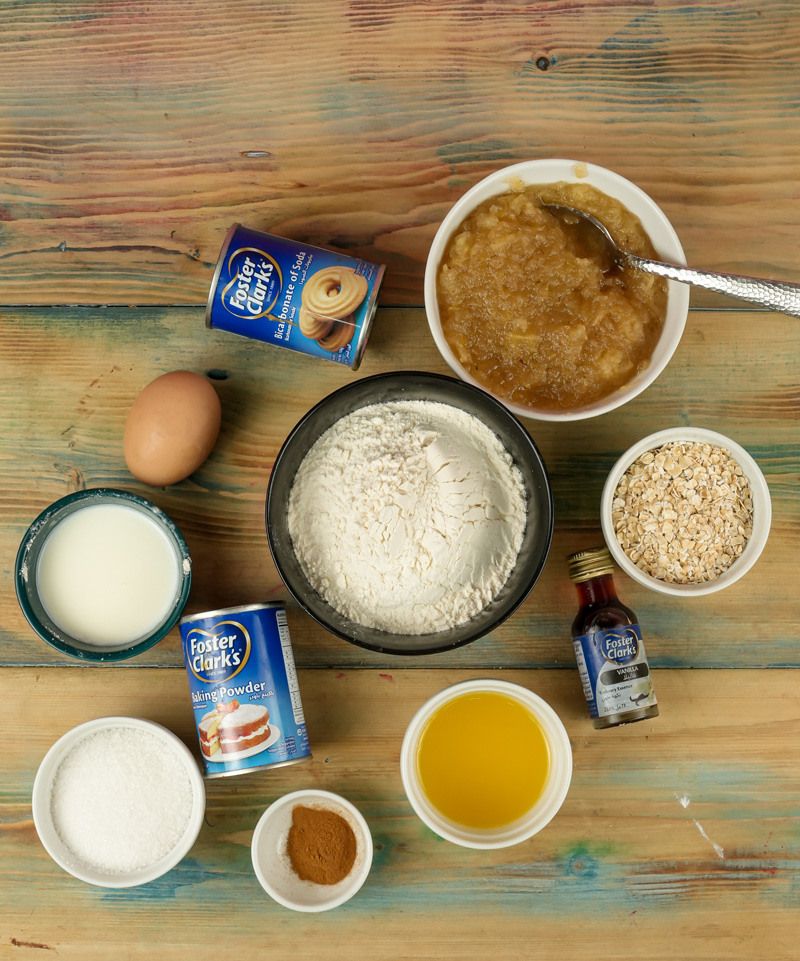
- ½ cup applesauce: This is our star player for making the muffins super moist and naturally sweet. It means we can use less fat, which is pretty neat. Unsweetened is my go-to, so I can control the sugar. But if you only have sweetened, that’s fine; they’ll just be a little extra sweet.
- ½ cup milk: Any kind works! Whole milk makes them richer, but 2%, skim, or even plant-based milks like almond, soy, or oat milk are great. Little tip: If your milk is at room temperature, the batter mixes up even better.
- ¼ cup unsalted butter, melted and cooled a bit: Melting the butter helps it mix in perfectly. And cooling it slightly? Super important so it doesn’t accidentally cook the egg. If you want to go dairy-free, melted coconut oil or a plain vegetable oil would work well.
- 1 large egg, lightly beaten: This is what holds our muffins together. Room temperature is best for eggs in baking.
- 1 teaspoon vanilla extract: Good quality pure vanilla extract makes a huge difference. It’s like the background singer that makes the star shine brighter.
- 1¼ cups whole wheat flour: This flour gives a great, slightly nutty taste and adds some extra fiber. If you want a lighter muffin, you can use half whole wheat and half all-purpose flour. Or just all all-purpose. For a gluten-free version, a good 1-to-1 gluten-free baking mix (the kind with xanthan gum) should do the trick.
- ½ cup rolled oats: Old-fashioned rolled oats are what you want here. They give a wonderful chewy texture. Quick oats can work if that’s all you have, but the texture will be a bit softer.
- ⅓ cup sugar: Regular granulated sugar is fine. But hey, feel free to experiment! Brown sugar would add a nice molasses touch. Coconut sugar is another option. If you use a liquid sweetener like maple syrup or honey, you might want to cut back on the milk just a tiny bit.
- 1 teaspoon cinnamon: The magic spice! Ground cinnamon brings that classic warm, cozy feeling. Add more or less depending on how much you love it. I’m team more cinnamon!
- 1 teaspoon baking powder: This is what makes our muffins rise up tall and fluffy.
- ½ teaspoon baking soda: This works with the baking powder to give an extra lift. It especially likes the acidity from the applesauce.
- ¼ teaspoon salt: Don’t you dare skip the salt! It might seem small, but it makes the sweet flavors pop and balances everything out.
Quick Ingredient Prep Notes:
- Make sure that butter is melted but cooled down a bit. Too hot, and it could scramble your egg. Nobody wants that.
- Beat your egg lightly before adding it in. It just mixes in easier.
- If you remember, let your egg and milk sit out for a bit to come to room temperature. It can help make your muffins even fluffier. It’s like letting them warm up before a big race!
Let’s Bake! Your Step-by-Step Guide
Step 1: Oven On & Pan Ready – Setting the Scene!
Okay, first things first! Before you even grab a measuring cup, let’s get that oven heating up. Go ahead and set it to 375 degrees F (that’s 190 degrees C). Seriously, letting your oven get fully hot is so important for light, fluffy muffins. If it’s not hot enough, your muffins might turn out kind of sad and flat. We want happy, puffy muffins!
While the oven is doing its thing, grab your 12-cup standard muffin pan. We need to make sure our muffins don’t stick. Nobody likes a muffin casualty. Get your nonstick cooking spray and give each cup a good, even spray. The person who came up with this recipe strongly suggests not using paper liners for these Easy Oatmeal Muffins Recipe. And I get it! With hearty batters like this one (thanks to the whole wheat flour and applesauce), they sometimes really cling to paper. So, a well-greased pan is your best buddy here. It’ll help those cinnamon oatmeal muffins slide right out. Easy peasy. If you decided to make those cute mini muffins, grease that pan just as well.
Step 2: Mix the Wet Stuff – Building Flavor!
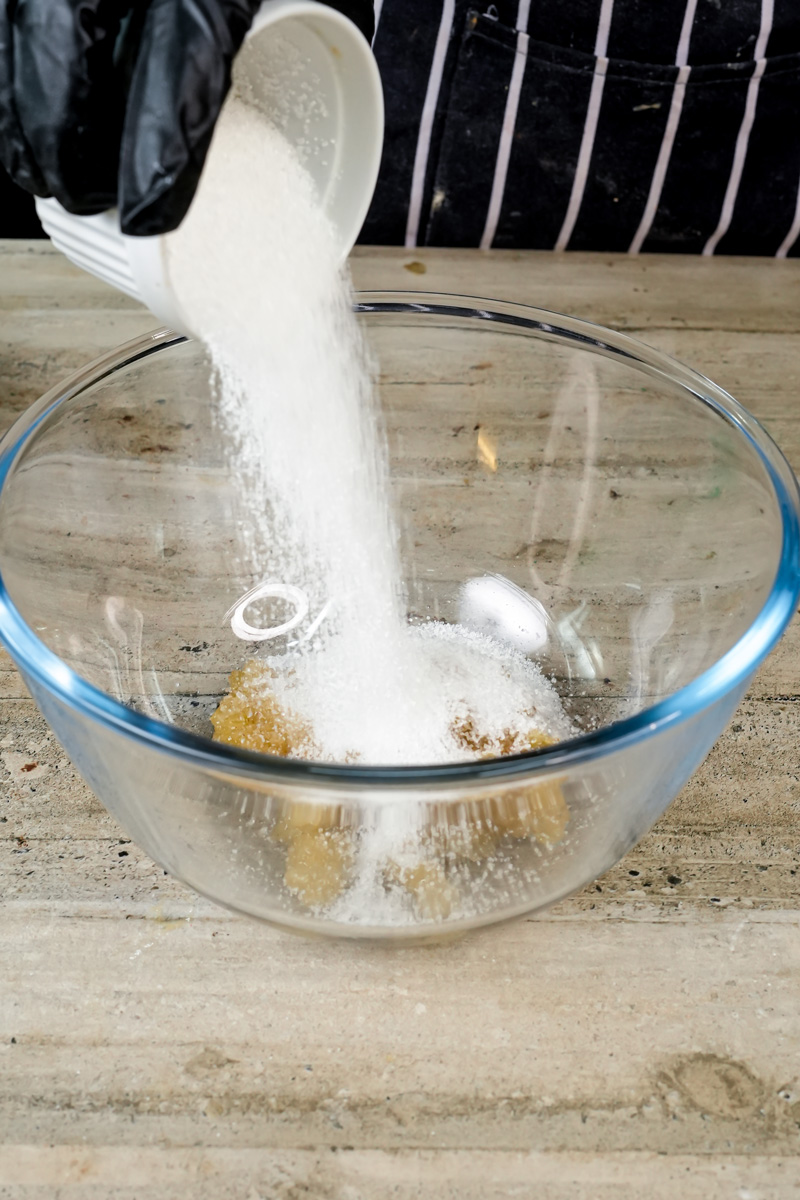
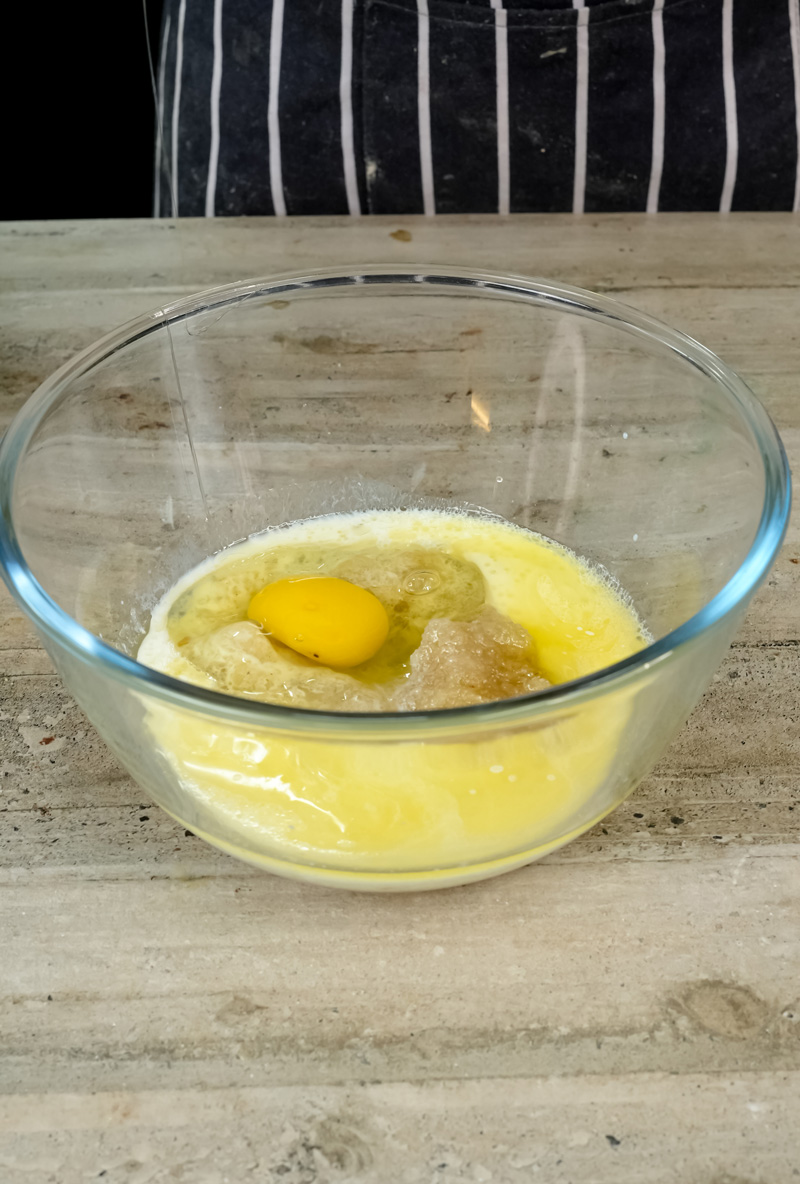
Time to make the flavor base! In a medium-sized mixing bowl – pick one that gives you some room to whisk without making a mess – we’re going to mix up all the liquid goodness. Carefully pour in the ½ cup of applesauce (this is a big part of why these are awesome Healthy Oatmeal Muffins!), then the ½ cup of milk. Next up is the ¼ cup of unsalted butter that you’ve already melted and let cool down a bit. Remember, cooling it is key so it doesn’t mess with the egg. Speaking of eggs, gently pour in your 1 large, lightly beaten egg. And finally, add that lovely 1 teaspoon of pure vanilla extract.
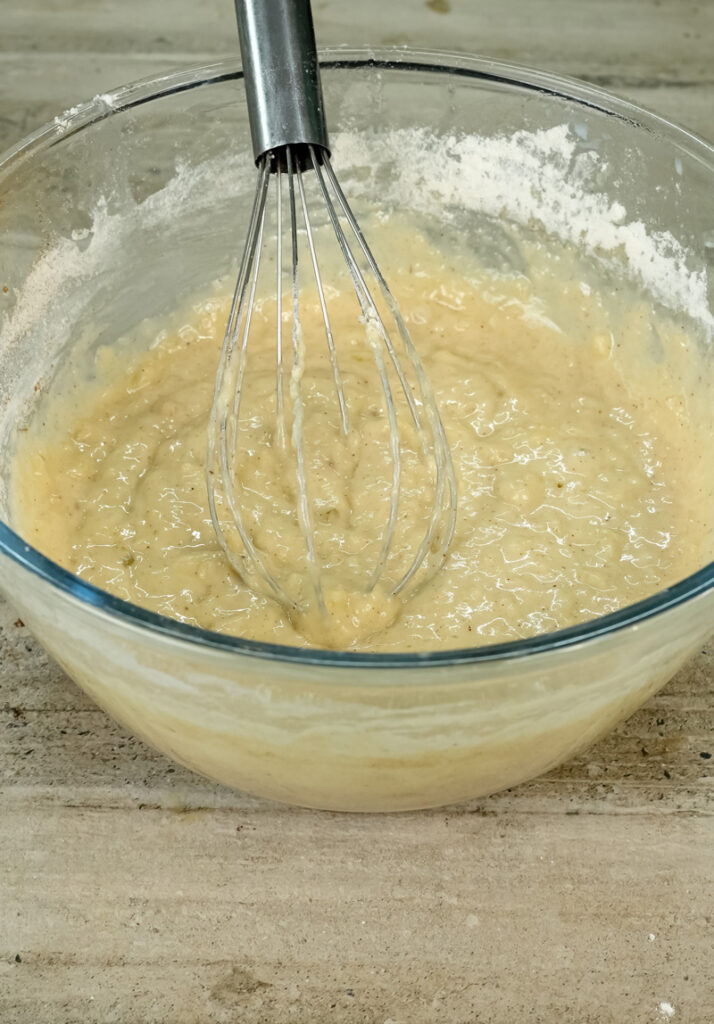
Grab your whisk and mix these ingredients together really, really well. You want it to look smooth and creamy, with no streaks of egg hanging around. Give it a little sniff. Smells good already, right?
Step 3: Add the Dry Goods & Mix – Gently Does It!
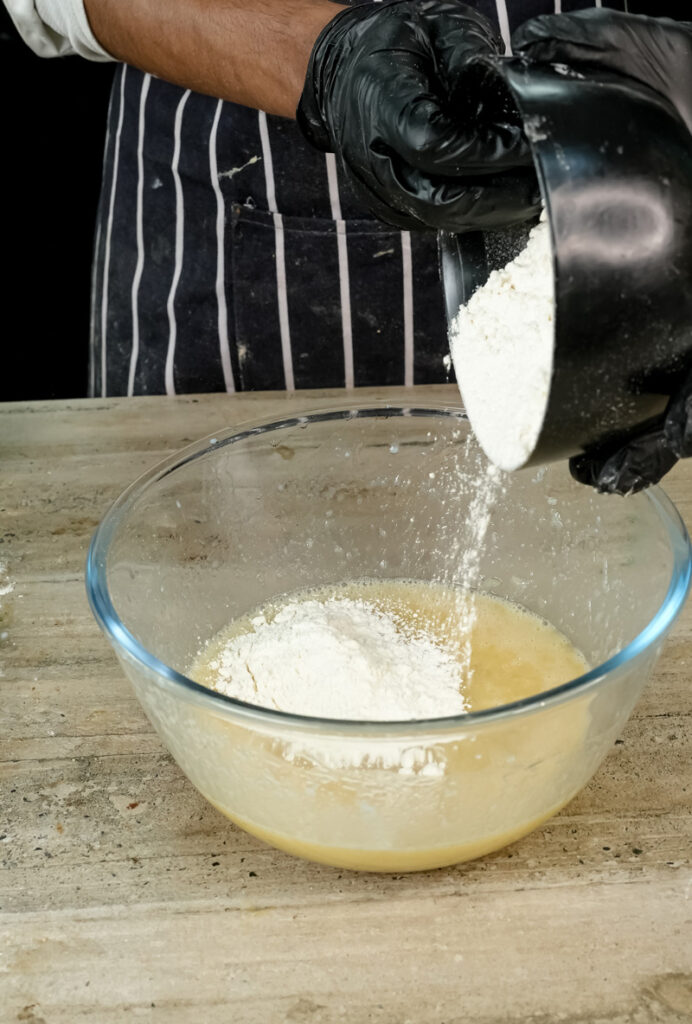
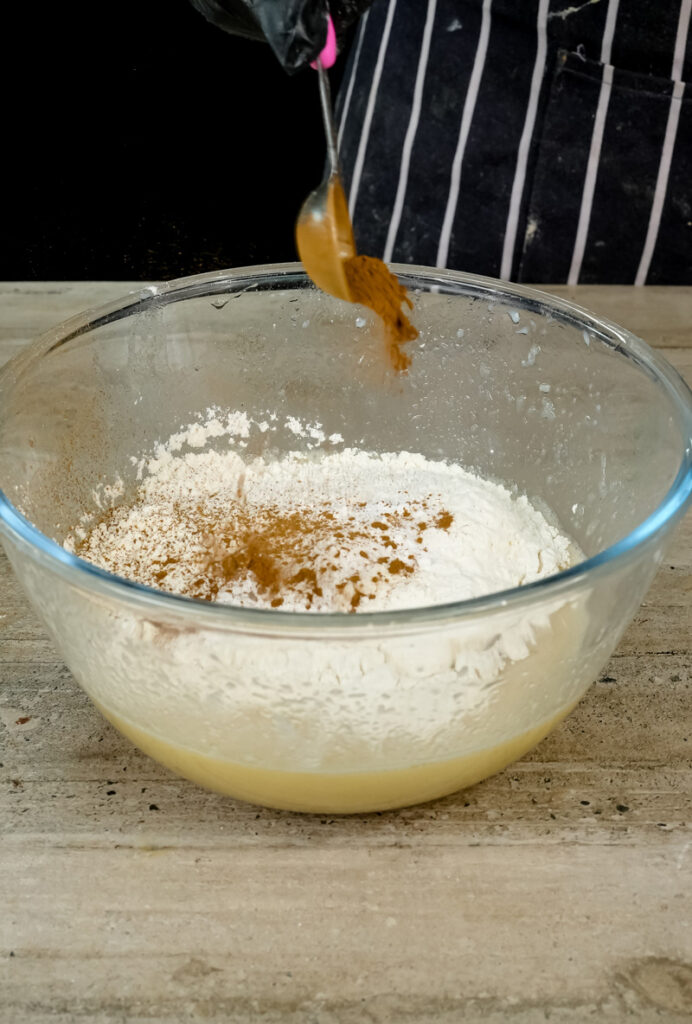
Alright, this is where our muffins get their structure. Right into the same bowl with all those lovely wet ingredients, we’re going to add the dry team. Carefully add the 1¼ cups of whole wheat flour, the ½ cup of rolled oats, the ⅓ cup of sugar, that super important 1 teaspoon of cinnamon (hello, yummy cinnamon oatmeal muffins!), the 1 teaspoon of baking powder, the ½ teaspoon of baking soda, and that tiny but mighty ¼ teaspoon of salt.
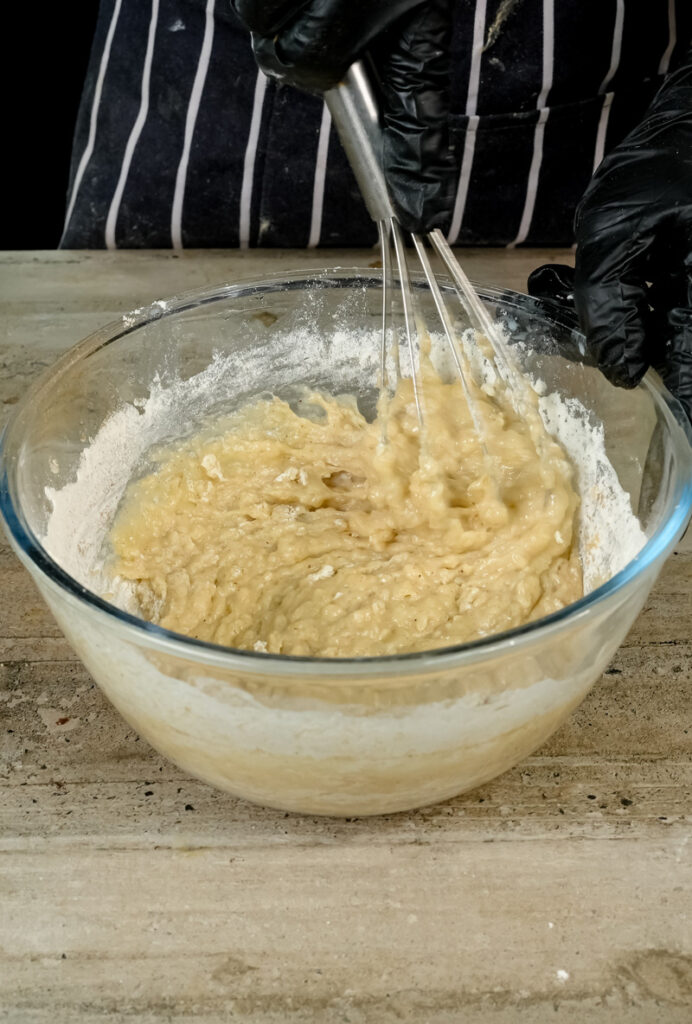
Now, this is a very important part of muffin making: whisk it all together (or even better, use a spatula to gently fold) until it’s just combined. Seriously, don’t go crazy mixing here! A few little lumps of flour are totally fine. They’re even good! If you overmix, especially with whole wheat flour, you can make the muffins tough. And nobody wants a tough muffin. We want tender, light, and fluffy. The batter will be pretty thick, almost like a soft cookie dough. That’s exactly what you want for this recipe. The smell of cinnamon and oats should be really noticeable now. Baking is the best, isn’t it?
Step 4: Fill Up the Muffin Cups – Sharing is Caring!
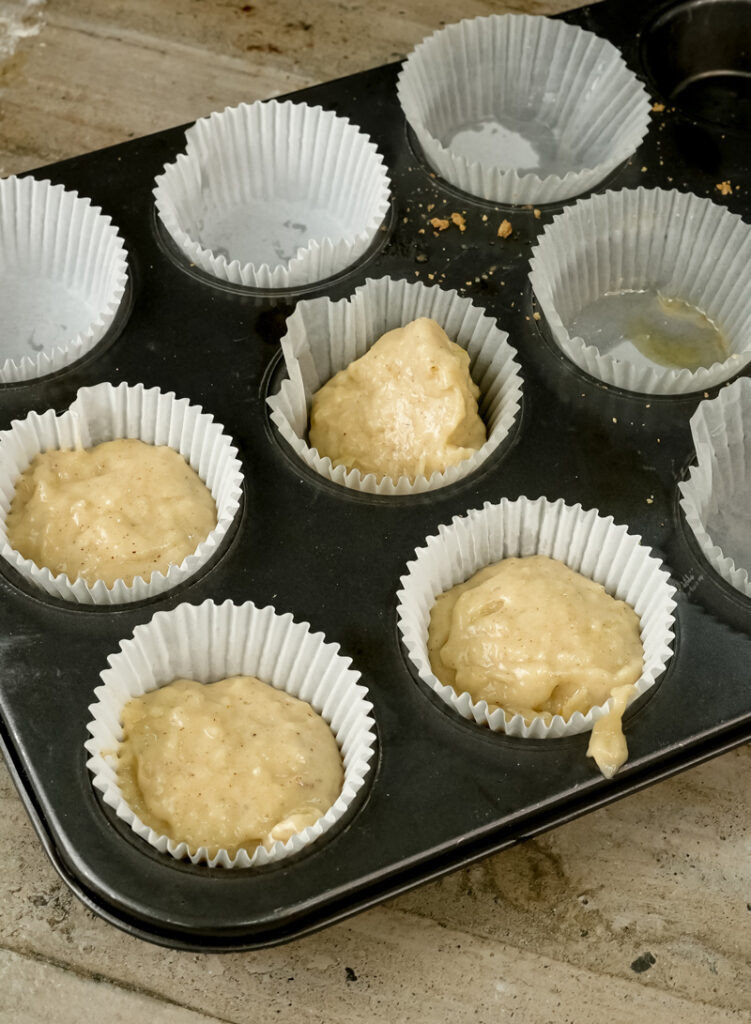
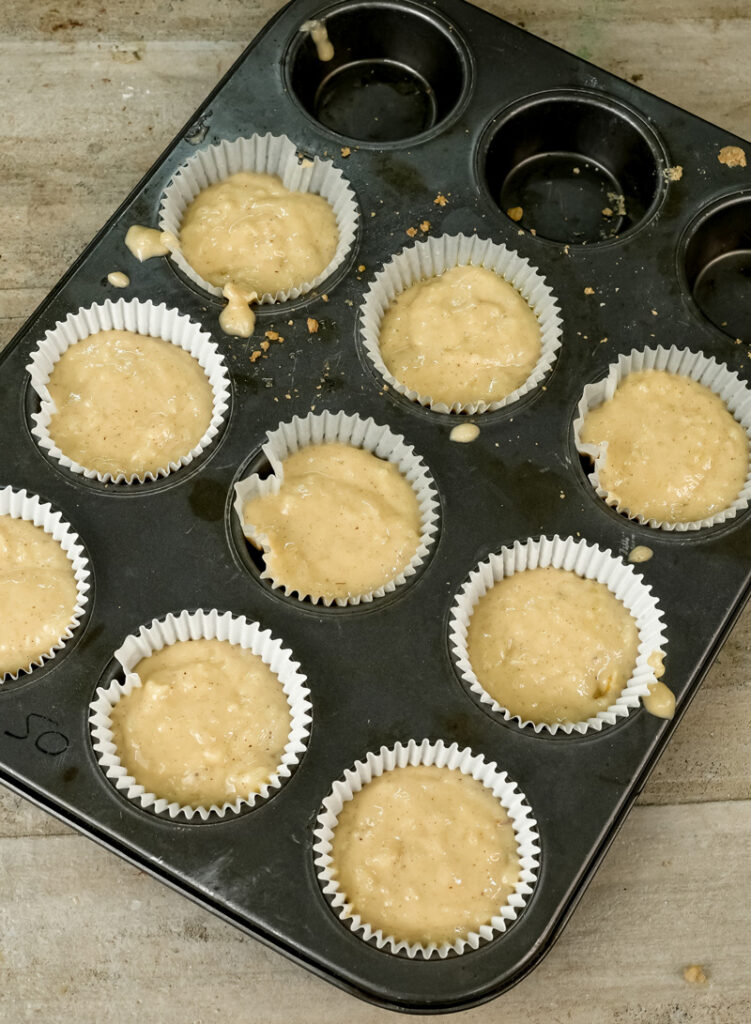
Your batter looks amazing, right? Thick and delicious. Now, let’s get it into our prepared muffin tin. The idea is to divide the batter as evenly as you can among the 12 muffin cups. For a regular-sized muffin pan, this usually means about ¼ cup of batter for each cup. This should fill them about two-thirds or three-quarters full. You need to leave a little space at the top because these muffins are going to puff up nicely while they bake. We don’t want them overflowing (though, sometimes the little crispy bits that spill over are a secret baker’s treat!).
My top tip? An ice cream scoop with one of those trigger releases is a lifesaver for getting muffin batter into the cups evenly and without making a mess. It makes it so fast and all your muffins will be the same size, which means they bake evenly. If you don’t have one, no sweat. Two spoons work just fine – one to scoop, one to scrape it off.
Step 5: Bake ‘Em Up! – The Magic Happens Now!
This is it! The moment we’ve been waiting for. Carefully – don’t tilt the pan too much! – place your filled muffin tin into your fully preheated 375°F (190°C) oven. Set your timer for 14-16 minutes.
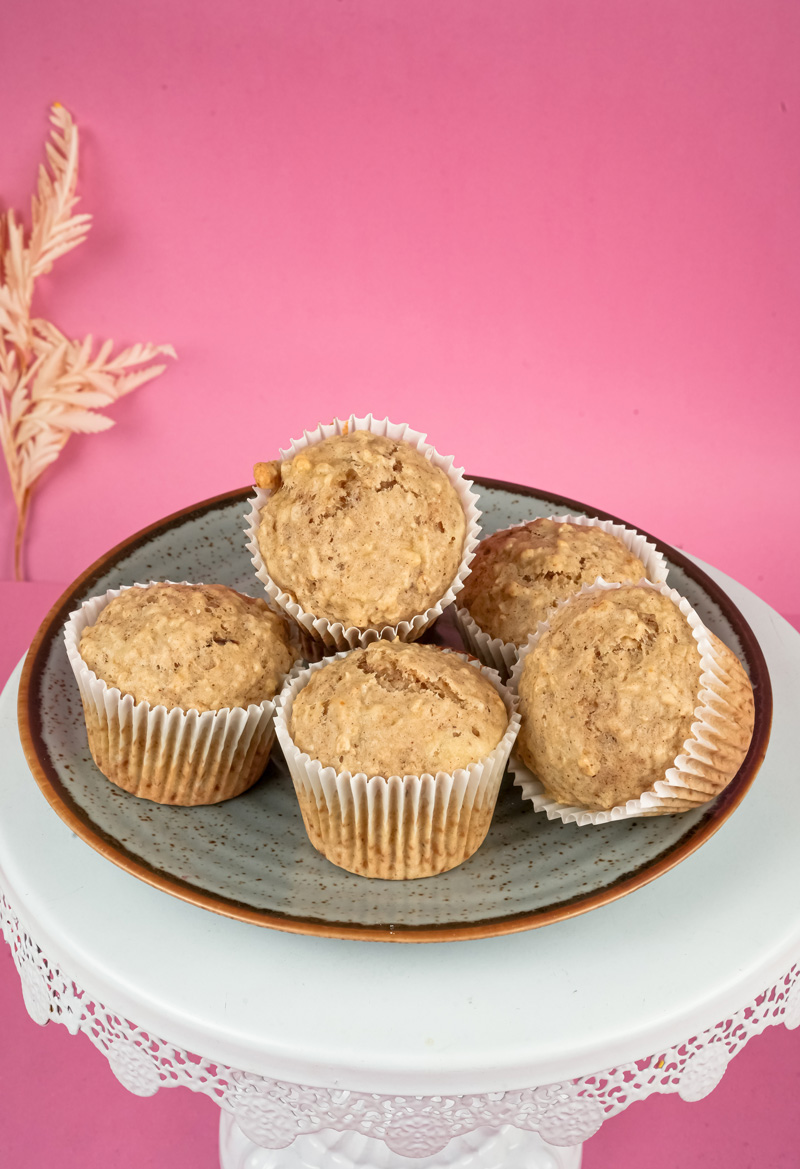
Now, every oven is a little different, kind of like people. So, it’s always smart to start checking your muffins on the earlier side of that baking time. What are you looking for? You want your muffins to be all puffed up, with nice rounded tops that are a beautiful golden-brown color. The edges should look set and dry. But the best way to know if they’re perfectly cooked? The good old toothpick test. (Or a cake tester, if you’re fancy!) Gently stick a toothpick into the center of a muffin in the middle of the pan – those are usually the last ones to cook. If it comes out clean, or with just a few moist, tender crumbs stuck to it (definitely no wet batter!), they are absolutely perfect. Take them out!
And that smell! Oh my goodness. Your kitchen should be filled with the most wonderful, warm, sweet, and spicy aroma of freshly baked cinnamon oatmeal muffins. Pure happiness!
Step 6: Cool Down & Dig In! – A Little Patience Goes a Long Way!
You did it! Using your oven mitts, carefully take the muffin tin out of the oven and put it on a surface that can handle the heat (like a trivet or a cool stovetop burner). Now, I know you want to grab one right away. The smell is probably driving you crazy! But, let the muffins cool in the pan for just a minute or two. This little rest helps them firm up a bit, so they’re less likely to fall apart when you try to get them out of the pan.
Since we didn’t use paper liners, if any of the muffins seem a little stuck, just gently run a thin knife or a small offset spatula around the edges of each muffin to loosen them. Then, carefully move the muffins to a wire rack to cool completely. Why a wire rack, you ask? Great question! It lets the air get all around the muffins, so their bottoms don’t get steamy and soggy while they cool. Nobody likes a soggy bottom!
Of course, rules are meant to be bent a little, right? If you absolutely have to try one while it’s still warm and wonderful… well, I won’t tell anyone. Just be careful, they’ll be hot! Enjoy your amazing muffins. You just learned How to Make Oatmeal Muffins that are both Healthy Oatmeal Muffins and incredibly tasty! High five!

Mix It Up: Making Them Your Own!
One of the coolest things about a solid basic recipe like this Easy Oatmeal Muffins Recipe is how you can totally make it your own! Here are a few ideas to get you thinking:
Let’s chat about how you can switch things up. Maybe you want to make them gluten-free. Totally doable! Just swap out the whole wheat flour for a good quality 1-to-1 gluten-free baking blend. Make sure it has xanthan gum, or add some according to the package directions. And, of course, use certified gluten-free rolled oats. For a vegan version, you can make a “flax egg.” Just mix 1 tablespoon of ground flaxseed with 3 tablespoons of water and let it sit for 5-10 minutes until it gets thick like an egg. Use that instead of the regular egg, pick your favorite plant-based milk, and use melted coconut oil or a vegan butter substitute. Easy!
Want to play with the flavors? These are already awesome cinnamon oatmeal muffins, but why stop there?
- Spice World: If you’re a cinnamon fanatic like me, go ahead and bump it up to 1 ½ teaspoons. Or, get creative! Add ¼ teaspoon of nutmeg and a little pinch of ground ginger or cardamom along with the cinnamon for a warmer spice vibe.
- Fun Add-Ins: To make them a bit fancier, think about stirring in about ½ cup of tasty extras. Like what?
- Chopped nuts (walnuts or pecans are so good for crunch)
- Chocolate chips (dark, semi-sweet, milk chocolate, or even white chocolate – because chocolate makes everything better, right?)
- Dried fruit (raisins, cranberries, chopped apricots, or dates are all yummy)
- Fresh or frozen berries (blueberries or raspberries would be amazing – just gently fold them in at the very end. If you use frozen berries, don’t thaw them first!)
- Shredded coconut for a little tropical flair.
- A bit of orange or lemon zest would add a lovely bright, citrusy zing.
- Simply Delicious: Honestly, they’re perfect just the way they are. But if you want a little something extra, a sprinkle of coarse sugar or a few extra oats on top before baking looks pretty and adds a nice little crunch.
For seasonal twists, think about what’s fresh and tasty! In the fall, you could swap out some of the applesauce for pumpkin puree and add a teaspoon of pumpkin pie spice. Hello, autumn! In the summer, like I mentioned, fresh berries are a fantastic choice.
Serving & Storing: Enjoying Your Awesome Bake!
You’ve baked a batch of gorgeous, Healthy Oatmeal Muffins! Woohoo! Now for the best part: eating them. But let’s also talk about how to keep them tasting great.
When it comes to serving them up, these muffins are lovely all by themselves. Maybe on a simple plate next to your morning coffee or tea. Pure bliss. For an extra bit of yum, you can serve them slightly warm with a little pat of butter (melty butter on a warm muffin? Yes, please!), a drizzle of honey or maple syrup, or even a spoonful of yogurt. They make a fantastic breakfast, a really satisfying snack, or even a light dessert.
As for what to serve them with, they go great with fresh fruit, a bowl of Greek yogurt with some granola, or a smoothie for a really well-rounded breakfast. It’s like a breakfast power-up!
Keeping your muffins fresh is key to enjoying them for days.
- Room Temperature: Once they’re completely cool (this is important!), store them in an airtight container at room temperature. They should stay fresh and tasty for 2-3 days.
- Fridge: If you want them to last a little longer, you can pop them in an airtight container in the refrigerator. They’ll be good for up to a week. I often do this!
Warming Them Up Again:
Want to get back that just-baked warmth and softness?
- Microwave: A quick zap in the microwave for about 10-20 seconds usually does the trick.
- Oven/Toaster Oven: For a slightly crispier top (my favorite way!), reheat them in a preheated 300°F (150°C) oven or toaster oven for about 5-7 minutes.

Making Ahead & Freezing Tips:
These muffins are amazing for making ahead. Seriously, a meal-prepper’s dream.
- Freezing: Once they’re totally cool, you can freeze them for later. Just place them in a single layer on a baking sheet and pop them in the freezer until they’re solid (this usually takes about 1-2 hours). Then, transfer them to a freezer-safe bag or container. They’ll keep really well in the freezer for up to 3 months. It’s like a gift to your future self!
- Thawing: You can thaw them overnight at room temperature. Or, if you’re in a hurry, reheat them straight from the freezer in the microwave (about 30-60 seconds) or in the oven (about 10-15 minutes at 300°F/150°C).
I really hope you have a blast making these oatmeal muffins – and an even better time eating them! They’re such good proof that simple ingredients, put together with a little bit of love, can make something truly wonderful. Happy baking, my friend!
PrintOat Muffins

Whip up a batch of these incredibly moist and flavorful Oat Muffins! They’re a wonderfully Healthy Oatmeal Muffin option, packed with whole grains and kissed with warm cinnamon. Perfect for a quick breakfast or a cozy snack. You’ll love how simple this Easy Oatmeal Muffins Recipe is!
- Prep Time: 10 minutes
- Cook Time: 14-16 minutes
- Total Time: About 26 minutes
- Yield: 12 standard muffins 1x
- Category: Breakfast, Snack
- Cuisine: American
Ingredients
- ½ cup applesauce (unsweetened is perfect!)
- ½ cup milk (any kind you like)
- ¼ cup unsalted butter, melted & cooled slightly
- 1 large egg, lightly beaten
- 1 teaspoon vanilla extract
- 1¼ cups whole wheat flour
- ½ cup rolled oats (old-fashioned, not instant)
- ⅓ cup sugar
- 1 teaspoon cinnamon (my favorite spice!)
- 1 teaspoon baking powder
- ½ teaspoon baking soda
- ¼ teaspoon salt
Instructions
- Get Set: First, preheat your oven to a toasty 375°F (190°C). Grease your 12-cup standard muffin pan really well. No paper liners needed for this recipe!
- Mix the Wet Stuff: In a medium bowl, whisk together the applesauce, milk, melted butter, egg, and vanilla until everything is nicely combined and smooth.
- Add the Dry Stuff: Now, tip in the whole wheat flour, oats, sugar, cinnamon, baking powder, baking soda, and salt directly into the wet ingredients. Grab a spatula and mix just until everything is combined. Seriously, a few lumps are totally fine – don’t overmix! The batter will be nice and thick.
- Fill the Cups: Spoon the batter evenly into your prepared muffin cups. About ¼ cup of batter per muffin should do it, filling them about two-thirds to three-quarters full. An ice cream scoop makes this part super easy!
- Bake ‘Em Up! Pop the pan into the oven and bake for 14-16 minutes. Your cinnamon oatmeal muffins are ready when they’re puffed up, golden brown, and a toothpick stuck into the center of one comes out clean (or with just a few moist crumbs).
- Cool Down Crew: Let the muffins cool in the pan for just a minute or two – it helps them firm up. Then, carefully move them to a wire rack to cool completely. Okay, maybe sneak one while it’s warm!
Notes
- Serving Suggestions:
- These are heavenly served warm, maybe with a tiny pat of butter or a little drizzle of honey.
- Perfect alongside your morning coffee or tea!
- Baker’s Tips & Tricks:
- For extra fluffy muffins, let your milk and egg come to room temperature before you start. It makes a difference!
- No overmixing! This is key for tender muffins.
- Want to add a little something extra? Gently fold in ½ cup of chocolate chips, fresh blueberries (don’t thaw if frozen!), or chopped walnuts with the dry ingredients.
- Storage & Reheating:
- Keep them Fresh: Once cooled, store your healthy oatmeal muffins in an airtight container. They’ll last 2-3 days at room temperature or up to a week in the fridge.
- Freeze for Later: These freeze beautifully for up to 3 months! Thaw at room temp.
- Warm ‘Em Up:
- Microwave: 10-20 seconds for a soft, warm treat.
- Oven/Toaster Oven: Reheat at 300°F (150°C) for 5-7 minutes to get those tops slightly crisp again.