
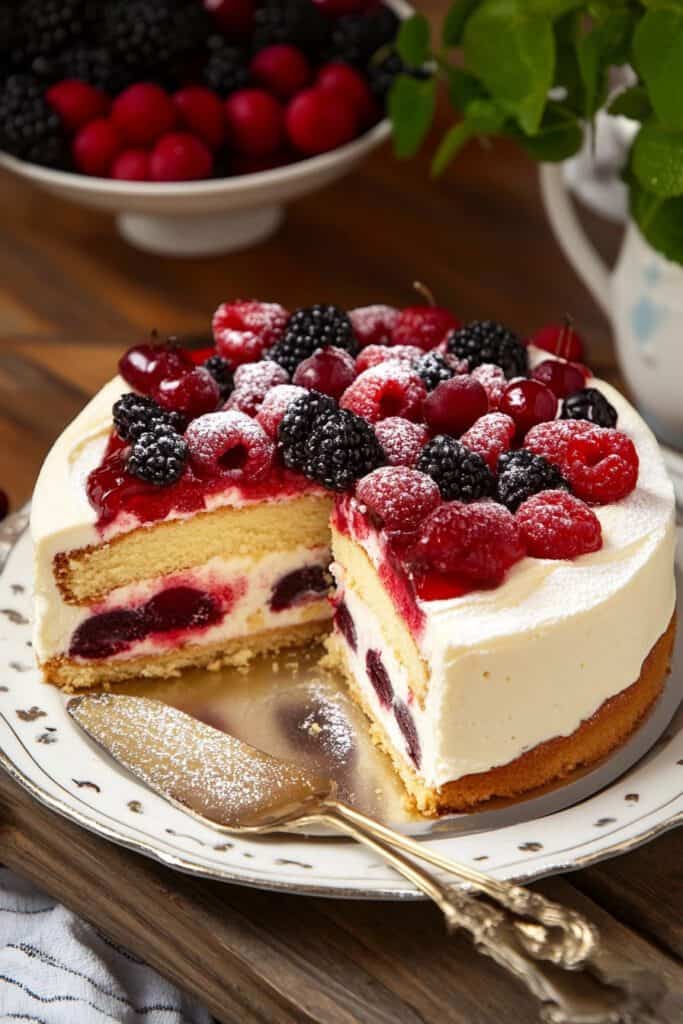
Craving the ultimate indulgence? My New York Cheesecake recipe is creamy, rich, and perfect for any dessert lover. With its delectable biscuit base, smooth cheesecake filling, and a fresh berry coulis, this recipe will easily become your go-to for special occasions or weeknight cravings. Let’s jump into it!
Ingredients List
Biscuit Base Ingredients
- 300 g digestive biscuits (alternatively, you can use graham crackers)
- 150 g unsalted butter (melted)
Cheesecake Filling Ingredients
- 600 g full fat Philadelphia cream cheese (room temperature)
- 175 g golden caster sugar
- 30 g plain flour
- 1/2 zest of a lemon
- 1 tbsp fresh lemon juice
- 1 tsp vanilla bean extract
- 3 medium eggs (lightly beaten)
- 150 ml soured cream
Fruit Coulis (Optional)
- 200 g strawberries
- 100 g raspberries
- 100 g caster sugar
Decoration (Optional)
- Fresh berries (strawberries, raspberries, blackberries)
- Icing sugar for dusting
- Drizzle of fruit coulis (from above)
Required Kitchen Tools
Before you get started, it’s essential to have the right kitchen tools on hand. These tools will help you achieve the perfect New York Cheesecake with minimal fuss.
- 8″/20cm Deep Springform Tin : A springform tin is ideal for cheesecakes, making it easy to release the cake once it’s baked and chilled.
- Food Processor : To blitz the biscuits into fine crumbs for the biscuit base.
- Stand Mixer or Hand Mixer : You’ll need this for mixing the cheesecake filling to ensure it’s smooth and creamy.
- Mixing Bowls : Make sure you have a couple of bowls for mixing the base, filling, and fruit coulis.
- Saucepan : For making the fruit coulis that will complement the cheesecake.
- Sieve : To strain the coulis and give it a smooth texture.
- Spatula : Perfect for folding ingredients together with ease.
- Whisk : Useful for whisking the eggs and sour cream into the cheesecake mixture.
- Measuring Scales : For precision in measuring your ingredients.
- Cooling Rack : To allow the cheesecake to cool after baking.
Step-by-Step Instructions
Ready to create your smooth and creamy New York Cheesecake? Follow these detailed steps for the perfect result.
Biscuit Base Preparation
- Preheat the Oven:
Begin by preheating your oven to 220ºC/200ºC fan . This ensures your oven will be hot enough by the time you’ve prepared the base and filling. - Prepare the Tin:
Grease your 8-inch (20 cm) deep springform tin , then line the base with parchment paper to prevent the cheesecake from sticking. - Make the Biscuit Base:
In a food processor, blitz 300 g digestive biscuits into a fine crumb. Alternatively, you can place the biscuits in a sealed plastic bag and crush them using a rolling pin. After that, pour in 150 g melted unsalted butter and blitz again until the crumbs are fully combined with the butter. - Form the Crust:
Pour the buttery biscuit mixture into the prepared tin. Press it down firmly with the back of a spoon or the bottom of a glass to create a tight, even layer. Once done, place the tin in the refrigerator to set while you prepare the cheesecake filling.
Cheesecake Filling Preparation
- Mix the Cream Cheese:
In your stand mixer using the whisk attachment (or in a large mixing bowl with an electric hand mixer), beat 600 g full fat Philadelphia cream cheese on a slow speed until it loosens and becomes smooth. This should take 2-3 minutes. - Add Sugar and Flour:
Gradually add 175 g golden caster sugar and 30 g plain flour into the cream cheese mixture while continuing to beat at a low speed. Make sure to add the sugar and flour a little at a time, allowing each addition to fully incorporate before adding more. This ensures a smooth and lump-free batter. - Incorporate Flavors:
Add in 1/2 zest of a lemon , 1 tbsp lemon juice , and 1 tsp vanilla bean extract into the cheesecake mix. These ingredients add a subtle tang and flavor that balances out the richness of the cream cheese. - Add the Eggs:
With the mixer still running on a low setting, slowly pour in the 3 medium eggs . Just like with the sugar and flour, only add a little bit at a time and make sure each portion is fully mixed in before adding more. This ensures a velvety texture. - Fold in the Sour Cream:
Stop mixing, and using a spatula, gently fold in 150 ml soured cream by hand. Be careful not to over-mix; this folds in some air, allowing the cheesecake to be light and creamy. - Pour into the Tin:
Pour the cheesecake filling over the pre-chilled biscuit base, making sure it spreads evenly.
Baking the Cheesecake
- Initial Bake:
Place the cheesecake in the preheated oven at 220ºC/200ºC fan and bake for 10 minutes . The higher temperature helps set the top of the cheesecake beautifully while locking in the moisture. - Lower the Temperature:
After the initial high-temperature bake, reduce the oven temperature to 110ºC/90ºC fan and bake for an additional 25-30 minutes . The cheesecake should be slightly jiggly in the center when you gently shake the tin, which is a sign of a perfectly creamy texture. - Cool Gradually:
Once the cheesecake is baked, turn off the oven and leave the door slightly ajar. Let the cheesecake cool in the oven for 2 hours . This gradual cooling process helps to prevent cracks from forming on the surface. - Chill Overnight:
After the 2-hour cool in the oven, carefully remove the cheesecake and allow it to come to room temperature. Once cooled, wrap the cheesecake (still in the tin) in foil and place it in the refrigerator to chill overnight . Chilling overnight enhances the flavor and helps the texture set nicely.

Fruit Coulis Preparation (Optional)
- Prepare the Fruit:
While the cheesecake chills, you can make a simple, yet vibrant, fruit coulis. Start by chopping 200 g strawberries into quarters and removing the tops. - Cook the Coulis:
In a small saucepan, combine the chopped strawberries, 100 g raspberries , and 100 g caster sugar . Heat the mixture over medium heat, stirring frequently. As the fruit softens, gently mash it with a fork until it forms a saucy consistency. - Strain the Coulis:
Once the sugar has completely dissolved and the texture is liquidy, turn off the heat and pass the fruit mixture through a sieve into a bowl. Discard any seeds or pulp, leaving only a smooth, vibrant coulis. Refrigerate the coulis until you’re ready to serve the cheesecake.
Decoration and Serving
- Unmold the Cheesecake:
After the cheesecake has chilled overnight, carefully run a knife or spatula around the edges to loosen it from the springform tin. Gently release the tin and transfer the cheesecake onto a serving plate. - Top with Fresh Fruit:
If desired, decorate the top of your cheesecake with fresh berries like strawberries, raspberries, and blackberries . This adds a burst of color and a fresh, fruity element that complements the rich creaminess of the cheesecake beautifully. - Drizzle with Coulis:
Drizzle the homemade fruit coulis over the cheesecake, allowing it to cascade down the sides for that stunning finishing touch. - Dust with Icing Sugar:
For an elegant flair, sprinkle a light dusting of icing sugar over the top just before serving.
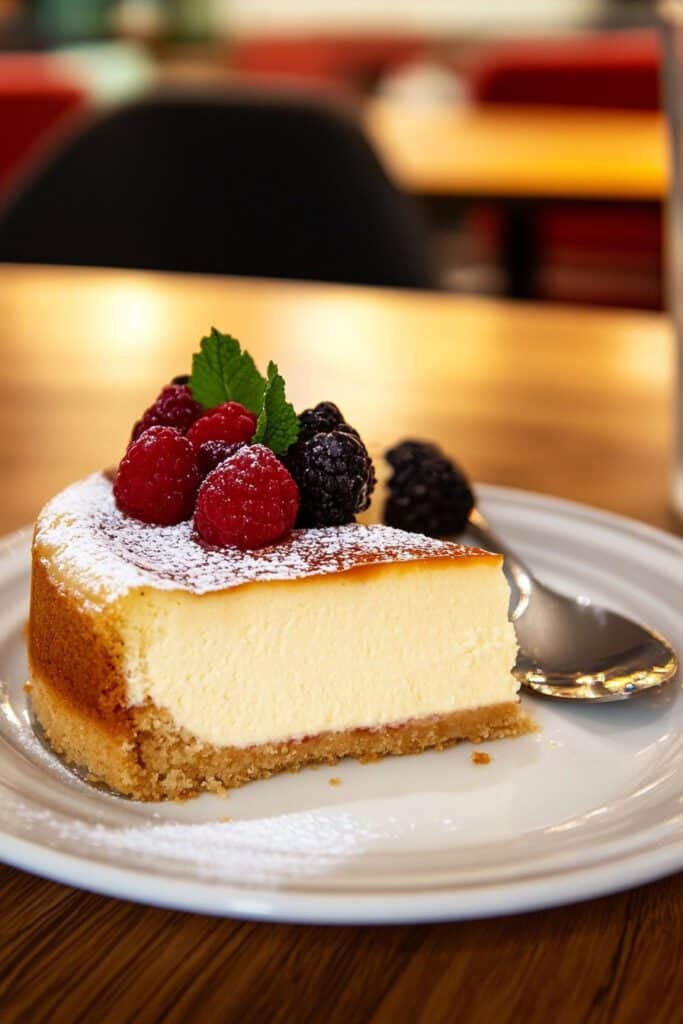
Time to Enjoy!
Once decorated, dive into your beautifully creamy New York Cheesecake. Slice it up and serve with additional fruit or a side of the coulis for extra indulgence. Trust me, this cheesecake is worth every bite!
Storage Instructions
Refrigeration:
Any leftover cheesecake should be stored in an airtight container in the refrigerator. It will stay fresh for up to 3-4 days .
Freezing:
If you want to save some for later, you can freeze the cheesecake! Wrap individual slices tightly in plastic wrap, then place them in a freezer-safe container. The cheesecake can be frozen for up to 1 month . When you’re ready to eat it, simply thaw in the fridge overnight.
Fantastic! Here’s the final part of your delicious New York Cheesecake recipe:
Baking the Cheesecake
- Initial Bake:
Place the cheesecake in the preheated oven at 220ºC/200ºC fan and bake for 10 minutes . The higher temperature helps set the top of the cheesecake beautifully while locking in the moisture. - Lower the Temperature:
After the initial high-temperature bake, reduce the oven temperature to 110ºC/90ºC fan and bake for an additional 25-30 minutes . The cheesecake should be slightly jiggly in the center when you gently shake the tin, which is a sign of a perfectly creamy texture. - Cool Gradually:
Once the cheesecake is baked, turn off the oven and leave the door slightly ajar. Let the cheesecake cool in the oven for 2 hours . This gradual cooling process helps to prevent cracks from forming on the surface. - Chill Overnight:
After the 2-hour cool in the oven, carefully remove the cheesecake and allow it to come to room temperature. Once cooled, wrap the cheesecake (still in the tin) in foil and place it in the refrigerator to chill overnight . Chilling overnight enhances the flavor and helps the texture set nicely.
Fruit Coulis Preparation (Optional)
- Prepare the Fruit:
While the cheesecake chills, you can make a simple, yet vibrant, fruit coulis. Start by chopping 200 g strawberries into quarters and removing the tops. - Cook the Coulis:
In a small saucepan, combine the chopped strawberries, 100 g raspberries , and 100 g caster sugar . Heat the mixture over medium heat, stirring frequently. As the fruit softens, gently mash it with a fork until it forms a saucy consistency. - Strain the Coulis:
Once the sugar has completely dissolved and the texture is liquidy, turn off the heat and pass the fruit mixture through a sieve into a bowl. Discard any seeds or pulp, leaving only a smooth, vibrant coulis. Refrigerate the coulis until you’re ready to serve the cheesecake.
Decoration and Serving
- Unmold the Cheesecake:
After the cheesecake has chilled overnight, carefully run a knife or spatula around the edges to loosen it from the springform tin. Gently release the tin and transfer the cheesecake onto a serving plate. - Top with Fresh Fruit:
If desired, decorate the top of your cheesecake with fresh berries like strawberries, raspberries, and blackberries . This adds a burst of color and a fresh, fruity element that complements the rich creaminess of the cheesecake beautifully. - Drizzle with Coulis:
Drizzle the homemade fruit coulis over the cheesecake, allowing it to cascade down the sides for that stunning finishing touch. - Dust with Icing Sugar:
For an elegant flair, sprinkle a light dusting of icing sugar over the top just before serving.
Time to Enjoy!
Once decorated, dive into your beautifully creamy New York Cheesecake. Slice it up and serve with additional fruit or a side of the coulis for extra indulgence. Trust me, this cheesecake is worth every bite!
Storage Instructions
Refrigeration:
Any leftover cheesecake should be stored in an airtight container in the refrigerator. It will stay fresh for up to 3-4 days .
Freezing:
If you want to save some for later, you can freeze the cheesecake! Wrap individual slices tightly in plastic wrap, then place them in a freezer-safe container. The cheesecake can be frozen for up to 1 month . When you’re ready to eat it, simply thaw in the fridge overnight.
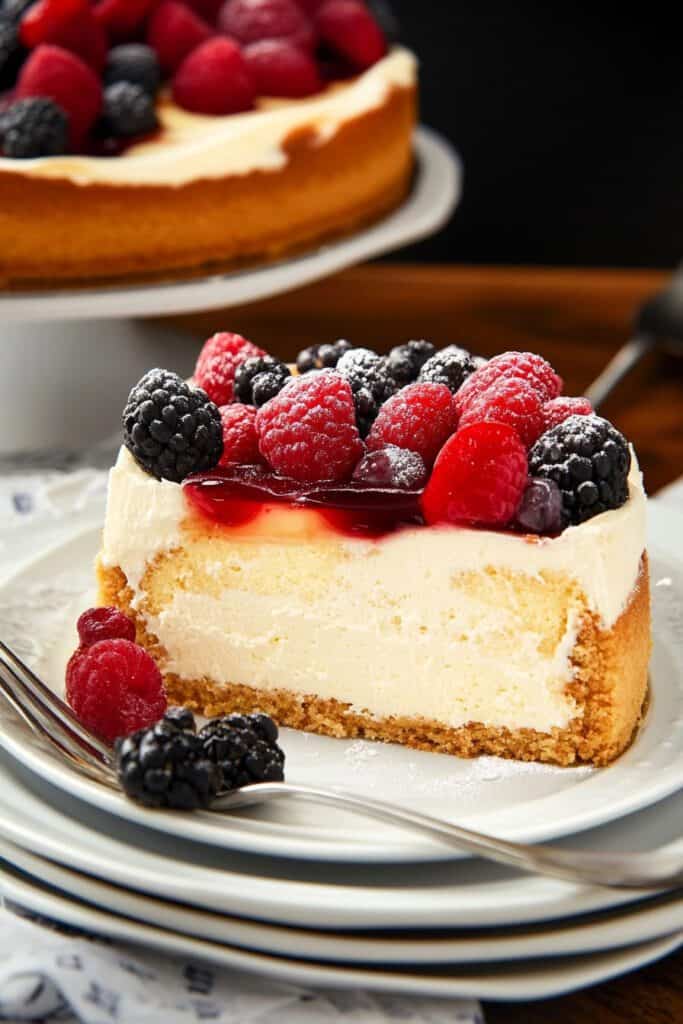
Conclusion
That’s it! A classic New York Cheesecake that’s luscious, creamy, and impossibly easy to make. The rich cheesecake filling and buttery biscuit base pair perfectly with the tangy brightness of fresh fruit and coulis. Whether you’re making this for a special occasion or simply indulging mid-week, this cheesecake is guaranteed to impress. Enjoy it with friends and family, or keep it all to yourself (I won’t judge 😏). Happy baking!