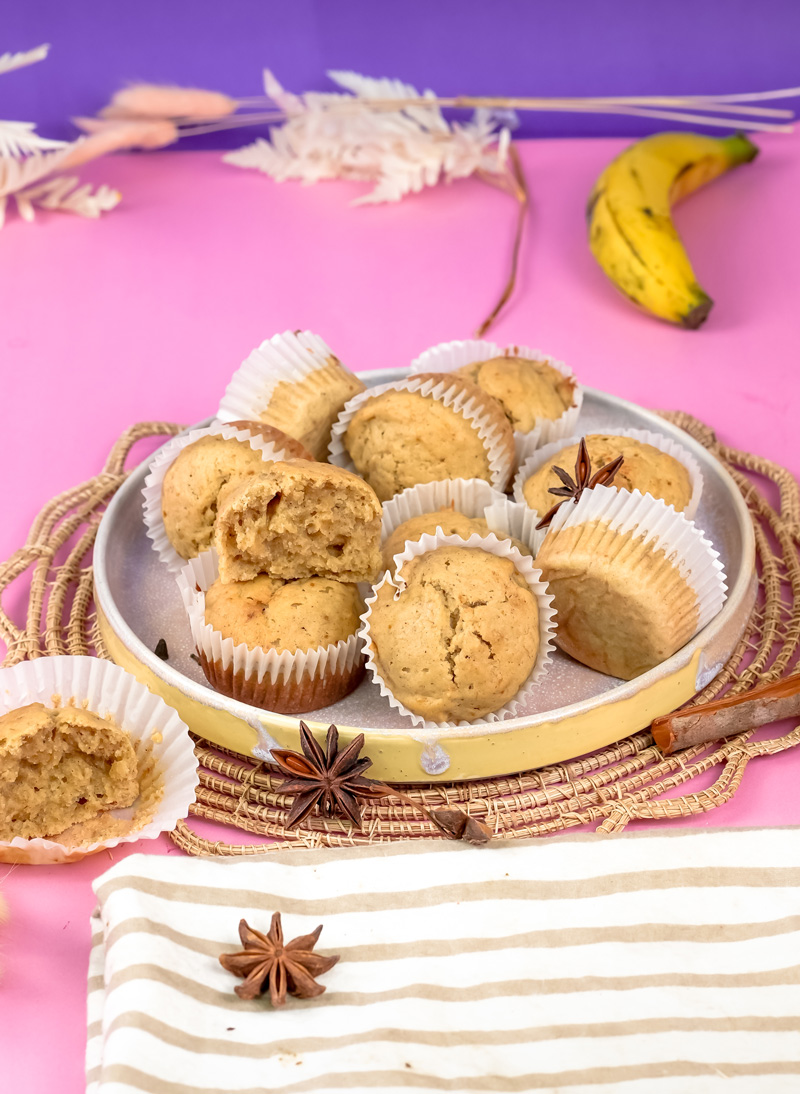
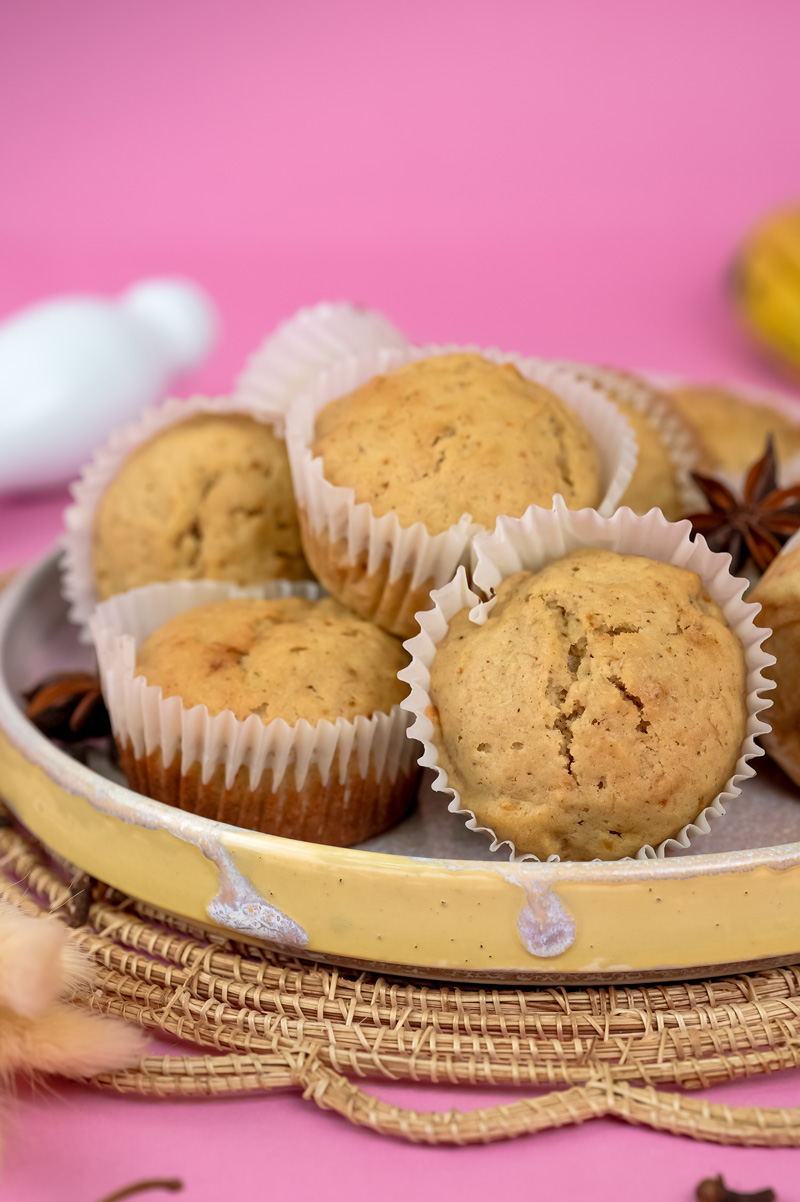
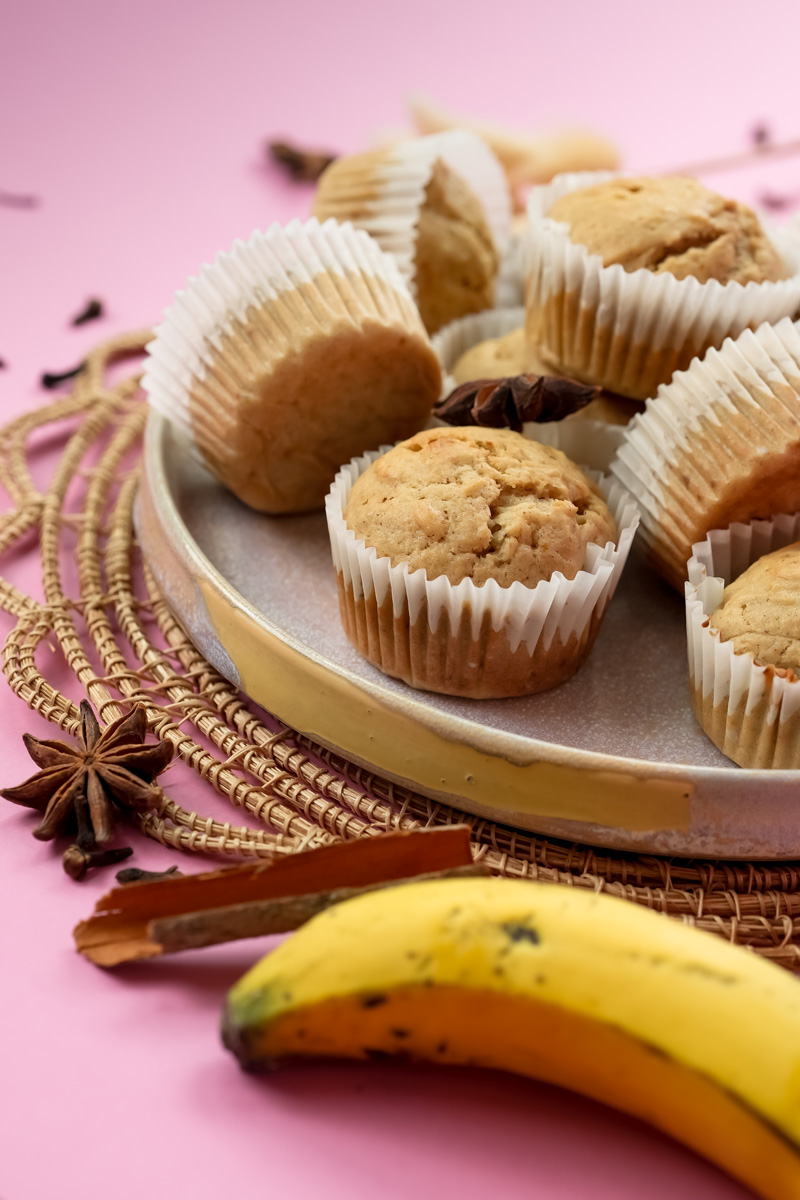
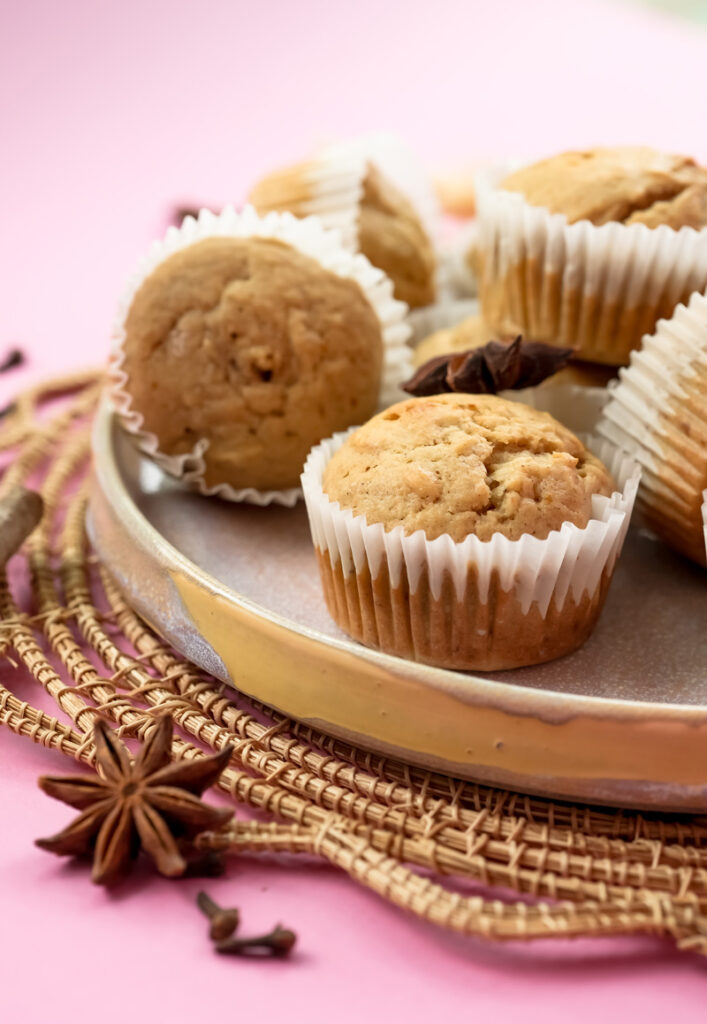
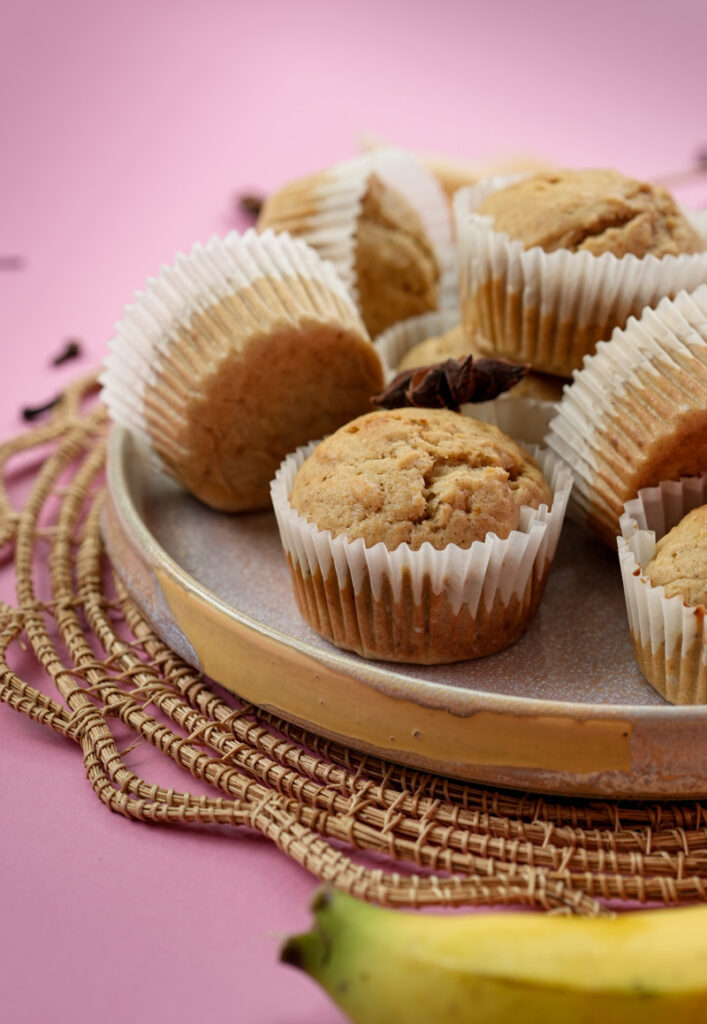
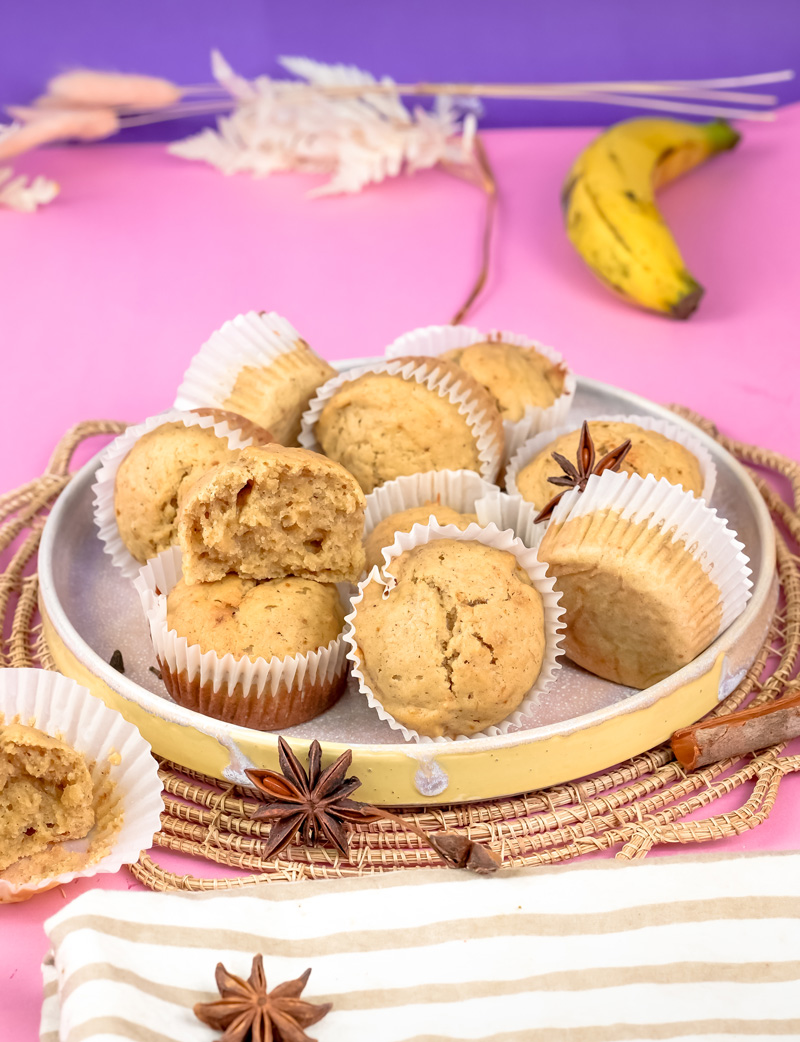
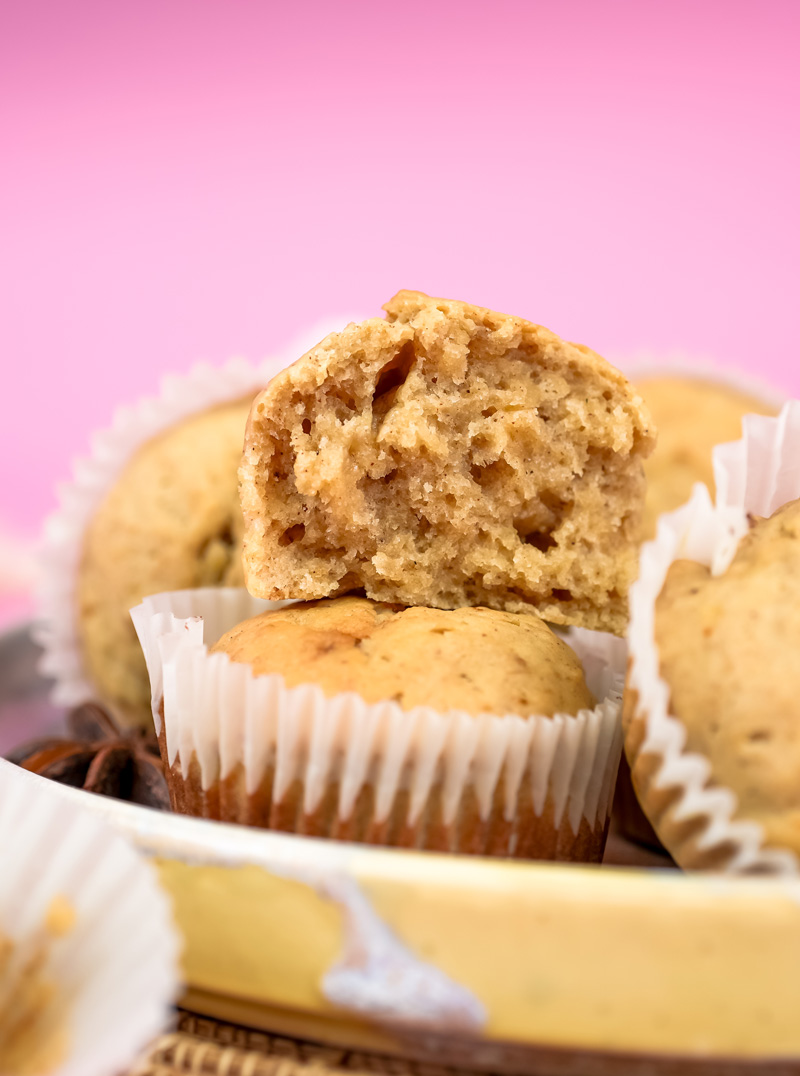
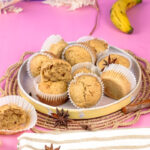
Oh, friends, I am so excited to share this recipe with you! Seriously, is there anything better than a warm, freshly baked Mini Banana Muffin? I think not! They’re like tiny bundles of joy. Perfect for a quick grab-and-go breakfast. Or maybe a sweet little afternoon pick-me-up. You could even call them a guilt-free dessert!
This Mini Banana Muffins Recipe is a true keeper in my house. Why? Well, it’s wonderfully simple. Plus, it’s the best way to use up those super-ripe bananas that always seem to be hanging out on my counter. You know the ones I’m talking about! And here’s a little secret: the Greek yogurt in this recipe makes them unbelievably moist. We’re talking seriously moist.
Banana bread and muffins? They have such a cozy story. Usually, they come about because someone smart didn’t want to waste perfectly good, overripe bananas. Talk about kitchen genius! This version, shrunk down to mini size, is extra charming. And they bake up fast. They’re the perfect little treat – somehow both wholesome and a tiny bit indulgent. That Greek yogurt? It’s my magic touch for these Mini and Moist Banana Muffins, making every bite tender and bursting with flavor. Okay, enough talk. Let’s get baking!
Recipe Lowdown
Before we jump into making these little treasures, let’s get a quick peek at what’s ahead. Trust me, these muffins are a breeze to make. Even if you’re new to baking, you’ve got this!
| Aspect | Details |
|---|---|
| Prep Time | Just 10 minutes! Seriously, that’s all you need to get your ingredients together and whip up the batter. Quick and easy. |
| Cook Time | These little guys are speedy. Only 14 to 16 minutes in the oven. |
| Total Time | So, from start to yummy finish, you’re looking at about 26 minutes. Not bad, right? |
| Yield | About 24 mini muffins. That’s around 12 servings if you figure two minis per person. Plenty for sharing! Or for stashing away. |
| Difficulty | Easy! I promise. The steps are super straightforward. No tricky stuff here. It’s a great recipe to get your baking confidence up! |
Need More? Or Fewer?
- Going Big: Want a bigger batch? Easy peasy. Just double everything. Make sure you have enough mini muffin pans, or bake them in waves.
- Scaling Down: Just want a few? Halve all the ingredients for about 12 mini muffins. For the egg, just whisk one up in a little bowl and use about half of it (that’s roughly 1.5 to 2 tablespoons).
What You’ll Need (Your Baking Gear)
You don’t need a ton of fancy equipment, but these things will make your life easier:
- Mini Muffin Cupcake Pan (24-cup): This is kinda key for those cute mini muffins.
- No mini pan? If you only have a standard 12-cup muffin pan, that’s okay! You’ll get about 10-12 regular-sized muffins. They’ll just need a bit longer to bake, maybe around 18-22 minutes.
- Mixing Bowls: A couple will do. One medium and one large should be perfect.
- Measuring Cups and Spoons: Baking is a bit of a science, so these are a must!
- Whisk: Great for mixing the dry stuff and starting on the wet ingredients.
- Rubber Spatula: Your best friend for folding the batter. Folding = tender muffins!
- Mini Muffin Liners: I love the parchment paper ones. They make cleanup a snap and stop any sticking. If you don’t have liners, just make sure to grease and flour your pan really well.
Make-Ahead Magic
These Mini Banana Muffins are awesome for meal prep. I often bake a batch on Sunday. Then, boom! Breakfasts or snacks are sorted for a few days. They also freeze like a dream (more on that later!).
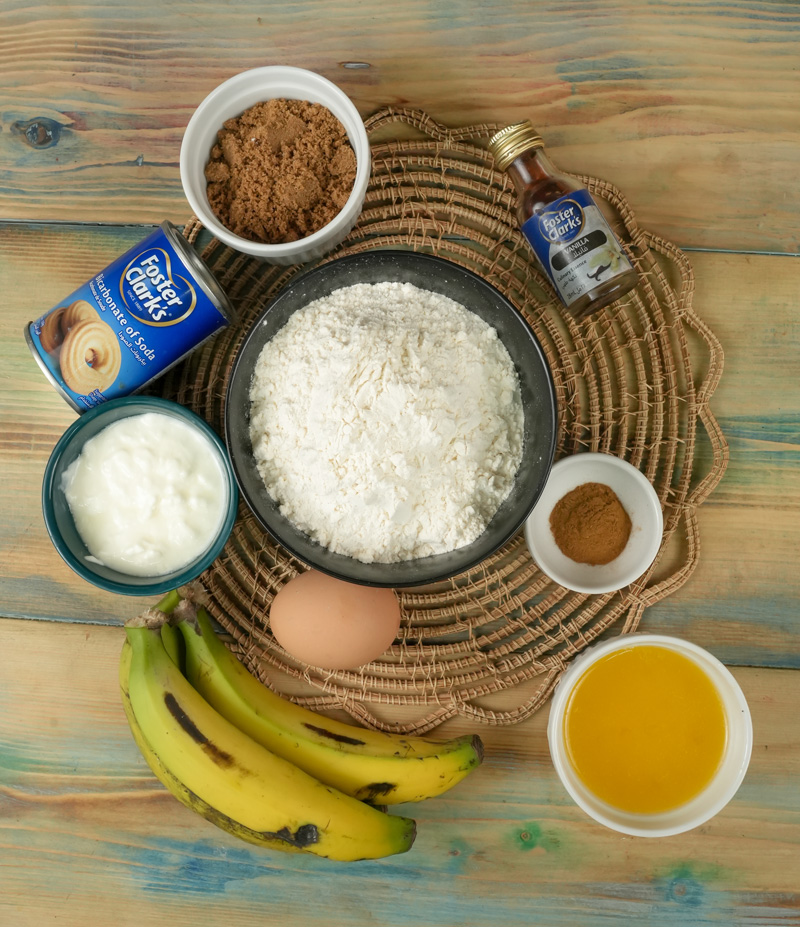
Ingredients: Your Building Blocks to Deliciousness
Alright, let’s chat about what goes into these beauties – the ingredients! Using good stuff and knowing what each ingredient does? That’s how you take your Mini Banana Muffins from just “good” to “wow!”
Here’s your shopping list:
- 1 cup all-purpose flour: This is what gives our muffins their shape. Regular all-purpose is perfect. No need for anything fancy.
- ½ teaspoon baking soda: This is our little helper that makes the muffins puff up! It works with the banana and yogurt to give them a nice lift. Make sure yours is fresh! Old baking soda = sad, flat muffins.
- ½ teaspoon cinnamon: Oh, cinnamon and banana. What a combo! It adds such a lovely warmth. Add more or less if you like!
- ¼ teaspoon salt: Don’t skip the salt! It might seem small, but it makes all the other flavors pop and keeps things from being too sweet.
- 2 ripe bananas: And when I say ripe, I mean really ripe. Think lots of brown spots! These bananas are way sweeter, have more banana-y flavor, and are easier to mash. This is key for our Mini and Moist Banana Muffins. You’ll need about ¾ to 1 cup of mashed banana.
- ½ cup packed light brown sugar: This brings sweetness and a nice hint of molasses, which also helps make the muffins moist. Remember to pack it down in your measuring cup!
- 4 tablespoons (¼ cup) unsalted butter, melted and cooled a bit: Butter means flavor and richness. Melting it helps it mix in smoothly. Letting it cool a little stops it from cooking the egg. Nobody wants scrambled egg muffins!
- ¼ cup Greek yogurt: My secret weapon for super moist and tender Greek Yogurt Banana Muffins! Plain Greek yogurt, full-fat or low-fat, works great. It also adds a little tang that plays so well with the sweetness. I always have a tub in the fridge.
- 1 large egg, at room temperature: The egg helps hold everything together and adds richness. An egg at room temp mixes in much better, making for a lighter muffin. Quick tip: To get an egg to room temp fast, just pop it in a bowl of warm (not hot!) water for 5-10 minutes.
- 2 teaspoons vanilla extract: Good old vanilla extract makes everything taste better, especially sweet things. If you can, use the pure stuff. It really does make a difference!
Oops! Need a Swap? (Ingredient Substitutions)
Hey, sometimes you open the cupboard and you’re out of something. It happens! Here are a few swaps that generally work well:
- Flour: Want to make them gluten-free? A good quality 1-to-1 gluten-free baking flour blend should do the trick.
- Light Brown Sugar: Dark brown sugar works too, for a deeper molasses taste. Granulated sugar is okay, but the muffins might not be quite as moist. If you’re trying to avoid refined sugar, you could try an equal amount of maple syrup. Just know it might change the liquid balance a tiny bit.
- Butter: Melted and cooled coconut oil or another neutral-tasting oil can work if you need a dairy-free option.
- Greek Yogurt: Sour cream is a fantastic substitute. Unsweetened applesauce can also work if you’re going dairy-free, but the texture will be a little different. Still yummy, though!
- Egg: For a vegan version, try a flax egg. Just mix 1 tablespoon of ground flaxseed with 3 tablespoons of water, and let it sit for 5-10 minutes until it gets thick.
- Cinnamon: Feel free to toss in other warm spices! A pinch of nutmeg or allspice with the cinnamon, or even instead of it, can be really nice.
Remember, baking is like a fun science experiment. Swapping things out can change the final taste or texture a bit, but it’s always fun to see what happens!
Okay, are you ready? Let’s roll up our sleeves, get a little flour on our noses, and bake these amazing Mini Banana Muffins together. I’ll walk you through it, step by step, just like I’m right there in your kitchen!
Step-by-Step Method: Let’s Bake Together!
1. Preheat and Prep – Setting the Stage for Success!
First things first, let’s get that oven going. Go ahead and preheat your oven to a toasty 350°F (175°C). Getting your oven to the right temperature before your batter is ready? That’s a golden rule in baking, friends. It means your muffins start baking evenly right away, which is super important for that perfect puffy top and lovely texture.
While the oven is doing its thing, let’s get our 24-cup mini muffin tin ready. Grab your parchment paper liners – I swear, these make life so much easier, and they look cute too – and pop one into each little cup. You’ll hear that satisfying little crinkle. Music to a baker’s ears! If you’re skipping liners, no worries. Just make sure to grease each cup well with butter or non-stick spray, then give it a light dusting of flour. Tap out any extra flour. This little step stops your precious muffins from sticking.
2. Whisk the Dry – Creating Light and Airy Foundations!
Now, find a medium-sized mixing bowl. This is where our dry ingredients will hang out. Measure in your 1 cup of all-purpose flour, the ½ teaspoon of baking soda (our little lift-off agent!), the warming ½ teaspoon of cinnamon, and that very important ¼ teaspoon of salt. Seriously, don’t skip the salt! It makes everything else taste better.
Take your whisk and give these ingredients a good mix for about 30 seconds, maybe even a minute. Think of it like you’re fluffing them up! This isn’t just about mixing; whisking helps get a little air into the flour, breaks up any clumps, and makes sure the baking soda and cinnamon are spread out evenly. You don’t want one super-spicy muffin and another that doesn’t rise, right? You’re aiming for a nice, uniform, pale mixture. It should look light and almost powdery.
3. Mash and Mix the Wet – Unleashing Flavor Central!
Alright, set your bowl of perfectly whisked dry ingredients aside for a sec and grab a separate large mixing bowl. This is where the flavor party really starts! Get your 2 ripe bananas – remember, the spottier and browner, the yummier and sweeter they’ll be! – peel them, and toss them into the bowl.
Using a fork (my favorite tool for mashing bananas) or even a potato masher, get to mashing. You want them mostly smooth. A few little lumps? Totally fine! They add a nice rustic touch and little bursts of banana. Mmm, smell that? That sweet banana aroma is just the beginning!
Next, into that lovely banana mash, add the ½ cup of packed light brown sugar. Now, pick up your whisk again and whisk these two together pretty hard for about 1 to 2 minutes. You’ll see the mixture change. It’ll get smoother, a bit more liquidy, and will look a little glossy as the sugar starts to melt into the banana. This step is pretty important because it helps the sugar mix in really well, which means a more tender muffin.
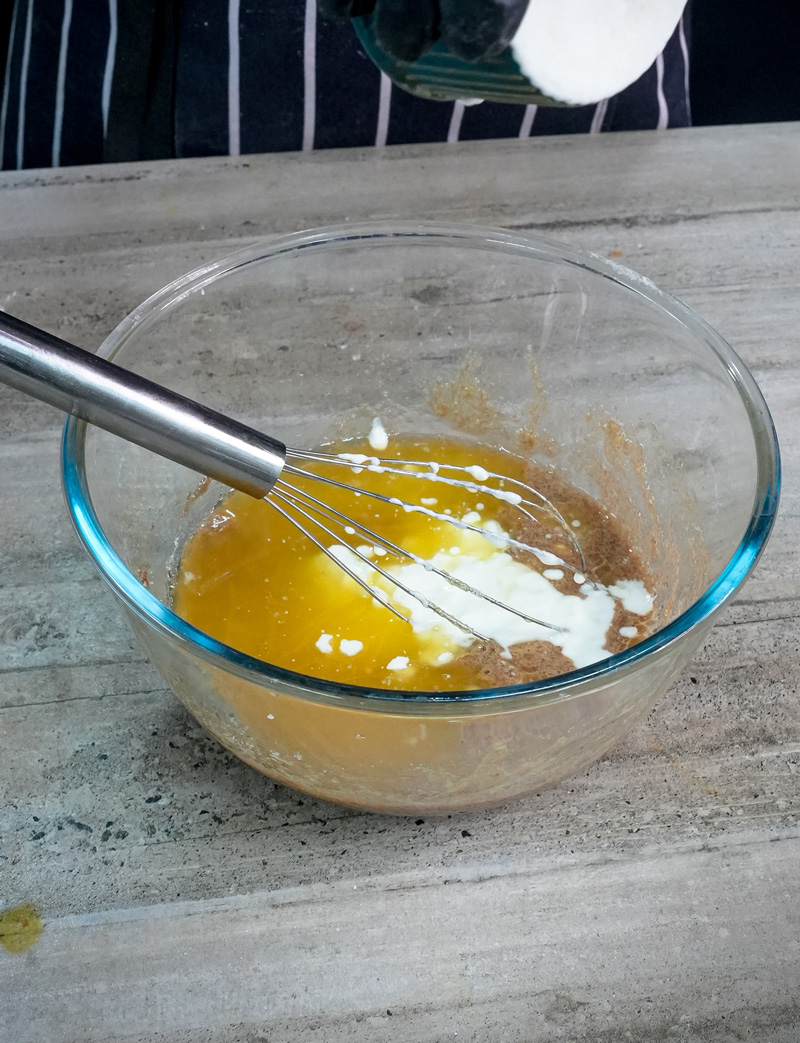
Once your banana and sugar mix looks good and luscious, it’s time for the rest of the wet ingredient crew. Gently pour in the 4 tablespoons of slightly cooled melted butter (remember, cool it a bit so it doesn’t scramble the egg!), the rich ¼ cup of Greek yogurt, the 1 large room temperature egg (room temp eggs just mix in so much better!), and finally, the 2 teaspoons of pure vanilla extract. Give everything a good whisk until it’s just combined and beautifully smooth – probably about another minute. The color will lighten up a bit, and the batter will become wonderfully creamy and smell amazing. That mix of banana, vanilla, and the little tang from the yogurt? Heavenly!
4. Combine Wet and Dry – The Gentle Art of the Fold!
This step is super important for getting those tender, Mini and Moist Banana Muffins we’re dreaming of. A gentle hand is what you need here! Carefully pour your beautiful wet mixture into the bowl with your dry ingredients. Now, put down your whisk. It’s time for a rubber spatula – it’s the right tool for this job. We’re going to fold the ingredients together. Not stir, not beat. Fold.
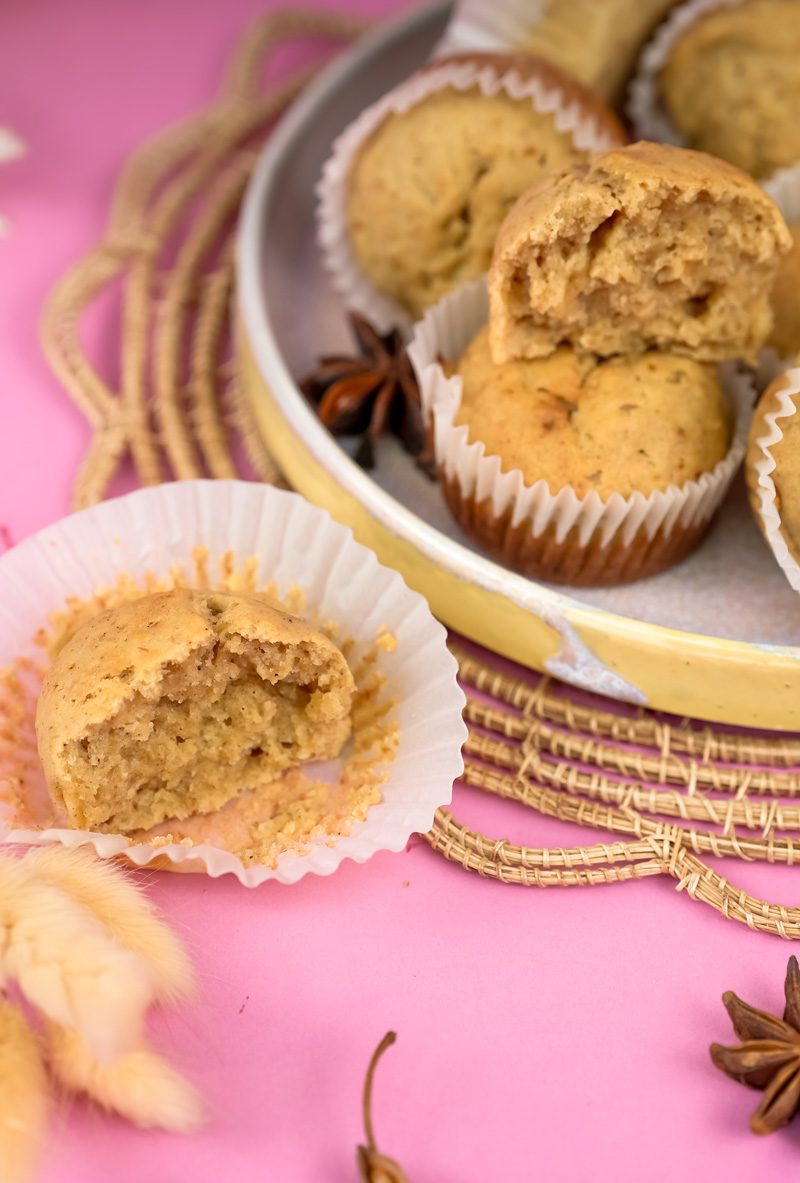
How do you fold? Easy! Cut your spatula down through the middle of the ingredients, scrape along the bottom of the bowl, and then bring that bit of batter up and over the top. Give your bowl a little quarter turn and do it again. Keep doing this gentle folding, scraping the sides and bottom of the bowl as you go, just until you don’t see any big streaks of dry flour. It’s so important not to overmix here! Overmixing makes the gluten in the flour work too hard, and that’s how you get tough, dense, or even rubbery muffins. The exact opposite of what we want!
A few small lumps in the batter are totally fine. In fact, they’re a good sign you haven’t overdone it. The batter will be pretty thick and yummy-looking, not runny. You should still see some texture from those mashed bananas. Perfect!
5. Fill and Bake – The Sweet Path to the Grand Finale!
Your gorgeous batter is now ready for its cozy little muffin homes! Using a spoon, or even better, a small cookie scoop (I find a heaping tablespoon is just about right for mini muffins), carefully fill each prepared mini muffin cup. You want to fill them pretty full. The batter should come close to the top edge of the liner or the tin. These muffins will puff up nicely but usually don’t spill over if you fill them this much. Try to make them all about the same size so they bake evenly.
Now, with your muffin tin all filled up, carefully open your preheated oven (watch out for that puff of warm air!) and place the tin on the center rack. Bake for about 14 to 16 minutes. Every oven is a little different – they all have their own quirks! So, I always say start checking for doneness around the 14-minute mark.
So, how do you know when these little beauties are perfectly baked? Here’s what to look for:
- Look at Them: They should be puffed up and a lovely light golden-brown on top and around the edges.
- The Touch Test: Gently press the top of one of the muffins in the middle of the pan. If it springs right back and feels set, that’s a great sign!
- The Trusty Toothpick Test: This is the most reliable way. Stick a cake tester or a plain wooden toothpick into the very center of one or two muffins. If it comes out clean, or with just a few moist, tender crumbs stuck to it (but no wet, sticky batter), they’re done! If you see wet batter, give them another minute or two and test again.
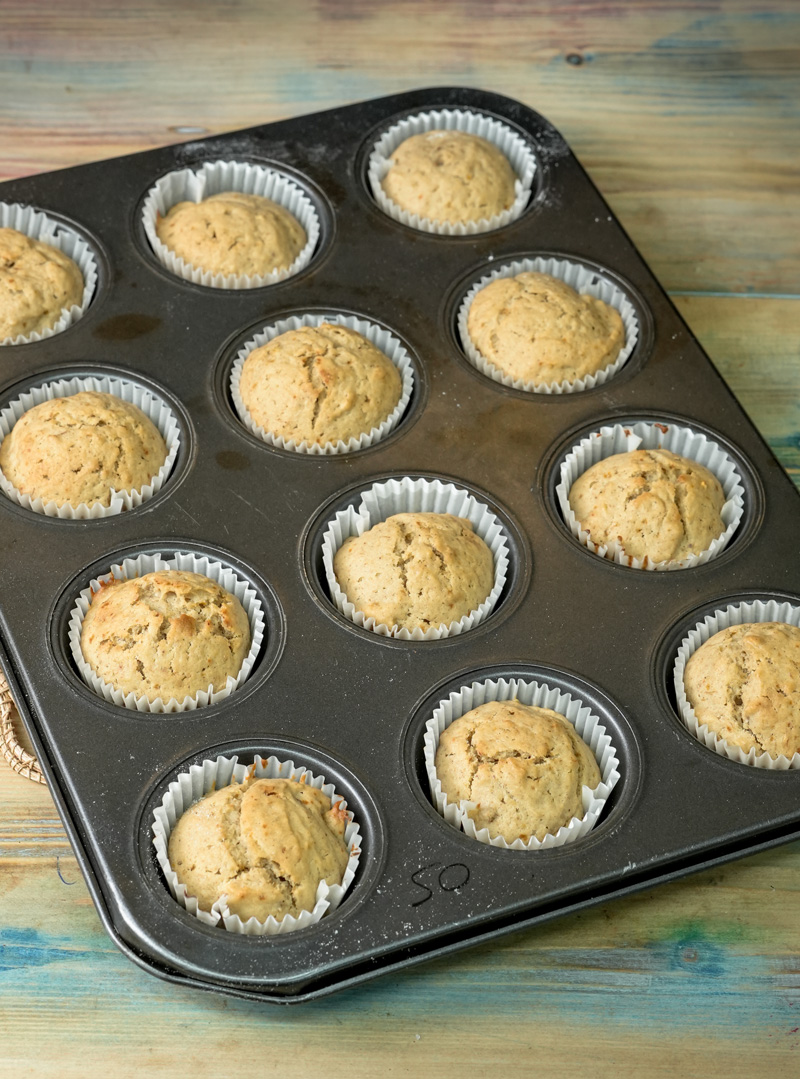
Once they pass the test, carefully take the muffin tin out of the oven. The smell in your kitchen right now should be amazing! Place the tin on a wire cooling rack for about 5 minutes. Letting them chill in the pan for a few minutes helps them set up a bit, so they’re easier to get out without breaking. After their little rest, gently move the mini muffins from the tin directly onto the wire rack to cool completely. This is important because it lets air get all around them, so their bottoms don’t get steamy and soggy.
And now for the hardest part: try to resist eating them all while they’re still wonderfully warm. Though, of course, having one (or two!) for quality control? That’s practically a baker’s duty!
Variations & Fun Twists: Make Them Your Own!
One of the best things about this Mini Banana Muffins Recipe? It’s so easy to change things up! Here are some ideas to add your own special touch:
Dietary Tweaks:
- Gluten-Free Mini Banana Muffins: Like I mentioned, a good 1-to-1 gluten-free all-purpose flour blend (the kind with xanthan gum already in it) should work great. Just use the same amount as regular flour.
- Vegan Mini Banana Muffins: You can totally do this!
- Swap the egg for a flax egg (1 tbsp ground flaxseed + 3 tbsp water, let it sit for 5-10 mins to get jelly-like).
- Use dairy-free butter (a good vegan butter block works well, melted and cooled) or melted coconut oil.
- Change out the Greek yogurt for a dairy-free plain yogurt (coconut or almond-based are good choices) or even unsweetened applesauce.
- Lower Sugar: Sugar does help with moisture and texture, but you could try cutting back the brown sugar by a couple of tablespoons. Those super-ripe bananas are already pretty sweet! Some people also like using maple syrup, which gives a different, tasty flavor.
Spice It Up (or Down!):
- If you really love cinnamon (like me!), feel free to bump it up to ¾ or even 1 whole teaspoon.
- Add a little pinch (like ⅛ to ¼ teaspoon) of nutmeg, allspice, or cardamom along with the cinnamon. It adds a lovely, complex warmth.
- Not a huge cinnamon fan? You can use less or leave it out. But, trust me, it’s so good with banana.
Fun Add-Ins:
This is where you can get really creative! Gently fold in about ½ cup of your favorite goodies with the dry ingredients, or sprinkle some on top before baking.
- Chocolate Chips: Mini chocolate chips are amazing in these mini muffins! Milk, semi-sweet, dark – whatever you love! I’m a semi-sweet fan myself.
- Chopped Nuts: Walnuts or pecans add a great crunch and nutty taste. Toast them a bit first for an even deeper flavor. So good!
- Dried Fruit: Finely chopped dates, raisins, or cranberries can add a nice chewiness and extra sweetness.
- Shredded Coconut: For a little taste of the tropics!
Fancy Pants vs. Everyday Muffins:
- Everyday Yum: Honestly, they are perfect just the way they are!
- A Little Bit Fancy:
- Streusel Topping: Want to dress them up? Before baking, sprinkle a simple streusel on top. Just mix 2 tbsp flour, 2 tbsp brown sugar, 1 tbsp cold butter (cut into little pieces), and a pinch of cinnamon until it’s crumbly. Lots of folks love this!
- Simple Glaze: Once they’re cool, drizzle them with a light glaze. Just mix some powdered sugar with a tiny bit of milk or lemon juice.
Seasonal Fun:
- Autumn Vibes: Add ¼ teaspoon of pumpkin pie spice along with the cinnamon. Cozy!
- Summer Berry Pop: Gently fold in about ¼ cup of fresh or frozen (don’t thaw if they’re frozen!) small berries like blueberries or finely diced strawberries. If you use frozen berries, you might need an extra minute or two of baking time.
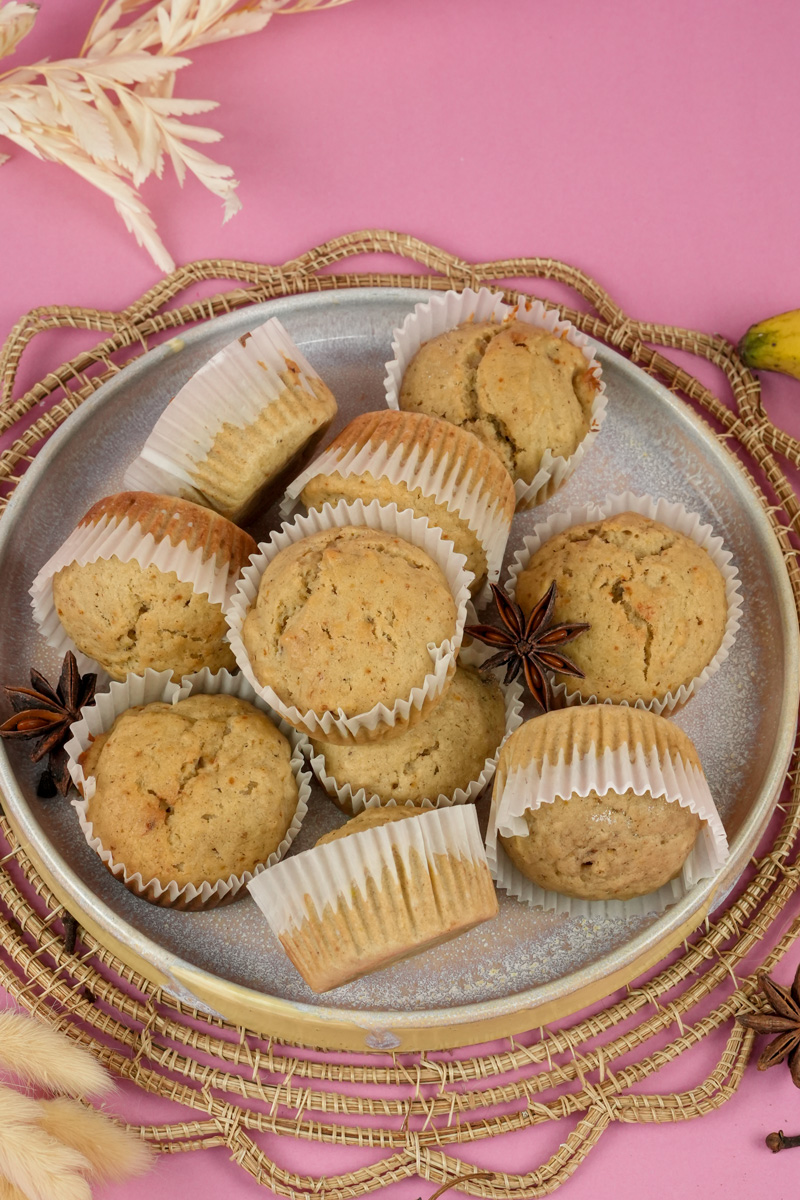
Serving & Storing Your Little Masterpieces!
You did it! You’ve baked a batch of beautiful, yummy-smelling healthy Mini Banana Muffins. (Yep, with Greek yogurt and real fruit, they’re a pretty wholesome treat!). Now, how to best enjoy them and keep them fresh?
Plating and Serving Ideas:
These little muffins are adorable all by themselves!
- Serve them warm (my favorite!) or at room temperature.
- Pile them on a pretty plate or in a bread basket for a breakfast get-together or brunch.
- They’re perfect with a cup of coffee, tea, or a big glass of cold milk.
- Want a bigger breakfast? Pair them with a fresh fruit salad or an extra spoonful of Greek yogurt.
How to Store Them:
To keep your Mini and Moist Banana Muffins fresh and tasty:
- Room Temperature: Once they’re completely cool, pop them in an airtight container and keep them on the counter. They should stay fresh for about 2-3 days. Sometimes I put a paper towel in the bottom of the container to soak up any extra moisture.
- Refrigerator: If you want them to last a bit longer, you can store them in an airtight container in the fridge for up to a week.
Reheating Tips:
They’re delicious at room temp, but a warm muffin? Extra comforting!
- Microwave: Zap one or two in the microwave for about 10-15 seconds for that just-baked warmth. Easy!
- Oven/Toaster Oven: For a slightly crispy top, warm them up in a preheated 300°F (150°C) oven or toaster oven for about 3-5 minutes.
Make-Ahead and Freezing Like a Pro:
These muffins are fantastic for freezing! I do it all the time.
- To Freeze: Let the muffins cool completely. Then, you can put them in a single layer on a baking sheet and freeze them until they’re solid (this usually takes about 1-2 hours). Once they’re frozen solid, transfer them to a freezer-safe zip-top bag or an airtight container. Don’t forget to label it with the date! They’ll keep really well in the freezer for up to 3 months.
- To Thaw: You can let them thaw overnight on the counter at room temperature. Or, if you’re in a hurry, pop one in the microwave for about 20-30 seconds. You can also reheat them from frozen in a 300°F (150°C) oven for about 8-10 minutes.
I really hope you have as much fun making and eating this Mini Banana Muffins Recipe as I do. They’re such a simple joy, and a perfect way to make any day just a little bit sweeter. Happy baking, everyone!
PrintMini Banana Muffins
Whip up a batch of these adorable and incredibly moist mini banana muffins! They’re a family favorite for a reason – super easy, perfect for using up those ripe bananas, and the Greek yogurt makes them unbelievably tender. Get ready for your new go-to snack! These are truly some of the best Mini Banana Muffins you’ll ever taste.
- Prep Time: 10 minutes
- Cook Time: 14-16 minutes
- Total Time: Approx. 26 minutes
- Yield: About 24 mini muffins 1x
- Category: Breakfast, Snack, Dessert
- Cuisine: American
Ingredients
- 1 cup all-purpose flour
- ½ teaspoon baking soda (make sure it’s fresh for good lift!)
- ½ teaspoon cinnamon (that classic warm spice!)
- ¼ teaspoon salt (balances the sweetness)
- 2 very ripe bananas (the spottier, the better! About ¾ to 1 cup mashed)
- ½ cup packed light brown sugar
- ¼ cup (4 tablespoons) unsalted butter, melted & cooled slightly
- ¼ cup plain Greek yogurt (full-fat or low-fat both work great for these Greek Yogurt Banana Muffins)
- 1 large egg, at room temperature (helps it mix in better!)
- 2 teaspoons vanilla extract (for that lovely flavor boost)
Instructions
- Get Ready: First off, preheat your oven to 350°F (175°C). Go ahead and line a 24-cup mini muffin tin with paper liners. If you don’t have liners, just grease and flour the tin really well.
- Dry Mix: Grab a medium bowl. Whisk together the all-purpose flour, baking soda, cinnamon, and salt. Set it aside for a moment. Whisking helps make your muffins nice and fluffy!
- Wet Mix: Now for the good stuff! In a separate large bowl, mash those ripe bananas thoroughly with a fork until they’re mostly smooth. A few small lumps are perfectly fine. Whisk in the packed light brown sugar until the mixture is smooth and a bit glossy. Next, add the slightly cooled melted butter, Greek yogurt, room temperature egg, and vanilla extract. Whisk everything together until it’s just combined and looks creamy and delicious.
- Combine Gently (The Secret!): Pour the wet banana mixture into the bowl with the dry ingredients. Using a rubber spatula, gently fold them together. Keep folding just until you no longer see big streaks of dry flour. It’s super important: Do not overmix! A few lumps in the batter are actually a good thing and lead to tender, moist banana muffins.
- Fill & Bake: Carefully spoon the batter into your prepared mini muffin cups. You’ll want to fill them pretty full, so the batter should be close to the top edge of the liner or tin. Now, pop them into your preheated oven and bake for 14 to 16 minutes. You’ll know they’re perfectly done when a toothpick poked into the center of a muffin comes out clean, or with just a few moist, tender crumbs clinging to it (no wet batter!).
- Cool Down: Once baked, carefully take the muffin tin out of the oven. Let the mini muffins cool in the tin for about 5 minutes. This helps them set up. Then, gently transfer them to a wire cooling rack to cool completely. Now, the hard part – try to resist gobbling them all up while they’re still wonderfully warm!
Notes
- Serving Ideas: These little guys are perfect as is! Enjoy them warm or at room temperature. They’re great with your morning coffee, as an after-school snack for the kids, or even a light dessert. For an extra treat, try one warm with a tiny pat of butter. So good.
- Top Tips for Muffin Success:
- Use REALLY Ripe Bananas: Seriously, the browner and spottier, the better! This means more sweetness and more banana flavor.
- Don’t Overmix the Batter! I can’t say this enough. Gentle folding is key to a soft, tender muffin. A lumpy batter is a happy batter here.
- Room Temperature Egg: It really does make a difference! It helps the egg incorporate more evenly into the batter, leading to a lighter texture.
- Storing Your Mini Muffins:
- Room Temperature: Once completely cooled, store them in an airtight container. They should stay fresh for about 2-3 days.
- Refrigerator: If you want them to last a bit longer (up to a week), pop them in an airtight container in the fridge.
- Reheating (For that just-baked warmth!):
- Microwave: A quick 10-15 seconds for one or two muffins is perfect.
- Oven/Toaster Oven: For a slightly crispier top, reheat them in a preheated 300°F (150°C) oven for about 3-5 minutes.
- Yes, They Freeze Beautifully!
- To Freeze: Let the muffins cool completely first. You can then place them in a single layer on a baking sheet and freeze until solid (about 1-2 hours). Once frozen, transfer them to a freezer-safe zip-top bag or airtight container. Don’t forget to label them! They’ll keep well in the freezer for up to 3 months.
- To Thaw: You can thaw them overnight at room temperature on the counter, or individually in the microwave for about 20-30 seconds.