
I’ve finally cracked the code for the perfect marble cake recipe after years of trial and error. This moist and fluffy marble cake, made from scratch, is a delightful treat that doesn’t have to be complicated. Many of you have requested an easy marble cake recipe that doesn’t involve separate cake batters, and I’m thrilled to share my foolproof version with you.
The secret to this amazing cake lies in the simplicity of using my popular vanilla cake recipe as the base. By adding a chocolate mixture to part of the batter and swirling it together, you create a beautiful marble effect effortlessly. Pair this delectable cake with a luscious chocolate frosting and ganache drip, and you have a dessert that will satisfy both vanilla and chocolate lovers alike.
Whether you savor the pure sweetness of vanilla or indulge in the richness of chocolate, this marble cake is sure to become a favorite in your baking repertoire.
Ingredients
Creating a delicious marble cake requires a careful selection of top-quality ingredients that work harmoniously together. Below is a breakdown of the main cake ingredients and the ingredients needed for the chocolate swirl.
Main Cake Ingredients
- All-purpose flour: Provides the base structure for the cake.
- Sugar: Adds sweetness to the cake; can be adjusted for personal preference.
- Eggs: Ensure the cake has the right texture and structure.
- Oil: Adds moisture to the cake; olive oil or a neutral vegetable oil can be used.
- Milk: Adds richness and moisture; can be dairy or non-dairy.
- Vanilla: Imparts a fragrant and rich flavor to the cake.
- Baking powder: Acts as a leavening agent.
- Salt: Enhances the overall flavor profile of the cake.
- Cocoa powder: Adds a rich chocolate flavor to create the marble effect in the cake. Make sure to use unsweetened cocoa powder for the best results.
Necessary Equipment
To prepare this delicious marble cake recipe, you’ll need a few essential tools and equipment to ensure a smooth baking process. Here’s a list of what you’ll need:
- Two 9-inch round cake pans
- Parchment paper
- Handheld or stand mixer with paddle attachment
- Large mixing bowls
- Sifter
- Measuring cups and spoons
- Cooling rack
- Spatula
- Oven for preheating
- Whisk
Having these tools at hand will help you create a perfect marble cake with ease and precision.
Preparation
Let’s dive into the essential steps to prepare the perfect marble cake batter and create those beautiful chocolate swirls.
Preparing the Cake Batter
To kick off this marble cake masterpiece, ensure your ingredients like flour, sugar, eggs, and cocoa powder are at room temperature. Preheat your oven to 335ºF (168ºC) and get your cake pans ready with some cake goop or your preferred pan spray. It’s all about setting the stage for baking success.
In a meticulous dance of mixing, combine the dry ingredients – flour, sugar, baking powder, baking soda, and salt in a bowl. With the paddle attachment on your stand mixer, blend these with softened butter until you achieve a sandy mixture. In a separate bowl, mix some of the milk and oil while in another container, whisk up the rest of the milk, eggs, vanilla, and almond extract. Once properly whisked, combine these wet ingredients with the flour mixture to create your base batter for the marble cake.
Creating the Chocolate Swirl
Let’s take this batter to the next level with a decadent chocolate swirl. Combine 1 cup of chocolate chips, 1/4 cup of room temperature butter, and 1/4 cup of heavy cream in a heatproof bowl. Melt this divine mixture in two 30-second intervals, stirring in between until smooth. With the chocolate fudge swirl ready, alternate spoonfuls of chocolate and vanilla cake batter into your prepared cake pans.
Fill the pans about an inch high with batter, ensuring each has an equal amount. Utilize a digital kitchen scale for precision. For the marbled effect, drop small chocolate swirls on top of the batter and use an offset spatula or butter knife to create enchanting patterns by dragging it through the batter.
Bake these mesmerizing creations for about 32-35 minutes until a toothpick emerges with a few moist crumbs. Once out of the oven, let them cool before moving on to the next step towards cake perfection.
Directions
Combining the Batters
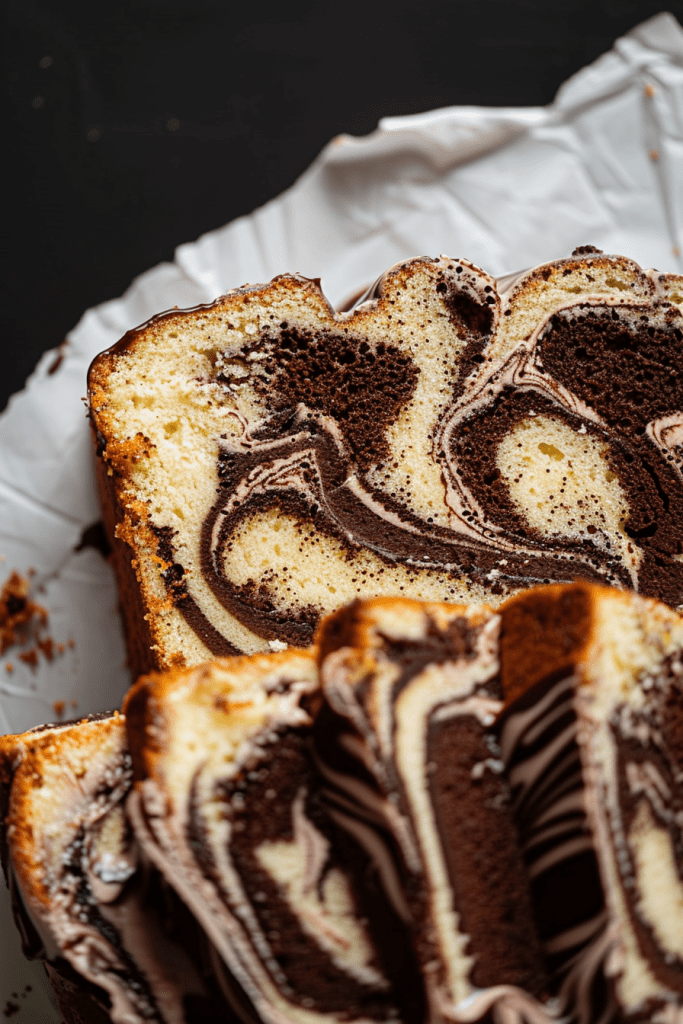
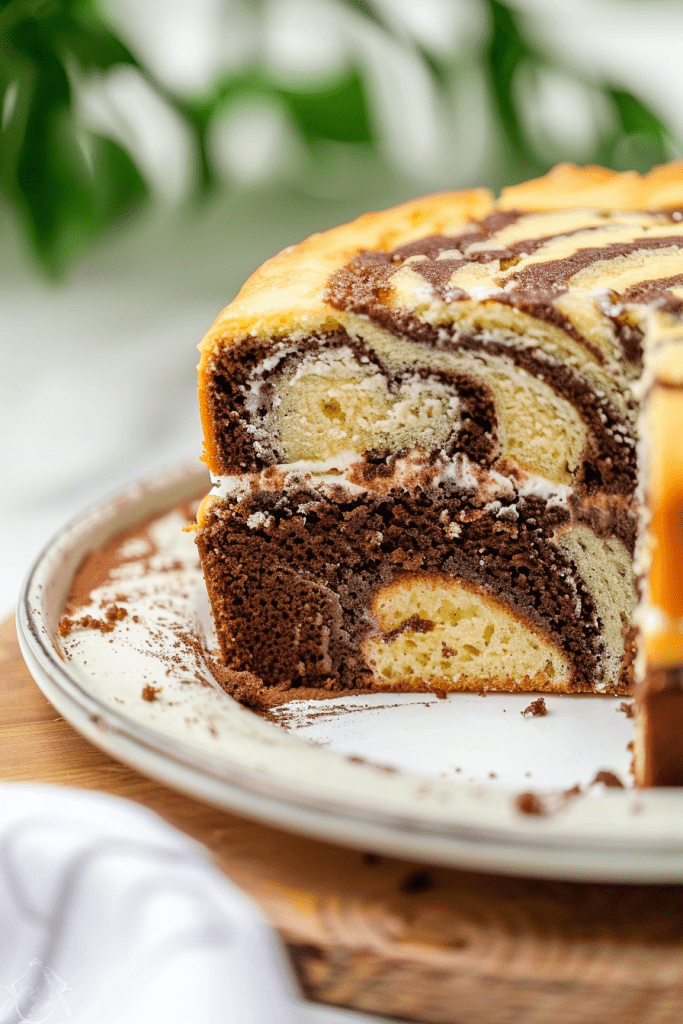
Take out ⅓ of your batter and combine it with the cooled chocolate mixture. Fold gently until fully combined. Layer the batter into the cake pans, starting with vanilla, then chocolate, and ending with vanilla. Use a butter knife to swirl them together gently. Avoid overmixing to maintain the marbled effect.
Baking the Cake
Bake the cakes at 335ºF (168ºC) for 35-40 minutes or until a toothpick inserted into the center comes out clean. Quickly tap the pan firmly on the countertop once to release steam, preventing the cake from shrinking. Let the cakes cool for 10 minutes in the pan before flipping them out onto a cooling rack. Chill the cakes before handling, or freeze them wrapped in plastic to retain moisture. Thaw the cake on the countertop before frosting.
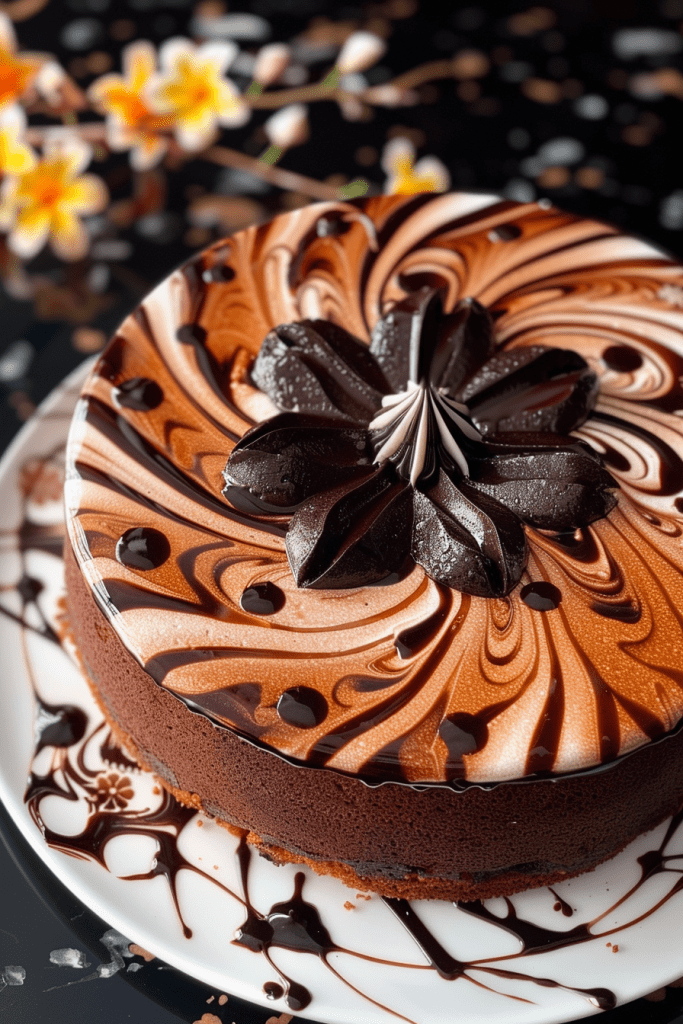
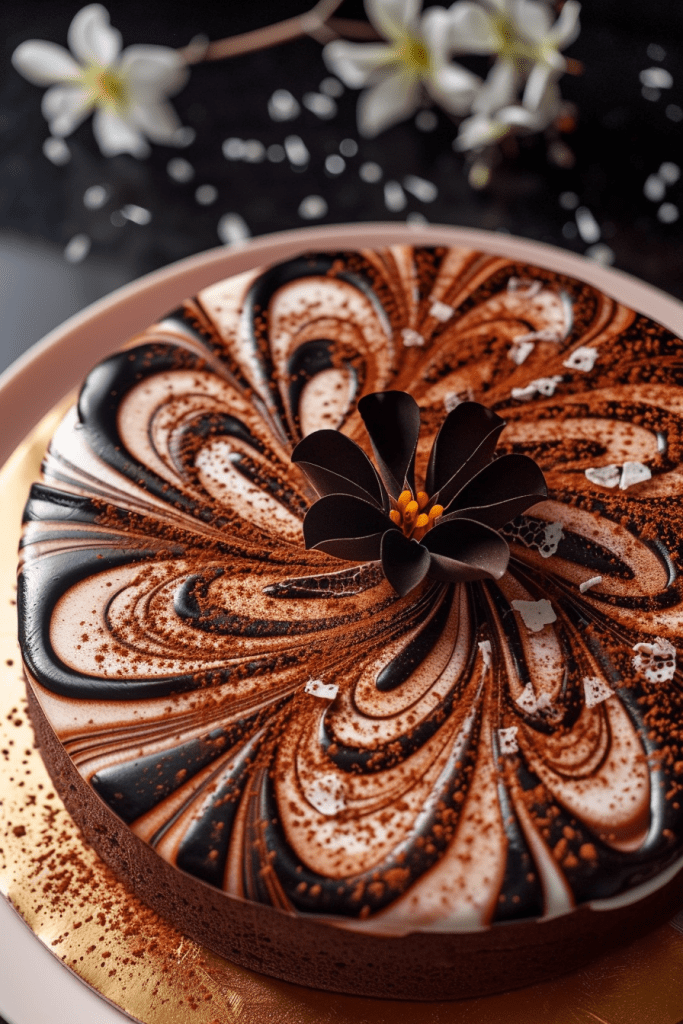
Assembling and Decorating the Cake
After baking the marble cake layers to perfection, assembling and decorating the cake is the final step to create a stunning dessert masterpiece.
Frosting Options
For frosting the marble cake, I recommend a luscious chocolate buttercream that complements the flavors of both the vanilla and chocolate swirls. The creamy and rich texture of the chocolate buttercream adds a delectable touch to the moist cake layers, enhancing the overall taste experience.
Decoration Tips
When it comes to decorating a marble cake, the options are endless. You can use a scalloped cake comb to create a textured finish on the frosting or opt for simple swirls using a piping tip for a classic look. Additionally, adding handmade marbled chocolate decorations between swirls can elevate the cake’s visual appeal and make it a showstopper dessert for any occasion.
Storing and Freezing
When it comes to marble cake, knowing how to store and freeze it properly can help you enjoy this delightful treat for longer periods. Here’s how you can keep your marble cake fresh for later indulgence.
Short-Term Storage
If stored at room temperature, your marble cake can stay moist and delicious for up to 2 to 3 days. Remember, it’s essential to let the cake come to room temperature before serving to avoid it tasting stale.
Freezing and Thawing Instructions
You can freeze marble cake for later enjoyment. Whether you’re saving whole frosted cakes or individual slices, here’s how to freeze and thaw them properly:
- For Whole Cakes: Wrap the whole frosted cake or unfrosted cake layers tightly in plastic wrap, place them in an airtight container, and freeze for up to 3 months. Thaw the cake completely on the counter for a few hours before serving.
- For Slices: If you prefer to freeze individual slices, wrap each slice in plastic wrap and store them in an airtight container in the freezer. When ready to enjoy, let the slices thaw completely on the counter for a few hours.
By following these simple storage and freezing tips, you can savor your marble cake whenever the craving strikes, ensuring that every bite is as fresh and delightful as the first slice.

Conclusion
In mastering the art of marble cake baking, I’ve shared valuable insights on achieving the perfect texture and appearance. By prioritizing top-notch ingredients and following precise steps, you can create a delectable treat that captivates both the eyes and taste buds. From mastering the marbling technique to handling and storing your creation, every detail contributes to a delightful marble cake experience. With the knowledge gained from this article, you’re equipped to bake marble cakes that impress and satisfy, whether for personal indulgence or sharing with loved ones. Embrace the joy of baking and savor the rewarding results of your efforts in each slice of moist, flavorful marble cake.