
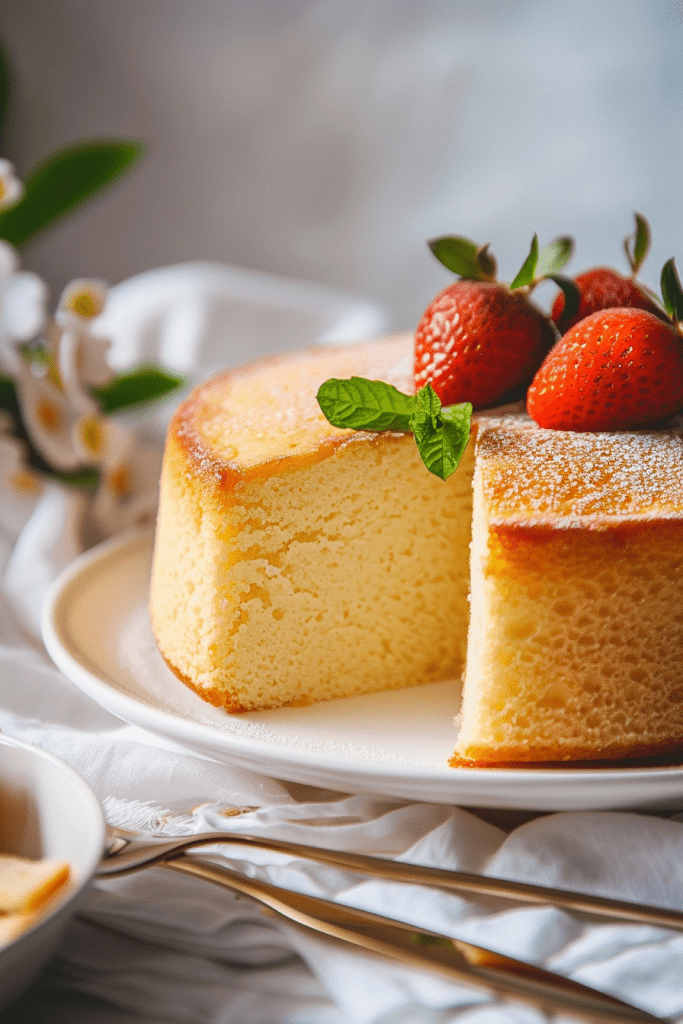
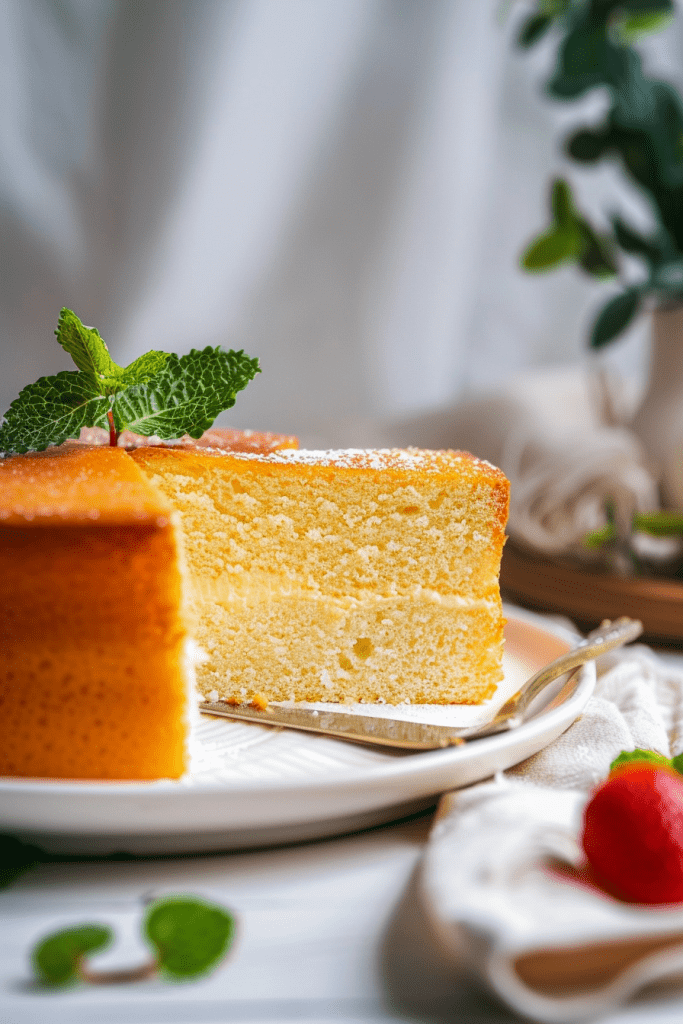
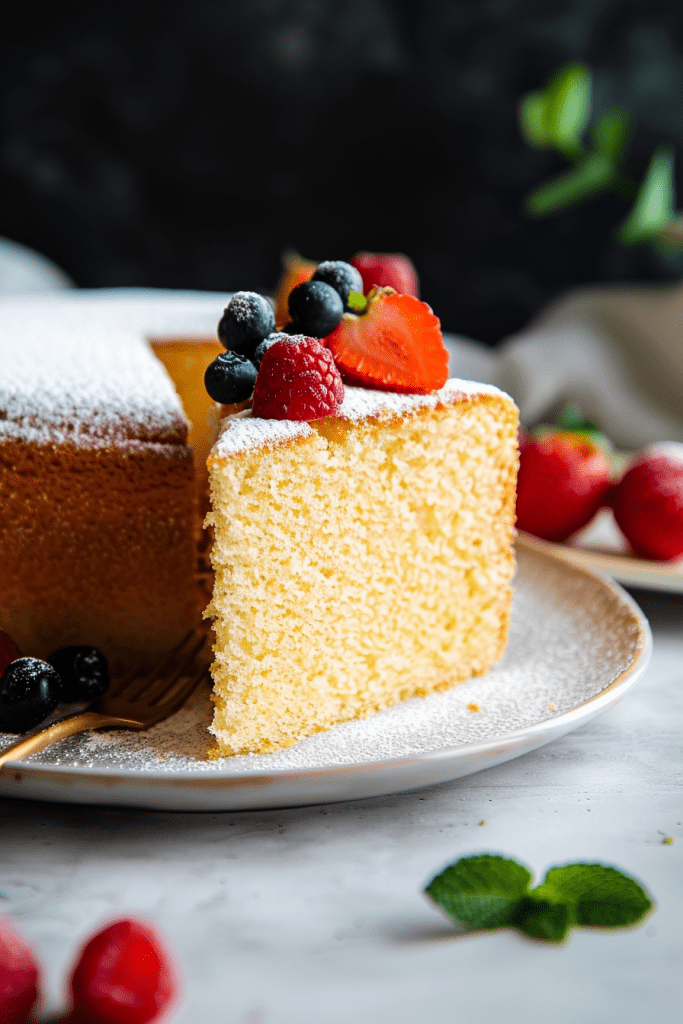
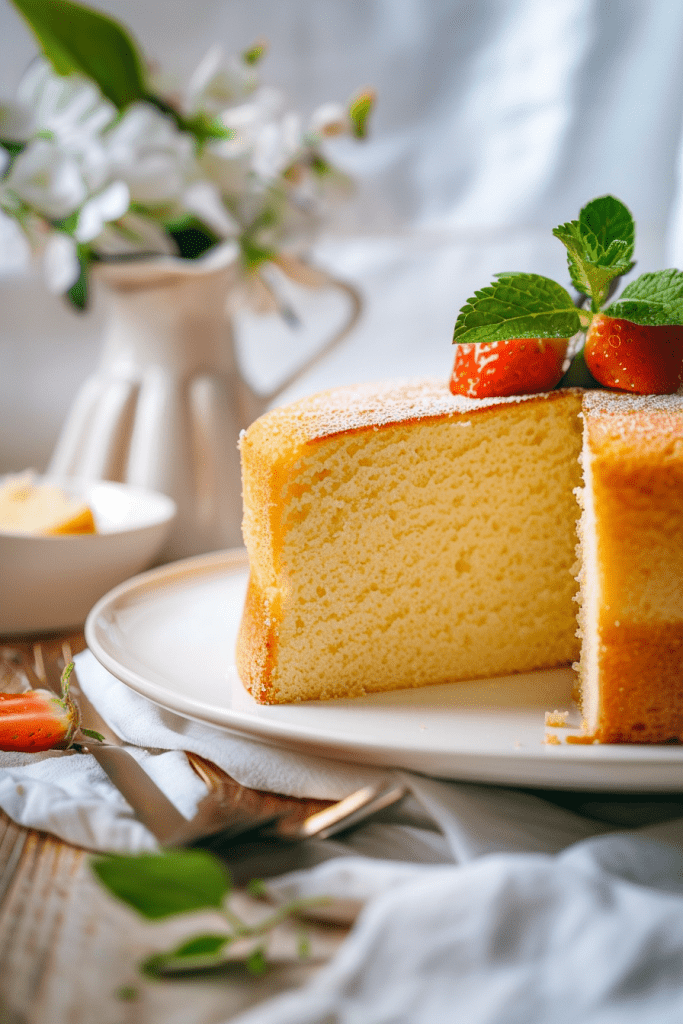
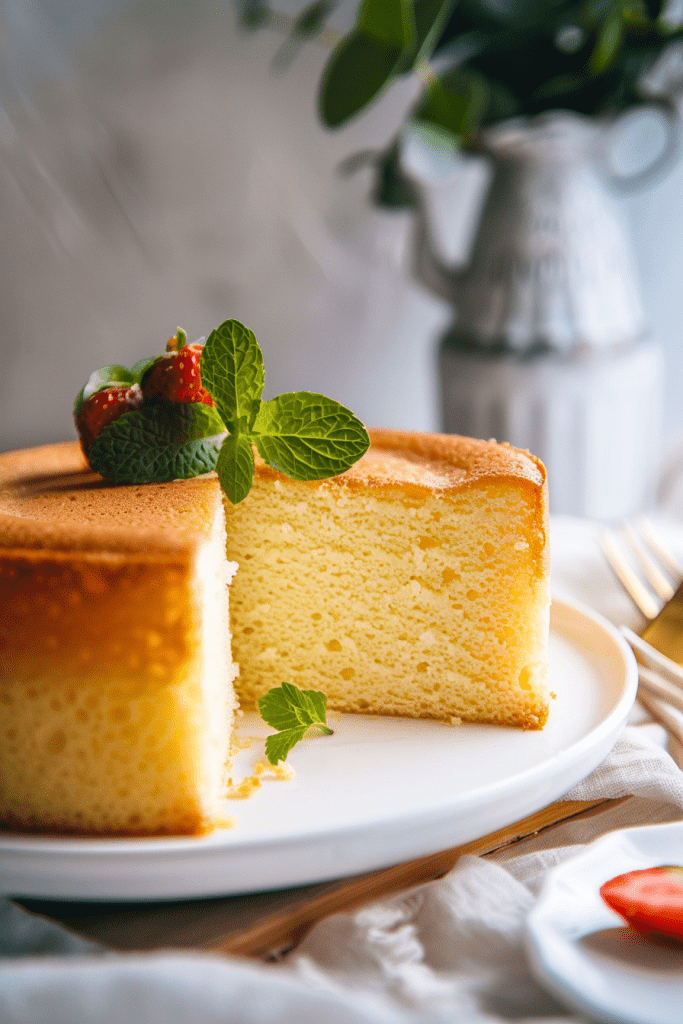
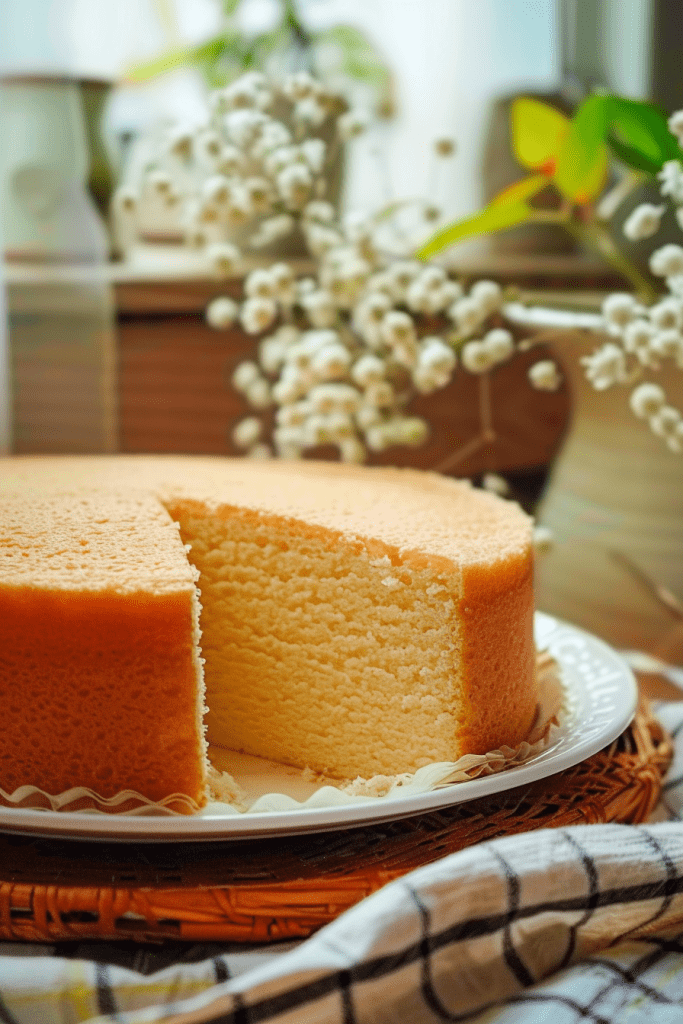
Ah, the delicate and versatile genoise sponge cake – a French classic that never fails to impress. This sponge cake is a true gem in the world of baking, known for its soft, moist, and cotton-fluffy texture. Whether dusted with a sprinkle of icing sugar or layered with your favorite creams and fruits, the genoise sponge cake is a blank canvas waiting for your creative touch.
As a culinary enthusiast, I delved into the art of genoise sponge cake to bring you a foolproof recipe that guarantees exceptional results. With just fresh eggs and a gentle folding technique, you can create a base that’s perfect for a myriad of sweet creations. This timeless recipe, devoid of any gimmicks, is a testament to the beauty of simplicity in baking. So, preheat your oven, bring those eggs to room temperature, and get ready to savor the magic of this classic genoise sponge cake.
Ingredients
Basic Ingredients:
- 6 large eggs (264g)
- 1 cup (200g) granulated sugar
- 1 cup (125g) cake flour, sifted
- ¼ teaspoon kosher salt
- 1 teaspoon (4g) vanilla extract
- ¼ cup (56.75g) unsalted butter, melted and cooled
Recommended Equipment
As I delve deeper into the world of genoise sponge cake recipes, having the right equipment can make all the difference in achieving that light and airy texture we all love. Here are the essential tools you’ll need to bake the perfect genoise sponge cake:
- Stand Mixer or Hand Mixer:
A reliable stand mixer or hand mixer is crucial for efficiently beating the egg whites to stiff peaks and achieving the desired lightness in the cake batter. Make sure to use the whisk attachment for the best results.
- 6-Inch Cake Pans:
Mist three 6-inch diameter cake pans with non-stick spray, dust them with flour, and line them with circles cut from parchment.
- Fine Mesh Sieve:
A fine mesh sieve is essential for sifting the cake flour and ensuring it is light and airy. This step is crucial for incorporating the dry ingredients smoothly into the batter.
- Rubber Spatula:
A rubber spatula is handy for gently folding the dry ingredients into the whipped egg mixture. This tool helps maintain the airy consistency of the batter.
- Cooling Rack:
Having a cooling rack is important for allowing the genoise sponge cake to cool evenly and prevent it from becoming soggy. Transfer the cake to the cooling rack after removing it from the pan.
Having these essential tools at your disposal will set you up for success in creating a delightful genoise sponge cake that is sure to impress your family and friends.
Prep the Ingredients
To ensure a successful genoise sponge cake baking experience, it’s crucial to prepare the ingredients meticulously. Here’s how I recommend prepping the key components for this delightful dessert:
- Eggs:
Fresh eggs are the star of a genoise sponge cake. Make sure to use them at room temperature for better incorporation into the batter.
- Sugar:
Sugar plays a vital role in the structure and sweetness of the cake. Measure out the required amount precisely, as it will impact both the flavor and the texture of the final product.
- Cake Flour:
Cake flour is preferred for its low protein content, which helps create a tender crumb in the cake. Sift the flour before incorporating it into the batter to ensure a smooth and lump-free mixture.
- Salt:
A pinch of salt enhances the overall flavor of the genoise sponge cake. Measure out the salt accurately to balance the sweetness of the cake.
- Vanilla Extract:
These flavor enhancers add depth and aroma to the cake. Incorporate them into the batter according to the recipe instructions for a delicious and fragrant genoise sponge cake.
By meticulously prepping these ingredients, you set the stage for a successful baking experience and a delightful genoise sponge cake that’s light, airy, and full of flavor.
Instructions
Step 1: Prepare the Airy Egg Base
Begin by ensuring your oven is preheating to 350 degrees F (175 degrees C), so it’s ready when your batter is. In a large, clean mixing bowl, combine your room temperature large eggs, granulated sugar, vanilla extract, and kosher salt. Using a stand mixer fitted with the whisk attachment or a hand mixer, whip these ingredients together on high speed. Continue whipping for approximately 5 to 7 minutes. You’re looking for the mixture to become pale, significantly increase in volume – it should nearly triple – and when you lift the whisk, the batter should fall back in a thick ribbon that slowly dissolves into the surface. This crucial step incorporates the air that will give your genoise its characteristic light and fluffy texture.
Step 2: Gently Fold in Flour and Butter
With your egg mixture perfectly aerated, it’s time to incorporate the dry and fat components with utmost care to preserve that hard-earned volume. First, sift about half of your cake flour directly over the surface of the whipped egg mixture. Using a large rubber spatula, begin to gently fold the flour in. Use a motion that scrapes down the side of the bowl and then brings the batter from the bottom up and over the top, rotating the bowl as you go. Continue just until the flour is almost combined, meaning a few streaks of flour might still be visible.
Next, gently drizzle in about half of your cooled, melted unsalted butter around the edges of the batter. Fold it in with the same gentle motion until it’s nearly incorporated. Now, sift the remaining cake flour over the batter and fold again until almost combined. Finally, gently fold in the remaining cooled, melted butter, continuing until it is just combined and no large pockets of butter or flour remain. Be careful not to overmix, as this can deflate the batter.
Step 3: Bake to Golden Perfection
Carefully divide the prepared batter evenly among your three prepared 6-inch cake pans. These should have been misted with non-stick spray, lightly dusted with flour, and lined with parchment paper circles. Smooth the tops gently with your spatula.
Place the pans into your preheated oven. Bake for approximately 20 to 25 minutes. The cakes are done when the edges are set and lightly pulling away from the sides of the pans, the tops are a deep golden brown, and they feel springy to a gentle touch in the center. As a final check, a toothpick or cake tester inserted into the very center of each cake should come out clean, with no wet batter attached.
Step 4: Cool and Release
Once baked, remove the cake pans from the oven and allow them to cool on a wire rack for about 10-15 minutes. After this initial cooling period, carefully run the tip of a sharp, thin knife around the edge of each cake to loosen it from the pan. Then, confidently invert each cake onto a wire cooling rack, peel off the parchment paper, and allow them to cool completely before attempting to slice, fill, or frost. This complete cooling is essential to prevent the delicate cakes from breaking.
Additional Tips for Perfection
Achieving the Perfect Foam
To ensure a light and airy genoise sponge cake, achieving the perfect foam is crucial. Whip the egg whites and sugar until very stiff peaks form, creating a stable structure for the cake to rise beautifully.
Proper Folding Techniques
Mastering the art of folding is key to maintaining the cake’s airy texture. Gently fold the dry ingredients into the whipped eggs in a slow and deliberate motion, ensuring thorough incorporation without deflating the batter.
Testing Doneness
To confirm the cake is perfectly baked, gently press the top – it should spring back. Insert a toothpick in the center; if it comes out clean, the cake is done. Avoid opening the oven door prematurely to prevent the cake from collapsing.
Variations and Flavoring
One of the joys of baking a genoise sponge cake is the endless possibilities for flavor variations and pairings. By incorporating different flavors and frostings, you can customize this classic cake to suit your preferences and occasion.
Common Flavor Additions
- Citrus Zest: Enhance the lightness of the genoise sponge with the bright flavors of lemon, orange, or lime zest. Add a tablespoon of finely grated citrus zest to the batter for a refreshing twist.
- Vanilla Extract: Elevate the subtle sweetness of the genoise sponge by adding a teaspoon of high-quality vanilla extract. The warm and aromatic notes of vanilla will complement the delicate nature of this cake.
- Almond Extract: For a nutty and fragrant flavor profile, consider incorporating almond extract into the batter. Just a hint of almond extract can add depth to the genoise sponge without overpowering its airy texture.
- Cocoa Powder: Indulge in a richer variation by incorporating cocoa powder into the batter. For a light chocolate genoise sponge, sift in a few tablespoons of cocoa powder and gently fold it in for a decadent treat.
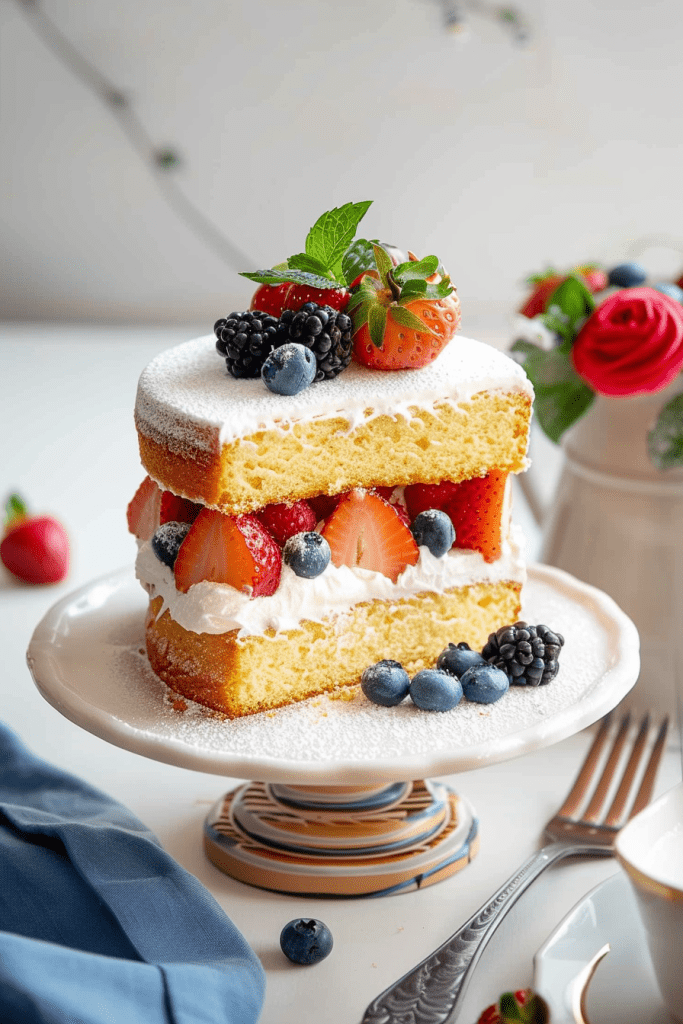
- Whipped Cream: The lightness of whipped cream complements the airy texture of the genoise sponge beautifully. Fill and frost the layers with sweetened whipped cream for a simple and elegant pairing.
- Fresh Berries: Pair the delicate genoise sponge with fresh berries like strawberries, raspberries, or blueberries. The juicy and vibrant fruits add a burst of flavor and color to the cake, creating a refreshing contrast.
- Chocolate Ganache: For a luxurious treat, consider topping the genoise sponge with a smooth and glossy chocolate ganache. The richness of the ganache balances the lightness of the cake, creating a decadent dessert for chocolate lovers.
- Chantilly Cream: Elevate the genoise sponge with Chantilly cream, a sweetened vanilla-infused whipped cream. The aromatic vanilla notes of the cream complement the subtle flavors of the cake, resulting in a sophisticated and flavorful pairing.
Experiment with these flavor additions and frosting pairings to create your own unique twist on the classic genoise sponge cake.
Make-Ahead and Storage Tips
How to Make Ahead
To make a genoise sponge cake ahead of time, you can prepare the cakes up to a month in advance. Once baked, allow the cakes to cool for about half an hour, then wrap them individually in plastic wrap. Place the wrapped cakes in a freezer bag, removing excess air before sealing. It’s best to avoid any trimming, slicing, or soaking in syrup before freezing. When ready to use, defrost the cake a few hours before assembling.
Best Storage Practices
Depending on the type of frosting used, the genoise sponge cake may need to be refrigerated. If the cake is stored at room temperature, ensure it is covered or wrapped with plastic wrap to avoid quick drying. To maintain freshness, consider refrigerating the cake, especially if it contains perishable fillings like whipped cream. Store any leftover cake in an airtight container in the refrigerator for up to a few days to preserve its texture and flavor.
Conclusion
Creating a genoise sponge cake is a delightful journey into the world of French baking. By mastering the art of this delicate cake, you open up endless possibilities for flavor experimentation and culinary creativity. Remember, the key lies in using fresh ingredients, employing gentle folding techniques, and paying attention to essential baking details.
Whether you choose to keep it traditional with a simple dusting of powdered sugar or venture into exciting flavor combinations, the genoise sponge cake is a canvas waiting for your personal touch. Embrace the process, savor the results, and let your imagination run wild as you embark on your genoise sponge cake baking adventures.
PrintGenoise Sponge Cake

Whip up this delightful French Genoise Sponge Cake! It’s incredibly light, airy, and wonderfully versatile – the perfect canvas for your favorite fillings, frostings, or a simple dusting of powdered sugar. A true baking gem!
- Prep Time: 20 minutes
- Cook Time: 25 minutes
- Total Time: 45 minutes
- Yield: 8 servings 1x
- Category: Dessert
- Cuisine: French
Ingredients
- 6 large eggs (264 g), at room temperature
- 1 cup (200 g) granulated sugar
- 1 teaspoon (4 g) vanilla extract
- 1/4 teaspoon kosher salt
- 1 cup (125 g) cake flour, sifted
- 1/4 cup (56.75 g) unsalted butter, melted and cooled
Instructions
- Get Ready: Preheat your oven to 350°F (175°C). Grease, flour, and line the bottom of three 6-inch round cake pans with parchment paper.
- Whip It Up: In a large mixing bowl, beat the room-temperature eggs, granulated sugar, vanilla extract, and kosher salt on high speed with an electric mixer. Continue for about 5-7 minutes, or until the mixture has tripled in volume, is pale, and falls from the whisk in thick ribbons.
- Fold with Care (Part 1): Sift about half of the cake flour over the egg mixture. Gently fold it in with a rubber spatula until almost combined – a few streaks of flour are okay! Then, gently fold in about half of the cooled melted butter.
- Fold with Care (Part 2): Sift the remaining cake flour over the batter and fold until almost incorporated. Finally, fold in the remaining melted butter until just combined. Be careful not to overmix and deflate your airy batter.
- Bake to Perfection: Divide the batter evenly among your prepared cake pans. Bake for 20-25 minutes, or until the cakes are beautifully golden, spring back when lightly touched, and a toothpick inserted into the center comes out clean.
- Cool Down: Let the cakes cool in their pans on a wire rack for about 10-15 minutes. Then, carefully run a thin knife around the edges of each cake and invert them onto the wire rack to cool completely before decorating.
Notes
- Serving Suggestions: This Genoise is lovely dusted with powdered sugar! Or, layer it with fresh berries and whipped cream, a rich chocolate ganache, or a zesty citrus curd. You can also add a teaspoon of citrus zest (like lemon or orange) to the batter for a bright flavor.
- Tips & Tricks for Success:
- Room Temp Eggs: Using room temperature eggs is key for achieving maximum volume when whipping.
- Gentle Folding: Be gentle when folding in the flour and butter to keep the batter light and airy.
- No Peeking! Avoid opening the oven door while baking, especially early on, as this can cause the cakes to collapse.
- Storage Savvy:
- Store cooled, unfrosted cake layers well-wrapped at room temperature for up to 2 days.
- If filled or frosted (especially with dairy), refrigerate in an airtight container for up to 3-4 days.
- Make Ahead: Baked and cooled layers can be wrapped tightly in plastic wrap, then foil, and frozen for up to 1 month. Thaw at room temperature before using.