
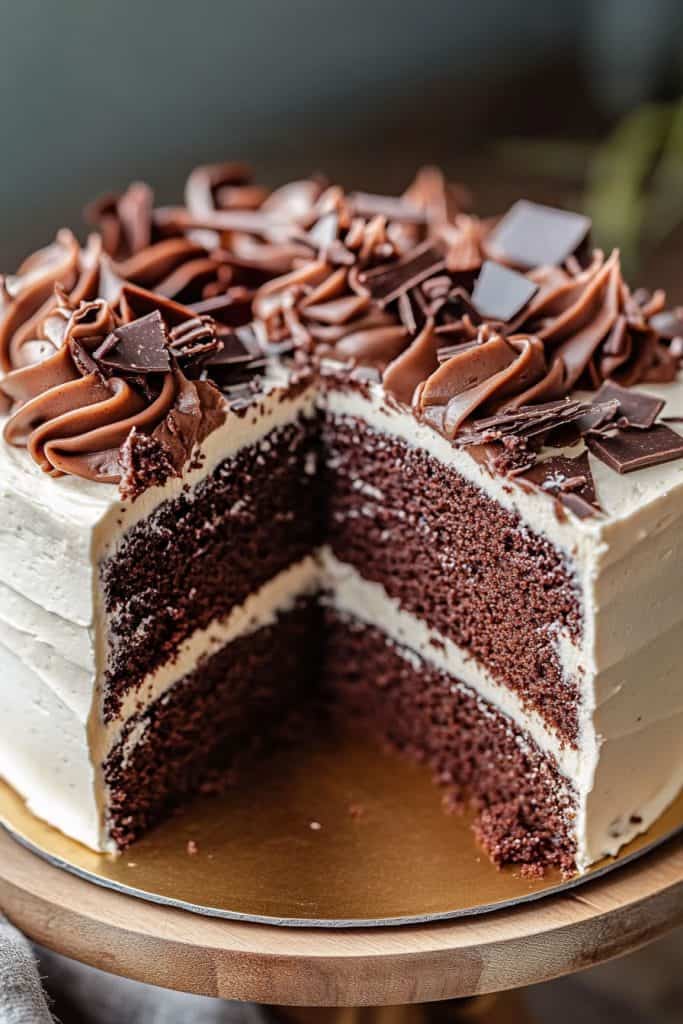
During the Great Depression, resourcefulness in the kitchen became a necessity. Depression cake, also known as “wacky cake” or “war cake,” emerged as a clever solution when ingredients like eggs, butter, and milk were scarce. This humble yet delicious dessert relies on simple pantry staples, making it a timeless favorite.
I love how this cake’s simplicity doesn’t compromise its rich, moist texture and deep flavor. It’s a testament to how creativity can flourish even in tough times. Whether you’re looking to save on ingredients or just want to try a piece of history, this recipe is a delightful way to enjoy a sweet treat with minimal fuss.
What Is Depression Cake?
Depression cake, often called “wacky cake” or “war cake,” is a dessert that originated during the Great Depression. Due to the scarcity of essential ingredients like eggs, butter, and milk, inventive home bakers crafted a cake using only the basic pantry staples. This resulted in a deliciously moist cake with a rich, deep flavor that belies its humble beginnings.
Key to the success of depression cake is its simplicity and the clever use of common ingredients. By using items such as flour, sugar, cocoa powder, and baking soda, bakers created a cake that was both economical and flavorful. The lack of eggs, butter, and milk didn’t detract from the cake’s texture – instead, it showcased the creativity and resilience of cooks during tough times.
Being a one-bowl recipe, depression cake also cut down on dishwashing and preparation time. It’s a testament to how resourcefulness can produce something delightful even in the face of adversity. This cake remains a favorite for those who appreciate history or need to bake without traditional ingredients.
Ingredients
To create this timeless Depression cake, gather the following ingredients. Each item below reflects the simplicity and creativity of the 1930s era, ensuring a flavorful and moist cake without the need for eggs, butter, or milk.
- 1 1/2 cups all-purpose flour: Measure it precisely and sift to ensure a light texture.
- 1 cup granulated sugar: For sweetness and moisture.
- 1/4 cup unsweetened cocoa powder: Choose a good quality cocoa for a rich chocolate flavor.
- 1 teaspoon baking soda: This helps the cake rise without eggs.
- 1/2 teaspoon salt: Balances the sweetness and enhances flavors.
- 1 teaspoon vanilla extract: Adds depth and warmth to the cake.
- 1 tablespoon white vinegar: Reacts with the baking soda to help the cake rise.
- 5 tablespoons vegetable oil: Keeps the cake moist and tender.
- 1 cup cold water: Binds the ingredients together and keeps it moist.
Tools and Equipment
To make the Depression cake recipe, you won’t need any fancy gadgets or specialized baking tools. This cake’s charm lies in its simplicity and ease of preparation. Here’s a list of tools and equipment you will need to get started:
- Mixing Bowl: A large mixing bowl is essential. It will house all your ingredients and allow plenty of space for thorough mixing.
- Whisk or Spoon: Use a whisk or sturdy spoon to combine the dry and wet ingredients. A whisk can help break up any lumps in the dry ingredients, ensuring a smoother batter.
- Measuring Cups and Spoons: Accurate measurements are crucial, especially in baking. You’ll need a set of measuring cups for both dry and wet ingredients, as well as a set of measuring spoons.
- 8×8-inch Baking Pan: An 8×8-inch baking pan is the traditional size for Depression cake, offering the ideal thickness and baking time.
- Spatula: A rubber or silicone spatula is handy for scraping down the sides of the bowl and ensuring all the batter is utilized.
- Oven Mitts: Safety first! Use oven mitts to protect your hands when placing the cake in the oven and when removing it once baked.
- Knife or Cake Tester: To check for doneness, a knife or cake tester will help ensure your cake is perfectly baked.
By gathering these basic tools and equipment, you’ll be well-prepared to bake a Depression cake that embodies the resourcefulness and simplicity of the 1930s.

Directions
Follow these straightforward steps to create a delectable Depression cake that mirrors the resilience and ingenuity of the 1930s era.
Prep
- Preheat your oven to 350°F (175°C).
- Grease an 8×8-inch baking pan lightly with oil or cooking spray, ensuring even coverage.
Dry Ingredients
- In a large mixing bowl, combine 1 1/2 cups of all-purpose flour, 1 cup of granulated sugar, 4 tablespoons of unsweetened cocoa powder, 1 teaspoon of baking soda, and 1/2 teaspoon of salt.
- Whisk the dry ingredients together until well blended, removing any lumps for an even texture.
Wet Ingredients
- Create three small wells in the dry mix. Pour 1 teaspoon of vanilla extract into the first well, 1 teaspoon of white vinegar into the second well, and 5 tablespoons of vegetable oil into the third well.
- Pour 1 cup of cold water over the entire mixture.
Combine and Mix
- Using a whisk or a spoon, stir the ingredients together gently but thoroughly. Ensure that you mix until no dry spots remain and you have a smooth batter.
- Scrape the sides of the bowl as needed to incorporate all the ingredients.
- Pour the batter into the prepared baking pan, spreading it out evenly with a spatula.
- Place the pan in the preheated oven and bake for 30 to 35 minutes, or until a knife or cake tester inserted into the center comes out clean.
- Once baked, remove the pan from the oven using oven mitts and let the cake cool in the pan on a wire rack.
Chocolate Icing
A Depression cake without a luscious chocolate icing on top would be incomplete. This simple icing recipe adds a rich and decadent layer, perfect to complement the moist cake underneath.
Ingredients
- 2 cups powdered sugar, sifted
- 1/4 cup cocoa powder, sifted
- 1/4 cup unsalted butter, melted
- 1/4 cup milk (or water for a dairy-free option)
- 1 teaspoon vanilla extract
- Mix Dry Ingredients: In a medium bowl, combine the sifted powdered sugar and cocoa powder. Ensure both are well-blended to avoid lumps in the icing.
- Add Wet Ingredients: Pour in the melted butter and milk (or water). Add the vanilla extract.
- Whisk Together: Using a whisk or an electric mixer, blend the ingredients until you achieve a smooth, glossy consistency.
- Adjust Consistency: If the icing is too thick, add a teaspoon of milk (or water) at a time, stirring continuously until the desired consistency is reached.
- Apply Icing: Allow the Depression cake to cool completely. Once cooled, spread the chocolate icing evenly over the top of the cake using a spatula or the back of a spoon.
How to Serve Depression Cake
Serving Depression cake can be as simple or as elegant as you like. Here’s how I recommend presenting this historic and delightful dessert:
Plate the Cake
- Cool Completely: Ensure the cake has cooled completely before serving. This prevents it from crumbling and allows the flavors to meld.
- Cut into Squares: Use a sharp knife to cut the cake into even squares or slices of your preferred size.
- Add the Chocolate Icing: Spread a generous layer of the chocolate icing on top of each piece if you haven’t already done so. Let the icing set for a few minutes.
Enhance the Flavor
- Dust with Powdered Sugar: Lightly dust the top of the iced cake with powdered sugar for an added touch of sweetness.
- Add Fresh Berries: Garnish each piece with fresh berries like strawberries or raspberries. Their tartness pairs beautifully with the rich chocolate icing.
- Serve with Whipped Cream: A dollop of whipped cream beside each slice can add a delightful creamy texture.
Presentation Tips
- Use a Cake Stand: Elevate the visual appeal by placing the cake pieces on a decorative cake stand.
- Garnish with Mint Leaves: Add a sprig of fresh mint on top of each piece for a pop of color and a hint of freshness.
- Set a Pretty Table: Use vintage or rustic plates and napkins to evoke the era of the Depression, emphasizing the history and resilience behind the recipe.
- Coffee or Tea: Serve the cake with a hot cup of coffee or tea for a classic pairing.
- Ice Cream: Vanilla ice cream can be a wonderful side, enhancing the cake’s flavor with its creamy texture.
- Milk: A cold glass of milk is a timeless companion to a slice of cake, perfect for balancing the rich chocolate icing.
By following these tips, you can turn a simple Depression cake into a noteworthy and treasured dessert that honors its historic roots and delights your guests.
Tips and Tricks
Crafting the perfect Depression cake involves some savvy tips and tricks that can make the process smoother and the results more delightful. Let me share some insider secrets to elevate your baking experience.
Measure Accurately
Accuracy is key in baking. Use a kitchen scale for precise measurements, especially when dealing with flour. This ensures consistency in your cake’s texture.
Room Temperature Ingredients
For a smoother batter and better rise, use room temperature ingredients. Take eggs, milk, and any other refrigerated items out at least 30 minutes before you start.
Mix Gently
When combining wet and dry ingredients, mix gently to avoid overworking the batter. Overmixing can result in a dense, tough cake. Stir until just combined for the best texture.
Use Quality Cocoa Powder
The quality of cocoa powder can greatly affect the flavor of your cake. I recommend using a high-quality, unsweetened cocoa powder for rich, chocolatey results.
Properly Preheat The Oven
Preheating the oven to the correct temperature before baking is crucial. An accurate oven temperature ensures even baking and prevents your cake from being undercooked or overbaked.
Lining The Pan
Line your baking pan with parchment paper. This not only prevents sticking but also makes removing the cake from the pan much easier, ensuring a clean, professional look.
Test For Doneness
Use a toothpick to test for doneness. Insert it into the center of the cake, and if it comes out clean or with a few crumbs, the cake is done. Avoid overbaking to keep your cake moist.
Cooling On A Rack
Cool the cake on a wire rack. This allows air to circulate around the cake, cooling it evenly and preventing sogginess.
Store Properly
Store any leftovers in an airtight container at room temperature for up to three days. For longer storage, refrigerate or freeze the cake. To maintain moisture, wrap the cake tightly in plastic wrap before placing it in a container or freezer bag.
Easy Variations
Feel free to experiment with flavors. Add a teaspoon of instant coffee granules to the batter for a mocha twist, or mix in some cinnamon or nutmeg for a warm spice undertone. This flexibility makes Depression cake a versatile dessert that can adapt to various tastes and occasions.
By following these tips and tricks, you’ll be well on your way to baking a Depression cake that’s both historically rooted and deliciously modern.
Variations and Substitutions
Depression cake has stood the test of time due to its simplicity and versatility. Here, I’ll explore several variations and substitutions to tailor the cake to your tastes or dietary needs.
Flavor Variations
- Chocolate Coffee Cake: Replace the water with brewed coffee to enrich the chocolate flavor and add a subtle coffee note.
- Spice it Up: Add 1 teaspoon of cinnamon or nutmeg to the dry ingredients to create a warm and aromatic twist.
- Citrus Delight: Incorporate 1 tablespoon of grated orange or lemon zest into the batter for a refreshing citrus kick.
- Nutty Crunch: Fold in 1/2 cup of chopped nuts, such as walnuts or pecans, for added texture and flavor.
Dietary Substitutions
- Gluten-Free Option: Substitute all-purpose flour with a gluten-free flour blend. Ensure the blend contains xanthan gum for proper texture.
- Sugar Alternatives: Replace granulated sugar with 1/2 cup of honey or 3/4 cup of maple syrup. Adjust the liquid content slightly to maintain consistency.
- Dairy-Free Version: Use coconut milk or almond milk instead of water for a richer, dairy-free version.
- Low-Calorie Sweetener: Use a low-calorie sweetener like stevia or erythritol. Follow the packaging instructions for equivalent measurements to sugar.
Additional Ingredients
- Dried Fruits: For added sweetness and texture, mix in 1/2 cup of dried fruits such as raisins, cranberries, or chopped dates.
- Chocolate Chips: Sprinkle 1/2 cup of chocolate chips into the batter to make a more indulgent cake.
- Oil Alternatives: Use the same amount of melted butter or margarine if you prefer these over vegetable oil.
- Whole Wheat Flour: Replace all-purpose flour with whole wheat flour for a healthier, fiber-rich alternative. Note that this might make the cake denser.
By experimenting with these variations and substitutions, you can create a Depression cake that suits your personal preferences and dietary requirements.
How to Store Depression Cake
Room Temperature
- Cool Completely: Allow the Depression cake to cool completely on a wire rack before storing to prevent condensation.
- Wrap in Plastic Wrap: Tightly wrap the entire cake or individual slices in plastic wrap to keep it moist.
- Place in Airtight Container: Transfer the wrapped cake into an airtight container for added protection. This step helps prevent the cake from drying out and absorbs any surrounding odors.
- Store in a Cool, Dry Place: Place the container in a cool, dry place away from direct sunlight or heat sources. At room temperature, your Depression cake will remain fresh for up to 3 days.
Refrigeration
- Cool Completely: As before, make sure the cake is fully cooled.
- Wrap Tightly: Use plastic wrap to wrap the cake or slices individually.
- Use an Airtight Container: Put the wrapped cake into an airtight container to protect it from moisture and refrigerator odors.
- Refrigerate: Store in the refrigerator. Refrigerated Depression cake will stay fresh for up to a week. Allow it to come to room temperature before serving for the best texture and flavor.
- Cool Completely: Ensure the cake is completely cooled.
- Wrap in Plastic and Foil: First, wrap the cake tightly in plastic wrap, then cover it in aluminum foil. This double layer helps to prevent freezer burn.
- Place in Freezer Bag: For extra protection, put the wrapped cake into a freezer-safe, resealable plastic bag.
- Freeze: Store in the freezer for up to 3 months. Thaw the cake in the refrigerator overnight or on the countertop for several hours when ready to enjoy.

Can You Freeze Depression Cake?
Step-by-Step Freezing Instructions
- Cool The Cake Completely
- Allow the cake to cool completely on a wire rack. Freezing a warm cake can lead to ice crystals forming which can result in a soggy texture once thawed.
- Pre-Portion The Cake
- If you prefer, you can slice the cake into portions before freezing. This makes it easier to thaw and enjoy individual servings without having to defrost the entire cake.
- Wrap The Cake
- Use plastic wrap to tightly wrap the cake or individual slices. Ensure there are no exposed areas that could be susceptible to freezer burn. Wrap it at least twice for extra protection.
- Aluminum Foil Protection
- After wrapping in plastic, cover each portion with a layer of aluminum foil. This adds an extra layer of protection against freezer burn and helps maintain freshness.
- Label and Date
- Label the wrapped cake with the date it was frozen. Depression cake maintains its best quality for up to 3 months in the freezer, so it’s useful to keep track of the freezing date.
- Use A Freezer-Safe Container
- Place the wrapped and labeled cake in a freezer-safe container or heavy-duty freezer bag for additional protection. This prevents the cake from being crushed by other items in the freezer.
Thawing Instructions
- Remove From Freezer
- When you’re ready to enjoy your Depression cake, take it out of the freezer and remove the aluminum foil. Keep the plastic wrap on.
- Thaw In The Refrigerator
- Place the cake or individual slice in the refrigerator. Thawing slowly in the fridge helps maintain the cake’s texture and moisture. Depending on the size of the portion, it can take anywhere from several hours to overnight.
- Room Temperature Thawing (Optional)
- If you’re in a hurry, you can let the cake sit at room temperature for 1-2 hours. Make sure to keep it in the plastic wrap to avoid losing moisture.
- Avoid Re-Freezing: Once the Depression cake has been thawed completely, avoid re-freezing it as this can significantly affect the texture and taste.
- Check For Spoilage: Always check for any off smells or textures before consuming the thawed cake to ensure it’s still fresh and safe to eat.
Conclusion
Exploring Depression cake recipes has been a delightful journey into both culinary history and modern adaptations. From understanding its roots to experimenting with flavors and dietary options, there’s so much versatility in this simple yet profound dessert. With proper storage techniques, you can enjoy Depression cake fresh or frozen, ensuring it’s always ready to satisfy your sweet tooth. So go ahead and try out these recipes, get creative with your ingredients, and share this timeless treat with friends and family.