
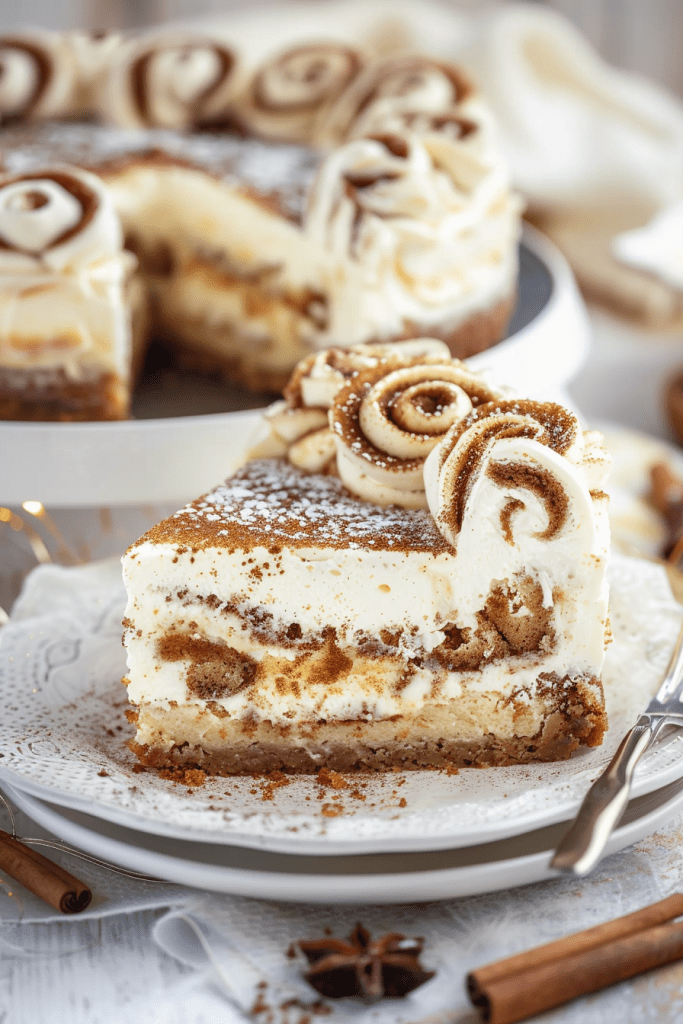
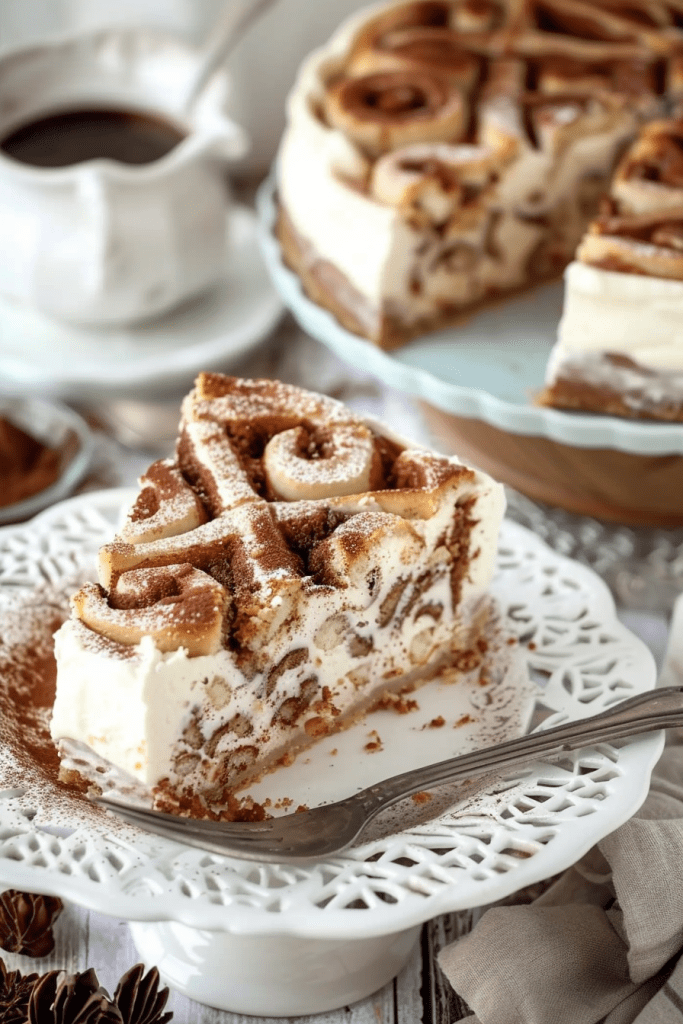
Craving the perfect blend of cinnamon rolls and cheesecake in one delightful dessert? Look no further than the irresistible Cinnamon Roll Cheesecake. This crowd-pleaser features a cinnamon roll crust, swirled with brown sugar and cinnamon, enveloping a creamy vanilla cheesecake filling. Topped with a decadent cinnamon roll frosting, this dessert is a true showstopper for any occasion.
Indulge in the heavenly flavors of homemade cinnamon rolls with a twist in this Cinnamon Roll Cheesecake recipe. With a graham cracker crust, velvety baked cheesecake, and layers of aromatic cinnamon filling, each bite is a symphony of sweet and spicy perfection. It’s no wonder this recipe has become one of my all-time favorite desserts, offering a delightful marriage of two beloved treats in one unforgettable creation.
Ingredients
When making this delightful Cinnamon Roll Cheesecake, the key is in the ingredients. Let’s break it down to ensure we have everything ready for a successful bake:
Crust Ingredients
- Graham cracker crumbs: 2 cups
- Brown sugar: 1/4 cup
- Ground cinnamon: 1 teaspoon
- Melted butter: 1/2 cup
- Vanilla extract: 1 teaspoon
Cheesecake Filling Ingredients
- Cream cheese: 24 ounces (3 packages)
- Sour cream: 1 cup
- Granulated sugar: 1 cup
- Vanilla extract: 1 teaspoon
- Eggs: 3 large
Cinnamon Swirl Ingredients
- Light brown sugar: 1/2 cup
- Ground cinnamon: 1 tablespoon
- All-purpose flour: 1 tablespoon
- Melted butter: 2 tablespoons
Frosting Ingredients
- Cream cheese: 4 ounces
- Butter: 4 tablespoons
- Powdered sugar: 2 cups (adjust for desired consistency)
- Heavy whipping cream: as needed for consistency
By gathering these precise ingredients, we can craft a velvety cheesecake brimming with the comforting flavors of cinnamon rolls.
Equipment Needed
To successfully create this scrumptious Cinnamon Roll Cheesecake, you’ll need the following equipment:
1. 9-Inch Nonstick Springform Pan
- This pan is essential for baking the cheesecake. Opt for a sturdy, nonstick springform pan to ensure easy release and a perfectly shaped cheesecake.
2. Medium Mixing Bowl
- A medium mixing bowl will be used to combine the cream cheese, sugar, and other ingredients for the cheesecake filling, providing a smooth and creamy texture.
3. Handheld Mixer
- Use a handheld mixer to beat the cream cheese and sugar until smooth, ensuring a lump-free cheesecake filling for a velvety consistency.
4. Whisk
- A whisk will be handy for combining the butter, brown sugar, and cinnamon to create the delectable cinnamon swirl that will be swirled into the cheesecake batter.
5. Measuring Cups and Spoons
- Accurate measurement is key to baking success. Ensure you have measuring cups and spoons on hand to measure out ingredients like sugar, vanilla extract, and cinnamon accurately.
6. Cooking Spray
- Coat your springform pan with cooking spray to prevent sticking and ensure easy removal of the cheesecake after baking.
7. Oven
- Preheat your oven to 325°F to bake the cinnamon roll cheesecake to perfection.
- Get a beautiful serving plate ready to showcase your finished cinnamon roll cheesecake in style.
With these essential pieces of equipment, you’ll be well-prepared to create a delightful Cinnamon Roll Cheesecake that will impress your family and guests alike.
Preparation Steps
Preparing the Crust
I always start by preparing the crust for my Cinnamon Roll Cheesecake. It’s essential to have a sturdy base for all the creamy goodness that follows.
To make the crust, I use a food processor to crush graham crackers until I have about 2 cups of crumbs. Then, I add melted butter and pulse until the mixture is well combined. Next, I pour the crumbs into a prepared pan, pressing them gently with the back of a spoon to form the crust. It’s crucial to ensure the crumbs come up about 1 inch up the sides of the pan for that perfect crust-to-filling ratio. After baking the crust for about 10 minutes or until it’s golden brown, I let it cool on a wire rack.
Making the Cheesecake Filling
Next comes the delicious part – creating the creamy cheesecake filling that will make this dessert a showstopper.
In a large mixing bowl, I beat cream cheese, sugar, sour cream, flour, and vanilla extract until completely combined and smooth. It’s important to use low speed to avoid adding excess air to the batter, which can lead to cracks in the finished cheesecake. I scrape down the sides of the bowl to ensure everything is well mixed. Then, I add the eggs one at a time, mixing slowly after each addition until the batter is velvety smooth.
Creating the Cinnamon Swirl
The cinnamon swirl in this Cinnamon Roll Cheesecake is what makes it truly special.
In a medium-sized bowl, I combine brown sugar, cinnamon, and flour for the cinnamon filling. I stir in melted butter until the mixture is well combined. This rich and fragrant filling will add layers of flavor to the cheesecake. To create the ultimate cinnamon swirl, I alternate layers of the cheesecake filling and the cinnamon swirl filling in the pan. Gently swirling the top layer ensures a smooth finish perfect for the creamy cheesecake to come together with the rich cinnamon flavor.
Assembly Instructions
Layering the Ingredients
To assemble this delightful Cinnamon Roll Cheesecake, start by layering the components strategically to create a perfect balance of flavors and textures. The layers of graham cracker crust, creamy cheesecake, and fragrant cinnamon swirl are key to the delectable outcome.
- Crust Layer: Begin by pressing the graham cracker mixture evenly into the pan, covering both the bottom and sides up to about halfway. This crust provides a sturdy and flavorful base for the cheesecake layers to come.
- Cinnamon Filling: Sprinkle the cinnamon filling over the crust in layers, ensuring each bite carries the aromatic essence of cinnamon. The blend of brown sugar, cinnamon, and butter adds a sweet and spicy contrast to the creamy cheesecake.
- Cheesecake Layer: Gently pour the cheesecake batter over the cinnamon filling, creating a luscious and creamy layer that envelopes the fragrant cinnamon swirls. The combination of cream cheese, sugar, and other ingredients forms the heart of this decadent dessert.
Swirling Techniques
Mastering the art of swirling in the cinnamon roll cheesecake is essential to achieve a visually appealing and flavorful outcome. Follow these steps to swirl the cinnamon filling effectively:
- Layering Swirls: After adding the cheesecake and cinnamon filling in alternating layers, use a toothpick to create delicate swirls on the surface. This swirling technique ensures a beautiful marbled effect and distributes the cinnamon flavor throughout the cheesecake.
- Gentle Touch: When swirling, be gentle and careful not to overmix the layers. Light, fluid motions with the toothpick will merge the layers elegantly without blending them entirely, preserving distinct cinnamon swirls in every slice.
By layering the ingredients thoughtfully and mastering the swirling techniques, you’ll create a visually stunning and irresistibly flavorful Cinnamon Roll Cheesecake that will delight your taste buds with every bite.
Baking the Cheesecake
Baking the cheesecake is a crucial step to achieve the perfect texture and flavor in your cinnamon roll cheesecake. Follow these detailed instructions to ensure a delicious outcome.
Oven Settings and Timing
- Preheat the Oven: Set your oven to 325°F (160°C) to ensure the ideal baking temperature for your cheesecake.
- Bake Duration: The cheesecake will need to bake for approximately 75-95 minutes. This is an essential time frame to allow the cheesecake to set properly and develop its rich flavors.
- Temperature Adjustment: After the initial baking time, crack the oven door open slightly and reduce the heat to 200°F (93°C). Let the cheesecake continue to bake for another 50-55 minutes until the edges are set, and the center has a slight jiggle. This precise baking process is key to achieving the perfect texture.
- Checking Consistency: The cheesecake should have a Jell-O-like consistency when done baking. If the center is still too runny or watery, bake for an additional 5-10 minutes, checking frequently until the desired consistency is achieved.
- Preparing the Water Bath: Place your cheesecake-filled springform pan into a larger cake pan, then place the ensemble into an even larger pan. Fill the outer pan with boiling water until it reaches halfway up the sides of the cake pan. This water bath method aids in even baking and helps prevent cracking on the cheesecake’s surface.
- Benefits of Water Bath: Using a water bath in baking your cheesecake ensures a moist and evenly baked dessert. It also helps in preventing the top surface from cracking during baking.
- Clean Baking Technique: The water bath method provides a clean baking process where there is no need for wrapping the springform pan with foil, making the baking experience simpler and mess-free.
By carefully following these steps for oven settings and utilizing the water bath method, you’ll be on your way to creating a perfectly baked and visually appealing cinnamon roll cheesecake that will impress your guests and leave them craving for more.
Decorating and Serving
After the cheesecake has been baked to perfection and cooled, it’s time to add the final touches that will elevate its presentation and taste to the next level. Decorating the cinnamon roll cheesecake with cream cheese frosting and selecting the right toppings will not only enhance its visual appeal but also add extra layers of flavor complexity.
Applying Cream Cheese Frosting
To prepare the cream cheese frosting for your cinnamon roll cheesecake, start by mixing together cream cheese and butter until smooth and creamy. Then, incorporate the vanilla and powdered sugar, followed by adding heavy cream as needed to achieve the desired consistency. Once the frosting is ready, you can pipe it in a spiral design over the top of the cheesecake, creating a visually appealing and decadent finish.
Suggested Toppings and Garnishes
While the cream cheese frosting adds a rich and creamy element to the cinnamon roll cheesecake, you can further enhance its taste and appearance by adding some suggested toppings and garnishes. Fresh strawberries, raspberries, or blueberries can bring a burst of fruity freshness to each bite. Additionally, a sprinkle of cinnamon sugar, chopped nuts, or a drizzle of caramel sauce can add texture and flavor contrast to the dessert. Get creative with your choice of toppings to personalize your cinnamon roll cheesecake and impress your guests with a stunning presentation.
Storage and Make-Ahead Tips
When it comes to preserving your delicious Cinnamon Roll Cheesecake, proper storage is key to maintaining its taste and texture. Here are some tips on how to store and prepare your cheesecake for later enjoyment.
Refrigerating
After enjoying your delectable Cinnamon Roll Cheesecake, it’s essential to refrigerate any leftovers promptly. Place the cheesecake in an airtight container or cover it with plastic wrap before storing it in the refrigerator. Properly refrigerated, your cheesecake can last for up to 5-7 days, allowing you to savor its flavors over time.
Freezing Instructions
If you want to extend the shelf life of your Cinnamon Roll Cheesecake, freezing is an excellent option. To freeze your cheesecake, ensure it is completely cooled and set. Wrap the cheesecake tightly in plastic wrap and then aluminum foil to prevent freezer burn. It can be stored in the freezer for up to 1-2 months. When ready to enjoy, thaw the cheesecake overnight in the refrigerator before serving.
Conclusion
Creating a Cinnamon Roll Cheesecake is a delightful culinary adventure that combines the best of two worlds – cinnamon rolls and cheesecake. From mastering the art of swirling to perfecting the graham cracker crust, each step in the process contributes to a decadent and flavorful dessert. By following the tips and techniques shared in this guide, you can confidently whip up a show-stopping cinnamon roll cheesecake that will impress your family and friends. Remember to store any leftovers properly to maintain freshness and taste. Whether enjoyed fresh or thawed from the freezer, this indulgent treat is sure to satisfy your cravings for a sweet and creamy delight. Happy baking!
PrintCinnamon Roll Cheesecake Recipe
Indulge in the ultimate dessert mashup with this Cinnamon Roll Cheesecake! Featuring a buttery graham cracker crust, creamy cheesecake filling, and swirls of cinnamon-sugar goodness, this dessert combines the best of two classics. Topped with a luscious cream cheese frosting, it’s perfect for holidays, gatherings, or whenever you want to impress.
- Prep Time: 30 minutes
- Cook Time: 1 hour 30 minutes
- Total Time: 8 hours (includes chilling time)
- Yield: 8-10 slices
- Category: Dessert
- Cuisine: American
Ingredients
For the Crust
- Graham cracker crumbs: 2 cups
- Brown sugar: 1/4 cup
- Ground cinnamon: 1 teaspoon
- Melted butter: 1/2 cup
- Vanilla extract: 1 teaspoon
For the Cheesecake Filling
- Cream cheese: 24 ounces (softened)
- Sour cream: 1 cup (room temperature)
- Granulated sugar: 1 cup
- Vanilla extract: 1 teaspoon
- Eggs: 3 large (room temperature)
For the Cinnamon Swirl
- Light brown sugar: 1/2 cup
- Ground cinnamon: 1 tablespoon
- All-purpose flour: 1 tablespoon
- Melted butter: 2 tablespoons
For the Frosting
- Cream cheese: 4 ounces (softened)
- Butter: 4 tablespoons (softened)
- Powdered sugar: 2 cups (adjust as needed)
- Heavy whipping cream: As needed for consistency
Instructions
Step 1: Prepare the Crust
- Preheat oven to 325°F (160°C). Grease a 9-inch springform pan and line the base with parchment paper.
- In a bowl, mix graham cracker crumbs, brown sugar, cinnamon, melted butter, and vanilla extract until evenly combined.
- Press the mixture firmly into the bottom and about an inch up the sides of the pan. Bake for ~10 minutes until golden brown. Let cool completely.
Step 2: Make the Cheesecake Filling
- Beat softened cream cheese until smooth and creamy. Add sugar and mix until fully incorporated.
- Blend in sour cream and vanilla extract on low speed. Add eggs one at a time, mixing gently after each addition to avoid over-aerating the batter.
Step 3: Create the Cinnamon Swirl
- In a small bowl, combine brown sugar, cinnamon, and flour. Stir in melted butter to form a thick paste.
Step 4: Assemble the Cheesecake
- Pour half of the cheesecake filling over the cooled crust. Drop spoonfuls of cinnamon swirl mixture over the filling and use a toothpick to swirl gently. Repeat with remaining filling and cinnamon swirl on top.
Step 5: Bake the Cheesecake
- Place your springform pan in a larger roasting pan. Fill the roasting pan with boiling water until it reaches halfway up the sides of your springform pan (water bath).
- Bake at 325°F for ~75 minutes or until edges are set but center jiggles slightly. Turn off oven, crack door open slightly, and let cheesecake cool inside for an hour before transferring to the fridge to chill overnight.
Step 6: Frost & Serve
- Beat cream cheese and butter until smooth for frosting. Gradually add powdered sugar and thin with heavy cream as needed for consistency. Pipe or spread frosting over chilled cheesecake in a spiral design.
- Slice and serve! Optional toppings include fresh berries, caramel drizzle, or a sprinkle of cinnamon.
Notes
Serving Suggestions
- Serve cold or let slices sit at room temperature for ~15 minutes before enjoying.
- Pair with coffee or tea for an indulgent treat.
Tips & Tricks
- Use room-temperature ingredients for a smooth batter.
- Avoid overmixing after adding eggs to prevent cracks.
- Swirl gently to preserve distinct layers of cinnamon.
Storage & Reheating
- Refrigerate leftovers in an airtight container for up to 5 days.
- Freeze individual slices by wrapping tightly in plastic wrap and storing in an airtight container for up to 2 months. Thaw overnight in the fridge before serving.